QLabel
QPushButton
QLineEdit
在進入範例之前,我們可以先打開 Qt Designer,這是一個圖形化介面設計工具,能夠直接設計界面,並導出成代碼進行修改。通常在安裝 PySide6 後,你可以在 Python 的安裝目錄中找到它,路徑為 lib\site-packages\PySide6裡面找到。打開後,界面如下所示。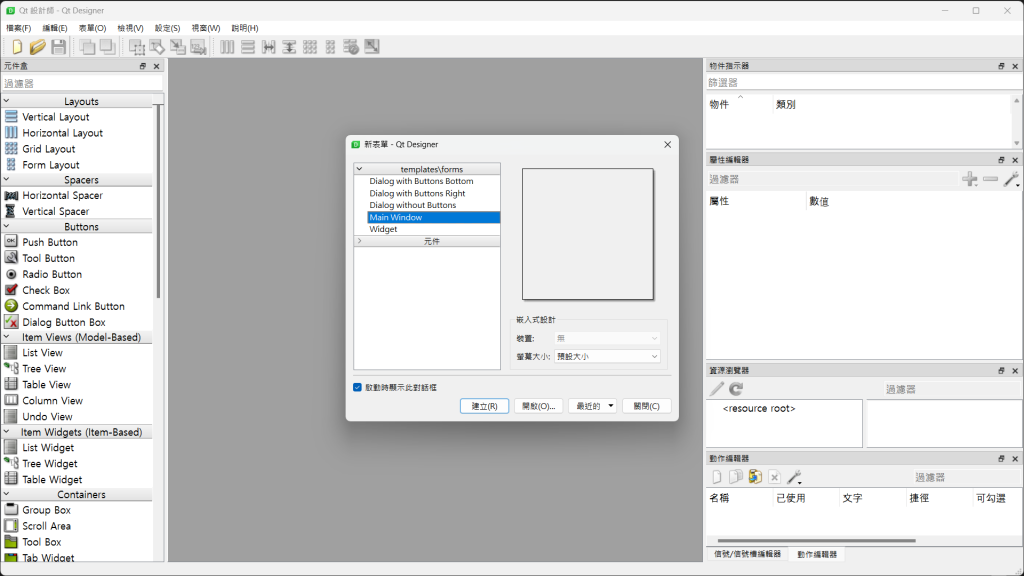
選擇一個窗口,選完後,隨便選一個元件拖到窗口裡。當你點擊剛拖進來的元件時,右邊會顯示可以調整的屬性。我們將以幾個屬性進行示範。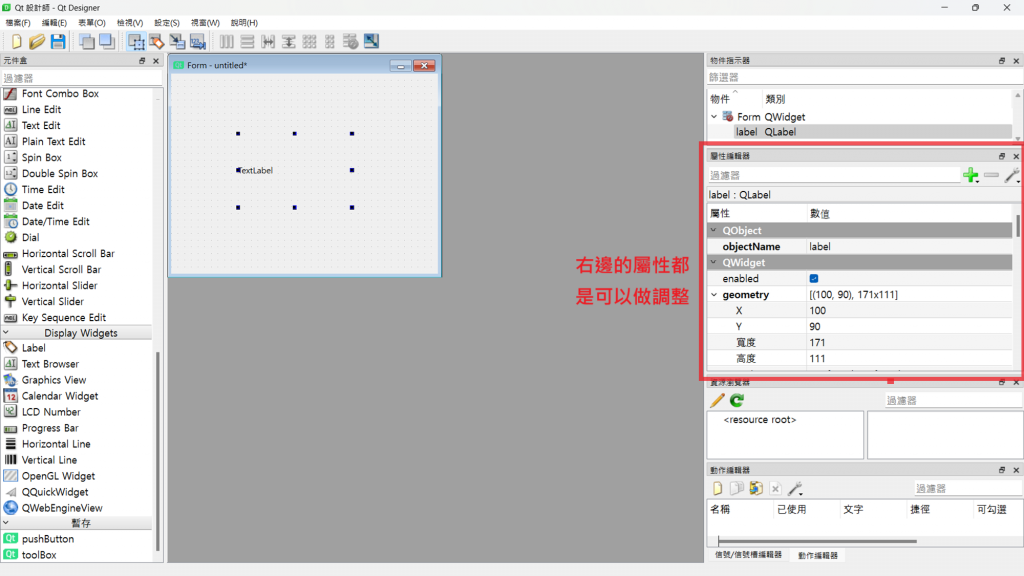
QLabel : 用來顯示靜態文字或圖片的元件。
from PySide6.QtWidgets import QApplication , QWidget , QLabel
from PySide6.QtCore import Qt
class Mywindow(QWidget):
    def __init__(self):
        super().__init__()

        #標籤名稱
        #如果沒有設定布局的話,需要在後面加上self,顯示在父窗口,而self就是當前的QWidget
        Label1 = QLabel("我是標籤1",self)
        Label2 = QLabel("空",self)

        #更改位置和大小,X座標,Y座標,寬,高
        Label1.setGeometry(0,0,200,200)
        Label2.setGeometry(0,200,200,200)

        #更改標籤文字
        Label2.setText("我被更改了")

        #設定標籤文字對齊,以下是靠右邊
        Label1.setAlignment(Qt.AlignmentFlag.AlignRight)

if __name__ == "__main__":
    app = QApplication([])
    window = Mywindow()
    window.show()
    app.exec()
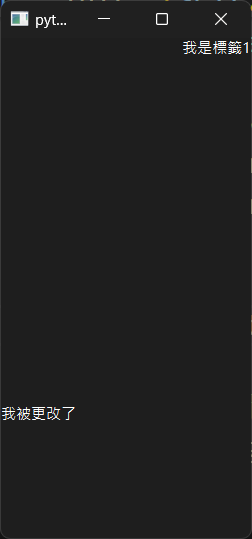
QPushButton : 按鈕。
from PySide6.QtWidgets import QApplication , QWidget , QPushButton

class Mywindow(QWidget):
    def __init__(self):
        super().__init__()

        #新增按鈕(按鈕名稱)
        #如果沒有設定布局的話,需要在後面加上self,顯示在父窗口,而self就是當前的QWidget
        Button = QPushButton("我是按鈕",self)
        Button2 = QPushButton("空",self)

        #更改位置和大小(X座標,Y座標,寬,高)
        Button.setGeometry(0,0,200,200)
        Button2.setGeometry(200,0,200,200) #這裡把X座標設定200,把按鈕2放在按鈕1旁邊。

        #更改按鈕文字
        Button2.setText("我被更改了")

if __name__ == "__main__":
    app = QApplication([])
    window = Mywindow()
    window.show()
    app.exec()
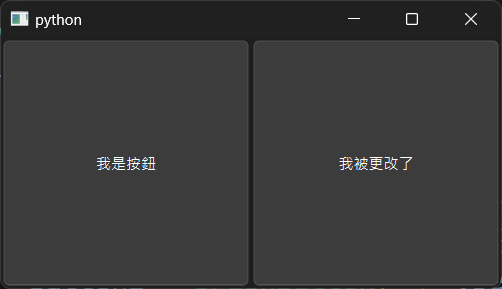
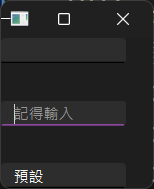
QLineEdit : 單行文字輸入框。
from PySide6.QtWidgets import QApplication , QWidget , QLineEdit
from PySide6.QtCore import Qt
class Mywindow(QWidget):
    def __init__(self):
        super().__init__()

        #如果一開始就在裡面設定文字的話就會直接顯示在上面
        #如果沒有設定布局的話,需要在後面加上self,顯示在父窗口,而self就是當前的QWidget
        LineEdit1 = QLineEdit(self)
        LineEdit2 = QLineEdit(self)
        LineEdit3 = QLineEdit("預設",self)     #預設輸入

        #更改位置和大小,X座標,Y座標,寬,高
        LineEdit1.setGeometry(0,0,100,20)
        LineEdit2.setGeometry(0,50,100,20)
        LineEdit3.setGeometry(0,100,100,20)

        #設定提醒,會有一層淡淡的灰色文字,再輸入後,會消失。
        LineEdit2.setPlaceholderText("記得輸入")


if __name__ == "__main__":

    app = QApplication([])
    window = Mywindow()
    window.show()
    app.exec()
這次的練習結合了佈局和上術的三個基礎元件,做出一個簡單的登入介面。
from PySide6.QtWidgets import QApplication , QWidget , QHBoxLayout , QVBoxLayout , QPushButton , QLabel , QLineEdit

class Mywindow(QWidget):
    def __init__(self):
        super().__init__()

        #設定佈局
        loginLayout  = QVBoxLayout()
        accountLayout  = QHBoxLayout()
        passwordLayout = QHBoxLayout()

        #元件
        loginBtn = QPushButton("登入")

        accountLabel = QLabel("帳號")
        passwordLabel = QLabel("密碼")

        account = QLineEdit()
        account.setPlaceholderText("請輸入帳號")

        password = QLineEdit()
        password.setPlaceholderText("請輸入密碼")

        #佈局
        #帳號
        accountLayout.addWidget(accountLabel)
        accountLayout.addWidget(account)

        #密碼
        passwordLayout.addWidget(passwordLabel)
        passwordLayout.addWidget(password)

        #整體登入介面
        loginLayout.addLayout(accountLayout)
        loginLayout.addLayout(passwordLayout)
        loginLayout.addWidget(loginBtn)

        #設定窗口
        self.setLayout(loginLayout)

if __name__ == "__main__":
    app = QApplication([])
    window = Mywindow()
    window.show()
    app.exec()
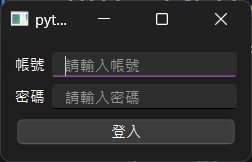
由於目前還未使用信號與槽,因此現在的介面尚無實際功能,僅作為一個視覺擺設。
