今天的重點會是API開發,會有三個大重點:
1.了解RESTful API
2.創建CRUD API
3.基本身份驗證
RESTful API是目前網路應用程式最常用的設計模式。它基於HTTP協議,通過不同的HTTP方法對資源進行操作。
HTTP 方法:
RESTful API 的設計:
在設計 RESTful API 時,每個資源(如用戶、文章等)應該對應一個 URL 路徑。資源的操作則通過不同的 HTTP 方法完成。
接下來我將使用express創建一個簡單的CRUD API
CRUD代表的是:Create, Read, Update, Delete
const express = require('express');
const app = express();
app.use(express.json()); // 解析 JSON 請求

let users = [
    { id: 1, name: 'John Doe' },
    { id: 2, name: 'Jane Doe' }
];

// GET 所有用戶
app.get('/users', (req, res) => {
    res.json(users);
});

// GET 單個用戶
app.get('/users/:id', (req, res) => {
    const user = users.find(u => u.id === parseInt(req.params.id));
    if (!user) return res.status(404).send('User not found');
    res.json(user);
});

// POST 新增用戶
app.post('/users', (req, res) => {
    const newUser = {
        id: users.length + 1,
        name: req.body.name
    };
    users.push(newUser);
    res.status(201).json(newUser);
});

// PUT 更新用戶
app.put('/users/:id', (req, res) => {
    const user = users.find(u => u.id === parseInt(req.params.id));
    if (!user) return res.status(404).send('User not found');

    user.name = req.body.name;
    res.json(user);
});

// DELETE 刪除用戶
app.delete('/users/:id', (req, res) => {
    const userIndex = users.findIndex(u => u.id === parseInt(req.params.id));
    if (userIndex === -1) return res.status(404).send('User not found');

    users.splice(userIndex, 1);
    res.status(204).send(); // 204 表示 No Content
});

app.listen(3000, () => {
    console.log('Server running on http://localhost:3000');
});
這個 API 可以處理使用者的增、刪、改、查操作,並返回對應的 HTTP 狀態碼(如 201 表示創建成功,404 表示資源未找到)。
JWT 是一個用來在客戶端和伺服器之間安全傳遞身份信息的標準。每個 JWT 包含一個加密的 token,用戶在登錄後獲取 token,並在後續請求中將其作為身份標識傳遞。
npm install jsonwebtoken bcryptjs
const jwt = require('jsonwebtoken');
const bcrypt = require('bcryptjs');

const users = [];

// 註冊
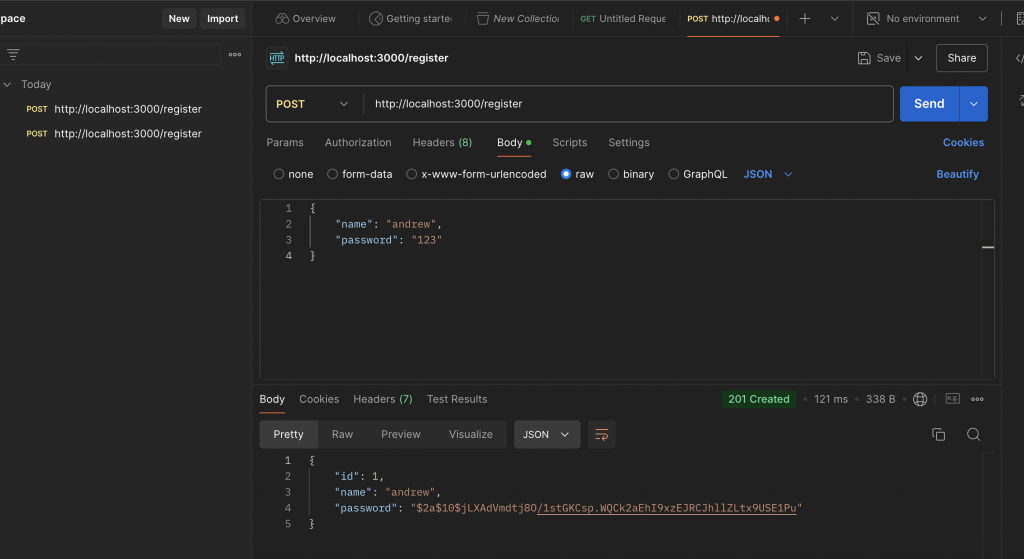
app.post('/register', async (req, res) => {
    const hashedPassword = await bcrypt.hash(req.body.password, 10);
    const newUser = {
        id: users.length + 1,
        name: req.body.name,
        password: hashedPassword
    };
    users.push(newUser);
    res.status(201).json(newUser);
});

// 登錄
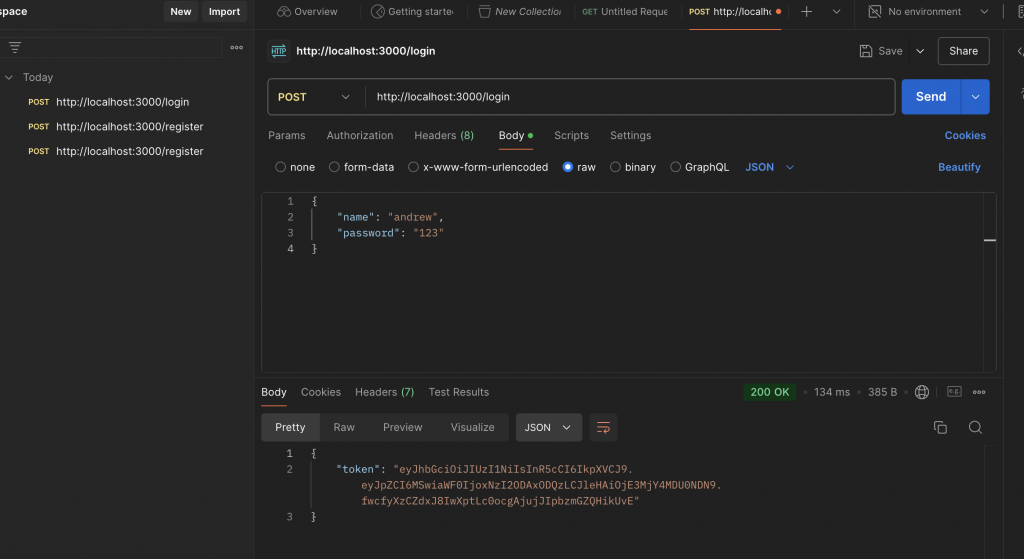
app.post('/login', (req, res) => {
    const user = users.find(u => u.name === req.body.name);
    if (!user) return res.status(404).send('User not found');

    bcrypt.compare(req.body.password, user.password, (err, isMatch) => {
        if (!isMatch) return res.status(401).send('Invalid credentials');

        const token = jwt.sign({ id: user.id }, 'secretKey', { expiresIn: '1h' });
        res.json({ token });
    });
});

// 驗證 Token 的中介軟體
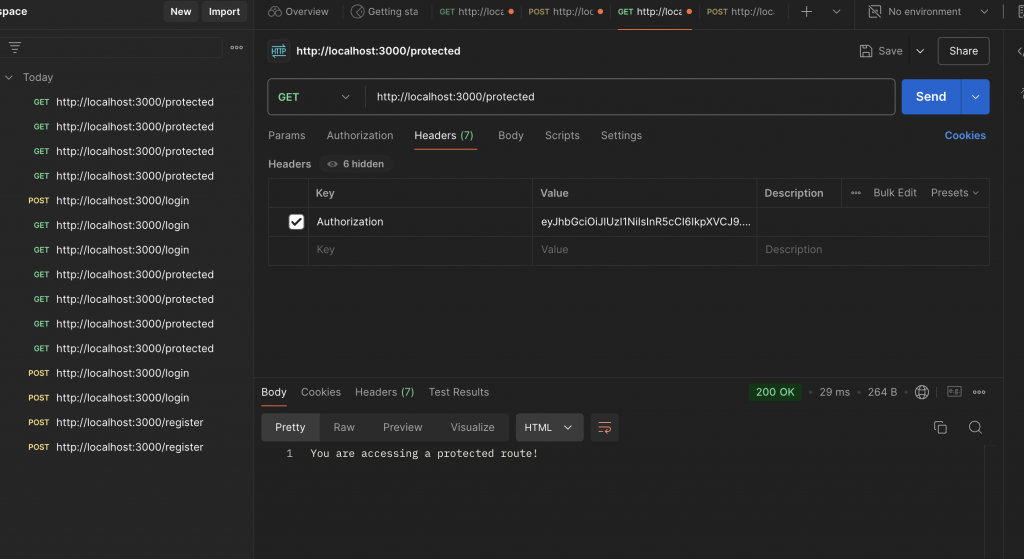
const authenticateToken = (req, res, next) => {
    const token = req.headers['authorization'];
    if (!token) return res.status(403).send('Token required');

    jwt.verify(token, 'secretKey', (err, user) => {
        if (err) return res.status(403).send('Invalid token');
        req.user = user;
        next();
    });
};

// 受保護的路由
app.get('/protected', authenticateToken, (req, res) => {
    res.send('You are accessing a protected route!');
});

app.listen(3000, () => {
console.log('Server running on http://localhost:3000');
});


