

在現代前端開發中,單元測試是確保代碼質量和可靠性的關鍵部分。本文將介紹如何使用 Vitest 和 @vue/test-utils 為 Vue 3 應用程序編寫單元測試。我們將探討如何整合 Pinia store、Zod、Vee-Validate、composables 和 @vueuse/core 等概念到測試中。此外,我們還將討論如何將 Storybook、Playwright 和 happy-dom 與 Vitest 集成,以創建一個全面的測試環境。
首先,我們需要安裝所有必要的依賴。在你的 Vue 3 項目目錄中運行以下命令:
bun add -D vitest @vue/test-utils happy-dom @vitejs/plugin-vue
# 這是手動裝 storybook bun add -D @storybook/vue3 @storybook/addon-essentials @storybook/testing-vue3
bunx storybook@latest init # 使用 storybook 官方提供的方法裝即可
bun add -D @playwright/test
bun add pinia @vueuse/core zod vee-validate @vee-validate/zod
備註: 這裡 @vitejs/plugin-vue 要升級版本,不然會有不相容的問題
創建一個 vitest.config.ts 文件在你的項目根目錄,並添加以下配置:
import { defineConfig } from "vitest/config";
import vue from "@vitejs/plugin-vue";

export default defineConfig({
  plugins: [vue()],
  test: {
    globals: true,
    environment: "happy-dom",
    exclude: ['node_modules', 'dist', '.idea', '.git', '.cache'],
    outputFile: {
      json: "test-results.json"
    },
    coverage: {
      provider: "v8",
      reporter: ["html", "json", "text"],
      exclude: [
        'node_modules',
        'src/main.ts'
      ]
    }
  }
});
並在 package.json 加入 scripts
{
  // ... (省略)
    "scripts": {
    "dev": "vite",
    "build": "vue-tsc && vite build",
    "preview": "vite preview",
    "test": "vitest" // 加入這行
  },
  // ... (省略)
}
import { describe, it, expect } from "vitest";

describe("main", () => {
  it("true", () => {
    expect(true).toBe(true);
  });
});
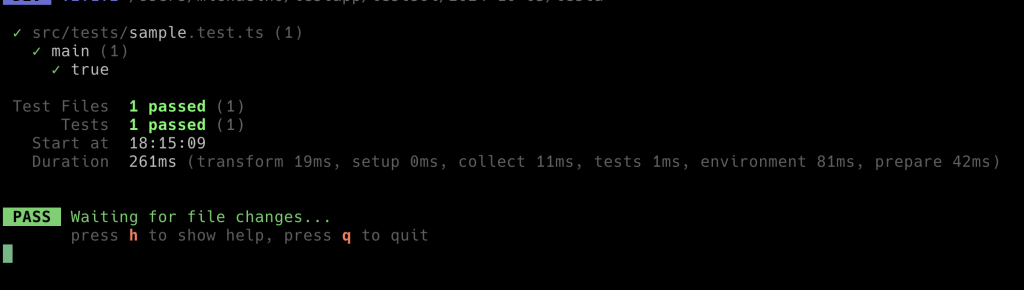
跑一下指令
bun run test
如果看到以下結果代表基本上安裝成功了
讓我們創建一個簡單的計數器組件和相應的 store 來演示測試。
(檔案:src/stores/useCounterStore.ts)
import { shallowRef , computed } from "vue"
import { defineStore, acceptHMRUpdate } from "pinia";

export const useCounterStore = defineStore("userStore", () => {

  // state::

  const count = shallowRef<number>(0);

  // getter::

  const doubleCount = computed<number>(() => count.value * 2)
  // methods::

  const increment = (): void => {
    count.value++;
  };

  const decrement = (): void => {
    count.value--;
  };

  return {
    // state::
    count,
    // getters::
    doubleCount,
    // methods::
    increment,
    decrement,
  }
})

if (import.meta.hot) {
  import.meta.hot.accept(acceptHMRUpdate(useCounterStore, import.meta.hot));
}
src/components/Counter.vue:
<script setup lang="ts">
  import { storeToRefs } from 'pinia';
  import { useCounterStore } from '../stores/useCouterStore';
  const counterStore = useCounterStore();
  const { increment, decrement } = counterStore;
  const { count, doubleCount } = storeToRefs(counterStore);
</script>

<template>
  <div>
    <p>count : {{ count }}</p>
    <p>double count : {{ doubleCount }}</p>
    <button data-testid="increment" aria-label="click to increase count" @click="increment" border-none px-3 py-2 rounded-md cursor-pointer box-border text="hover:white" bg="blue-400 hover:blue-800">+</button>
    <button data-testid="decrement" aria-label="click to decrease count" @click="decrement" border-none px-3 py-2 rounded-md cursor-pointer box-border text="hover:white" bg="blue-400 hover:blue-800">-</button>
  </div>
</template>
創建 src/components/Counter.spec.ts 文件:
import { describe, it, expect, beforeEach } from 'vitest';
import { mount } from '@vue/test-utils';
import { setActivePinia, createPinia  } from 'pinia';
import Counter from './Counter.vue';

describe('Counter.vue', () => {
  beforeEach(() => {
    setActivePinia(createPinia());
  })

  it('render', () => {
    const wrapper = mount(Counter);
    expect(wrapper.text()).toContain('count : 0')
  });

  it('increments count when button is clicked', async () => {
    const wrapper = mount(Counter);
    await wrapper.find('[data-testid="increment"]').trigger('click');
    expect(wrapper.text()).toContain('count : 1')
  });

  it('decrement count when button is clicked', async () => {
    const wrapper = mount(Counter);
    await wrapper.find('[data-testid="decrement"]').trigger('click');
    expect(wrapper.text()).toContain('count : -1')
  });
});
一樣可以跑跑看,注意這裡我建議用 data-testid 將行測試,這樣比較可以錨定對象,前面組件我盡可能寫得簡單,也同時為了單元測試鋪路
讓我們創建一個使用 Zod 和 Vee-Validate 的表單組件,然後為它編寫測試。
(檔案:src/components/UserForm.vue)
<script setup lang="ts">
  import { useUserForm } from '../composables/useUserForm';
  import CustomInput from './CustomInput.vue';
  const wait = (ms: number) => new Promise<void>(resolve => setTimeout(resolve, ms));

  const {
    name,
    email,
    formSubmit,
    isSubmittingDisabled,
    errors
  } = useUserForm(async submitValue => {
    await wait(500);
    console.log(submitValue);
    return true;
  });
</script>

<template>
  <form @submit.prevent="formSubmit" role="user form" w="1/4 2xl:1/6" border="solid 1px gray-100" shadow-lg px-6 py-4 flex="~ col" gap-y-2>
    <CustomInput label="Name" placeholder="name" v-model="name" :error-message="errors.name" :disabled="isSubmittingDisabled" />
    <CustomInput label="Email" placeholder="email" v-model="email" :error-message="errors.email" :disabled="isSubmittingDisabled" />
    <button :disabled="isSubmittingDisabled" type="submit" aria-label="submit user form" border-none px-3 py-2 rounded-md cursor-pointer box-border text="disabled:gray-800 hover:white" bg="blue-400 disabled:gray-400 hover:blue-800">
      {{ isSubmittingDisabled ? 'Submitting...' : 'Submit' }}
    </button>
  </form>
</template>
補充:
(檔案:src/composables/useUserForm.ts)
import * as zod from "zod";
import { shallowRef } from "vue";
import { useThrottleFn } from "@vueuse/core";
import { useForm, useField } from "vee-validate";
import { toTypedSchema } from "@vee-validate/zod";

export const userSchema = zod
  .object({
    name: zod.string().min(1, "name is required"),
    email: zod.string().email(),
  });

export type UserSchema = zod.infer<typeof userSchema>;

export const useUserForm = (submitFn: (values: UserSchema) => Promise<boolean>, submitErrorFn?: () => void) => {
  const isSubmittingDisabled = shallowRef<boolean>(false);
  const validationSchema = toTypedSchema(userSchema);

  const initialValues: UserSchema = {
    name: "",
    email: "",
  };

  const { handleSubmit, isSubmitting, resetForm, errors } = useForm<UserSchema>({
    validationSchema,
    initialValues
  });

  const formSubmit = handleSubmit(
    useThrottleFn(async values  => {
      isSubmittingDisabled.value = true;
      const isSuccess = await submitFn(values);
      if (!isSuccess && submitErrorFn) {
        submitErrorFn();
      }
      isSubmittingDisabled.value = false;
    }, 800)
  );

  const { value: name } = useField<string>("name");
  const { value: email } = useField<string>("email");

  return {
    name,
    email,
    formSubmit,
    isSubmitting,
    isSubmittingDisabled,
    resetForm,
    errors
  };
};

export type UseUserForm = typeof useUserForm;
(檔案 : src/components/CustomInput.vue)
<script setup lang="ts">
  import { useId } from 'vue';

  const { id = useId(), isShowLabel = true, placeholder = '', errorMessage = '', disabled = false } = defineProps<{
    label: string;
    id?: string;
    isShowLabel?: boolean;
    placeholder?: string;
    errorMessage?: string;
    disabled?: boolean;
  }>();

  const errorID = useId();
  const modelValue = defineModel<string | number>({ default: '' });
</script>

<template>
  <div>
    <label v-show="isShowLabel" :for="id">{{ label }}</label>
    <input bg="disabled:gray-400" w-full px-2 py-1 rounded-md border="solid 1px gray-500" :placeholder :aria-describedby="errorMessage ? errorID : undefined" :id :disabled v-model="modelValue" />
    <span text="red-500 sm"  v-show="errorMessage" :id="errorID">{{ errorMessage }}</span>
  </div>
</template>

(檔案:src/components/UserForm.spec.ts)
import { describe, it, expect } from "vitest";
import { mount } from '@vue/test-utils';
import UserForm from './UserForm.vue'
import flushPromises from 'flush-promises';
import waitForExpect from 'wait-for-expect';

describe("UserForm.vue", () => {
  it("validate form not valid", async () => {
    const wrapper = mount(UserForm);
    const nameInput = wrapper.find<HTMLInputElement>('input[placeholder="Name"]');
    const emailInput = wrapper.find<HTMLInputElement>('input[placeholder="Email"]');

    await nameInput.setValue('j');
    await emailInput.setValue('1234');

    await wrapper.find('form').trigger('submit');
    await flushPromises();
    await waitForExpect(() => {
      expect(wrapper.text()).toContain('at least 2 characters');
      expect(wrapper.text()).toContain('not email format');

    });
  });

  it("validate form valid", async () => {
    const wrapper = mount(UserForm);
    await wrapper.find<HTMLInputElement>('input[placeholder="Name"]').setValue('hello');
    await wrapper.find<HTMLInputElement>('input[placeholder="Email"]').setValue('1234@gmail.com');
    await wrapper.find('form').trigger('submit');

    await flushPromises();
    await waitForExpect(() => {
      expect(wrapper.text()).not.toContain('at least 2 characters');
      expect(wrapper.text()).not.toContain('not email format');
    });
  });

});
補充 : vee-validate在撰寫測試時因為元件非同步的問題(Promise pending 沒有 resolve) 的問題
解決方法:
bun add -D flush-promises
bun add -D wait-for-expect
並按照我上方的寫法即可解決測試上的問題
讓我們創建一個使用 @vueuse/core 的 composable 並為其編寫測試。
(檔案 : src/composables/useWindowSize.ts)
import { useWindowSize as vueUseWindowSize } from '@vueuse/core'

export function useWindowSize() {
  const { width, height } = vueUseWindowSize()

  const isSmallScreen = computed(() => width.value < 640)
  const isMediumScreen = computed(() => width.value >= 640 && width.value < 1024)
  const isLargeScreen = computed(() => width.value >= 1024)

  return {
    width,
    height,
    isSmallScreen,
    isMediumScreen,
    isLargeScreen,
  }
}
現在,讓我們為這個 composable 編寫測試。
src/composables/useWindowSize.spec.ts:
import { describe, it, expect, vi } from 'vitest'
import { useWindowSize } from './useWindowSize'
import { ref } from 'vue'

vi.mock('@vueuse/core', () => ({
  useWindowSize: vi.fn(() => ({
    width: ref(1024),
    height: ref(768),
  })),
}))

describe('useWindowSize', () => {
  it('correctly determines screen sizes', () => {
    const { isSmallScreen, isMediumScreen, isLargeScreen } = useWindowSize()

    expect(isSmallScreen.value).toBe(false)
    expect(isMediumScreen.value).toBe(false)
    expect(isLargeScreen.value).toBe(true)
  })
})

首先,初始化 Storybook:
npx storybook init
然後,為我們的 Counter 組件創建一個 story。
src/stories/Counter.stories.ts:
import type { Meta, StoryObj } from '@storybook/vue3'
import Counter from '../components/Counter.vue'
import { createPinia } from 'pinia'

const meta: Meta<typeof Counter> = {
  title: 'Components/Counter',
  component: Counter,
  decorators: [() => ({ template: '<div><story /></div>', setup: () => {createPinia()} })],
}

export default meta
type Story = StoryObj<typeof Counter>

export const Default: Story = {}

創建一個 Playwright 測試文件 tests/counter.spec.ts:
import { test, expect } from '@playwright/test'

test('counter increments and decrements', async ({ page }) => {
  await page.goto('http://localhost:5173')  // 假設你的 app 運行在這個地址

  await expect(page.locator('text=Count: 0')).toBeVisible()

  await page.click('text=Increment')
  await expect(page.locator('text=Count: 1')).toBeVisible()

  await page.click('text=Decrement')
  await expect(page.locator('text=Count: 0')).toBeVisible()
})
在 package.json 中添加以下腳本:
{
  "scripts": {
    "test": "vitest",
    "test:ui": "vitest --ui",
    "test:coverage": "vitest run --coverage",
    "test:e2e": "playwright test"
  }
}
現在你可以運行以下命令來執行測試:
bun run test: 運行單元測試bun run test:ui: 在 UI 模式下運行單元測試bun run test:coverage: 運行單元測試並生成覆蓋率報告bun run test:e2e: 運行 Playwright e2e 測試在本文中,我們學習了如何使用 Vitest 和 @vue/test-utils 為 Vue 3 應用程序編寫單元測試。我們成功整合了 Pinia store、Zod、Vee-Validate、@vueuse/core 等工具,並展示了如何測試使用這些工具的組件和 composables。
此外,我們還介紹了如何將 Storybook 用於組件開發,以及如何使用 Playwright 進行端到端測試。通過使用 happy-dom,我們能夠在 Node.js 環境中模擬 DOM,從而加速了測試的執行。
記住,編寫好的單元測試不僅可以幫助你捕獲錯誤,還可以提高代碼質量,並為重構提供信心。隨著你的應用程序變得越來越複雜,擁有一個強大的測試套件將變得越來越重要。
希望這個指南能夠幫助你開始在 Vue 3 項目中使用 Vitest 進行測試。隨著你的經驗增加,你可以探索更多高級的測試技術和策略。
