上篇文章建立了 Teleport Auth 和 Proxy,已經可以連接到 VM 了。這個章節會示範連接到 GKE 叢集,結合 K8s 內的 RBAC 來進行權限控管,將 Teleport 的強大之處展示給大家。
$ helm pull teleport/teleport-kube-agent --version 16.3.0
$ tar zxvf teleport-kube-agent-16.3.0.tgz
進入昨天架設好的 Teleport 網頁,點擊 Enroll New Resource > Self-Hosted Kubernetes
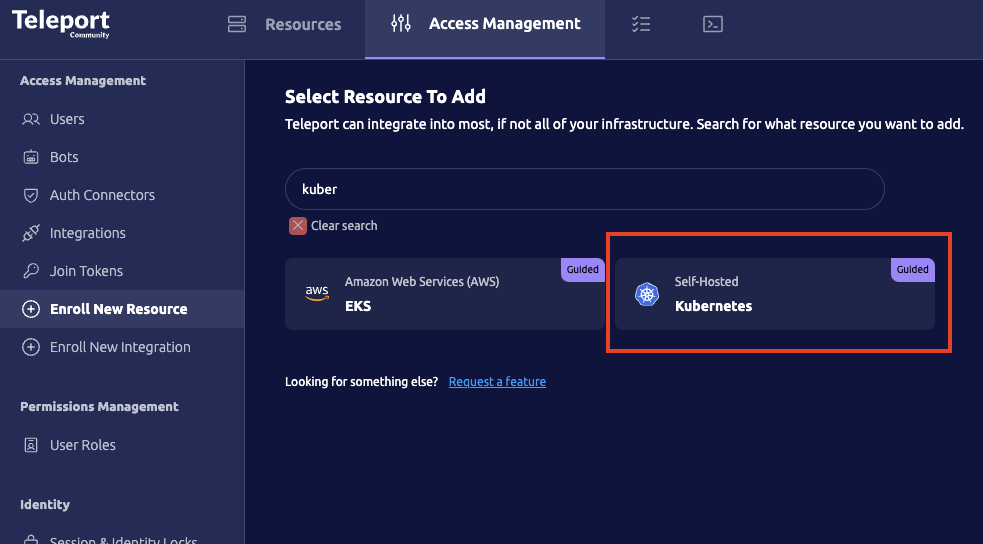
我們要將這個叢集註冊上去,需要安裝 Teleport-Agent 在此叢集內
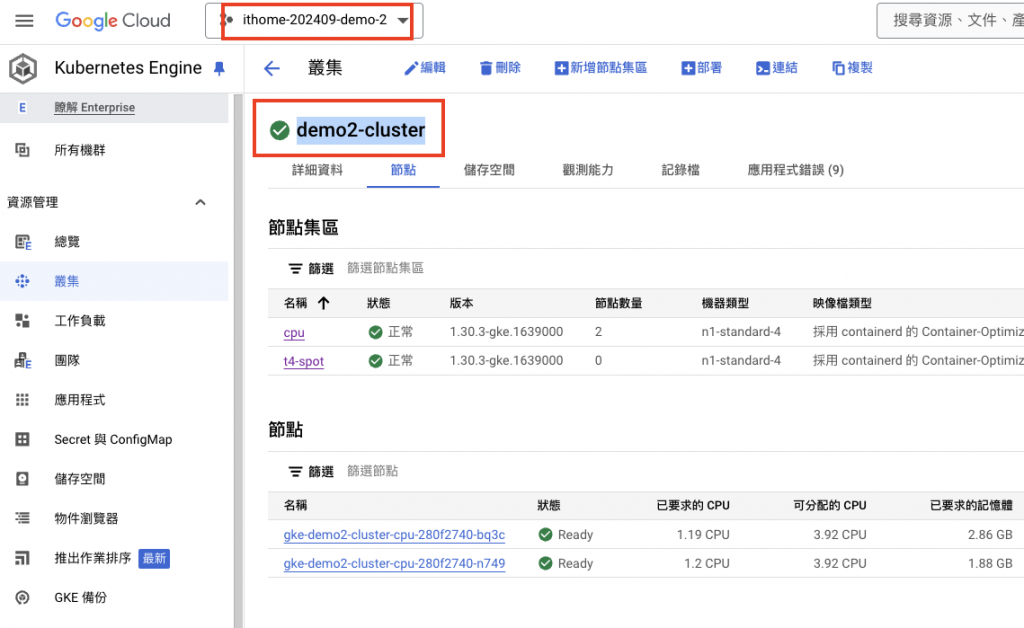
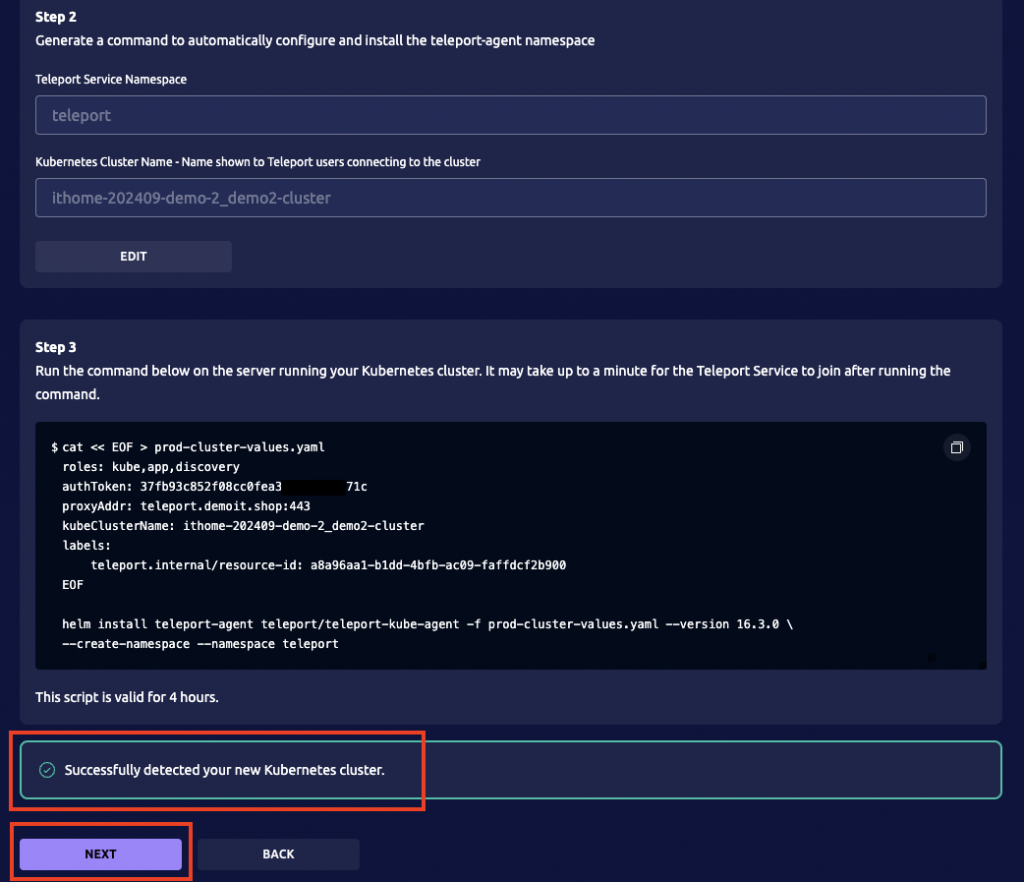
我們將此 GKE 叢集命名為 ithome-202409-demo-2_demo2-cluster ,點擊 NEXT
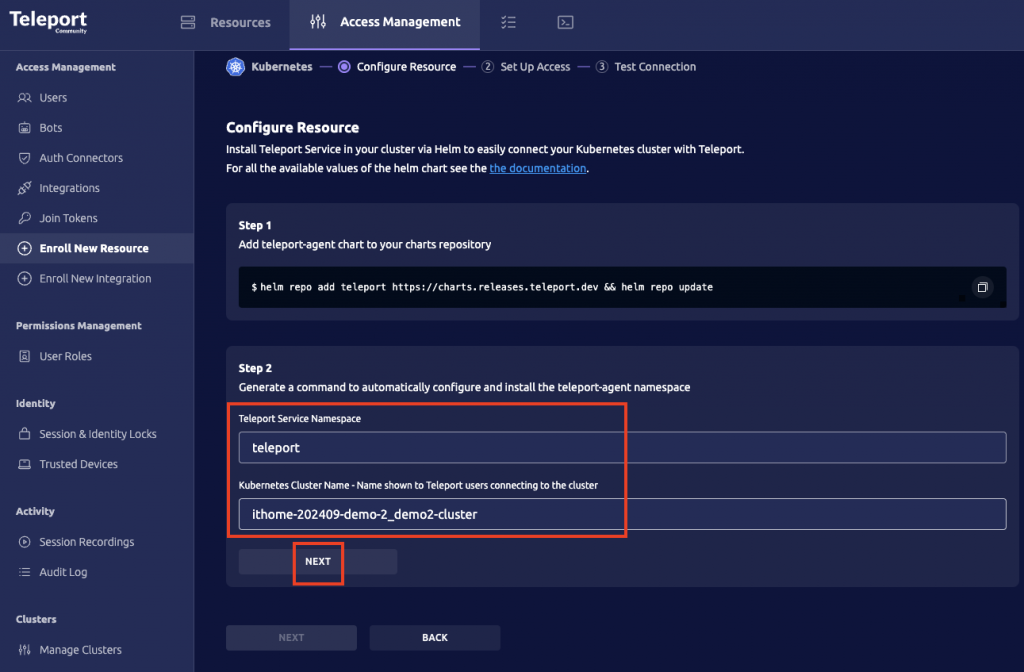
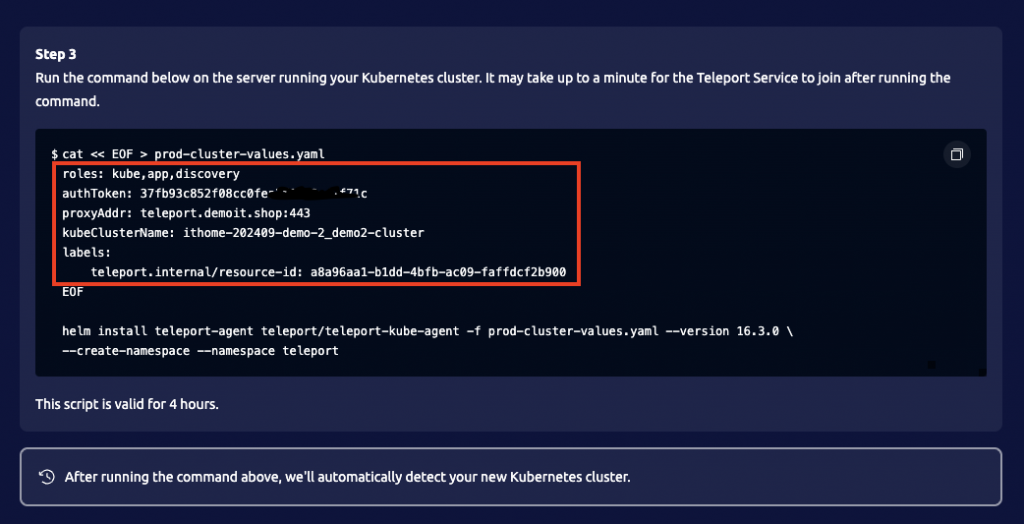
會出現 Step3,將其中的 roles, authToken, proxyAddr, kubeClusterName, labels 更改至 Helm Chart Values.yaml,且另外幫這個叢集打上標籤 env:demo2-cluster
labels:
  env: demo2-cluster
$ helm upgrade --install teleport-agent -f values.yaml . -n teleport --create-namespace
teleport-agent Pods 正常啟動後, Teleport Web UI 會顯示 Successfully detected your new Kubernetes cluster. ,點擊 NEXT
在此 GKE 集群內創建一個 ClusterRole 及 ClusterRoleBinding,此 Group:“developer-readonly” 設定為只有讀取權限,無法刪除任何物件,且看不到敏感資訊(Secret),Group:“developer-readonly” 綁定 ClusterRole:“readonly”
apiVersion: rbac.authorization.k8s.io/v1
kind: ClusterRole
metadata:
  name: readonly
rules:
  - apiGroups: [""]
    verbs: ["get", "list", "watch"]
    resources:  [
      "configmaps","endpoints","persistentvolumeclaims","persistentvolumeclaims/status","pods","nodes",
      "replicationcontrollers","replicationcontrollers/scale","serviceaccounts",
      "services","services/status","events","bindings","events","limitranges","namespaces/status",
      "pods/log","pods/status","replicationcontrollers/status",
      "resourcequotas","resourcequotas/status","namespaces"
      ]
  - apiGroups: ["apps"]
    verbs: ["get","list","watch"]
    resources: [
      "controllerrevisions","daemonsets","daemonsets/status","deployments",
      "deployments/scale","deployments/status","replicasets","replicasets/scale","replicasets/status",
      "statefulsets","statefulsets/scale","statefulsets/status"
      ]
  - apiGroups: ["autoscaling"]
    verbs: ["get","list","watch"]
    resources: ["horizontalpodautoscalers","horizontalpodautoscalers/status"]
  - apiGroups: ["batch"]
    verbs: ["get","list","watch"]
    resources: ["cronjobs","cronjobs/status","jobs","jobs/status"]
---
apiVersion: rbac.authorization.k8s.io/v1
kind: ClusterRoleBinding
metadata:
  name: readonly-binding
subjects:
  - kind: Group
    apiGroup: rbac.authorization.k8s.io
    name: developer-readonly
roleRef:
  apiGroup: rbac.authorization.k8s.io
  kind: ClusterRole
  name: readonly
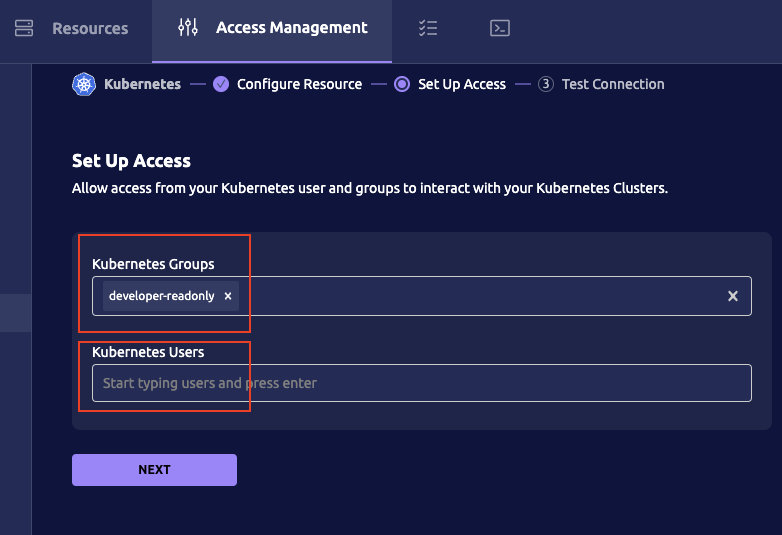
在 Teleport UI 頁面創建 ClusterRoleBinding 使用的 Group: “developer-readonly”,如果讀者想要建立的是 User 也可以,只需要改成在 K8s 內建立 Role 及 RoleBinding,關於 K8s 的 RBAC 這裡就不進行詳述了。
點擊 NEXT
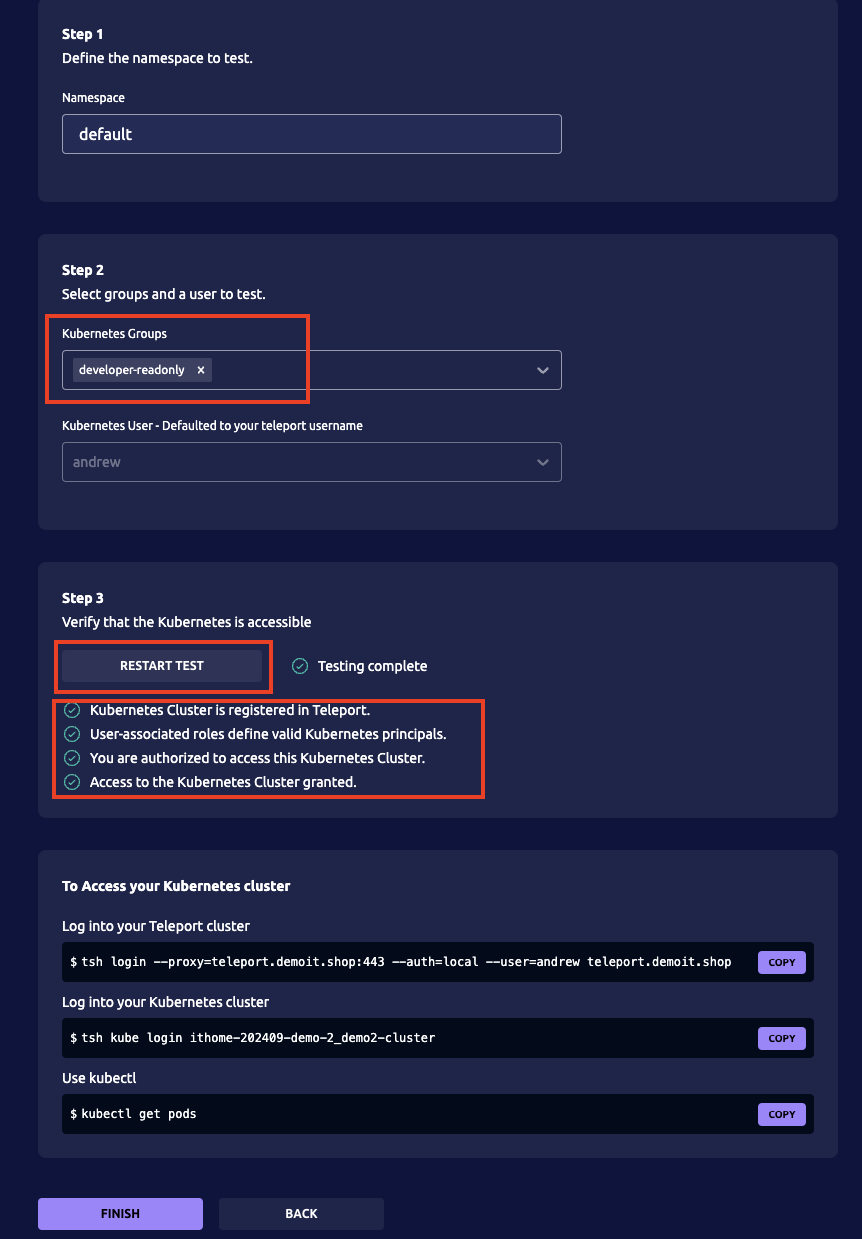
在 Step2 選擇剛剛創建的 Group: “developer-readonly”,在 Step3 點擊 Test,可以檢查剛剛創建的 Group 是否有正確綁定到 ClusterRole 的權限,確定設定都正確後點擊 Finish。
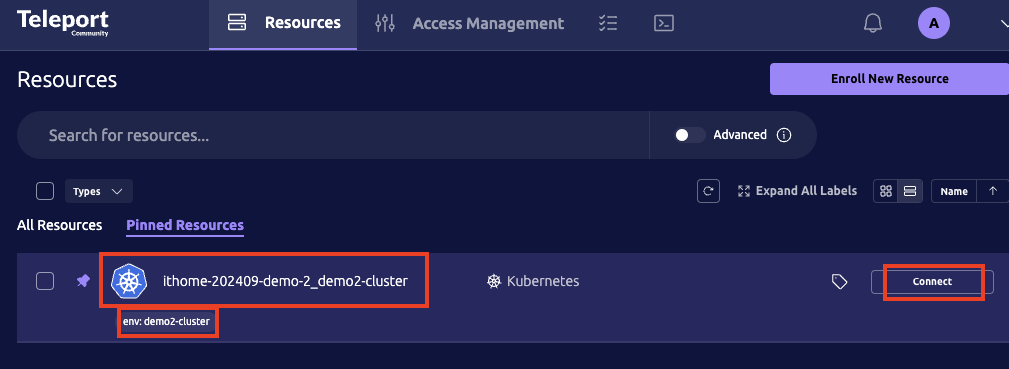
回到首頁,會看到多了一個新的 K8s 叢集(ithome-202409-demo-2_demo2-cluster),且標籤為 env:demo2-cluster
進入 Access Managerment > User Roles,點擊右上角的 CREATE NEW ROLE
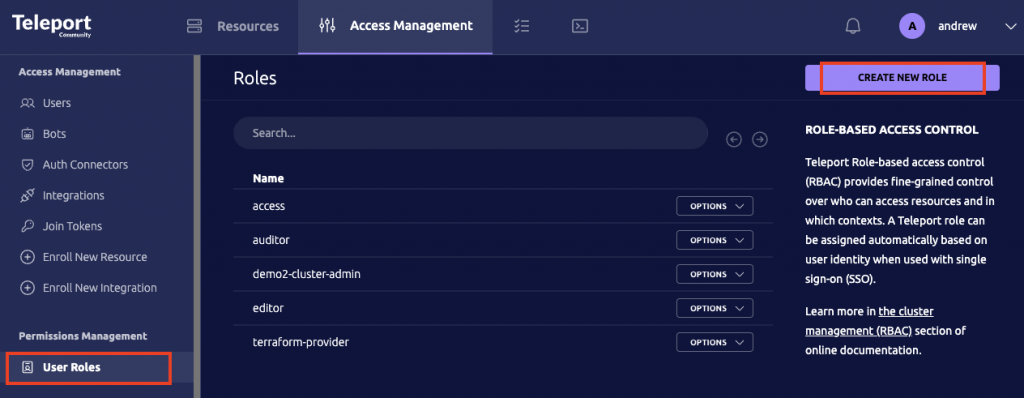
創建 demo2-cluster-developer-readonly 角色,擁有連接ithome-202409-demo-2_demo2-cluster叢集的權限
version: v7
kind: role
metadata:
	name: demo2-cluster-developer-readonly # 創建的 Teleport Role 名稱
spec:
  allow:
    kubernetes_groups:
    - developer-readonly # 剛剛創建的 Group: “developer-readonly”
    kubernetes_labels:
      env: demo2-cluster # ithome-202409-demo-2_demo2-cluster 的標籤
    kubernetes_resources:
    - kind: pod
      name: '*'
      namespace: '*'
    node_labels:
      '*': '*'
    rules:
    - resources:
      - role
      verbs:
      - list
      - read
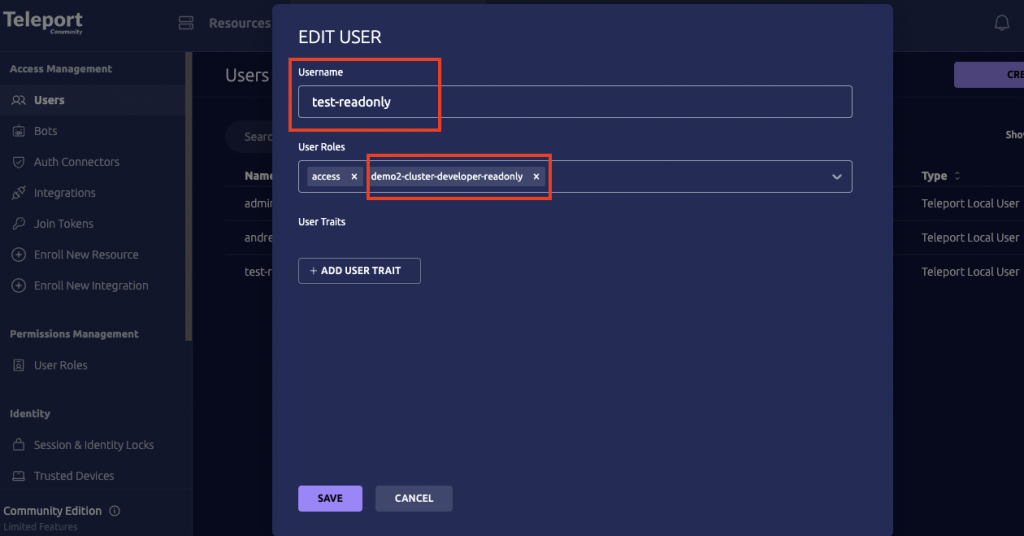
創建一個使用者 test-readonly 具有 demo2-cluster-developer-readonly 角色的權限
接下來要先在本機安裝 tsh 命令行工具
Linux
# 首先,根據版本分配環境變數
$ TELEPORT_EDITION="oss"
$ TELEPORT_VERSION="16.3.0"

# 在要安裝 Teleport 的伺服器上下載並執行安裝
$ curl https://cdn.teleport.dev/install-v16.4.0.sh | bash -s ${TELEPORT_VERSION?} ${TELEPORT_EDITION?}
MacOS
$ curl -O https://cdn.teleport.dev/teleport-ent-16.3.0.pkg
$ sudo installer -pkg teleport-ent-16.3.0.pkg -target /
which teleport
Windows
要在 Windows 上安裝 tsh 和 tctl,請在 PowerShell 中運行以下命令(這些命令在 cmd.exe 中不起作用):
# Set the desired teleport version
$ TELEPORT_VERSION="16.4.0"

# Set the TLS level to TLS 1.2 (required on Windows Server 2016 and lower)
$ [Net.ServicePointManager]::SecurityProtocol = [Net.SecurityProtocolType]::Tls12

# Get the expected checksum for the Windows tsh package
$ Resp = Invoke-WebRequest https://cdn.teleport.dev/teleport-v$TELEPORT_VERSION-windows-amd64-bin.zip.sha256

# PowerShell will return the binary representation of the response content
# by default, so you need to convert it to a string
$ [System.Text.Encoding]::UTF8.getstring($Resp.Content)

# <checksum> <filename>
$ Invoke-WebRequest -OutFile teleport-v$TELEPORT_VERSION-windows-amd64-bin.zip -Uri https://cdn.teleport.dev/teleport-v$TELEPORT_VERSION-windows-amd64-bin.zip
$ certUtil -hashfile teleport-v$TELEPORT_VERSION-windows-amd64-bin.zip SHA256

# SHA256 hash of teleport-v$TELEPORT_VERSION-windows-amd64-bin.zip:
# <checksum>
# CertUtil: -hashfile command completed successfully.
驗證校驗和匹配后,您可以提取檔案。可執行檔將在上 teleport-v$TELEPORT_VERSION-windows-amd64-bin\ 提供。
$ Expand-Archive teleport-v$TELEPORT_VERSION-windows-amd64-bin.zip
$ cd teleport-v$TELEPORT_VERSION-windows-amd64-bin

$ .\tsh.exe version
# Teleport v$TELEPORT_VERSION git:v$TELEPORT_VERSION go1.22

$ .\tctl.exe version
# Teleport v$TELEPORT_VERSION git:v$TELEPORT_VERSION go1.22
確保將 tsh.exe和 tctl.exe 移動到PATH中。
開啟欲連接的 K8s 叢集,點擊 Connect,依序做完以下4步驟
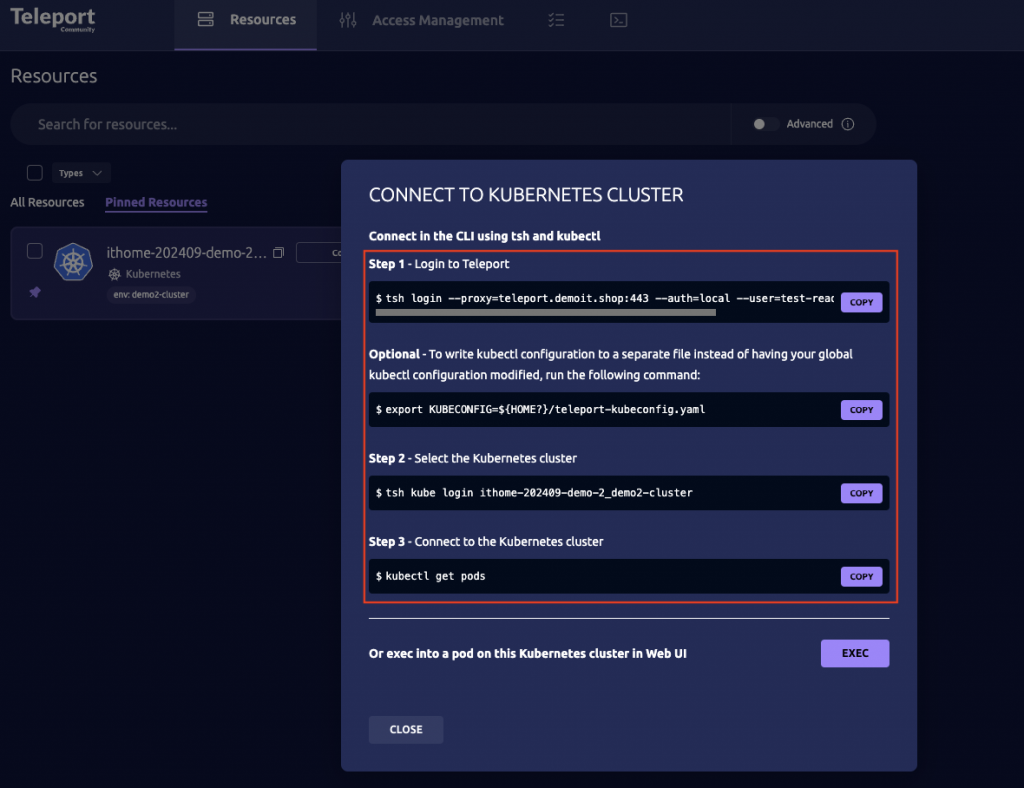
登入後可以測試看看權限是否如預期
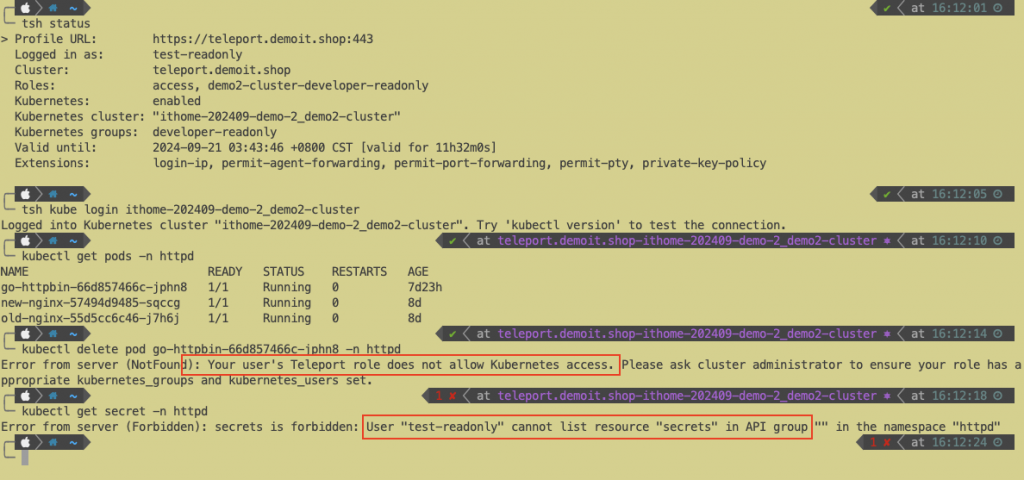
可以看到 demo2-cluster-developer-readonly 的可以查看 Pod 但是沒辦法刪除,以及不能看到 Secret 物件。
這篇文章介紹了使用 Teleport 安全連接到 Kubernetes 集群的方法。首先解釋了 Teleport 作為一個 Proxy 閘道如何簡化對 K8s 集群的訪問,並提供更安全的連接方式。
接著,詳細說明了如何整合 Teleport 和 Kubernetes RBAC,實現基於角色的精細權限控制。透過結合 Teleport 和 RBAC,管理員可以根據用戶角色授予不同的集群資源訪問權限,從而提高集群的整體安全性。