Kubernetes 的普及,讓管理多個叢集變得越來越複雜。Teleport 提供了一個統一的訪問平台,簡化了對分散式 Kubernetes 環境的管理。接下來三天的 Teleport 系列文章將介紹如何利用 Google Kubernetes Engine (GKE) 快速部署 Teleport,並將其與 Google Cloud Platform (GCP) 整合,實現對不同 VM 和 Kubernetes 叢集的安全訪問。通過 Teleport,用戶可以輕鬆登錄到各個目標叢集,提高操作效率,同時保障系統安全。
Teleport 是訪問和保護所有基礎設施的最簡單、最安全的方式。基於加密身份和 Zero Trust 提供對基礎設施的按需、最低許可權訪問,並具有內置的身份安全和策略治理。
它的強大之處在於廣泛的支持三大雲 AWS,GCP,Azure 及其代管服務,資料庫Mysql, PostgresSQL, Redis, MongoDB 及各種作業系統的虛擬機等。
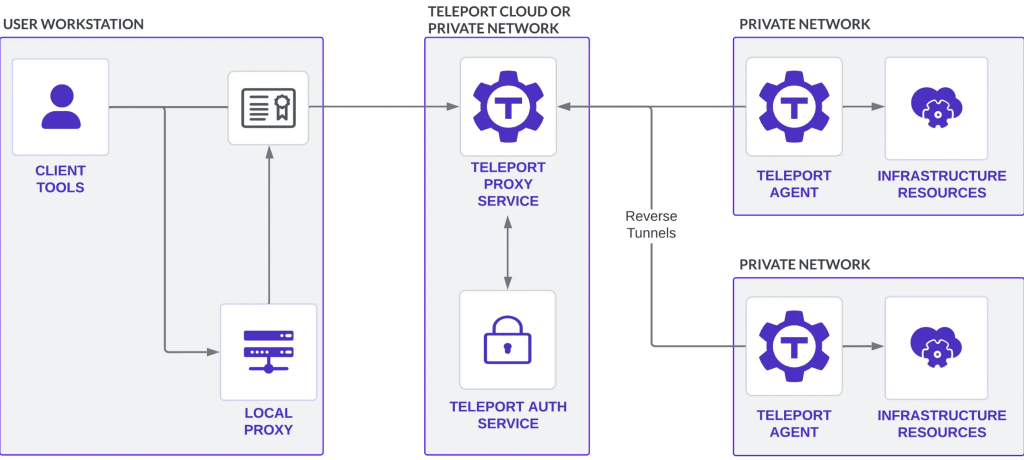
Teleport 用戶端工具(tsh、Teleport Connect 和 Teleport Web UI):通過 Teleport 代理和 Teleport 代理服務連接到基礎設施中的資源。
Local Proxy:
在某些情況下,tsh 會啟動本地代理伺服器,這些伺服器向 Teleport 進行身份驗證,並從用戶端工具(例如,資料庫用戶端和 AWS 開發工具套件應用程式)轉發流量。
Teleport Proxy:
一種無狀態服務,用於執行身份驗證閘道的功能,提供 Web UI 並接受客戶端連接。在託管的 Teleport Enterprise 帳戶上,可以通過您的 Teleport 帳戶 URL 訪問此服務
Teleport Auth:
充當集群的證書頒發機構,處理使用者身份驗證/授權並頒發短期客戶端證書。
Teleport Agent:
代理對基礎設施資源執行身份驗證,將使用者流量路由到這些資源,並執行協定解析。
Infrastructure Resources:
Teleport 可以保護對自託管基礎設施以及由雲供應商管理的基礎設施的訪問。
在 K8s 內使用 Helm 安裝 Teleport Cluster(Auth & Proxy)
設置 Teleport Helm 儲存庫
$ helm repo add teleport https://charts.releases.teleport.dev && helm repo update
拉取Helm Chart,並解壓縮
$ helm pull teleport/teleport-cluster --version 16.3.0
$ tar zxvf teleport-cluster-16.3.0.tgz
value.yaml需要修改的項目如下
clusterName: "teleport.demoit.shop" # Teleport網址
kubeClusterName: "demo2-cluster" # GKE Cluster Name
chartMode: "gcp" # 這個系列都是以GCP作為示範
gcp:
projectId: "ithome-202409-demo-2" # GKE Cluster 專案ID
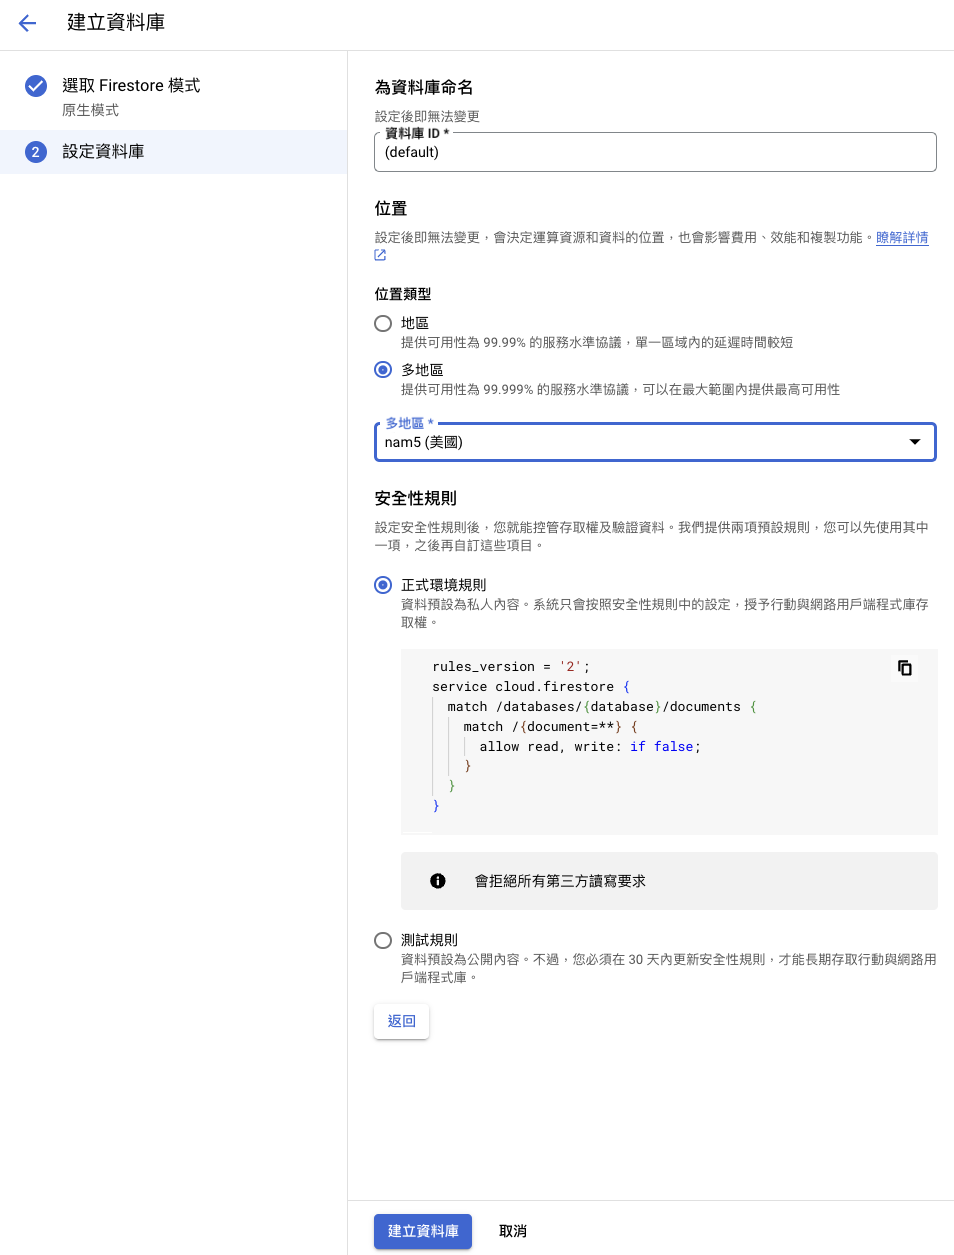
backendTable: "teleport-backend" # Firestore backendTable name,需要手動先建立 (default) DB
auditLogTable: "teleport-audit-log" # Firestore auditLogTable name,需要手動先建立 (default) DB
auditLogMirrorOnStdout: false
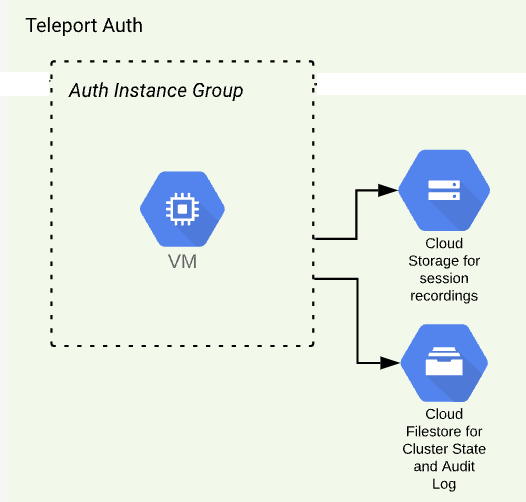
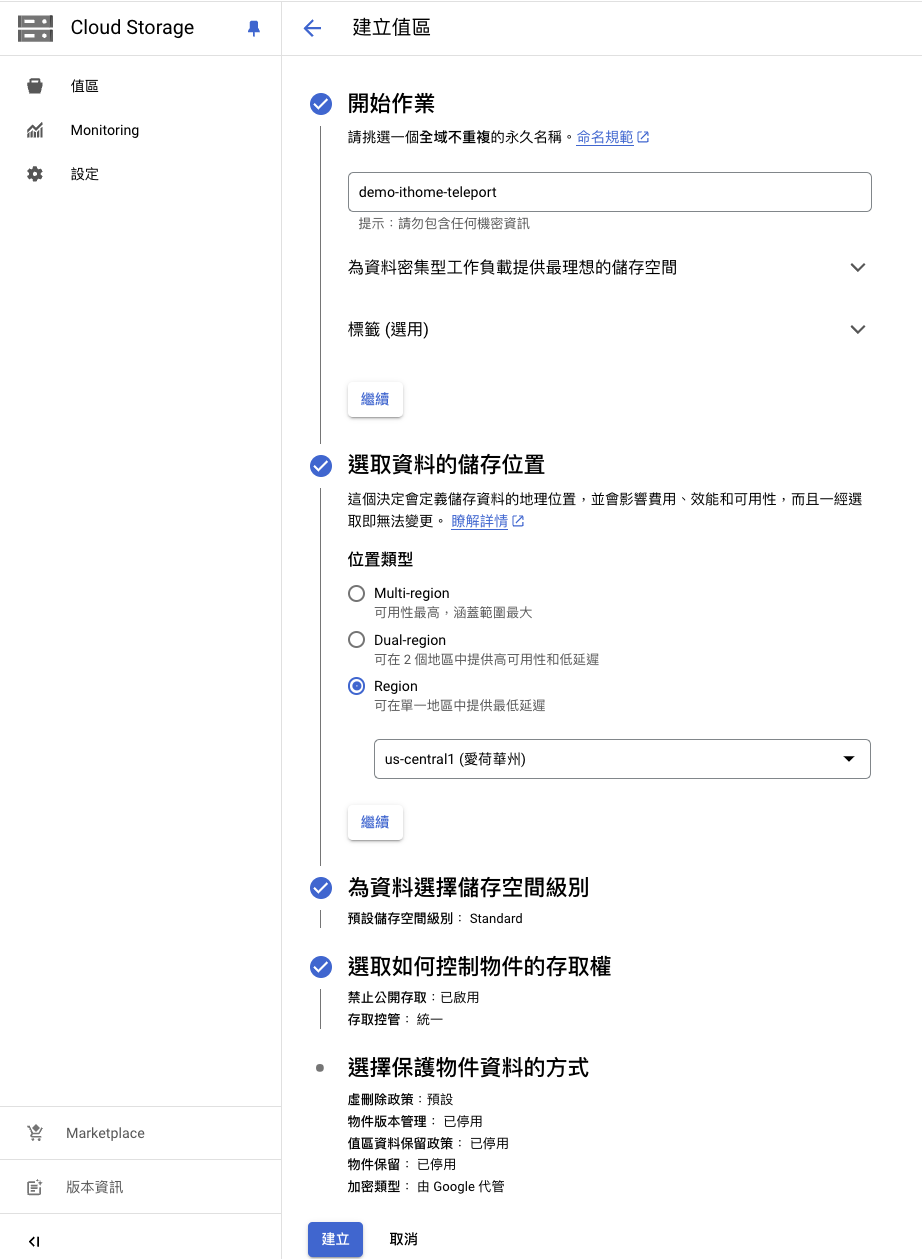
sessionRecordingBucket: "demo-ithome-teleport" # GCS Bucket 名稱,需要手動先建立
credentialSecretName: "teleport-gcp-credentials" # 要給Teleport使用的GCP SA的k8s Secret名,如果使用 Day6 的 Workload Identity,這裡可以註解掉
highAvailability:
# 是否使用 Cert-manager 創建 Teleport 網址的 tls 證書
certManager:
enabled: true
addCommonName: false
addPublicAddrs: false
issuerName: "letsencrypt-demo"
issuerKind: ClusterIssuer
issuerGroup: cert-manager.io
installCRDs: true
$ helm upgrade --install teleport-cluster -f values.yaml . -n teleport-cluster --create-namespace
參數說明:
創建 GCP 服務帳戶,產生服務帳戶的金鑰,然後將產生的金鑰 JSON 放入 GKE 的 Secret 物件內,名稱為 values.yaml 檔案內的 gcp.credentialSecretName
創建 GCP IAM 服務帳戶指令
$ gcloud iam service-accounts create teleport-auth-server \
		--project ithome-202409-demo-2 \
    --description="Service account for Teleport Auth Server" \
    --display-name="teleport-cluser" \
    --format=yaml
kubectl apply -f teleport-gcp-credentials-secret.yaml
apiVersion: v1
kind: Secret
metadata:
  name: teleport-gcp-credentials
  namespace: teleport-cluster
type: Opaque
stringData:
  gcp-credentials.json:
    '將產生的GCP SA Token Json貼上'
將 values.yaml 檔案內的 gcp.credentialSecretName 註解掉,再使用 Day6 的 Workload Identity ,將 GKE 內的 SA teleport-cluster 加上 GCP的權限,Terraform 設定如下
    teleport-cluster = {
      gcp_service_account           = "teleport-cluster"
      k8s_service_account           = "teleport-cluster"
      k8s_service_account_namespace = "teleport-cluster"
      use_existing_gcp_sa           = false
      use_existing_k8s_sa           = true
      roles = [
        "roles/editor"
      ],

      additional_projects = {
        "ithome-202409-demo-2" = [
          "roles/editor"
        ]
      }
    },
將 GKE Service 產生的 Loadbalance 加入 Cloud DNS 紀錄。
$ gcloud dns --project=$PROJECT_NAME record-sets create teleport.demoit.shop. --zone=$CLOUD_DNS_區域名稱 --type="A" --ttl="300" --rrdatas=$A_RECORD_IP
將 GKE Service 產生的 Loadbalance 加入防火牆,開啟 443 及 3022-3036 port
$ gcloud compute --project=ithome-202409-demo firewall-rules create teleport-cluster --direction=INGRESS --priority=1000 --network=ithome-202409-demo-vpc --action=ALLOW --rules=tcp:443,tcp:3022-3036 --source-ranges=0.0.0.0/0 --destination-ranges=34.170.184.228 --target-tags=gke-demo2-cluster --enable-logging
建立 demo-ithome-teleport GCS Bucket
建立 Firestore > (default) 資料庫
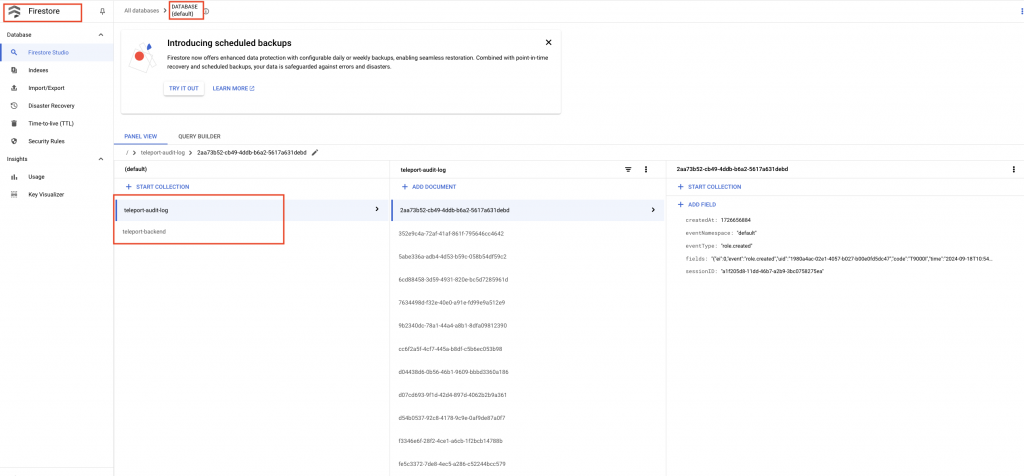
等到 teleport-cluster-auth Pod Ready,就會建立出 backendTable 及 auditLogTable 兩張表。
登入網頁:teleport.demoit.shop(筆者示範使用),會看到 Teleport Community Licence 說明。
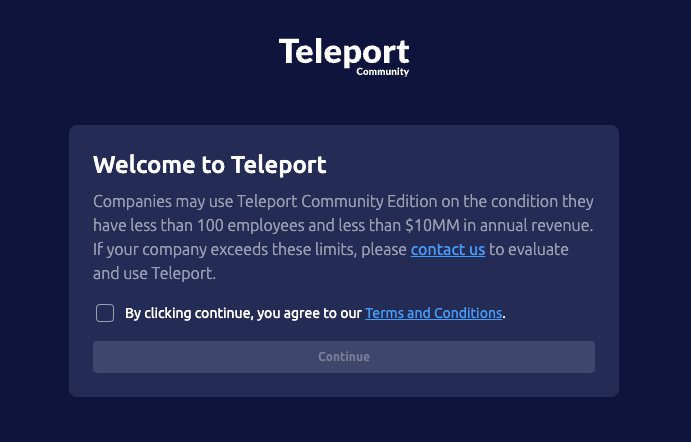
公司可以使用 Teleport 社區版,前提是公司低於100人且年收入低於 1000 萬美元。
對 teleport-cluster-auth-6fcd8f5d99-9z64m pod 執行創建 admin user 的指令
$ kubectl exec -it teleport-cluster-auth-6fcd8f5d99-9z64m -n teleport-cluster -- tctl users add admin --roles=editor,access --logins=root,ubuntu,ec2-user
該命令將列印類似於以下內容的消息,訪問提供的URL以創建您的Teleport使用者。
User "teleport-admin" has been created but requires a password. Share this URL with the user to complete user setup, link is valid for 1h:
https://teleport.example.com:443/web/invite/123abc45......9ghi123abc46def78

NOTE: Make sure teleport.example.com:443 points at a Teleport proxy which users can access.
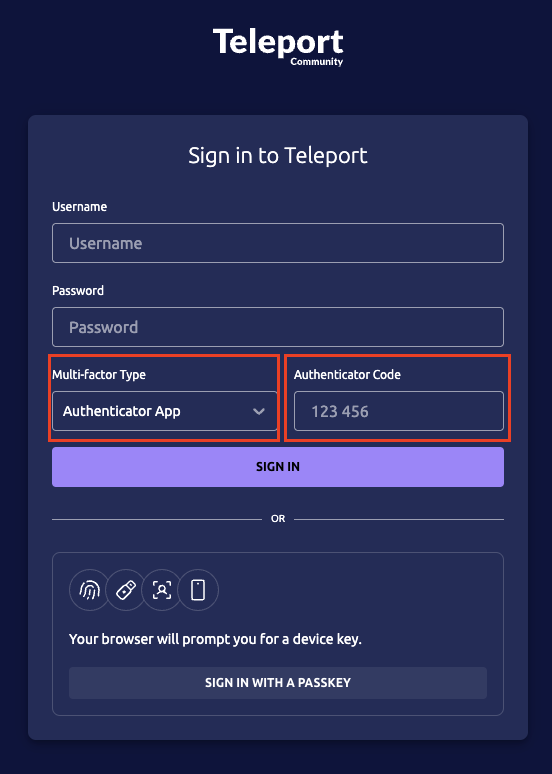
輸入完密碼後,將 Multi-factor Type 調整成 Authenticator APP ,這時會請使用者進行 QR Code 綁定驗證,可使用 Google Authenticator , Authy 等工具記下 QR Code,再輸入當下時間所產生的6位數字進行驗證。當然如果讀者有其他例如:指紋、USB 金鑰、臉部辨識等兩因素驗證都可以綁定,Teleport 的資安功能非常強大。
登入畫面如下,記得將 Multi-factor Type 調整成 Authenticator APP,這裡示範使用 QR Code 認證。
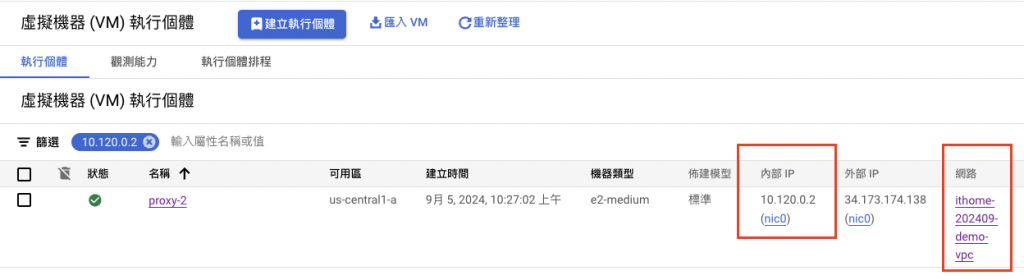
以下使用同一個 Shared VPC 下建立 Compute Engine 來示範,內部 IP 為 10.120.0.2,外部 IP 為 34.173.174.138
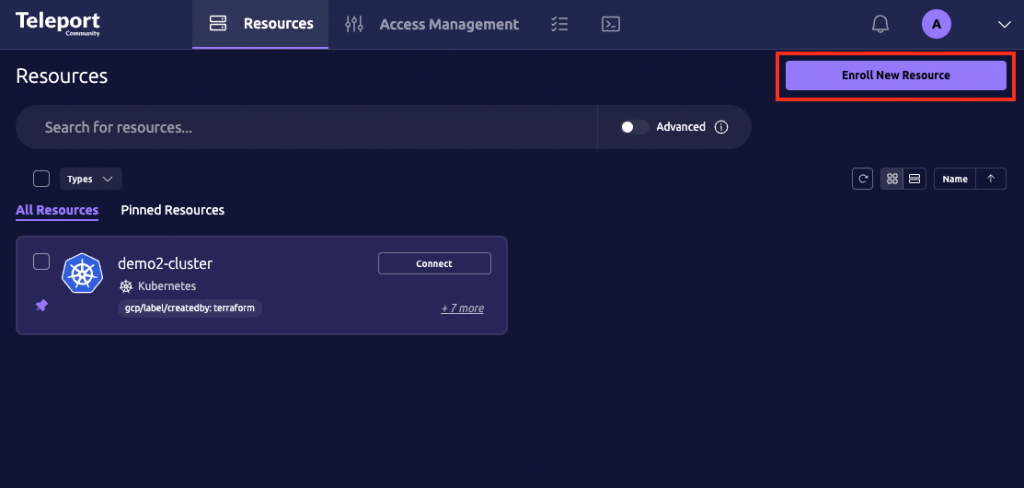
登入 Teleport,點擊 Enroll New Resource
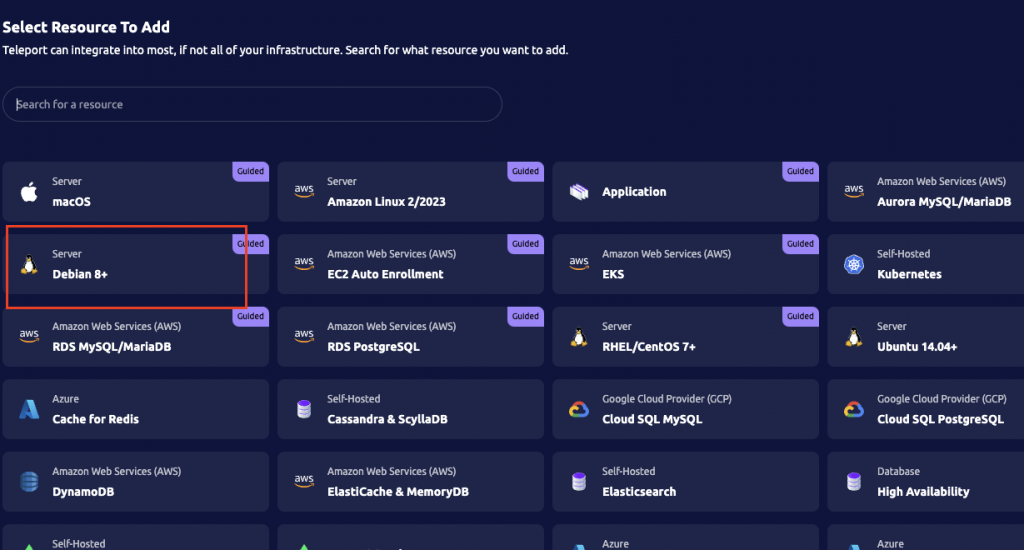
選擇機器的作業系統,我的這台機器是debian-12-bookworm-v20240815,所以選擇 Debian 8+
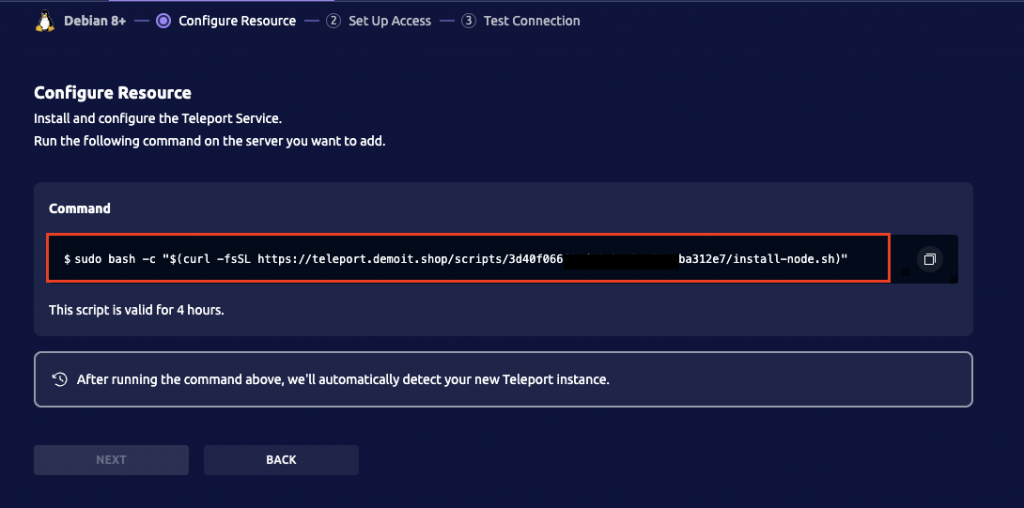
進到要綁定的機器內輸入這行 Teleport 產生的指令,並加入使用者帳號。
$ sudo bash -c "$(curl -fsSL https://teleport.demoit.shop/scripts/78138d3f........59f383c/install-node.sh)"
$ useradd teleport
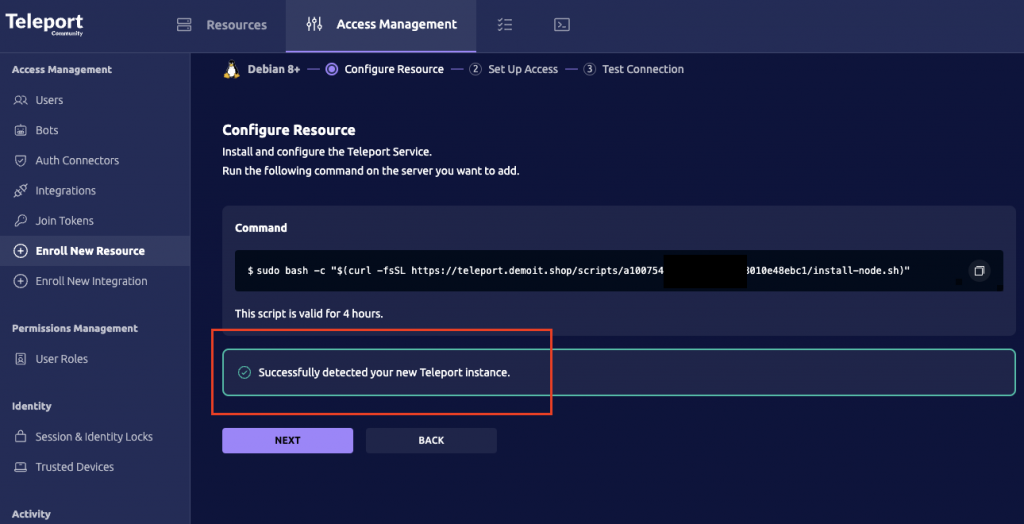
綁定成功後會顯示 Successfully detected your new Teleport instance.
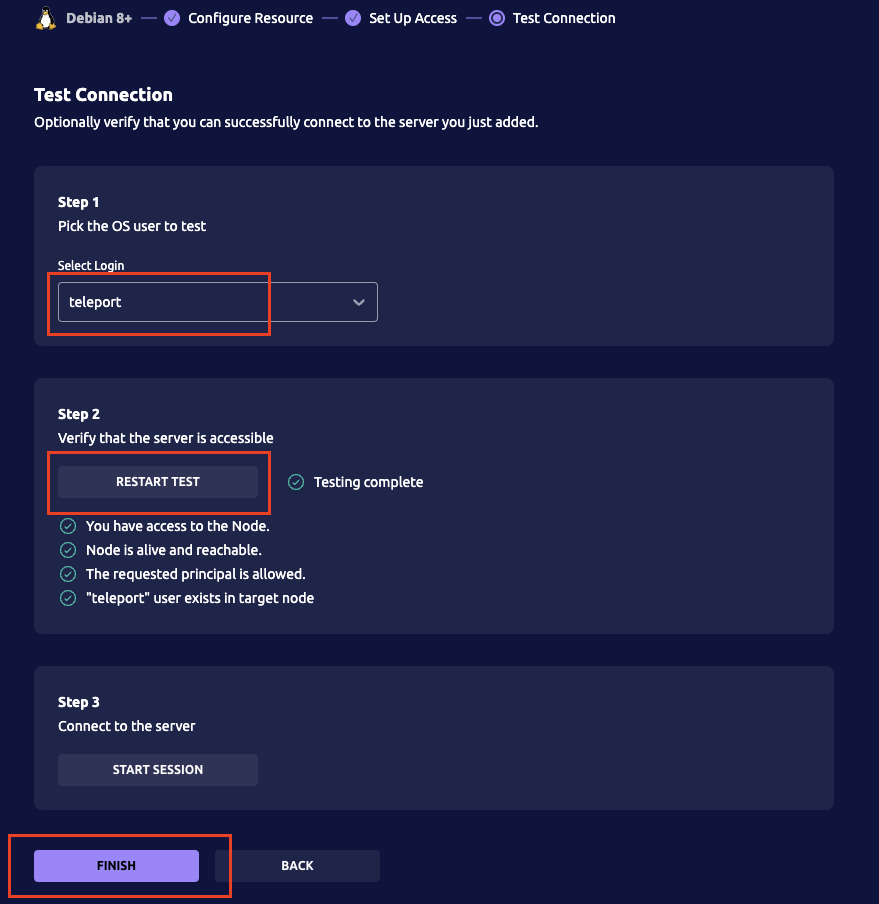
接下來如下設定 Teleport 連接過去的使用者,這裡設定為上面 useradd teleport 創建的使用者。
返回 Teleport 首頁,即可看見剛剛創建的 Proxy-2 VM 連線。
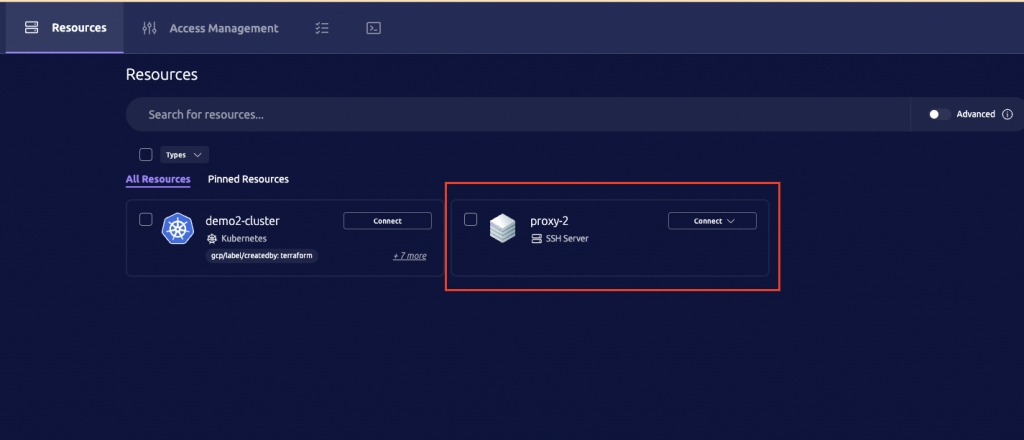
點擊 Connect,即可連入那台機器,輸入指令測試。
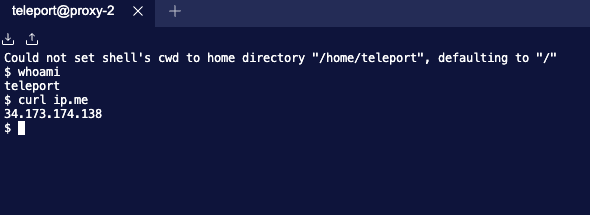
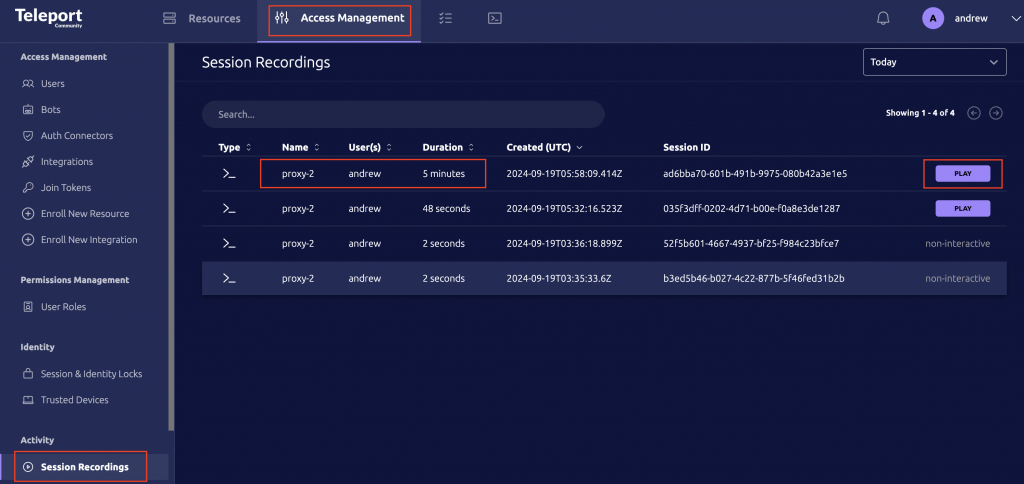
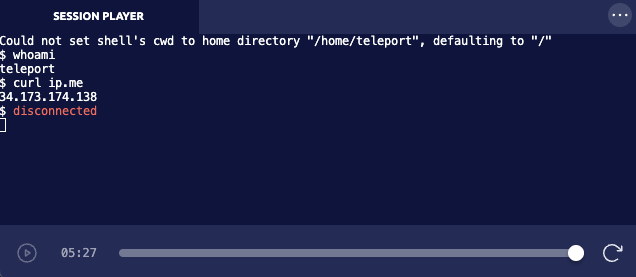
到 Access Management 頁面右邊選擇 Session Recordings,有稽核紀錄,可以查詢到剛剛操作的錄影。
本篇文章介紹了如何利用 Google Kubernetes Engine (GKE) 快速部署 Teleport,並將其與 Google Cloud Platform (GCP) 整合,實現對不同 VM 和 Kubernetes 叢集的安全訪問。
我們使用 Helm Chart 在 GKE 上部署了 Teleport Cluster,並配置了 GCP 服務帳戶與 Workload Identity 以確保 Teleport 能夠存取 GCP 資源。同時,我們也設定了 Let's Encrypt 憑證以及多重身份驗證,強化了 Teleport 的安全性。
最後,我們示範了如何將一台 Debian VM 加入 Teleport 管理,讓使用者能夠透過 Teleport 安全地訪問該 VM,而且此 VM 無需開啟 22 port。
透過 Teleport,我們可以輕鬆地管理分散式 Kubernetes 環境以及其他基礎設施,提高操作效率,同時保障系統安全。
下一篇文章,會介紹 Teleport 和 K8s 集群的整合,可以切分權限並讓使用者可以方便的連接多個集群。