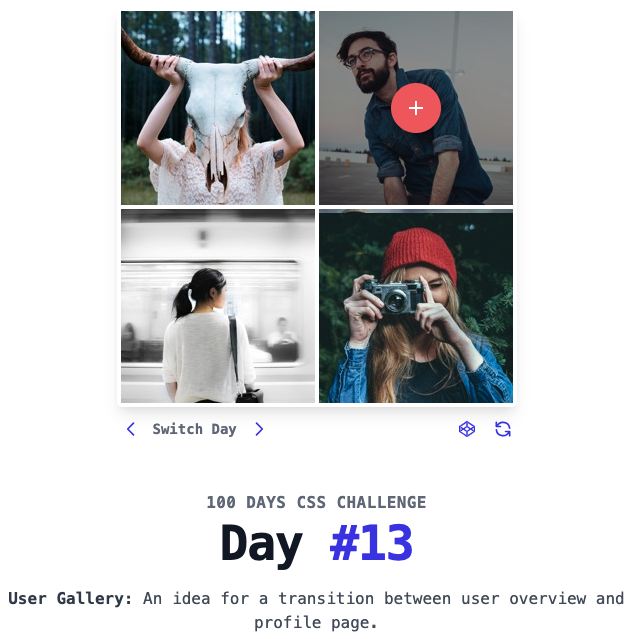
題目除了基本 Gallery 介面樣式以外,還有點擊後的介面

上面的圖是題目,而我們要做出幾乎一樣的樣子,題目中還有附上出題官方的CodePen,也有附上給我們解題用的template,當我們真的不會的時候,還是可以參考他們的寫法,所以沒有想像中困難。
我做好的此題CSS Challeage解答
那麼我們就開始吧。
這個題目要求我們製作一個 User Gallery
<div class="frame">
	<div class="gallery">
		<div class="pic pic-1"><img src="https://100dayscss.com/codepen/13-1.jpg" /></div>
		<div class="pic pic-2"><img src="https://100dayscss.com/codepen/13-2.jpg" /></div>
		<div class="pic pic-3"><img src="https://100dayscss.com/codepen/13-3.jpg" /></div>
		<div class="pic pic-4"><img src="https://100dayscss.com/codepen/13-4.jpg" /></div>
	</div>
</div>
在 .frame 內分成兩個主要的區塊,我們先做第一區的 gallery。
這邊雖然看起來好像可以用變數來寫四個 div,但我考慮過要放不同的圖片,圖片可能也之後不會使用官方的(有時間的話想改成自己想要的),再加上我們後面需要綁定 click 事件,怎麼想都應該要分開,所以我就拆出來寫了。
gallery:四個圖片外的主要框架。pic:四個區塊的基礎設定,包含滑鼠指上...等,都會做在這裡。img:放入要顯示的照片。剛做好的時候長這樣: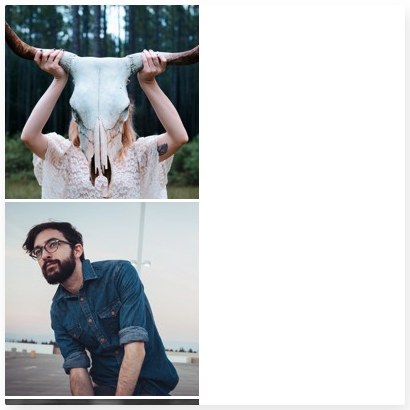
$primary: #EC6565;

.frame {
    color: #fff;
}
首先,就先把第一天教的小工具拿出來吸色,先把那個主要的紅色制作成變數 $primary,後面一定很多地方會用到他。
再來就是到 .frame 把文字顏色直接改白色。
.gallery {
	display: grid;
	width: 100%;
	height: 100%;
	grid-template-columns: 1fr 1fr;
    grid-template-rows: 1fr 1fr;
	gap: 4px;
	padding: 4px;
	overflow: hidden;
}
我將 gallery 設定為 grid layout,並做了以下設定:
grid-template-columns: 1fr 1fr 和 grid-template-rows: 1fr 1fr 將 gallery 分成四個均等的區塊,每行 2 個 column,並且總算有 2 行。gap: 4px:設定了圖片之間的間距。padding: 4px:為 gallery 外邊設置了內邊距。overflow: hidden:確保任何超出範圍的內容會被隱藏。
.gallery {
    ...
	.pic {
		cursor: pointer;
		position: relative;

        img {
			width: 100%;
			height: 100%;
		}
    }
}
這段很簡單的先設定 4 個 pic 的基本架構:
cursor: pointer: 滑鼠移動到 .pic 上時,游標會變成手指。position: relative: 將 .pic 定義為相對定位,這樣等等裡面的東西(像是壓黑跟[+]的按鈕才能定位在格子的中間。img 的部分,直接設定最大的寬高,讓它這樣才不會跟邊界之間有奇怪的空隙唷。
.gallery {
    ...
	.pic {
		...
		&:before {
			content: '';
			background: #000;
			opacity: 0;
			position: absolute;
			left: 0;
			right: 0;
			top: 0;
			bottom: 0;
			transition: all .6s ease-in-out;
		}
		&:hover:before {
			opacity: 0.4;
		}
    }
}
&:before { ... }
content: '': 定義了 :before 的內容,即一個空的元素。background: #000: 設置背景為黑色,制作我們的壓黑。opacity: 0: 初始設置透明度為 0,表示 :before 的元素在未懸停時是隱藏的。position: absolute: 絕對定位,使 :before 元素在 .pic 內自由定位。left: 0 right: 0 top: 0 bottom: 0: 這些屬性將 :before 完全覆蓋 .pic,延展到四個邊界,做出在格子內滿版的效果。transition: all .6s ease-in-out: 定義了所有屬性變化的動畫效果,過渡時間是 0.6 秒,並使用平滑的進出效果。&:hover:before { ... }
opacity: 0.4 使得 :before 的透明度變為 0.4,從而顯示出來我們想要的淡淡的壓黑樣式,並與上面設置的 transition 效果一起提供平滑的漸變。
$plusIconWH: 50px;
這邊我先制作這個 plus icon 的寬高,把它設定在變數內,接著我們就來制作 icon 本人。
.pic {
    &:after {
	content: '+';
	position: absolute;
	left: 50%;
	top: 50%;
	translate: -50% -50%;

	background: $primary;
	width: $plusIconWH;
	height: $plusIconWH;
	border-radius: 50%;
	font-size: 30px;
	line-height: .8;
	font-weight: 400;

	display: inline-flex;
	justify-content: center;
	align-items: center;

	opacity: 0;
	transition: all .4s ease-in-out;
	transform: scale(2);
	}
    &:hover:after {
	opacity: 1;
	transform: scale(1) translate3d(0,0,0);
	}
}
我使用 &:after 來制作它,.pic:after 是一個偽元素,主要用來創建一個在原始 HTML 結構中不存在的元素。
這裡的 :after 會在每個 .pic 元素之前插入一個加號(+)。具體作法如下:
content: '+':在圖片上方產生一個 "+" 的符號。position: absolute left: 50% top: 50% translate: -50% -50%:使用絕對定位,將偽元素的起點放在 .pic 的中心點,並通過 translate(-50%, -50%) 完全置中。background: $primary:設置背景色。font-size: 30px line-height: .8 font-weight: 400:調整 "+" 符號的文字大小,讓它儘量貼近題目的樣式。width 和 height:設定 "+" 背景的寬高,並將其設為圓形 (使用 border-radius: 50%)。display: inline-flex justify-content: center align-items: center:將 + 符號在偽元素內居中顯示,這裡一定要修改 display 也是因為偽元素一定要是區塊性質才能設定這些寬高,而我使用 inline-flex 是為了達到讓裡面的 "+" 符號居中。opacity: 0 和 transform: scale(2):初始狀態下 "+" 是透明且放大兩倍的。transition: all .4s ease-in-out:定義了過渡效果,在狀態變更時平滑過渡。&:hover{
&:before {...}
&:after {
opacity: 1;
transform: scale(1) translate3d(0,0,0);
}
}
最後當然是把 hover 狀態內的 before & after 整合在一起,在 after 的地方修改成我們滑鼠指上後要的透明度跟放大倍率,這樣就做好了。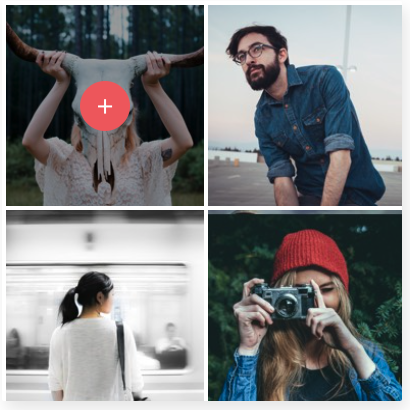
由於篇幅太長了,我決定分兩篇寫,下一篇再來寫後面的 Info 頁面。
希望改變了這種按照步驟的寫法,能讓更多人看得懂,也能跟我一樣喜歡上寫CSS。
那今天就先到這裡,明天我們再繼續來玩下一集。
