到github下載Prometheus安裝包
https://github.com/prometheus/prometheus/releases
我下載的版本是v2.45.0
https://github.com/prometheus/prometheus/releases/tag/v2.45.0
下載prometheus-2.45.0.linux-amd64.tar.gz後上傳至虛擬機
#解壓縮下載包
tar -zxvf prometheus-2.45.0.linux-amd64.tar.gz

#將解壓縮的檔案移動至/opt/prometheus-2.45.0
mv prometheus-2.45.0.linux-amd64 /opt/prometheus-2.45.0


#cd 到/opt/prometheus-2.45.0
cd /opt/prometheus-2.45.0

#啟動Prometheus
./prometheus

### 註 : 若是要關閉Prometheus,可在Prometheus運行的視窗輸入ctrl c,或是搜尋運行的Prometheus進程,將進程關閉

#搜尋運行的Prometheus process
ps -ef |grep prometheus

#中止process
kill -TERM ${對應process id}
#下載tomcat

https://tomcat.apache.org/download-10.cgi

我下載的是10.1.16版本

下載後解壓縮至/opt目錄下

#下載jmx_prometheus_javaagent-0.16.1.jar(依據tomcat版本安裝相對應的jmx exporter)

https://mvnrepository.com/artifact/io.prometheus.jmx/jmx_prometheus_javaagent

#移動jmx-explorer
mv jmx_prometheus_javaagent-0.16.1.jar /opt/apache-tomcat-10.1.16/bin

#創建配置文件config.yaml
/opt/apache-tomcat-10.1.16/bin目錄下創建配置文件config.yaml,並寫入以下内容:

config.yaml
-----------------------------------------------------------------------
wercaseOutputLabelNames: true
lowercaseOutputName: true
whitelistObjectNames: ["java.lang:type=OperatingSystem"]
blacklistObjectNames: []
rules:
  - pattern: 'java.lang<type=OperatingSystem><>(committed_virtual_memory|free_physical_memory|free_swap_space|total_physical_memory|total_swap_space)_size:'
    name: os_$1_bytes
    type: GAUGE
    attrNameSnakeCase: true
  - pattern: 'java.lang<type=OperatingSystem><>((?!process_cpu_time)\w+):'
    name: os_$1
    type: GAUGE
    attrNameSnakeCase: true
-----------------------------------------------------------------------


#修改/opt/apache-tomcat-10.1.16/bin/catalina.sh文件中的JAVA_OPTS變量,加入javaagent相關配置,設定30018 port 為JMX Exporter port
JAVA_OPTS="$JAVA_OPTS -Djava.protocol.handler.pkgs=org.apache.catalina.webresources -javaagent:/opt/apache-tomcat-10.1.16/bin/jmx_prometheus_javaagent-0.16.1.jar=30018:/opt/apache-tomcat-10.1.16/bin/config.yaml"


#啟動Tomcat

cd /opt/apache-tomcat-10.1.16/bin

./startup.sh

#測試JMX Exporter是否生效

curl -s http://${目標IP}:30018

#在本地訪問,使用127.0.0.1 or localhost
curl -s http://127.0.0.1:30018

#成功後應該會有監控指標頁面
#cd 到/opt/prometheus-2.45.0
cd /opt/prometheus-2.45.0
vim prometheus.yml
# my global config
global:
  scrape_interval: 15s # Set the scrape interval to every 15 seconds. Default is every 1 minute.
  evaluation_interval: 15s # Evaluate rules every 15 seconds. The default is every 1 minute.
  # scrape_timeout is set to the global default (10s).

# Alertmanager configuration
alerting:
  alertmanagers:
    - static_configs:
        - targets:
          # - alertmanager:9093

# Load rules once and periodically evaluate them according to the global 'evaluation_interval'.
rule_files:
  # - "first_rules.yml"
  # - "second_rules.yml"

# A scrape configuration containing exactly one endpoint to scrape:
# Here it's Prometheus itself.
scrape_configs:
  # The job name is added as a label `job=<job_name>` to any timeseries scraped from this config.


#新增一個tomcat的job
#-------------------------------------------------
  - job_name: 'es-sql-tomcat'
    static_configs:
      - targets: ["localhost:30018"]
        labels:
          group: 'production'
#-------------------------------------------------


#prometheus本身的監控
#---------------------------------------------
  - job_name: "prometheus"

    # metrics_path defaults to '/metrics'
    #     # scheme defaults to 'http'.
    #
    static_configs:
      - targets: ["localhost:9090"]
#---------------------------------------------
修改完prometheus.yml後啟動Prometheus
# cd 到/opt/prometheus-2.45.0
cd /opt/prometheus-2.45.0

#啟動Prometheus
./prometheus
Prometheus啟動後,在Prometheus WebUI查看監控数据,網址列輸入 http://${目標IP}:9090/

進入到target頁面可以看到 es-sql-tomcat 已經啟動了,代表JMX Exporter已經於Prometheus註冊服務成功。
# 拉取grafana的image
docker pull grafana/grafana:${版本號}

我使用的版本是9.5.3
docker pull grafana/grafana:9.5.3

# 將grafana的image打包成grafana.tar
docker save -o grafana.tar grafana/grafana:${版本號}

# 將grafana.tar以scp的方式上傳至要安裝的虛擬機上

# 將grafana.tar還原成grafana的image
docker load -i grafana.tar

# 檢查還原是否成功
docker images

# 建立volume grafana-storage
docker volume create grafana-storage

#  查看docker volume,應該會出現JSON output
docker volume inspect grafana-storage

# 執行grafana
docker run -d -p 3000:3000 --name=grafana  --volume grafana-storage:/var/lib/grafana grafana/grafana:${版本號}
輸入 http://${目標IP} : ${garana的port}/login 後出現登入畫面
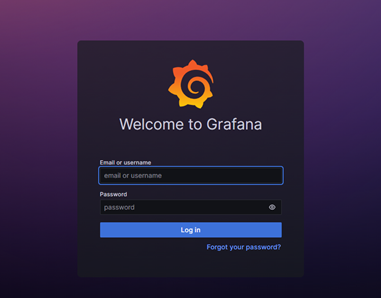
預設帳號密碼為 帳號:admin、密碼:admin
進入主畫面後按下 "Add your first data source "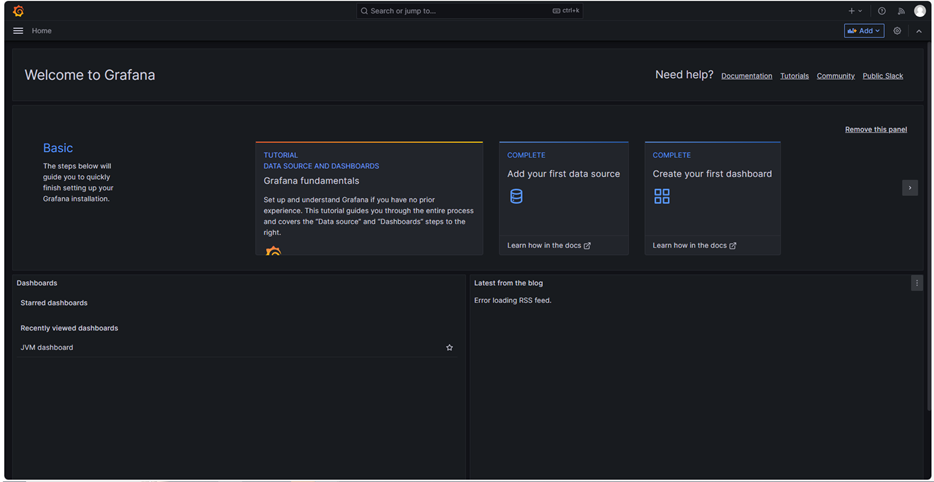
選擇Prometheus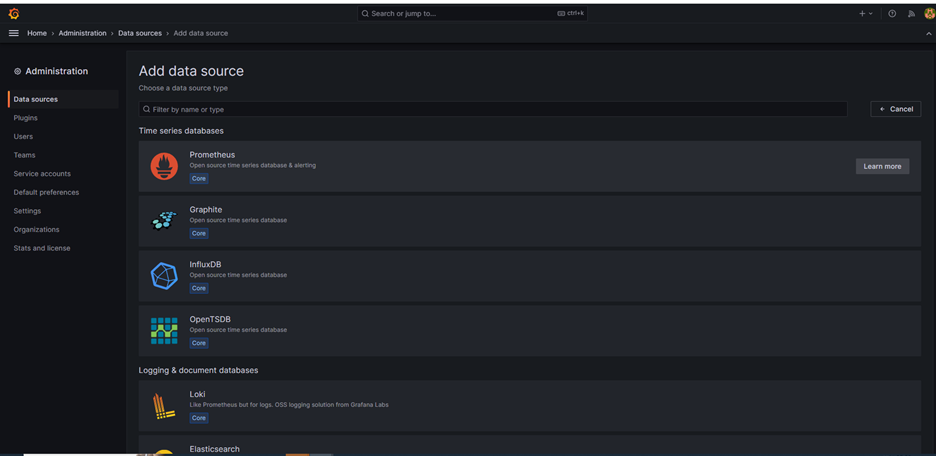
在URL部分輸入 http://${目標IP}:9090/
按 save & test,成功後即代表data source新增成功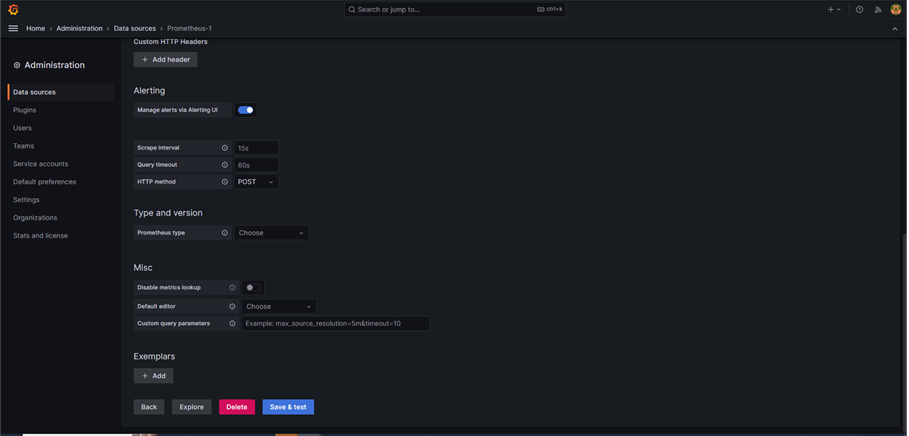
可以在"Explore"部份下promQL,查詢metrics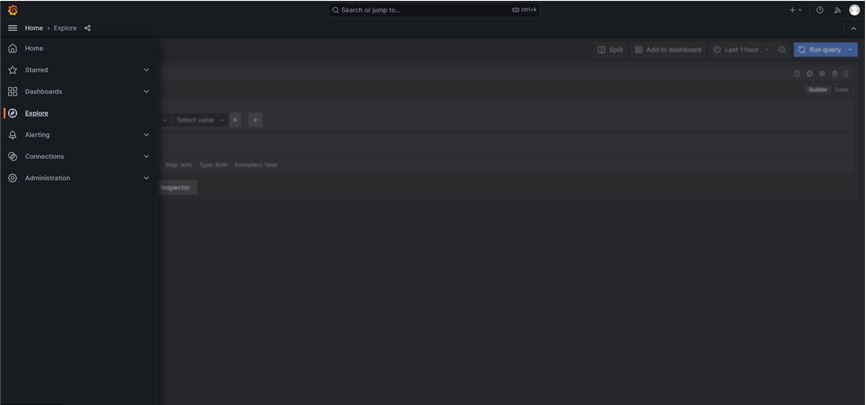
JVM使用的memory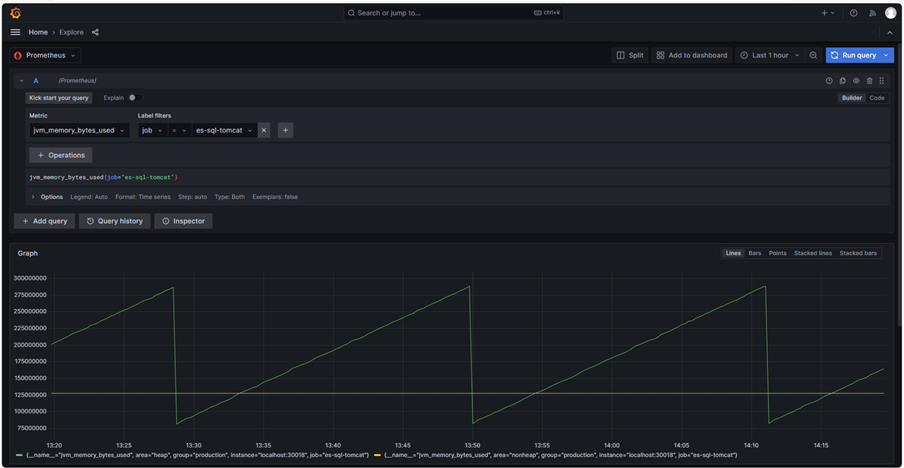
發生deadlock的threads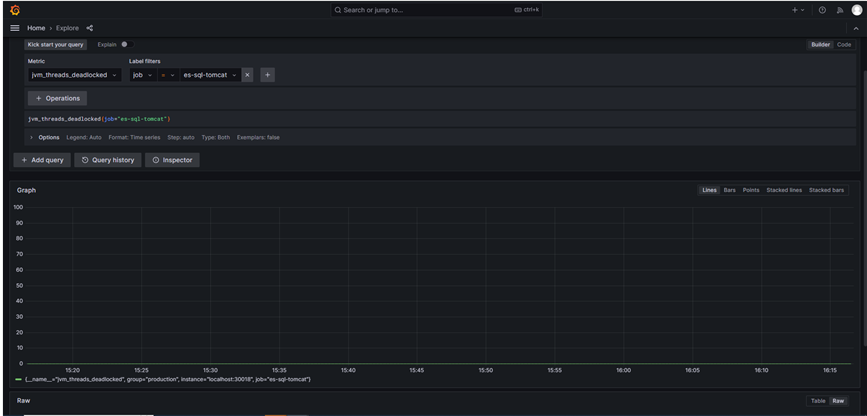
選擇Dashboards,New 一個 import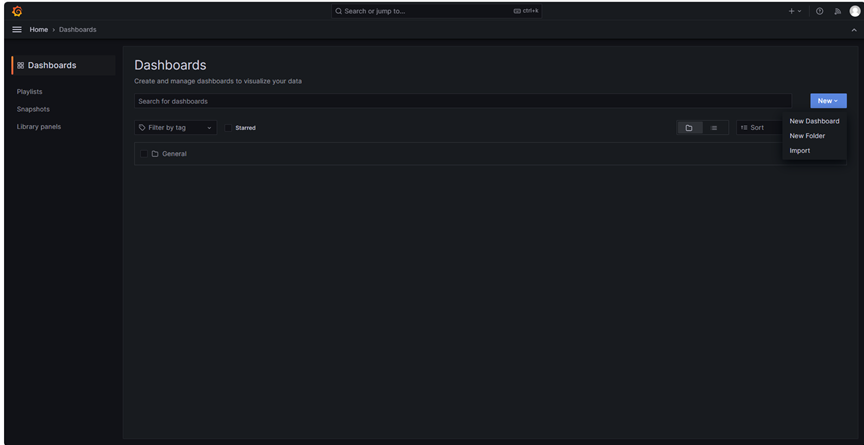
輸入JSON或是上傳.json檔案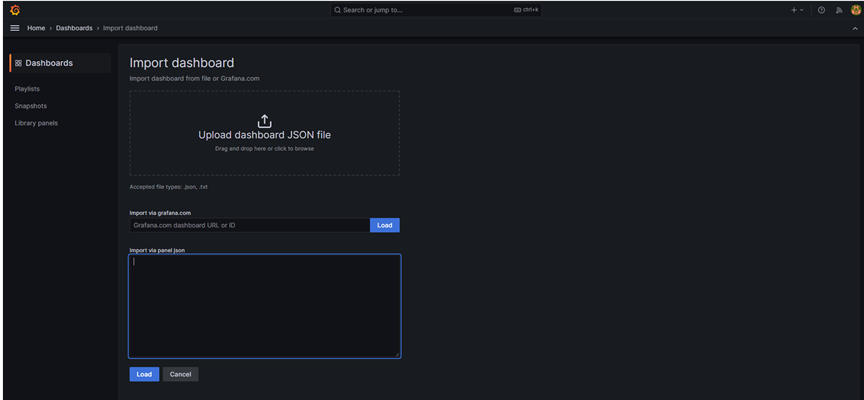
我選擇的Dashboards是 " JVM dashboard " ,可以監測JVM 的heap區,有詳細到Eden Space、Survivor Space 、old gen,還有class loading、threads、GC等等。
(如果需要其他的Dashboards,可以在grafana搜尋,下面的網址為JVM dashboard)
https://grafana.com/grafana/dashboards/8563-jvm-dashboard/
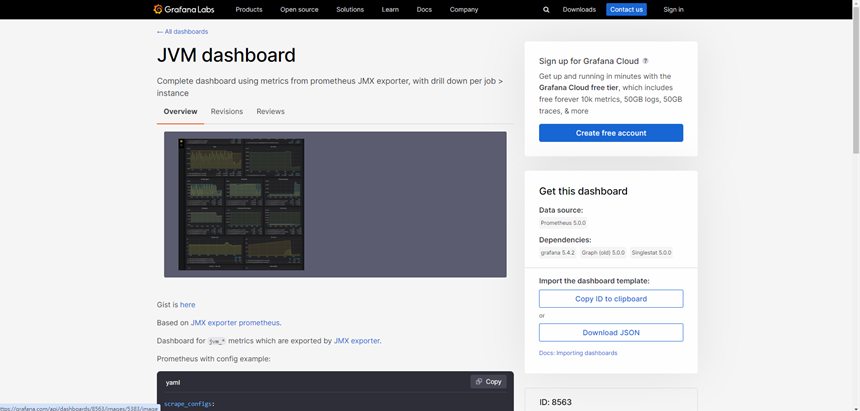
輸入JSON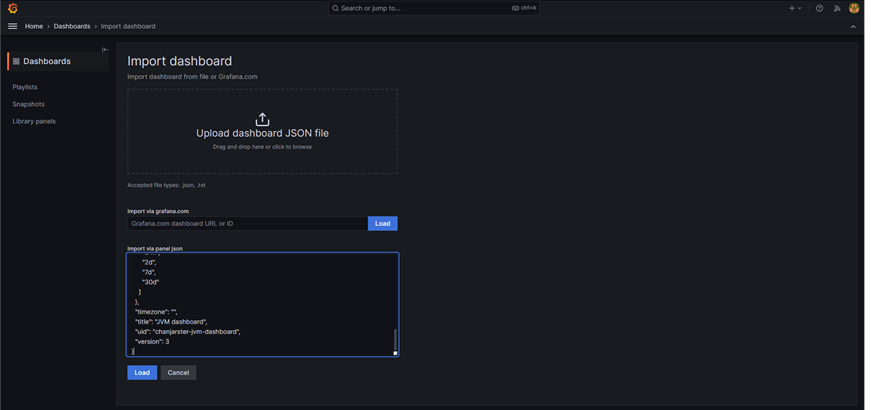
將job的名稱改為 "es-sql-tomcat" ,按下import後導入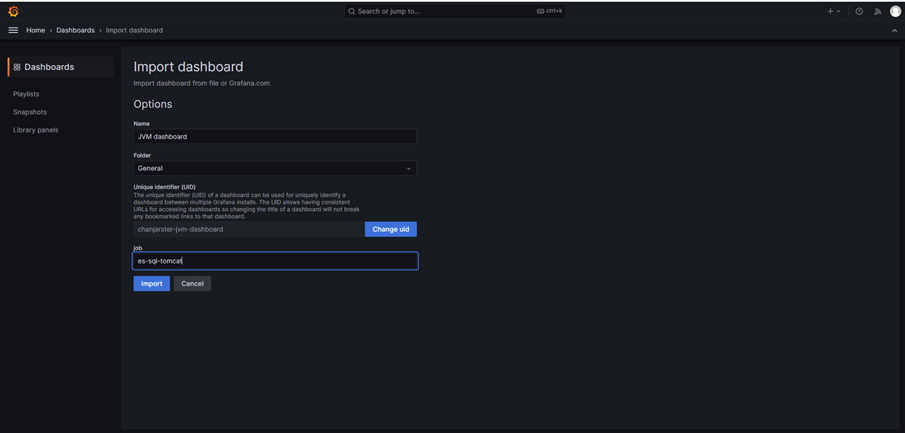
出現此畫面後代表成功了,可以從不同的Panel觀察tomcat的JVM的運行狀態

以上安裝所需的安裝包都可以在網路上下載到。使用Prometheus不僅可以監控目前的流量及服務狀態,還能透過流量狀態優化程式碼,減少deadlock的發生和memory的優化。
