我們接下來會建立以下幾個頁面
urls.py 中設置 URL 路由。我們將根路由設置為指向 index 函數,該函數會渲染 index.html 模板。from TASKapp.views import *
urlpatterns = [
path('',index),
]
views.py 中,我們需要定義一個名為 index 的視圖函數,這個函數將負責處理請求並返回 index.html 模板。def index(request):
return render(request,'index.html')
index.html 模板中,我們使用 Django 的模板語言來加載靜態文件並顯示內容。這裡是基本的 HTML 結構{% load static %}
<!DOCTYPE html>
<html>
<head></head>
<meta charset="UTF-8">
<meta name="viewport" content="width=device-width, initial-scale=1.0">
<title>TASK</title>
<link rel="stylesheet" href="{% static 'css/index.css' %}">
</head>
<body>
<div class="container">
<img src="{% static 'images/logo.png' %}">
<div class="button-group"></div>
<button class="login-button"><a href='/login/'>登入</a></button>
<button class="register-button"><a href='/register/'>註冊</a></button>
</div>
</div>
</body>
</html>
html, body {
    height: 100%; /* 設置html和body的高度為100% */
    margin: 0;    /* 去掉默認的margin */
}

body {
    position: relative; /* 使偽元素可以定位 */
    text-align: center;
    font-family: Arial, sans-serif;
}

body::before {
    content: '';
    position: absolute;
    top: 0;
    left: 0;
    right: 0;
    bottom: 0;
    background: url('../images/logo.png');
    background-repeat: repeat;
    background-size: 5%;
    opacity: 0.5; /* 設置背景圖像的透明度 */
    z-index: -1; /* 確保偽元素在後面 */
}

body {
    background: linear-gradient(to right, rgba(240, 244, 195, 1), rgba(165, 214, 167, 1)); /* 背景漸變 */
}

img {
    width: 500px;  /* 設置寬度 */
}

body {
    display: flex; /* 使用 Flexbox 布局 */
    justify-content: center; /* 水平居中 */
    align-items: center; /* 垂直居中 */
    height: 100vh; /* 使頁面高度為視窗高度 */
    margin: 0; /* 移除默認的margin */
    background-color: #f5f5f5; /* 背景色 */
}

.container {
    text-align: center; /* 使文字居中 */
    background-color: rgba(255, 255, 255, 0.5); /* 白色背景,80% 不透明度 */
    padding: 20px; /* 內邊距*/
    border-radius: 20px; /* 圓角 */
    box-shadow: 0 4px 10px rgba(0, 0, 0, 0.1); /* 陰影效果 */
}


.button-group {
    display: flex; /* 使用 Flexbox 布局 */
    justify-content: center; /* 水平居中 */
    gap: 20px; /* 按鈕之間的間距 */
    margin-top: 20px; /* 頂部間距 */
}

button {
    background-color: #1c3720; /* 深綠色背景 */
    color: #a5d6a7; /* 淺綠色文字 */
    border: 2px solid #333333; /* 深灰色邊框 */
    border-radius: 20px; /* 圓角 */
    font-size: 16px; /* 字體大小 */
    font-weight: bold; /* 字體加粗 */
    padding: 10px 20px; /* 內邊距 */
    cursor: pointer;
    transition: background-color 0.3s, color 0.3s;
}

button a {
    color: inherit; /* 繼承按鈕文字顏色 */
    text-decoration: none; /* 移除底線 */
}

.login-button:hover {
    background-color: #333333;
}

.register-button {
    background-color: #333333;
}

.register-button:hover {
    background-color: #1c3720;
}
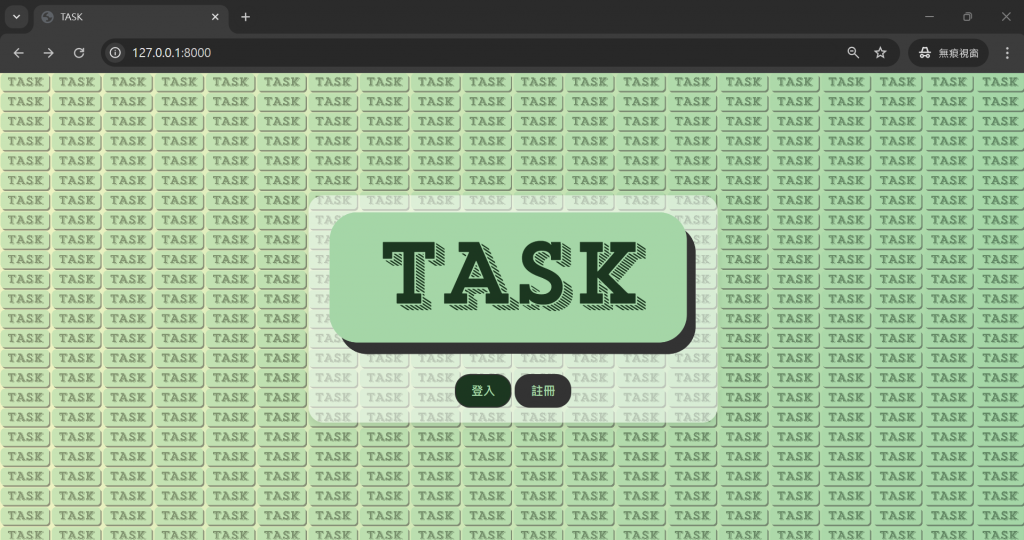
最後的效果如下圖