在我們之前的應用中,已經介紹了如何使用 JWT 來進行身份驗證,但我們沒有處理不同角色之間的權限問題。這次,我們將進一步擴展,實作基於角色的權限管理,讓應用可以根據用戶的角色與權限來決定他們可以進入哪些頁面、操作哪些功能。
在這篇文章中,我們會教你如何使用 Role 和 Permissions 來管控用戶的操作權限,並且利用這些權限來改寫我們之前的 Route Guard,實現一個更完整的權限控制系統。

在系統中,不同的使用者會有不同的身份,像是管理員、一般使用者等,而不同的身份往往會有不同的操作權限。Role-Based Permissions 就是這樣一套權限管理系統,讓我們可以根據使用者的角色,來決定他們是否有權限進行某些操作。
| Role | Permission |
|---|---|
| admin | view_products, edit_products |
| user | view_products |
透過這樣的架構,我們就能讓 admin 角色擁有查看和編輯商品的權限,而 user 角色則只能查看商品,無法進行編輯操作。
為了幫助讀者更容易理解,接下來會使用 Node.js + Express 搭配 Sequelize 來實作資料庫的角色與權限結構,並通過 Migration 和 Seeder 的方式來設置與填充資料。這樣不需要手動寫 SQL,可以透過工具自動生成資料庫表結構與範例數據。
首先,我們會使用 Sequelize Migration 來定義三張表:Roles、Permissions 和 Role_Permission。這三張表格可以有效管理角色與權限的關聯。
假設你已經安裝了 Sequelize,並且專案內有 Sequelize CLI,接下來我們會創建三個資料表:
npx sequelize-cli migration:generate --name create-roles-table
npx sequelize-cli migration:generate --name create-permissions-table
npx sequelize-cli migration:generate --name create-role-permission-table
在 migrations 資料夾中,找到剛剛生成的 create-roles-table 檔案,並加入以下程式碼:
'use strict';
module.exports = {
  up: async (queryInterface, Sequelize) => {
    await queryInterface.createTable('Roles', {
      id: {
        allowNull: false,
        autoIncrement: true,
        primaryKey: true,
        type: Sequelize.INTEGER
      },
      role: {
        type: Sequelize.STRING,
        allowNull: false
      },
      createdAt: {
        allowNull: false,
        type: Sequelize.DATE
      },
      updatedAt: {
        allowNull: false,
        type: Sequelize.DATE
      }
    });
  },
  down: async (queryInterface, Sequelize) => {
    await queryInterface.dropTable('Roles');
  }
};
在 create-permissions-table 檔案中,加入以下程式碼:
'use strict';
module.exports = {
  up: async (queryInterface, Sequelize) => {
    await queryInterface.createTable('Permissions', {
      id: {
        allowNull: false,
        autoIncrement: true,
        primaryKey: true,
        type: Sequelize.INTEGER
      },
      permission: {
        type: Sequelize.STRING,
        allowNull: false
      },
      createdAt: {
        allowNull: false,
        type: Sequelize.DATE
      },
      updatedAt: {
        allowNull: false,
        type: Sequelize.DATE
      }
    });
  },
  down: async (queryInterface, Sequelize) => {
    await queryInterface.dropTable('Permissions');
  }
};
在 create-role-permission-table 檔案中,加入以下程式碼,建立 Roles 和 Permissions 之間的關聯:
'use strict';
module.exports = {
  up: async (queryInterface, Sequelize) => {
    await queryInterface.createTable('Role_Permission', {
      role_id: {
        type: Sequelize.INTEGER,
        references: {
          model: 'Roles',
          key: 'id'
        },
        onUpdate: 'CASCADE',
        onDelete: 'CASCADE'
      },
      permission_id: {
        type: Sequelize.INTEGER,
        references: {
          model: 'Permissions',
          key: 'id'
        },
        onUpdate: 'CASCADE',
        onDelete: 'CASCADE'
      },
      createdAt: {
        allowNull: false,
        type: Sequelize.DATE
      },
      updatedAt: {
        allowNull: false,
        type: Sequelize.DATE
      }
    });
  },
  down: async (queryInterface, Sequelize) => {
    await queryInterface.dropTable('Role_Permission');
  }
};
在寫好 migration 檔案後,執行以下指令來建立資料表:
npx sequelize-cli db:migrate
這樣,資料庫就會自動創建三張表:Roles、Permissions 和 Role_Permission,用來存放角色和權限的相關資料。
接下來,使用 Sequelize Seeder 來填充一些初始角色和權限數據,讓系統可以開始使用這些資料。
首先,生成 Seeder 檔案:
npx sequelize-cli seed:generate --name add-roles
npx sequelize-cli seed:generate --name add-permissions
npx sequelize-cli seed:generate --name add-role-permission
在 add-roles 檔案中,加入以下程式碼來插入一些預設角色:
'use strict';

module.exports = {
  up: async (queryInterface, Sequelize) => {
    return queryInterface.bulkInsert('Roles', [
      { role: 'admin', createdAt: new Date(), updatedAt: new Date() },
      { role: 'user', createdAt: new Date(), updatedAt: new Date() },
    ]);
  },
  down: async (queryInterface, Sequelize) => {
    return queryInterface.bulkDelete('Roles', null, {});
  }
};
在 add-permissions 檔案中,加入以下程式碼來插入一些預設權限:
'use strict';

module.exports = {
  up: async (queryInterface, Sequelize) => {
    return queryInterface.bulkInsert('Permissions', [
      { permission: 'view_products', createdAt: new Date(), updatedAt: new Date() },
      { permission: 'edit_products', createdAt: new Date(), updatedAt: new Date() },
    ]);
  },
  down: async (queryInterface, Sequelize) => {
    return queryInterface.bulkDelete('Permissions', null, {});
  }
};
在 add-role-permission 檔案中,插入角色和權限的關聯:
'use strict';

module.exports = {
  up: async (queryInterface, Sequelize) => {
    return queryInterface.bulkInsert('Role_Permission', [
      { role_id: 1, permission_id: 1, createdAt: new Date(), updatedAt: new Date() }, // admin can view products
      { role_id: 1, permission_id: 2, createdAt: new Date(), updatedAt: new Date() }, // admin can edit products
      { role_id: 2, permission_id: 1, createdAt: new Date(), updatedAt: new Date() }, // user can view products
    ]);
  },
  down: async (queryInterface, Sequelize) => {
    return queryInterface.bulkDelete('Role_Permission', null, {});
  }
};
寫好 Seeder 後,執行以下指令來填充資料:
npx sequelize-cli db:seed:all
這樣,資料庫就會自動填充角色、權限和它們的關聯資料。
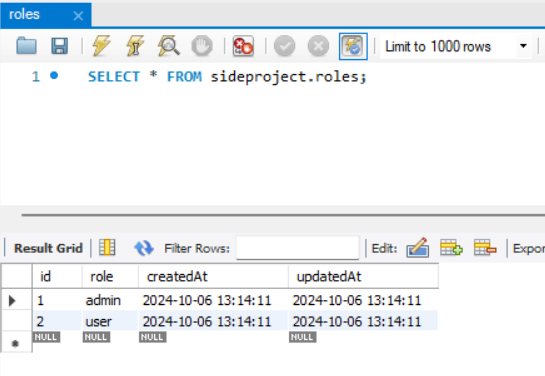
這張表記錄了系統中的角色,例如管理員和一般使用者。
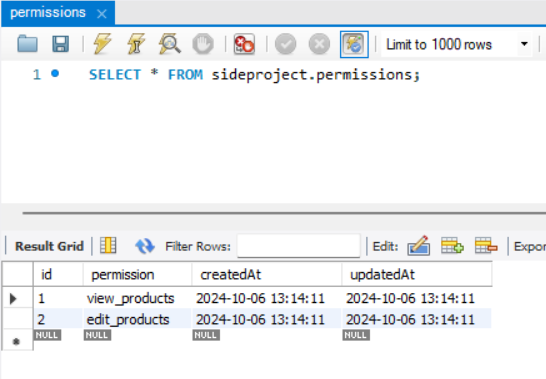
這張表記錄了系統中不同的操作權限,例如查看產品和編輯產品。
這張表是關聯表,用來表示每個角色具備的權限。在這裡,我們可以看到每個角色擁有的具體權限:
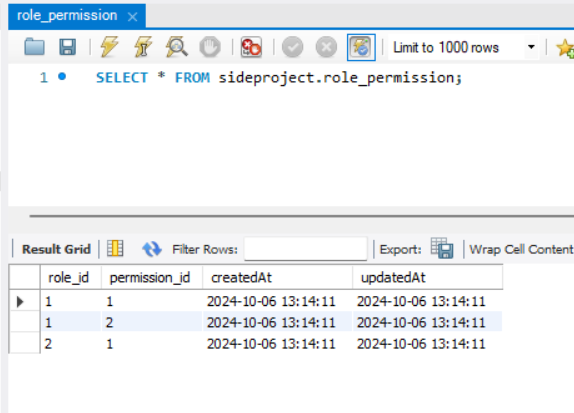
admin(角色 id = 1)和 user(角色 id = 2)。view_products(權限 id = 1)和 edit_products(權限 id = 2)。admin 角色擁有查看產品和編輯產品的權限,而 user 角色只能查看產品,沒有編輯產品的權限。這三張表的關係如下:
view_products 和 edit_products。view_products。當使用者登入成功後,除了給他們一個 JWT Token,我們還需要根據他們的角色來決定他們的操作權限。以下是我們的完整流程:
當用戶登入成功時,後端會生成一個 JWT,這個 Token 包含使用者的基本身份資訊(例如 userId),並回傳給前端:
const token = jwt.sign({ userId }, process.env.JWT_SECRET, { expiresIn: '1h' });
res.json({ token });
當需要操作一些敏感功能(如編輯商品)時,前端會向後端請求使用者的權限,後端則會查詢使用者的角色,並從 Role_Permission 關聯表裡找到這個角色對應的權限。
// controllers/permissionController.js
exports.getPermissions = async (req, res) => {
  const userId = req.userId; // 從 JWT 取得 userId

  // 查詢使用者角色與對應的權限
  const userRole = await db.User.findOne({ where: { id: userId }, include: ['role'] });
  const permissions = await db.Role_Permission.findAll({ where: { role_id: userRole.role.id } });

  res.json({ permissions });
};
現在我們已經知道如何在後端查詢使用者的權限,那前端該如何使用這些權限來控制頁面顯示呢?例如,當使用者想要進入編輯商品頁面時,我們可以先請求權限資料,再根據權限決定是否允許存取。
this.permissionService.getPermissions().subscribe((permissions) => {
  if (!permissions.includes('edit_products')) {
    alert('您沒有權限編輯商品');
    this.router.navigate(['/home']);
  }
});
這段程式碼會在使用者進入頁面時,向後端請求他的權限,並檢查是否有 edit_products 的權限,沒有的話就重導到首頁。
在我們的應用中,我們可以用 Role-Permission 的架構來改寫之前的 Route Guard,讓我們可以根據使用者的角色與權限來決定是否允許他們訪問某些頁面。
auth.guard.ts在之前的 auth.guard.ts 中,我們是根據是否有 JWT 來決定是否允許訪問。現在我們要進一步檢查用戶的權限。這樣,我們可以根據權限決定某些頁面(如管理員頁面)是否允許進入。
檔案路徑:src/app/guards/auth.guard.ts
import { Injectable } from '@angular/core';
import { CanActivate, Router } from '@angular/router';
import { AuthService } from '../services/auth.service'; // 確保路徑正確
import { PermissionService } from '../services/permission.service';

@Injectable({
  providedIn: 'root',
})
export class AuthGuard implements CanActivate {
  constructor(
    private authService: AuthService,
    private permissionService: PermissionService,
    private router: Router
  ) {}

  canActivate(): boolean {
    const token = localStorage.getItem('token'); // 取得 JWT Token
    if (token) {
      return this.checkPermissions(); // 確認權限
    } else {
      this.router.navigate(['/login']); // 未登入,重導至登入頁
      return false;
    }
  }

  private checkPermissions(): boolean {
    // 假設這個 Guard 用於管理員頁面
    this.permissionService.getPermissions().subscribe((permissions) => {
      if (permissions.includes('admin_access')) {
        return true; // 有權限,允許訪問
      } else {
        this.router.navigate(['/home']); // 沒有權限,重導至首頁
        return false;
      }
    });
  }
}
接下來,我們將這個改寫過的 Route Guard 套用到路由上,來保護特定的頁面,例如管理頁面只能由有權限的使用者訪問。
檔案路徑:src/app/app-routing.module.ts
import { NgModule } from '@angular/core';
import { RouterModule, Routes } from '@angular/router';
import { AdminComponent } from './admin/admin.component';
import { HomeComponent } from './home/home.component';
import { AuthGuard } from './guards/auth.guard';

const routes: Routes = [
  { path: 'home', component: HomeComponent },
  { path: 'admin', component: AdminComponent, canActivate: [AuthGuard] }, // 受保護的管理員頁面
  { path: '', redirectTo: '/home', pathMatch: 'full' },
];

@NgModule({
  imports: [RouterModule.forRoot(routes)],
  exports: [RouterModule],
})
export class AppRoutingModule {}
我們已經完成了角色與權限管理系統的基本架構,並且進一步探討了如何讓這套系統具備彈性,動態調整角色的權限,並在前端根據這些權限動態渲染頁面。這樣不僅提升了系統的安全性,也讓整個應用變得更具彈性與可維護性。
透過這樣的架構,你可以輕鬆管理大型應用中的角色和權限,並且確保不同角色的用戶都能看到他們應該看到的內容,不會造成混亂或安全問題。
這就是一個完整的角色與權限管理系統,讓你的應用程式從登入、操作、權限控管到頁面呈現,都變得既安全又靈活!