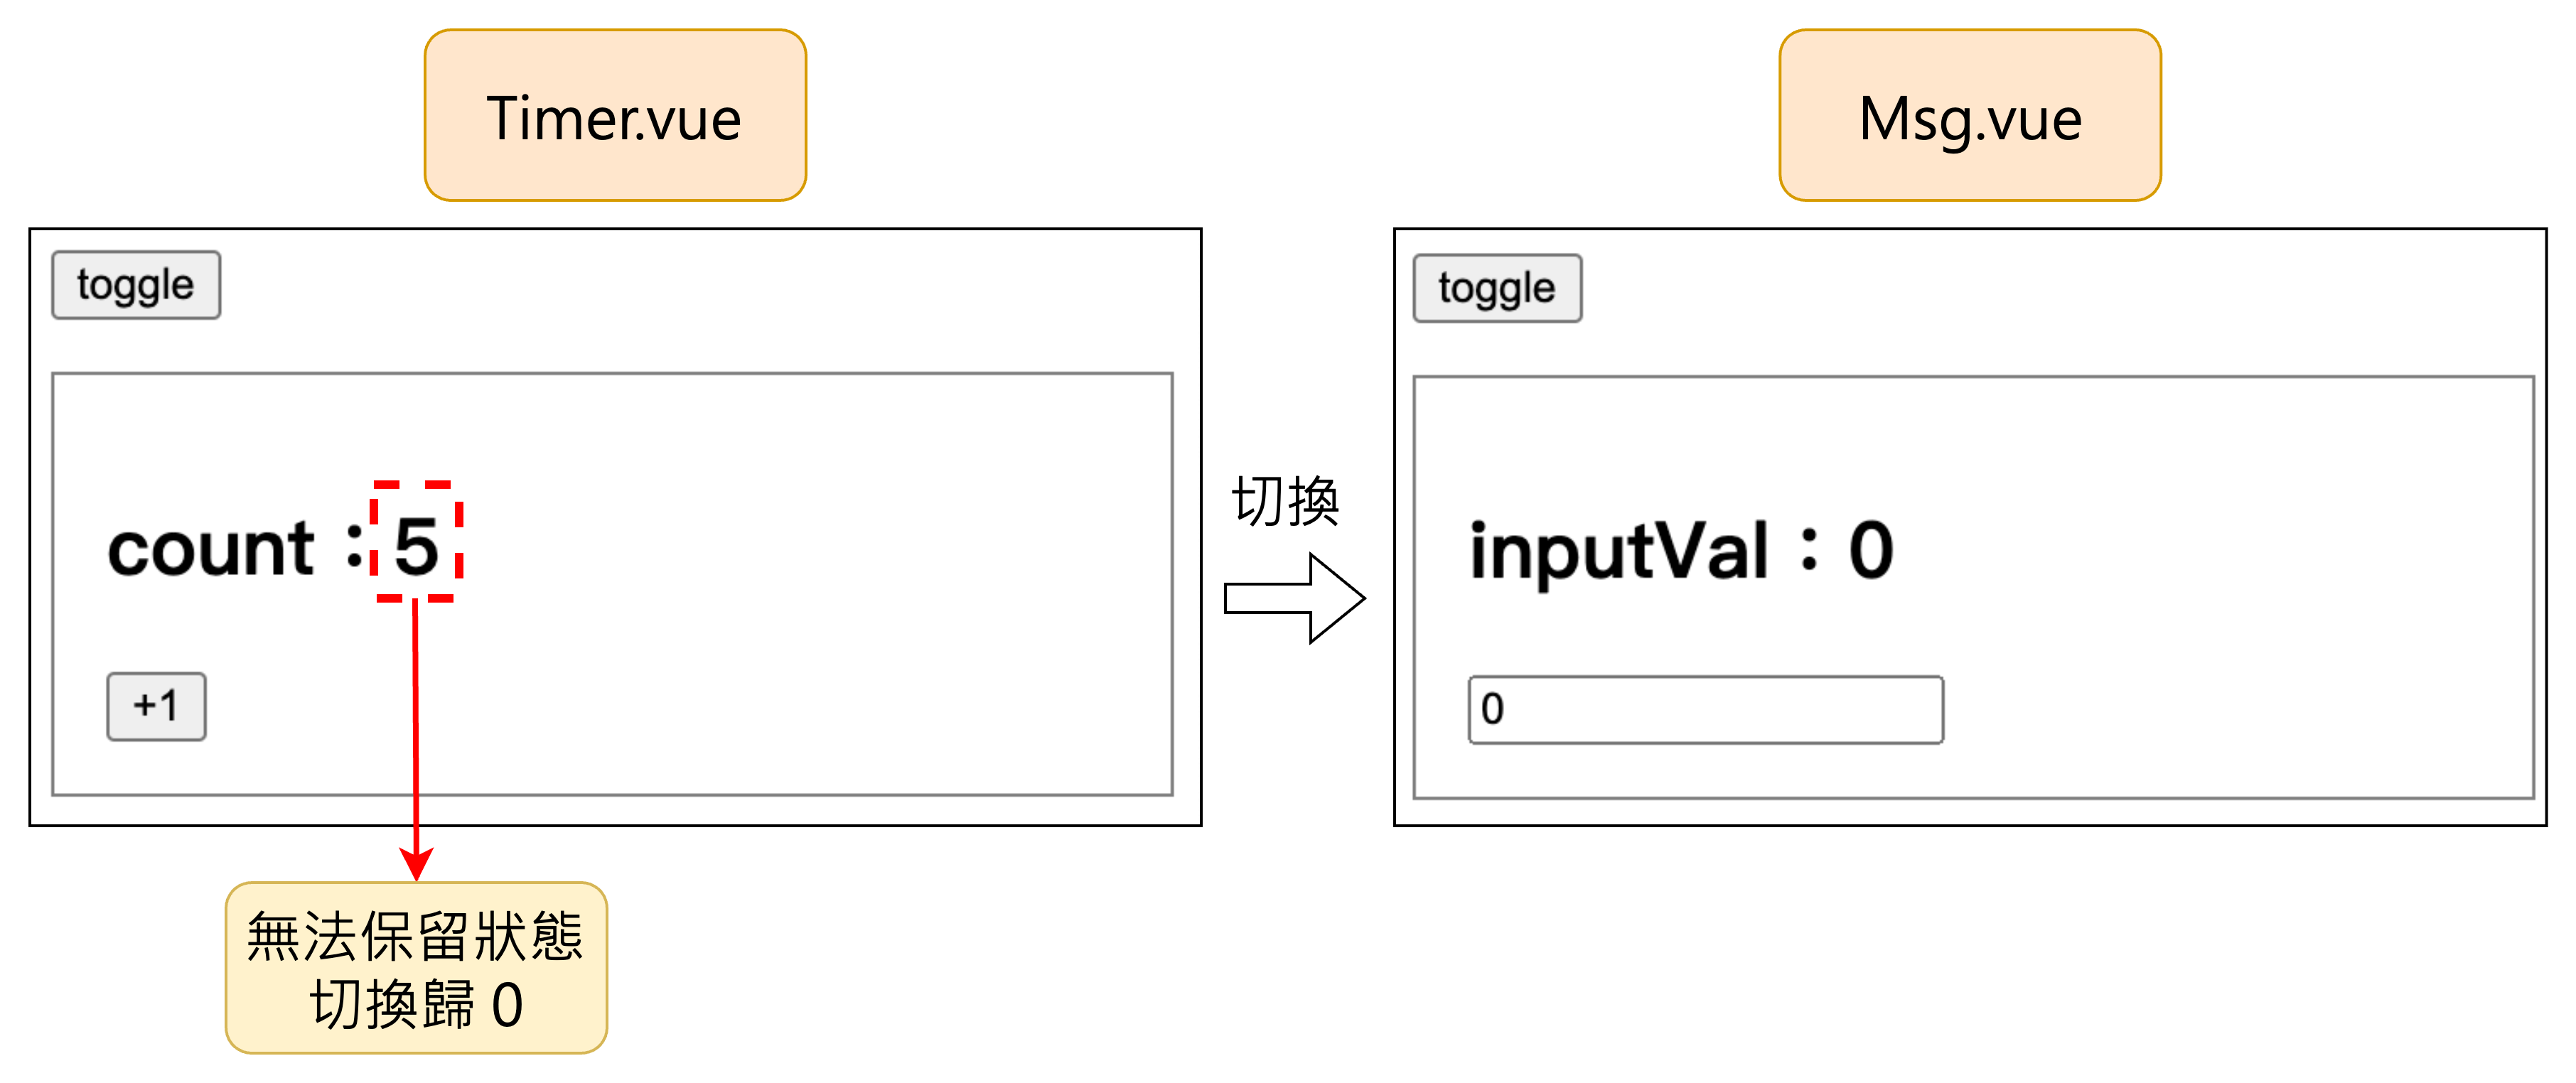
預設情況下,切換組件會導致組件的創建及銷毀,無法保持組件內部的狀態。
以下是使用v-if指令進行計時器和訊息輸入框組件切換的範例:
👉 Vue3 Options API v-if 組件切換實作連結

當我們希望在組件切換時保留其狀態,例如讓計時器的count在切換回來後依然保留,我們可以使用 Vue 的<KeepAlive>組件來實現這一需求。透過<KeepAlive>組件搭配<component>標籤來實現動態組件的緩存和顯示,並使用:is屬性綁定當前要顯示的組件。這樣可以確保組件在切換時不會被銷毀,其狀態和數據得以保留。
👉 Vue3 Options API KeepAlive 組件切換實作連結
修改前 App.vue:
<div class="content">
    <Timer v-if="showComponentName === 'Timer'" />
    <Msg v-if="showComponentName === 'InputVal'" />
</div>
修改後 App.vue:
<KeepAlive>
  <component :is="showComponentName"></component>
</KeepAlive>
<KeepAlive>預設會緩存所有在其中的組件,但我們可以透過include或exclude這兩個prop 來限制緩存的範圍。然而,使用這些prop時,必須確保在組件中設置了name屬性,才能生效。
接下來,我們會延續之前的案例,並加入一個新的組件Select.vue,實現Timer.vue、Msg.vue 和Select.vue組件之間的切換。此時,我們會使用exclude props 來避免緩存 Msg.vue 的內容。
include 和 exclude 設定說明:
include和exclude也支持正則表達式或陣列定義。這種方式需要透過v-bind指令動態綁定實現。Vue Template:
<KeepAlive exclude="Msg">
   <!-- 如果不止一個要限制緩存的組件(exclude),可以使用透號分開 -->
  <component :is="showComponentName"></component>
</KeepAlive>
👉 KeepAlive 組件切換(include & exclude 使用)
【 限制緩存實例數量 - max 】
<KeepAlive> 組件還提供 max prop,用來限制最多可以緩存的組件實例數量。當緩存的組件超過 max設定的數量時,最久未使用的組件會被移出緩存(LRU 緩存策略)。
將上面的案例試著使用v-bind綁定max prop:
<KeepAlive :max="2">
  <component :is="showComponentName"></component>
</KeepAlive>
<KeepAlive>組件可以與v-if指令一起使用,但在使用時需要注意:在同一時間內只能有一個組件符合條件並被渲染。
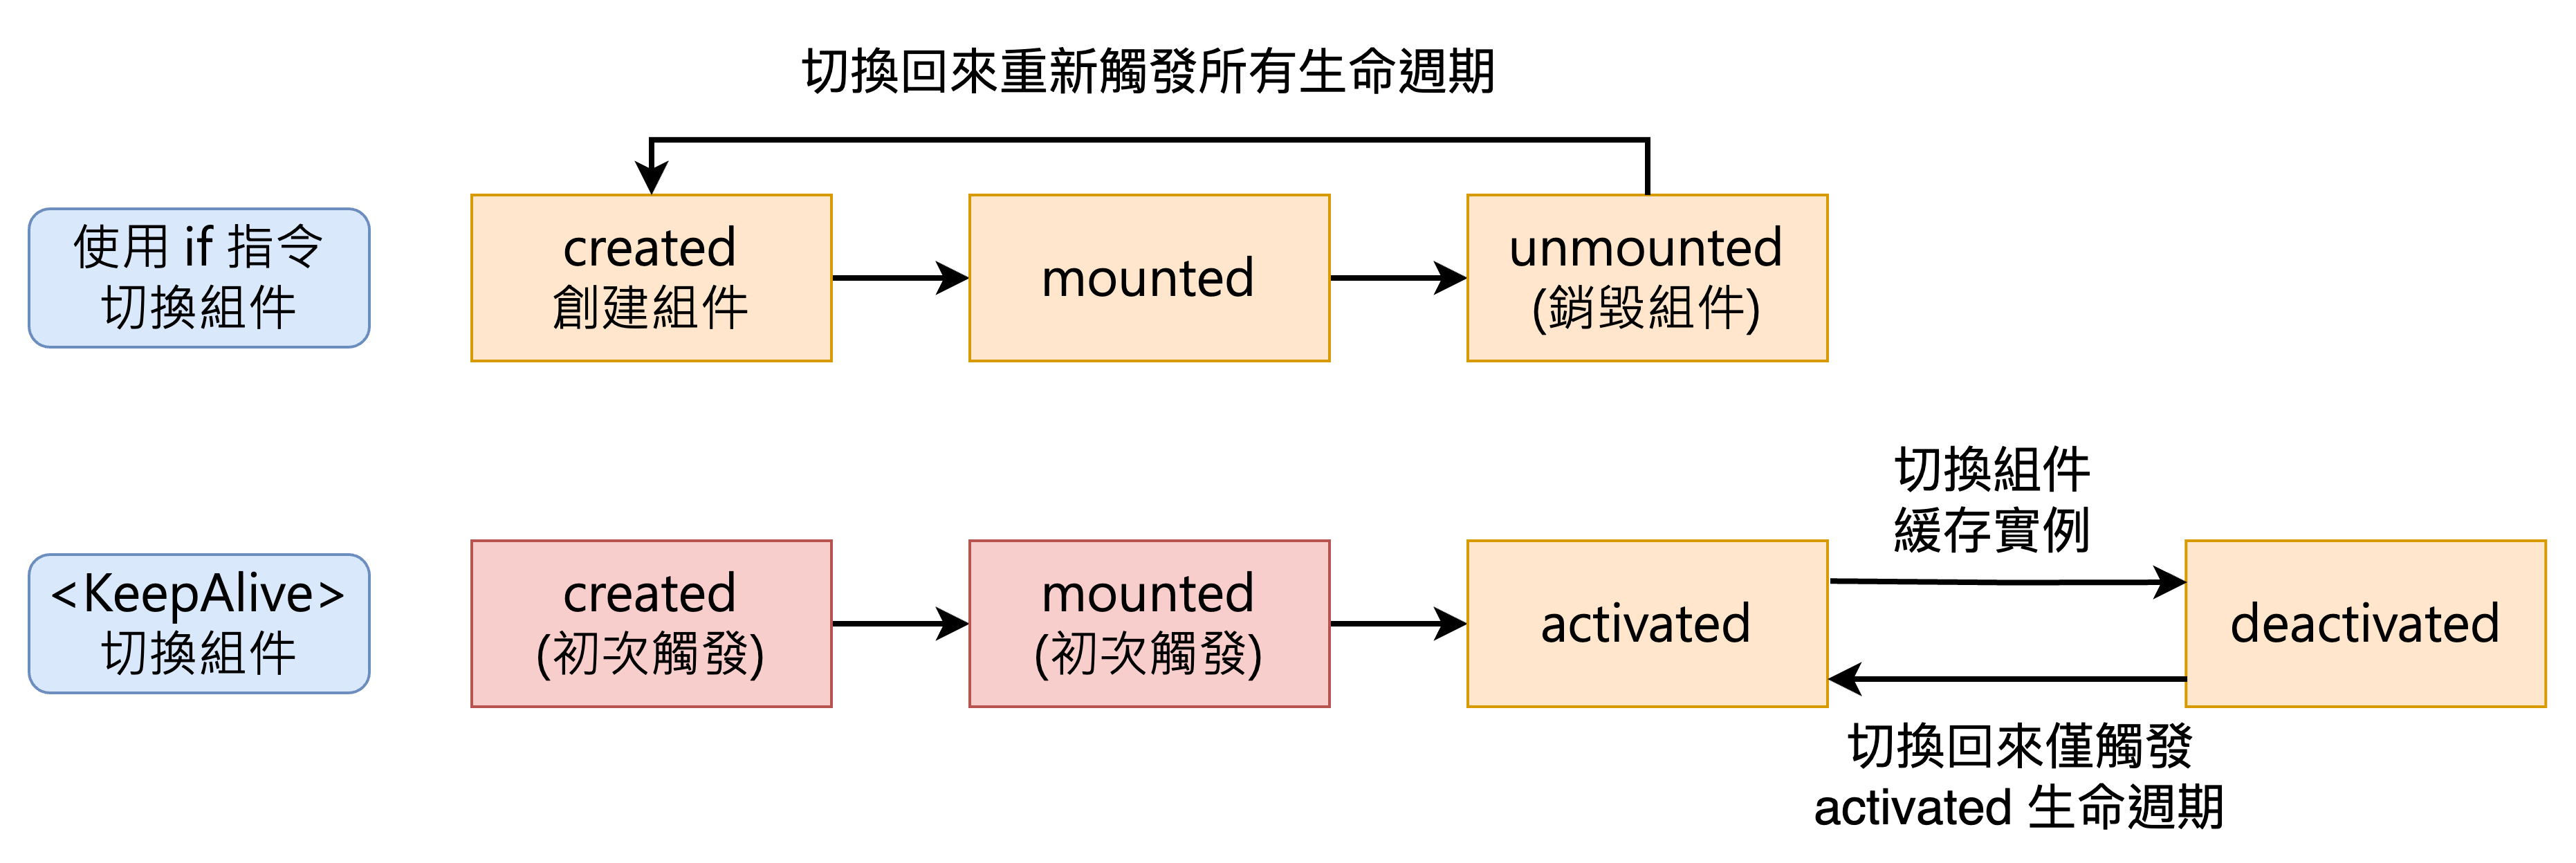
使用<KeepAlive> 組件時,組件的狀態和生命周期會有特定的表現。接下來,我們將通過範例來觀察其生命周期的變化,並了解<KeepAlive>如何在組件切換過程中影響其狀態管理和生命周期鉤子的觸發。
👉 KeepAlive 搭配 v-if 指令查看生命週期實做連結

當使用 KeepAlive 組件,組件被切換會進入deactivated生命週期,並儲存其實例,因此當切換回來的時候僅會觸發activated。
Teleport是 Vue3 提供的一個內置組件,它可以將一個組件的 DOM 結構傳送到當前組件 DOM 結構之外的其他位置。這個功能特別適用於需要打破組件層級結構的情況,常見的使用場景包括模態框(Modal)及彈出提示(Tooltip)。
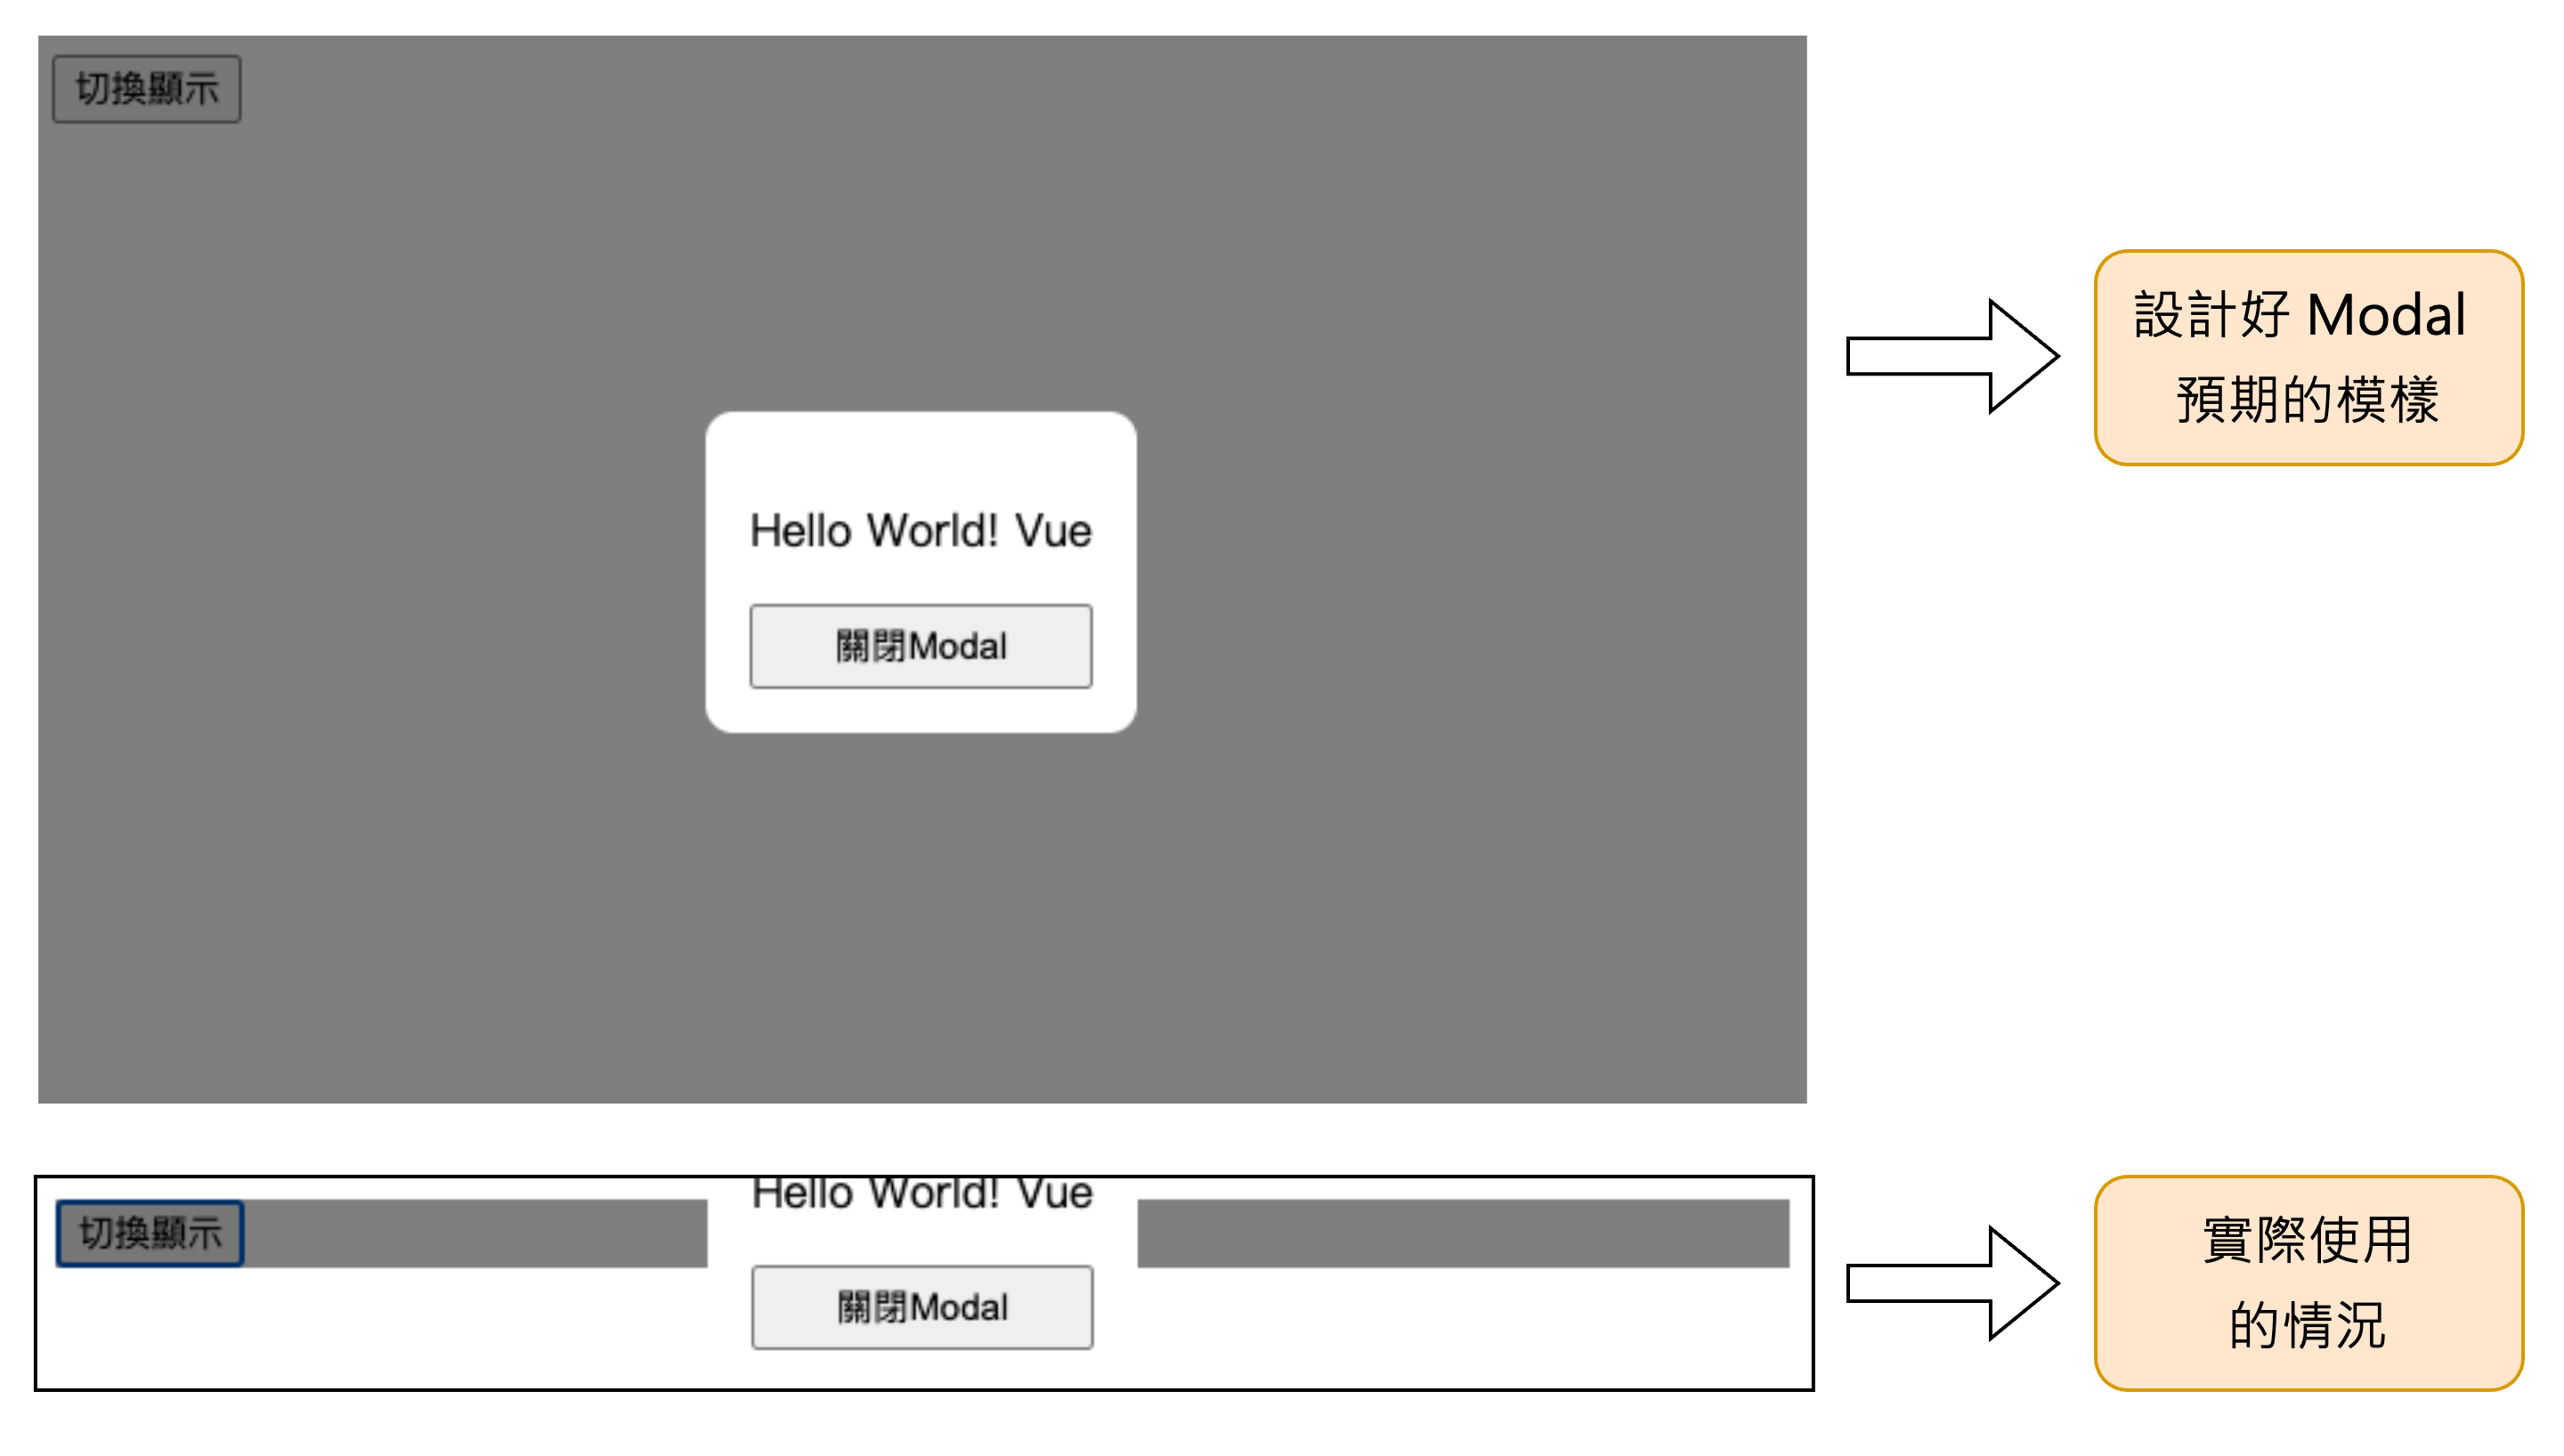
在實際開發中,我們經常會遇到組件的邏輯結構與視覺輸出因為階層的樣式產生衝突,進而導致組件無法正常顯示其呈現。為了解決這個問題,我們可以運用Teleport來確保組件能夠在正確的位置渲染,同時保持其在組件樹中的邏輯位置。
讓我們透過一個模態框的實例來說明Teleport的具體用法:

👉 Vue3 Options API Teleport 內置組件實做連結
子組件(Modal) Vue Template:
<template id="modal">
  <Teleport to="body">
    <div v-if="isShow" class="modalContainer">
      <div class="modalContent">
        <p>Hello World! Vue</p>
        <button class="btn-close" type="button" @click="closeModal">關閉Modal</button>
      </div>
    </div>
  </Teleport>
</template>
父組件 template:
<div id="app">
  <div class="container">
    <button type="button" @click="isShow = !isShow">切換顯示</button>
    <modal :is-show="isShow" @close-modal="isShow = $event"></modal>
  </div>
</div>
子組件(Modal)CSS:
.modalContainer{
  position: absolute;
  top: 0;
  left: 0;
  background-color: rgba(0,0,0,.5);
  height: 100%;
  width: 100%;
}
父組件 CSS:
/* position 影響佈局方式 */
.container{
  position: relative;
}
問題的主要原因在於,父組件中的.container樣式對Modal組件的佈局造成了影響。為了解決這個問題,可以使用 Vue 的內置組件Teleport,將 Modal 的 DOM 結構移動到body節點下,從而避免其佈局受到父組件樣式的干擾。
【 google 瀏覽器開發者工具查看網頁結構 - DOM 元素正確渲染 】
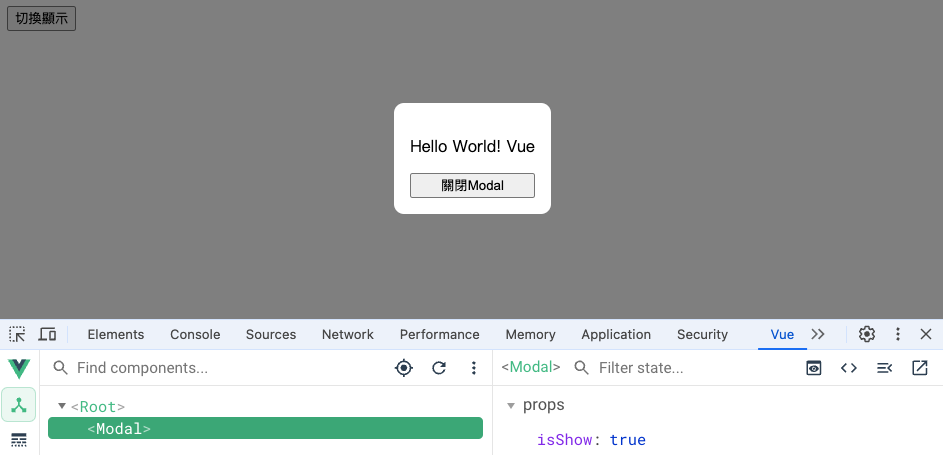
【 chrome vue devtools - 組件樹位置仍然在根組件下面 】
這裡可能會引發一個疑問:如果多個 Teleport 組件同時將 DOM 元素渲染到同一個目標(例如:body),這些元素會互相取代嗎?
其實,當多個 Teleport 組件指向相同的目標元素時,它們不會彼此覆蓋,而是會按照順序顯示在目標元素中。
將上面的案例在修改一下,加入一個跑馬燈的Teleport組件並且同樣在body上顯示:
👉 Vue3 Options API Teleport 內置組件(多個Teleport 共享)實做連結
父組件 Vue Template(加入跑馬燈 Teleport 組件):
  <div class="container">
    <button type="button" @click="isShow = !isShow">切換顯示</button>
    <modal :is-show="isShow" @close-modal="closeModal"></modal>
    <Teleport to="body">
      <div class="marquee-container">
        <p class="marquee-text">
          <span class="bg-gray">
             跑馬燈開始跑起來!!
          </span>
        </p>
      </div>
    </Teleport>
  </div>
【 google 瀏覽器開發者工具查看網頁結構 - DOM 元素按照順序顯示 】
disable prop(禁用 Teleport 功能屬性):如果僅需要在特定解析度下啟用Teleport功能,例如在桌面版啟用但在手機版禁用,可以使用 disabled屬性來動態控制Teleport的行為。
Template 呈現:
<Teleport :disabled="isMobile">
  ...
</Teleport>
模板延遲解析(defer prop):從 Vue 3.5 開始,可以使用defer prop 來延遲目標模板的解析,直到其完成後,才將Teleport內的 DOM 元素移轉到指定目標。
Tempalte 呈現
<Teleport defer to="#out-container">
 ...
</Teleport>
activated和 deactivated hook,讓我們可以在組件被緩存和重啟時執行特定邏輯。Teleport,並支持延遲目標模板的解析,適用於更加動態和複雜的場景需求。這次分別針對KeepAlive跟Teleport內置組件分別準備兩個練習:
KeepAlive 頁籤練習:請幫我讓page A、page B、page C能根據頁籤的切換顯示並保留每個頁面內的輸入框值的狀態。
👉 Vue3 Options API tab 應用動態元件(模板)實做連結
👉 Vue3 Options API tab 應用動態元件(完成版)實做連結
Teleport Boostrap Modal 練習:請幫我讓被父層組件樣式影響的 Boostrap Modal 能正常顯示。
👉 Vue3 Options API Teleport 解決 transform 影響佈局(模板)
👉 Vue3 Options API Teleport 解決 transform 影響佈局(正式版)
