框架的目的是什麼呢?無疑的就是簡化你手邊繁瑣的工作,讓你可以更專注於業務邏輯的撰寫。Spring MVC基於Servlet進行封裝,對於整個Spring生態系有著很好的整合,Spring MVC已成為當前Java Web框架的首選。
在專案跟目錄右鍵new -> module
輸入module名稱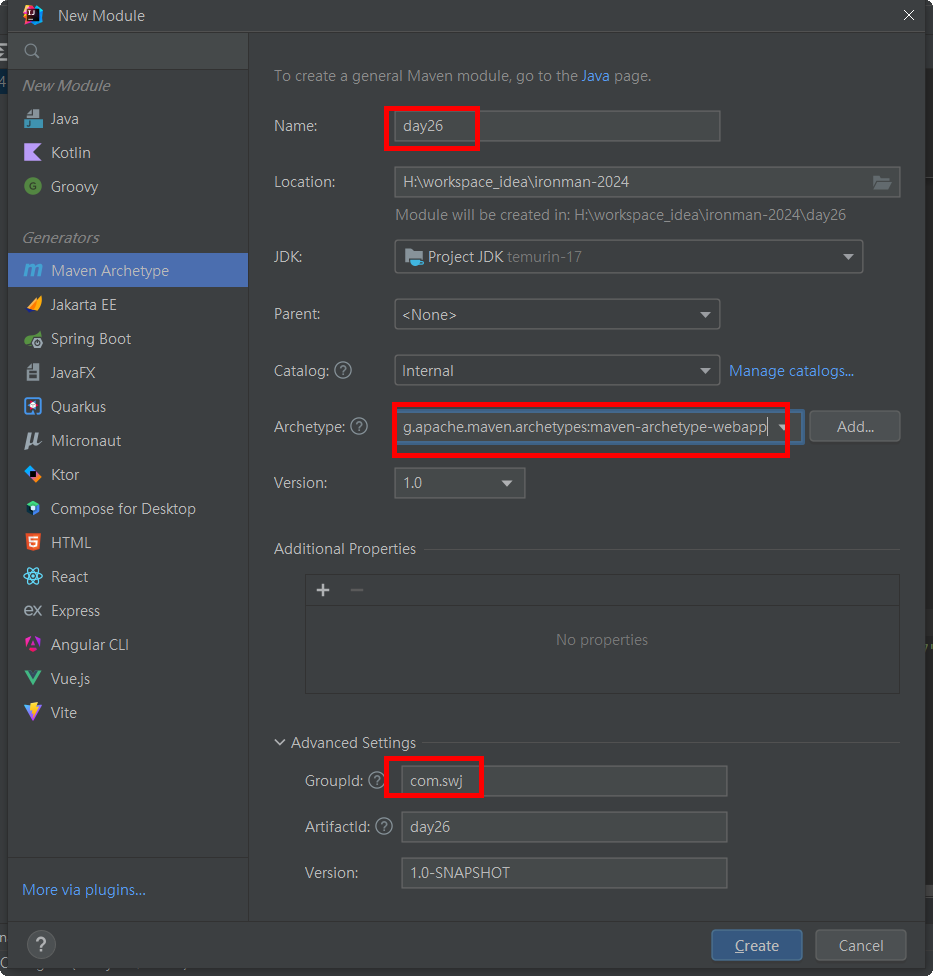
WEB-INF下創建springmvc-servlet.xml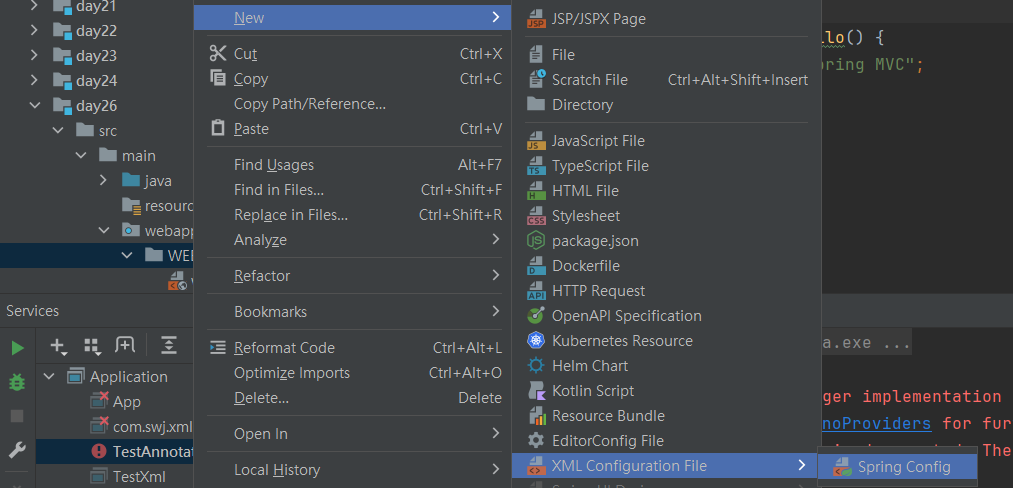
Spring MVC 兩大功能
Spring MVC透過在web.xml註冊一個DispatcherServlet將要處理的請求先導到Spring MVC框架中,由HandleMapping處理路由映射,確定路由後轉給HandlerAdapter進行前端參數的封裝,經過Controller處理完成後交由HandlerAdapter處理回應的數據,最後DispatcherServlet交由ViewResolver查找對應的頁面返回後response給client。
我們可以透過spring webmvc的maven repository查詢他相依於那些套件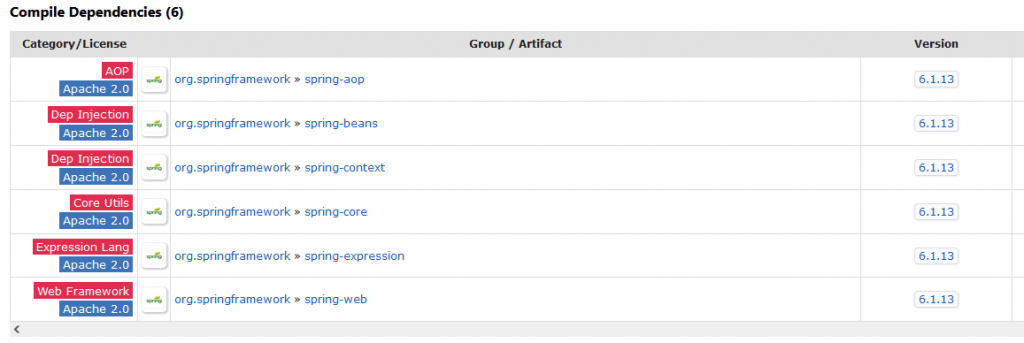
除了相依於Core Container的beans、core、context、SpEL外還有AOP與Web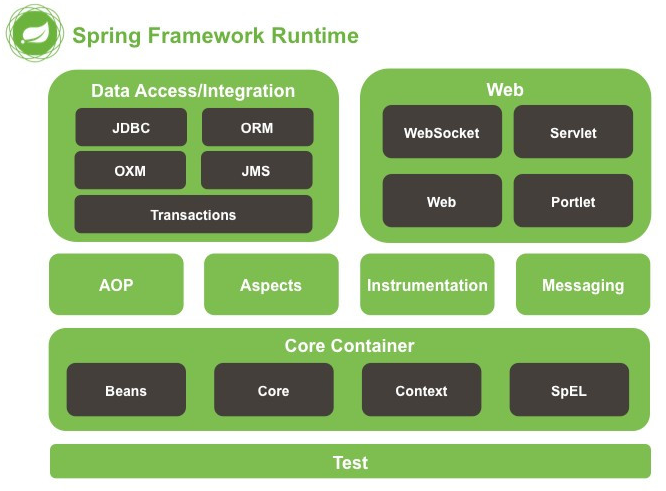
我們知道spring-webmvc套件已會帶入spring相關基礎設施套件,因為spring mvc是基於servlet的,所以我們只需要再把servlet api再導入進來
<project xmlns="http://maven.apache.org/POM/4.0.0" xmlns:xsi="http://www.w3.org/2001/XMLSchema-instance"
  xsi:schemaLocation="http://maven.apache.org/POM/4.0.0 http://maven.apache.org/maven-v4_0_0.xsd">
  <modelVersion>4.0.0</modelVersion>
  <groupId>com.swj</groupId>
  <artifactId>day26</artifactId>
  <packaging>war</packaging>
  <version>1.0-SNAPSHOT</version>
  <name>day24 Maven Webapp</name>
  <url>http://maven.apache.org</url>

  <properties>
    <maven.compiler.source>17</maven.compiler.source>
    <maven.compiler.target>17</maven.compiler.target>
    <project.build.sourceEncoding>UTF-8</project.build.sourceEncoding>
  </properties>

  <dependencies>
    <dependency>
      <groupId>org.springframework</groupId>
      <artifactId>spring-webmvc</artifactId>
      <version> 6.1.13</version>
    </dependency>
    <dependency>
      <groupId>jakarta.servlet</groupId>
      <artifactId>jakarta.servlet-api</artifactId>
      <version>6.0.0</version>
      <scope>provided</scope>
    </dependency>
  </dependencies>

  <build>
    <finalName>day24</finalName>
  </build>
</project>
因為需要將web container接收到的請求導到Spring MVC中,所以我們需要在web.xml設置DispatcherServlet
<?xml version="1.0" encoding="UTF-8"?>
<web-app xmlns="http://xmlns.jcp.org/xml/ns/javaee"
         xmlns:xsi="http://www.w3.org/2001/XMLSchema-instance"
         xsi:schemaLocation="http://xmlns.jcp.org/xml/ns/javaee http://xmlns.jcp.org/xml/ns/javaee/web-app_4_0.xsd"
         version="4.0">

  <display-name>Archetype Created Web Application</display-name>
  <servlet>
    <servlet-name>springmvc</servlet-name>
    <servlet-class>org.springframework.web.servlet.DispatcherServlet</servlet-class>
  </servlet>
  <servlet-mapping>
    <servlet-name>springmvc</servlet-name>
    <url-pattern>/</url-pattern>
  </servlet-mapping>
</web-app>
透過設定@Controller告訴ioc容器納管此元件,@RequestMapping設定路由映射規則,@ResponseBody設定不需要ViewResolver直接response內容即可!!
@Controller
public class HelloController {
    @RequestMapping("/hello")
    @ResponseBody
    public String sayhHllo() {
        return "Hello Spring MVC";
    }
}
萬事俱備只欠東風,我們還需要一個方式讓我們把這些annotation讓ioc容器知曉,那就是在spring的設定檔設置component-scan,所以我們在WEB-INF下設定一個springmvc-servlet.xml
<?xml version="1.0" encoding="UTF-8"?>
<beans xmlns="http://www.springframework.org/schema/beans"
       xmlns:xsi="http://www.w3.org/2001/XMLSchema-instance"
       xmlns:context="http://www.springframework.org/schema/context"
       xsi:schemaLocation="http://www.springframework.org/schema/beans http://www.springframework.org/schema/beans/spring-beans.xsd http://www.springframework.org/schema/context https://www.springframework.org/schema/context/spring-context.xsd">
    <context:component-scan base-package="com.swj.controller"></context:component-scan>
</beans>
demo
Spring MVC設置了DispatchServlet將所有的請求導到Spring MVC中交給HandleMapping找尋對應的URL映射Handler,再交給HandlerAdapter進行請求參數的簡化處理後委由Handler處理,返回DispatcherServlet後若需要示圖解析器處理則繼續處理,完成後响應數據給client端。
create folder
create index.jsp
<%@ page contentType="text/html;charset=UTF-8" language="java" %>
<html>
<head>
    <title>index</title>
</head>
<body>
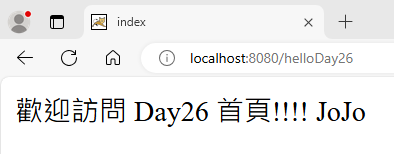
歡迎訪問 Day26 首頁!!!! ${name}
</body>
</html>
springmvc-servlet.xml設定視圖解析器,透過設置prefix與suffix可以簡化我們寫訪問資源路徑
<!-- view resolver setting   -->
    <bean id="jspViewResolver" class="org.springframework.web.servlet.view.InternalResourceViewResolver">
        <property name="prefix" value="/WEB-INF/jsp/"/>
        <property name="suffix" value=".jsp"/>
    </bean>
在HelloController增加訪問jsp,可以透過傳入model作為與視圖共享資訊
@RequestMapping("helloDay26")
public String index(Model model){
    model.addAttribute("name", "JoJo");
    return "index";
}
