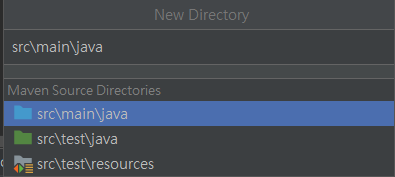
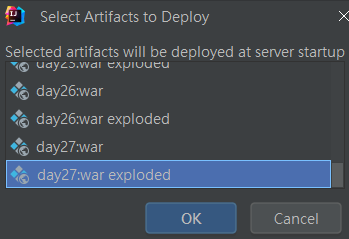
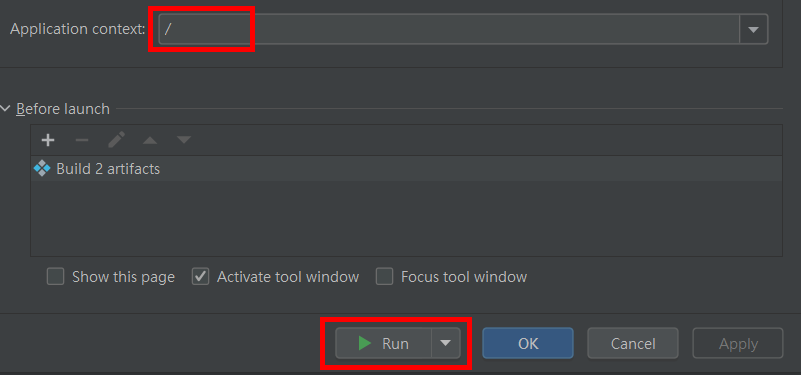
昨日完成Spring MVC的快速入門,我們複習一下整個過程


  <properties>
    <maven.compiler.source>17</maven.compiler.source>
    <maven.compiler.target>17</maven.compiler.target>
    <project.build.sourceEncoding>UTF-8</project.build.sourceEncoding>
  </properties>

  <dependencies>
    <dependency>
      <groupId>org.springframework</groupId>
      <artifactId>spring-webmvc</artifactId>
      <version> 6.1.13</version>
    </dependency>
    <dependency>
      <groupId>jakarta.servlet</groupId>
      <artifactId>jakarta.servlet-api</artifactId>
      <version>6.0.0</version>
      <scope>provided</scope>
    </dependency>
  </dependencies>
<display-name>Archetype Created Web Application</display-name>
    <servlet>
        <servlet-name>springmvc</servlet-name>
        <servlet-class>org.springframework.web.servlet.DispatcherServlet</servlet-class>
    </servlet>
    <servlet-mapping>
        <servlet-name>springmvc</servlet-name>
        <url-pattern>/</url-pattern>
    </servlet-mapping>

在springmvc.xml中設定
<context:component-scan base-package="com.swj"></context:component-scan>
若需要使用jsp、thymeleaf 等再配置,接下來的日子不會提到這個部分
<!-- view resolver setting   -->
<bean id="jspViewResolver" class="org.springframework.web.servlet.view.InternalResourceViewResolver">
    <property name="prefix" value="/WEB-INF/jsp/"/>
    <property name="suffix" value=".jsp"/>
</bean>


會看到initializing Servlet的字樣
Spring MVC中路徑匹配設置交給@RequetMapping
完整路徑匹配ex.\hello\world
/*單層任意字串,ex.\haha\a、\haha\abc
/** 任意層任意字串創建HelloController
@Controller
public class HelloController {
    //1.精確匹配
    @RequestMapping("/hello/world")
    @ResponseBody
    public String hello(){
        return "Hello World";
    }

    //2.模糊匹配
//    @RequestMapping("/world/*")
    @RequestMapping("/world/**")
    @ResponseBody
    public String world(){
        return "World Hello ";
    }
}

class中的方法重複的路徑可以放置在Controller
//放置在方法中
@Controller
public class EmpController {

    @RequestMapping("/emp/create'")
    public String create(){
        return "Emp create";
    }
    @RequestMapping("/emp/insert'")
    public String insert(){
        return "Emp insert";
    }

}
@RequestMapping("/emp")
@Controller
public class EmpController {

    @RequestMapping("/create")
    public String create(){
        return "Emp create";
    }
    @RequestMapping("/insert")
    public String insert(){
        return "Emp insert";
    }
}
@RequestMapping(value = "/create",method = RequestMethod.GET)
public String create(){
    return "Emp create";
}
@GetMapping("/insert'")
public String insert(){
    return "Emp insert";
}
Spring MVC在處理請求參數時已為我們封裝了Cookie,我們只需要透過@CookieValue就可以拿到Cookie,當然也可以透過傳入原生API HttpServletRequest,使用for迴圈遍歷取值
@Controller
@ResponseBody
public class CookieController {

    @RequestMapping("CreateCookie")
    public String CookieTest(HttpServletRequest httpServletRequest){
        HttpSession session = httpServletRequest.getSession();
        return "CreateCookie:"+session.getId();
    }

    @RequestMapping("GetCookie")
    public String GetCookie(@CookieValue(name = "JSESSIONID",value = "",required = false) String sessionid){
        System.out.println(sessionid);
        return "GetCookie:"+sessionid;
    }
}


如果是要取得Header裡面的資料,可以透過@RequestHeader取得
@ResponseBody
@Controller
public class HeaderController {

    @RequestMapping("GetHeader")
    @ResponseBody
    public String GetHeader(@RequestHeader(name = "host") String host){
        System.out.println("GetHeader:"+host);
        return "GetHeader:" + host;
    }
}

