今天來介紹如何部署 SvelteKit 的網站,基本上我們可以分成需不需要 server-side 來選擇部署的設定。
那這次的部署都是使用 Cloudflare Pages 進行,基本上在個人使用的情況下很難超出他的免費額度,主要是它不像 vercel 有限制流量,主要是看 build 的次數以及與 worker (它們家的另外一個服務)和 Pages Function (Pages 中的 serverless function) 的 request 數來看。
Cloudflare Pages 簡單來說就是一個部署平台,只要與 github(或 gitlab) repo 連結完成後,當設定的分支有更新時將會自動部署網站。
首先登入後到了首頁點開點選側邊欄的「Workers 和 Pages」
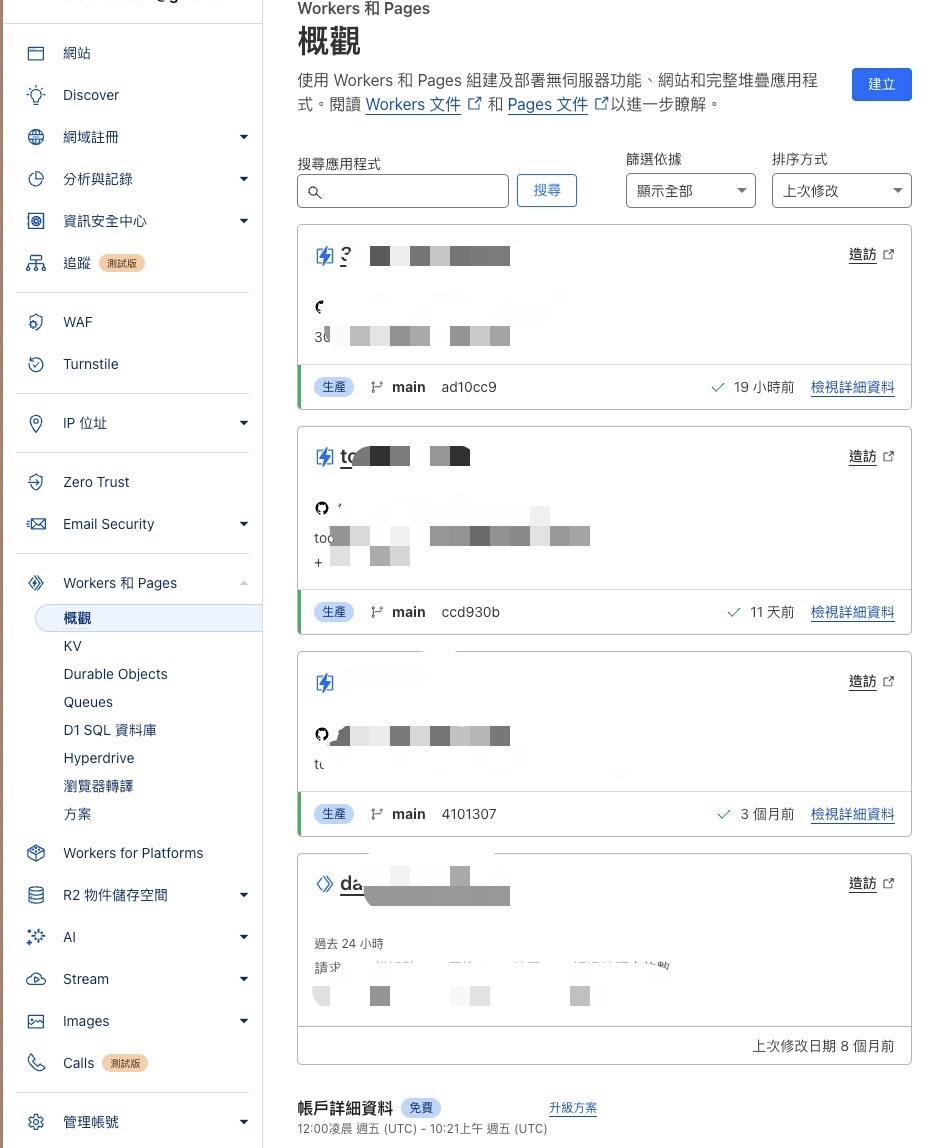
然後按右上角的「建立」,然後選擇 「Pages」之後再選擇要部署的 repo
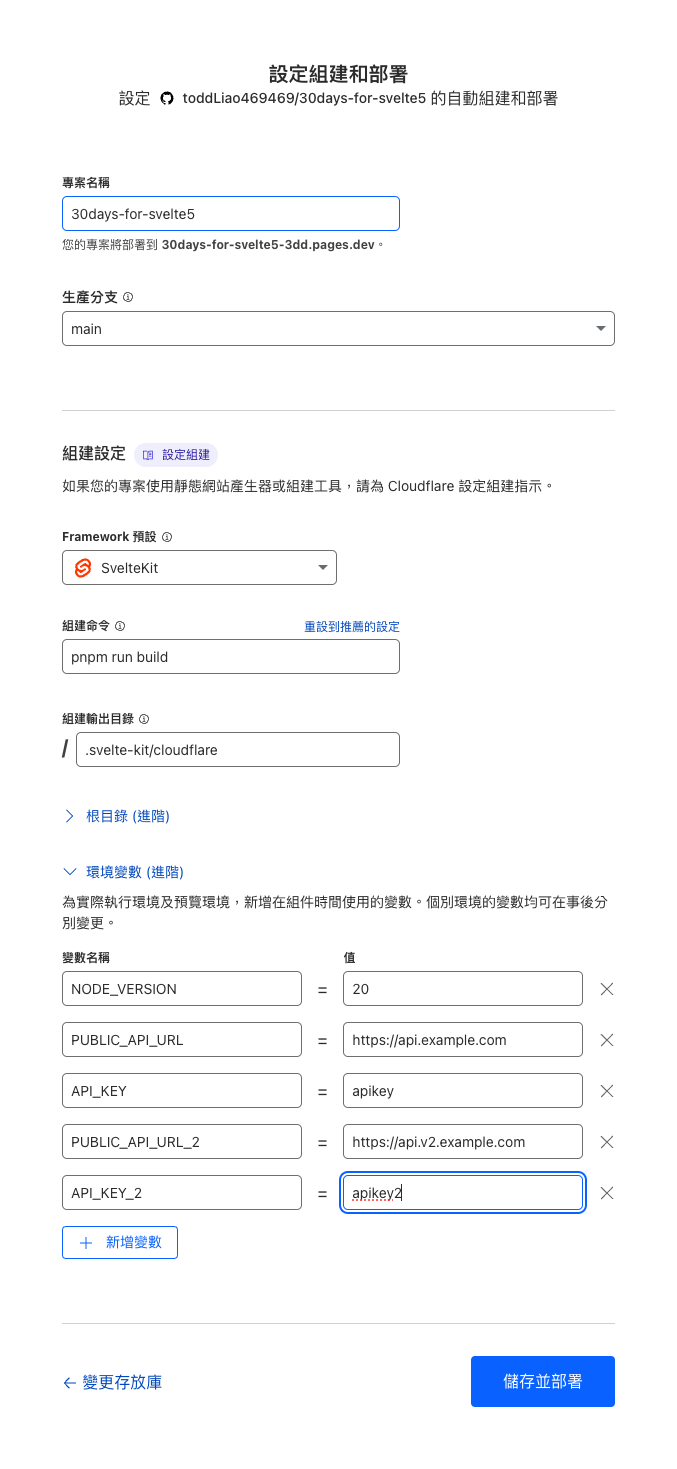
接下來開始更改設定,主要就是看要那個分支有更新時就觸發自動部署、 build 的指令、環境變數等等。
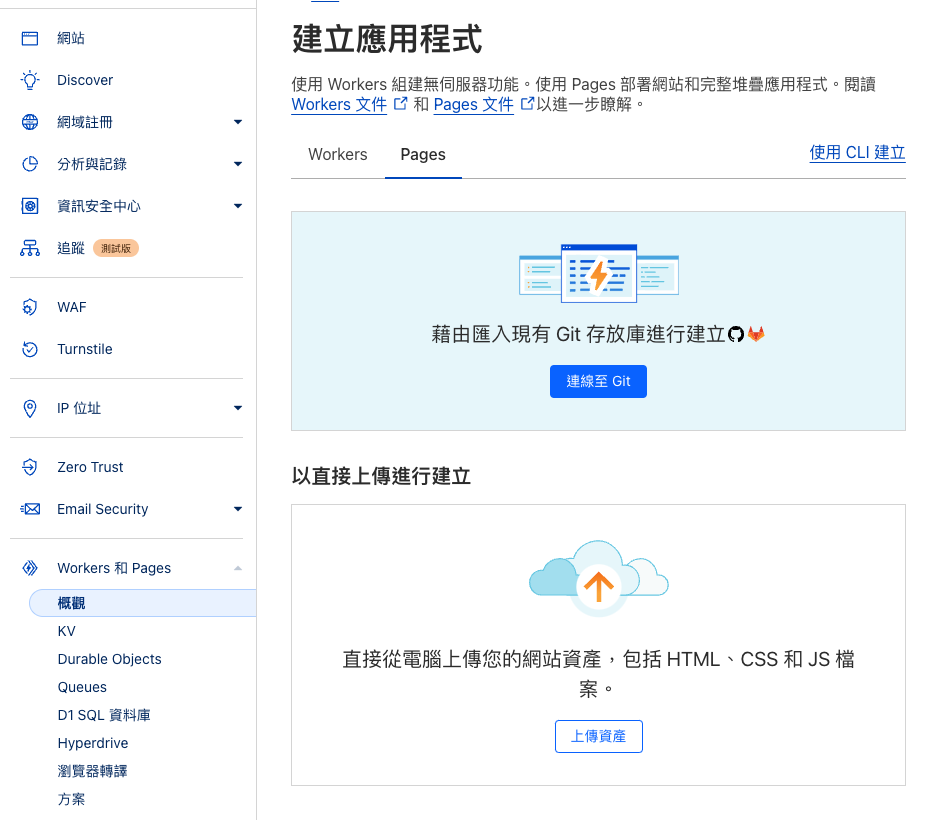
這邊可先直接使用 SvelteKit 的預設,至於組建指令就看使用的 package management 是哪一個,環境變數為了簡單就直接在這裡傳入。
補充一下因為通常
.env檔都不會被放進版控中,所以到 prod 環境時會選擇用其他方式在CI/CD時讓.env出現在機器中或是乾脆直接都使用 CLI 傳入環境變數等等方式,讓我們可以不用把.env放進版控,這裡就不詳細說明了。
那 NODE_VERSION 設定為 20 是因為預設 Pages 是用 v18 但因為有依賴需要更高的版本,所以這邊乾脆就直接使用 20 了
至於為什麼目錄是 .svelte-kit/cloudflare 這是因為 SvelteKit 預設是使用 adapter-auto 來進行部署,基本上在官方文件上提到的平台它都能自動使用該平台的部署方式,所以在 Pages 上的設定我們就用 SvelteKit 的預設了。
// in svelte.config.js
import adapter from '@sveltejs/adapter-auto';
import { vitePreprocess } from '@sveltejs/vite-plugin-svelte';

/** @type {import('@sveltejs/kit').Config} */
const config = {
	// Consult https://kit.svelte.dev/docs/integrations#preprocessors
	// for more information about preprocessors
	preprocess: vitePreprocess(),

	kit: {
		// adapter-auto only supports some environments, see https://kit.svelte.dev/docs/adapter-auto for a list.
		// If your environment is not supported, or you settled on a specific environment, switch out the adapter.
		// See https://kit.svelte.dev/docs/adapters for more information about adapters.
		adapter: adapter()
	}
};

export default config;
部署完成點擊網址就能看到網站了
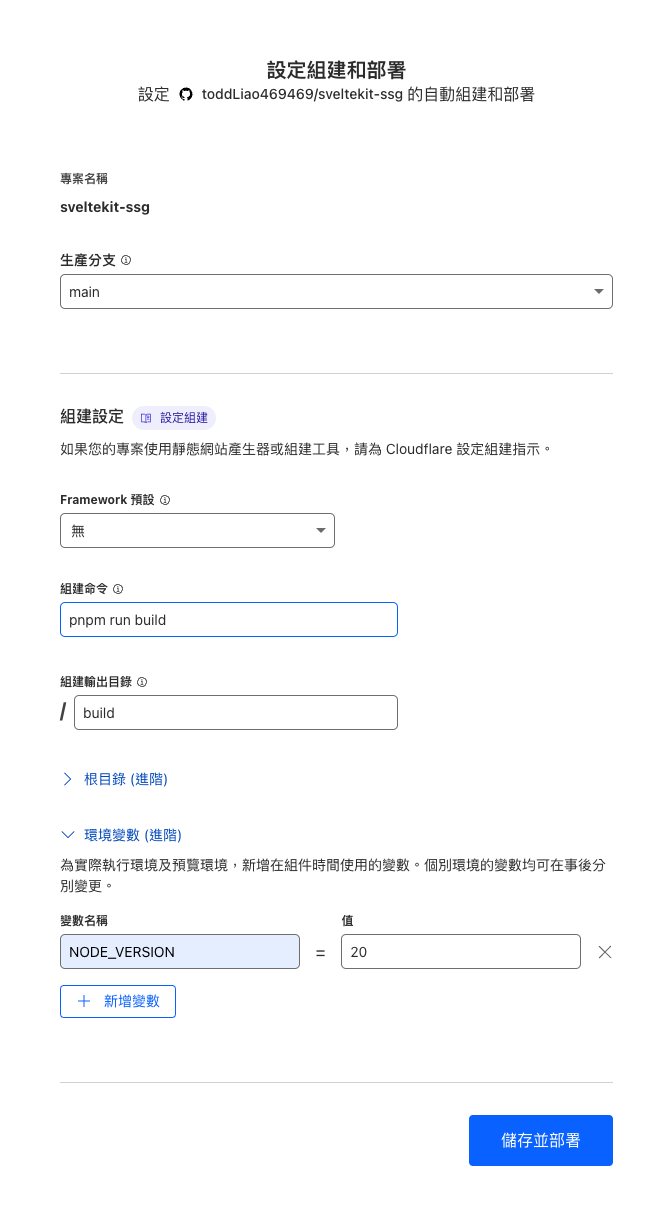
首先因為我這個專案已經有包含太多 server 的 code,所以這邊為了方便演示我就另外建立一個專案。
如果讀者也是想要用新建立專案來測試的話建立依照這個範例進行配置,主要是在「Which Svelte app template?」這個選項中,選擇「Skeleton project」的話就不會有 server-side 的 code
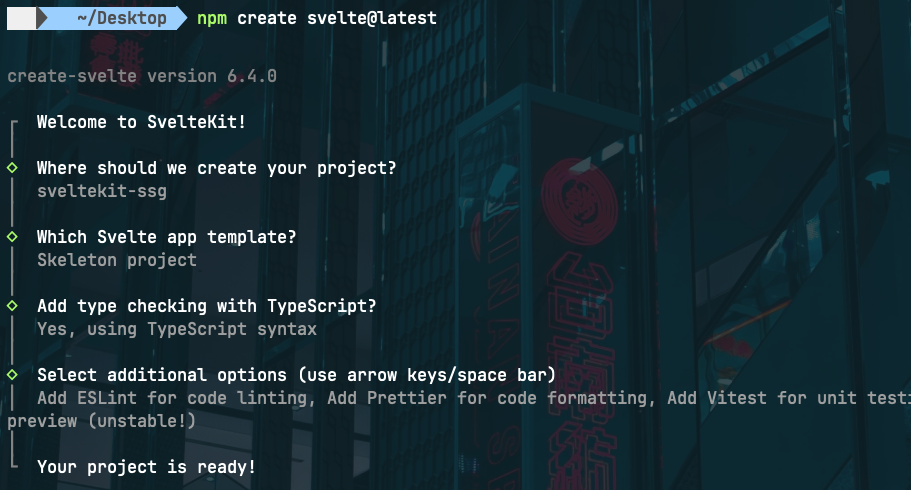
接下來就安裝 @sveltejs/adapter-static
pnpm add -D @sveltejs/adapter-static
然後新增 routes/+layout.ts
export const prerender = true;
所謂 prerender 就是他會將每個路由都產生相對應的 HTML 檔案,也就是 SSG 的概念。
更改 svelte.config.js
import adapter from '@sveltejs/adapter-static';
import { vitePreprocess } from '@sveltejs/vite-plugin-svelte';

/** @type {import('@sveltejs/kit').Config} */
const config = {
	// Consult https://kit.svelte.dev/docs/integrations#preprocessors
	// for more information about preprocessors
	preprocess: vitePreprocess(),

	kit: {
		// adapter-auto only supports some environments, see https://kit.svelte.dev/docs/adapter-auto for a list.
		// If your environment is not supported, or you settled on a specific environment, switch out the adapter.
		// See https://kit.svelte.dev/docs/adapters for more information about adapters.
		adapter: adapter()
	}
};

export default config;
然後在 Pages 的設定也跟上面的例子類似,只是「組建輸出目錄」要改為 build ,這是因為 adapter-static 預設的輸出目錄就是 build 。
