iT邦幫忙

2025 iThome 鐵人賽

DAY 3
0

本文同步刊登於個人Blogger

在講解繁瑣的軟體使用之前,
先來研究如何將 World Creator 中預設建立好的地形導出並匯入 Unity 內並使用。

https://ithelp.ithome.com.tw/upload/images/20250808/20175925b2eIII2B5X.jpg

先以最基本的地形為例,然後我們試著在 Export Preset 加入 Height Map

https://ithelp.ithome.com.tw/upload/images/20250808/20175925he3kA6JAbx.jpg

https://ithelp.ithome.com.tw/upload/images/20250808/2017592563dhCZKOUZ.jpg

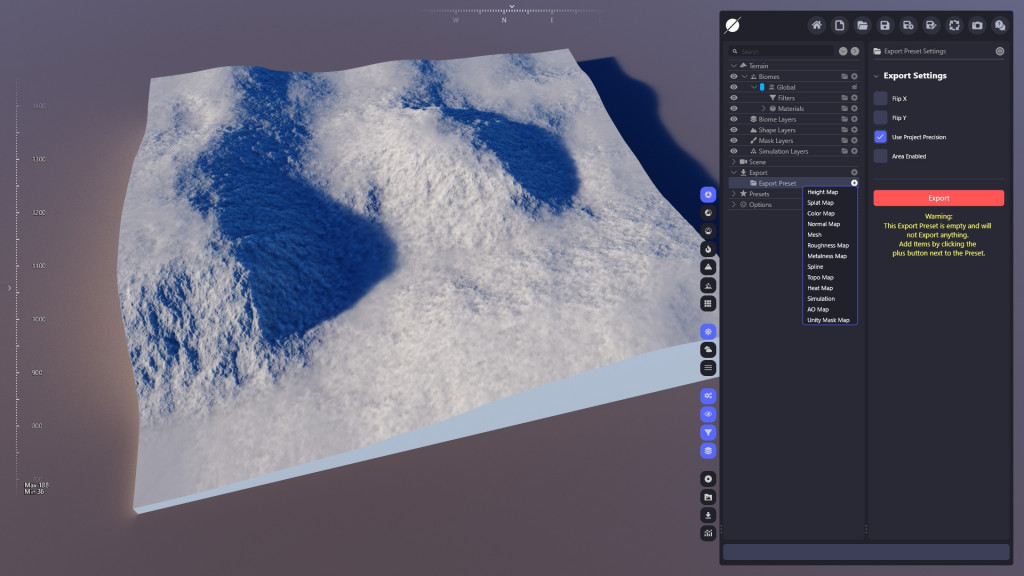
導出的檔案使用.exr (32-Bit float)

然後放入 Unity 資料夾內
https://ithelp.ithome.com.tw/upload/images/20250808/20175925EU4pOb3IFZ.jpg

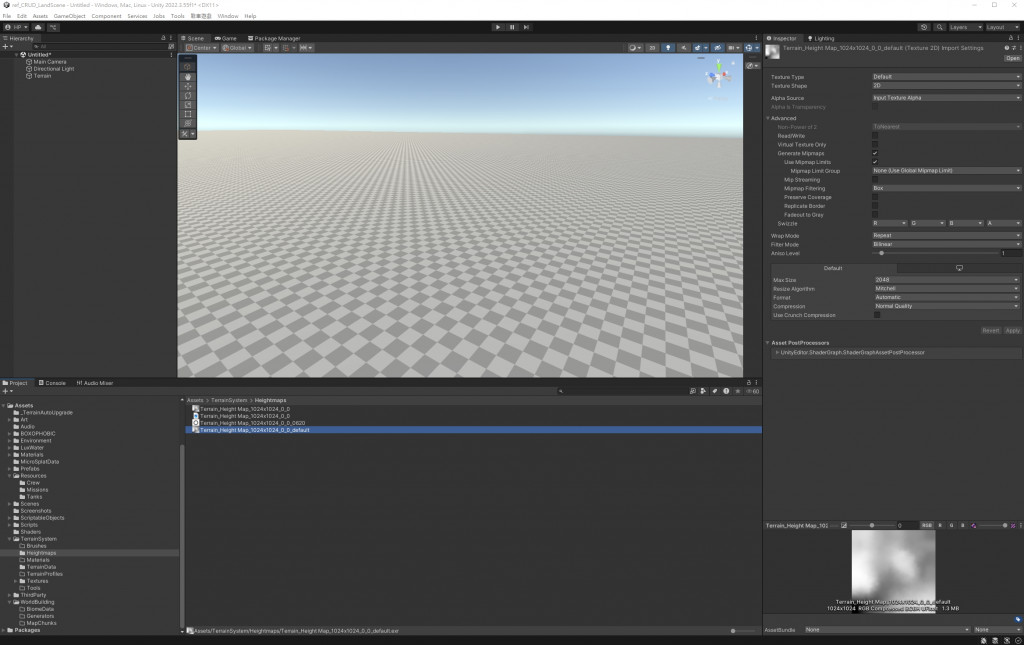
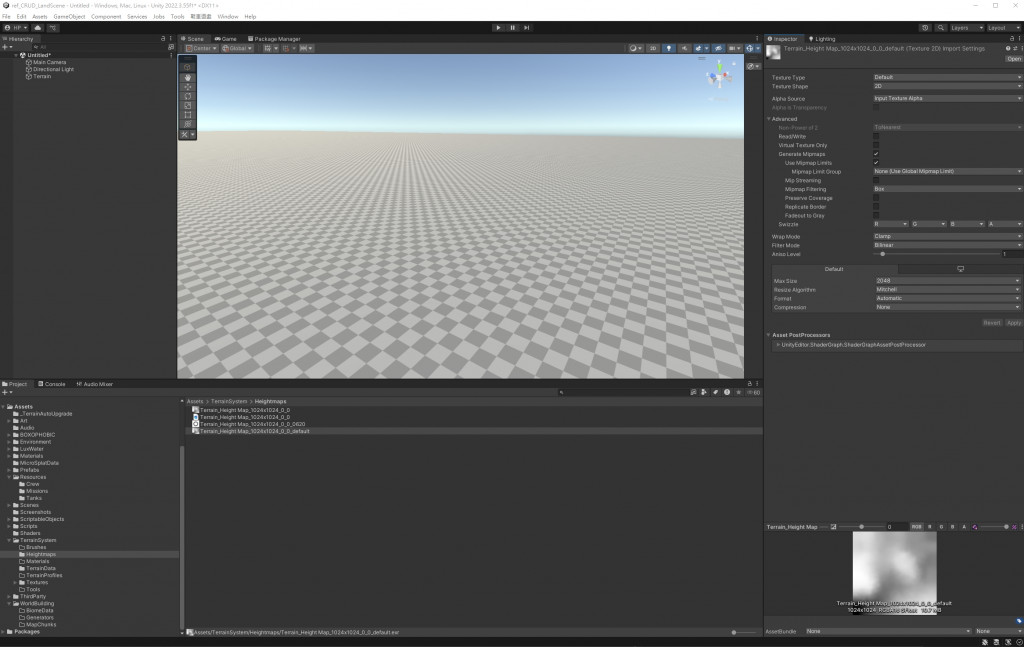
然後我們要針對匯出的圖檔進行設定上的調整

Texture Type: Default
Wrap Mode: Clamp
Filter Mode: Bilinear
Compression: None

https://ithelp.ithome.com.tw/upload/images/20250808/20175925RTg6qGb0l9.jpg

這邊選擇使用 MicroVerse > Create MicroVerse With Terrain 去建立一塊空白地形

https://ithelp.ithome.com.tw/upload/images/20250808/20175925XvIPLSqNTL.jpg

然後加入 高度圖的印章 (Height Stamp)

https://ithelp.ithome.com.tw/upload/images/20250808/20175925dYs91oJdQy.jpg

然後將 .exr 放入 Height Stamp 內

https://ithelp.ithome.com.tw/upload/images/20250808/20175925ZLVs2B4pr8.jpg

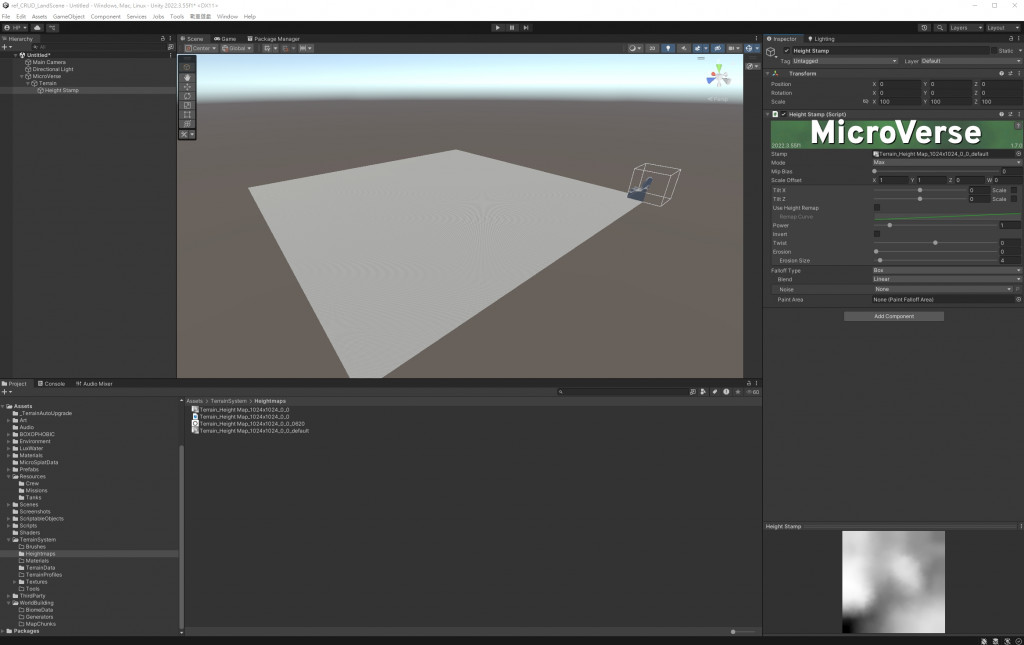
然後你可以看到,你的地形好像出來了,但只在邊邊角角,接著我們就可以利用調整 Transform 來將地形符合原本的長、寬、高

World Creator 將地形導出的時候,可以看到你設定的地圖尺寸,只要將尺寸填回 Unity 的 Transform 內,你就可以得到一塊一模一樣的地形。
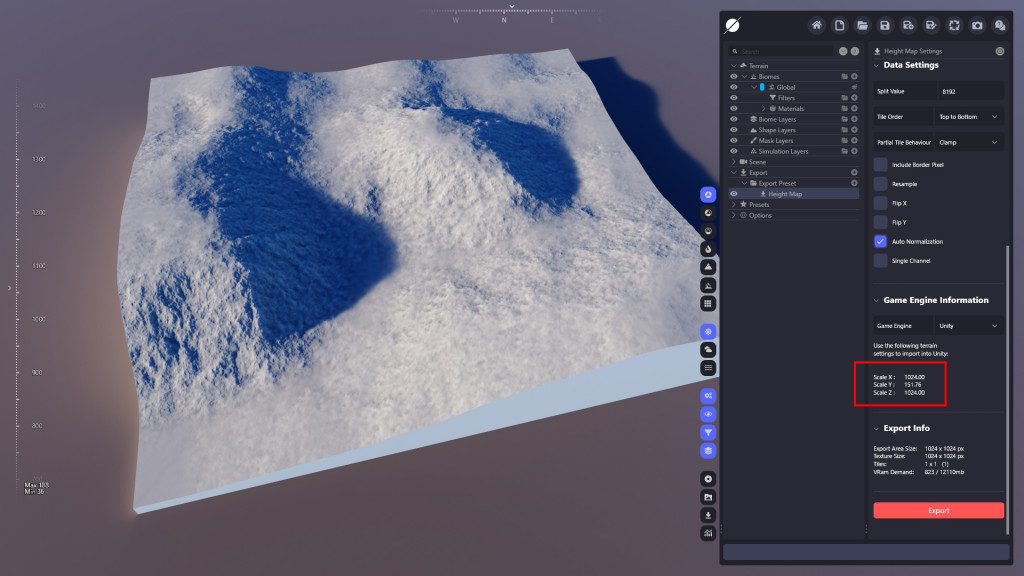
https://ithelp.ithome.com.tw/upload/images/20250808/20175925p18ZkchTFW.jpg

我看到我們的地形尺寸
X:1024
Y:151.76
Z:1024

X軸 跟 Z軸 都是 1024,所以中心點位置都是 512

https://ithelp.ithome.com.tw/upload/images/20250808/20175925Iix7B2rWpE.jpg

https://ithelp.ithome.com.tw/upload/images/20250808/20175925a22oJwPsAi.jpg

將資訊都填入之後,我們就可以得到一塊近乎一樣的地形了。


上一篇
Day 2|初探 World Creator
下一篇
Day 4|基本物件 (Primitive)
系列文
打造一個適用於戰車對戰遊戲的 Unity 場景10
圖片
  熱門推薦
圖片
{{ item.channelVendor }} | {{ item.webinarstarted }} |
{{ formatDate(item.duration) }}
直播中

尚未有邦友留言

立即登入留言