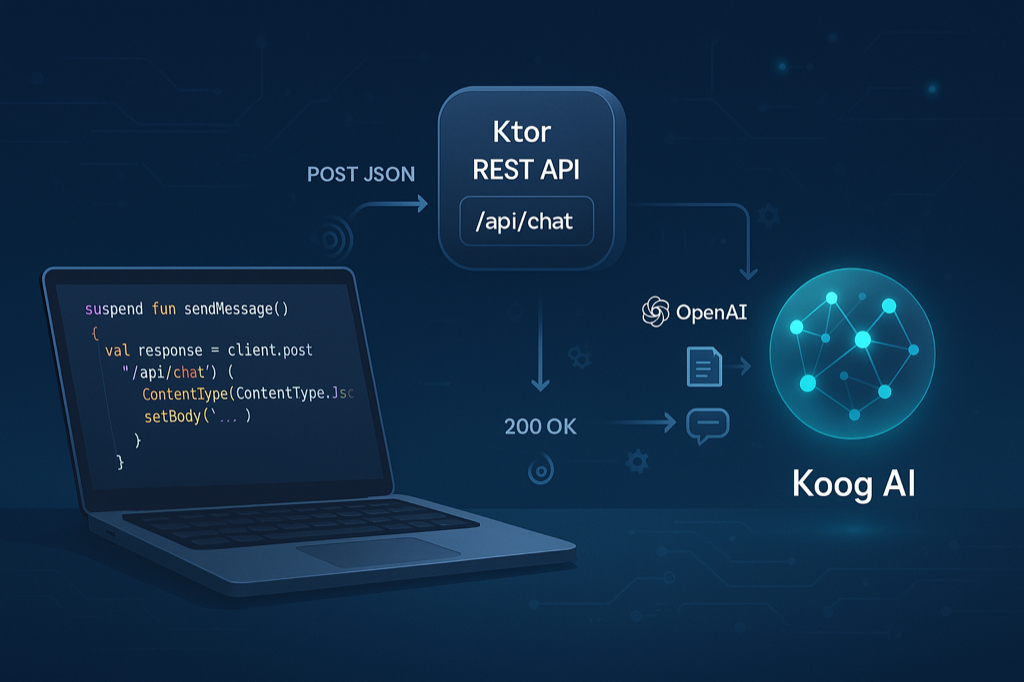
在前面的文章中,我們學會了如何使用 Koog AI 框架建立基本的 AI 應用。今天我們要進一步學習如何將 Koog 整合到 Ktor 中,讓我們的 AI 功能可以透過 REST API 提供服務,這樣就能讓前端應用或其他系統輕鬆地與我們的 AI 進行互動
Ktor 是 JetBrains 開發的純 Kotlin Web 框架,特別適合與 Koog 整合
最重要的是,Ktor 的協程支援讓我們可以直接使用 Koog 的 suspend 函數,無需額外的配置
使用 IntelliJ IDEA 建立新的 Gradle 專案
Generators 選擇 Ktor
ktor-koog-ai
建議勾選
Add sample code,它會先幫你配置好專案
基本上有勾選 Add sample code 的話,專案都已經幫你配置好了
只要在 build.gradle.kts 加上 koog 就好了
dependencies {

    // 其它程式碼 ...

    // Koog AI 框架
    implementation("ai.koog:koog-agents:0.3.0")
}
在 application.yaml 加上 OpenAI 的 api-key
# AI 配置
ai:
  openai:
    api-key: your_openai_api_key
建立一個 AI Chat 的 service
class AiChatService(apiKey: String) {

    // 建立 OpenAI 執行器
    private val executor = simpleOpenAIExecutor(apiKey)

    // 建立 AI Agent
    private val aiAgent = AIAgent(
        executor = executor,
        systemPrompt = """
            你是一個友善且專業的 AI 助手
            請用正體中文回答使用者的問題
            保持回答簡潔明瞭,但要有幫助性
        """.trimIndent(),
        llmModel = OpenAIModels.CostOptimized.GPT4_1Mini
    )

    /**
     * 處理聊天請求
     */
    suspend fun chat(chatRequest: ChatRequest): ChatResponse {
        val startTime = System.currentTimeMillis()

        return try {
            val response = aiAgent.run(chatRequest.message)
            val processingTime = System.currentTimeMillis() - startTime

            ChatResponse(
                success = true,
                message = response,
                processingTimeMs = processingTime
            )
        } catch (e: Exception) {
            ChatResponse(
                success = false,
                message = "抱歉,發生錯誤:${e.message}",
                processingTimeMs = System.currentTimeMillis() - startTime,
                error = e.message
            )
        }
    }
}

// 資料類別
@Serializable
data class ChatRequest(
    val message: String
)

@Serializable
data class ChatResponse(
    val success: Boolean,
    val message: String,
    val processingTimeMs: Long,
    val error: String? = null,
    val timestamp: Long = System.currentTimeMillis()
)
建立 Routing.kt
如果前面有勾選 Add sample code 的話,Routing.kt 會先建立,而且有一個預設的 / 路由
fun Application.configureRouting() {

    val apiKey = environment.config.property("ai.openai.api-key").getString()
    val aiChatService = AiChatService(apiKey)

    routing {

        get("/") {
            call.respondText("Hello World!")
        }

        // 聊天端點
        post("/api/chat") {
            try {
                val request = call.receive<ChatRequest>()

                // 驗證請求
                if (request.message.isBlank()) {
                    call.respond(
                        HttpStatusCode.BadRequest,
                        mapOf("error" to "訊息不能為空")
                    )
                    return@post
                }

                if (request.message.length > 1000) {
                    call.respond(
                        HttpStatusCode.BadRequest,
                        mapOf("error" to "訊息長度不能超過 1000 字元")
                    )
                    return@post
                }

                val response = aiChatService.chat(request)
                call.respond(response)

            } catch (e: Exception) {
                call.respond(
                    HttpStatusCode.InternalServerError,
                    mapOf("error" to "處理請求時發生錯誤:${e.message}")
                )
            }
        }
    }
}
GET localhost:8081/
回應
Hello World!
POST localhost:8081/api/chat
Content-Type: application/json

{
  "message": "請簡單的說明,什麼是 Kotlin 的協程"
}
回應
{
  "success": true,
  "message": "Kotlin 的協程是一種輕量級的非同步程式設計工具,可以讓你用簡單、直覺的方式寫出非同步和並行的程式碼,類似同步程式的結構,但不會阻塞執行緒,提高效能和可讀性。",
  "processingTimeMs": 1843,
  "error": null,
  "timestamp": 1755355532393
}
API 金鑰設定錯誤
{
  "success": false,
  "message": "抱歉,發生錯誤:Error from OpenAI API: 401 Unauthorized: {\n    \"error\": {\n        \"message\": \"Incorrect API key provided: your-api-key. You can find your API key at https://platform.openai.com/account/api-keys.\",\n        \"type\": \"invalid_request_error\",\n        \"param\": null,\n        \"code\": \"invalid_api_key\"\n    }\n}\n",
  "processingTimeMs": 1285,
  "error": "Error from OpenAI API: 401 Unauthorized: {\n    \"error\": {\n        \"message\": \"Incorrect API key provided: your-api-key. You can find your API key at https://platform.openai.com/account/api-keys.\",\n        \"type\": \"invalid_request_error\",\n        \"param\": null,\n        \"code\": \"invalid_api_key\"\n    }\n}\n",
  "timestamp": 1755356068862
}
今天我們成功建立了一個簡單而實用的 Ktor + Koog AI 整合範例
這個簡單的整合為你的 AI 應用提供了一個現代化、高效能的基礎,特別適合 Kotlin 生態系的開發者
在下一篇文章中,我們將學習如何透過 Model Context Protocol (MCP) 為 AI Agent 添加標準化的外部工具能力。從自己實作每個工具到使用標準化的 MCP 生態系統,這將大幅提升開發效率並確保工具品質
圖片來源:AI 產生
同步刊登於 Blog 第一次學 Kotlin Koog AI 就上手 Day 20:建構 AI API:將 Koog 整合到 Ktor


 iThome鐵人賽