上一篇中,我們訓練了一個 CNN 模型,能夠根據靜態手勢圖片辨識出對應的手語字母。但真實世界的互動往往是動態的,例如使用者面對鏡頭比出手勢,期望即時得到辨識結果。
因此今天將整合 MediaPipe Hands 手部關鍵點偵測,讓模型能在 即時鏡頭畫面中擷取手勢區域(ROI)並進行辨識,實作真正的互動式手語辨識。
本篇目標:
先定義與訓練階段相同的 CNN 結構,並載入訓練好的 .pth 權重檔:
import cv2
import mediapipe as mp
import torch
import torchvision.transforms as transforms
from PIL import Image
import numpy as np
import torch.nn as nn

# CNN 架構(需與訓練時一致)
class SimpleCNN(nn.Module):
    def __init__(self, num_classes=24):
        super(SimpleCNN, self).__init__()
        self.cnn = nn.Sequential(
            nn.Conv2d(1, 32, 3, padding=1), nn.ReLU(),
            nn.MaxPool2d(2),
            nn.Conv2d(32, 64, 3, padding=1), nn.ReLU(),
            nn.MaxPool2d(2),
            nn.Conv2d(64, 128, 3, padding=1), nn.ReLU(),
            nn.MaxPool2d(2),
        )
        self.fc = nn.Sequential(
            nn.Flatten(),
            nn.Linear(128 * 3 * 3, 256), nn.ReLU(),
            nn.Dropout(0.3),
            nn.Linear(256, num_classes)
        )

    def forward(self, x):
        return self.fc(self.cnn(x))
載入模型:
device = torch.device("cuda" if torch.cuda.is_available() else "cpu")
model = SimpleCNN()
model.load_state_dict(torch.load("model.pth", map_location=device))
model.eval()
初始化 MediaPipe Hands:
mp_hands = mp.solutions.hands
hands = mp_hands.Hands(static_image_mode=False, max_num_hands=1)
mp_draw = mp.solutions.drawing_utils
定義影像轉換流程(與訓練一致):
transform = transforms.Compose([
    transforms.Resize((28, 28)),
    transforms.Grayscale(),
    transforms.ToTensor(),
])
使用 MediaPipe 偵測手部位置,自動擷取 ROI,並傳入 CNN 模型推論。
cap = cv2.VideoCapture(0)

while True:
    ret, frame = cap.read()
    if not ret:
        break

    # 轉換為 RGB 給 MediaPipe 使用
    img_rgb = cv2.cvtColor(frame, cv2.COLOR_BGR2RGB)
    results = hands.process(img_rgb)

    if results.multi_hand_landmarks:
        for hand_landmarks in results.multi_hand_landmarks:
            h, w, _ = frame.shape
            x_list = [lm.x for lm in hand_landmarks.landmark]
            y_list = [lm.y for lm in hand_landmarks.landmark]
            xmin = int(min(x_list) * w)
            xmax = int(max(x_list) * w)
            ymin = int(min(y_list) * h)
            ymax = int(max(y_list) * h)

            # 加 margin 讓手勢不被裁切
            margin = 20
            xmin = max(xmin - margin, 0)
            ymin = max(ymin - margin, 0)
            xmax = min(xmax + margin, w)
            ymax = min(ymax + margin, h)

            # 擷取 ROI 區域並轉成 PIL 圖片
            hand_roi = frame[ymin:ymax, xmin:xmax]
            hand_pil = Image.fromarray(cv2.cvtColor(hand_roi, cv2.COLOR_BGR2RGB))
            input_tensor = transform(hand_pil).unsqueeze(0).to(device)

            # 模型推論
            with torch.no_grad():
                output = model(input_tensor)
                pred = torch.argmax(output, dim=1).item()

                # A~Z(跳過 J 對應 label=9)
                label_char = chr(pred + 65 if pred < 9 else pred + 66)

            # 顯示結果與綠框
            cv2.rectangle(frame, (xmin, ymin), (xmax, ymax), (0, 255, 0), 2)
            cv2.putText(frame, f"{label_char}", (xmin, ymin - 10),
                        cv2.FONT_HERSHEY_SIMPLEX, 1.2, (0, 255, 0), 2)
            mp_draw.draw_landmarks(frame, hand_landmarks, mp_hands.HAND_CONNECTIONS)

    # 顯示畫面
    cv2.imshow("Hand Sign Prediction", frame)
    if cv2.waitKey(1) == ord('q'):
        break

cap.release()
cv2.destroyAllWindows()
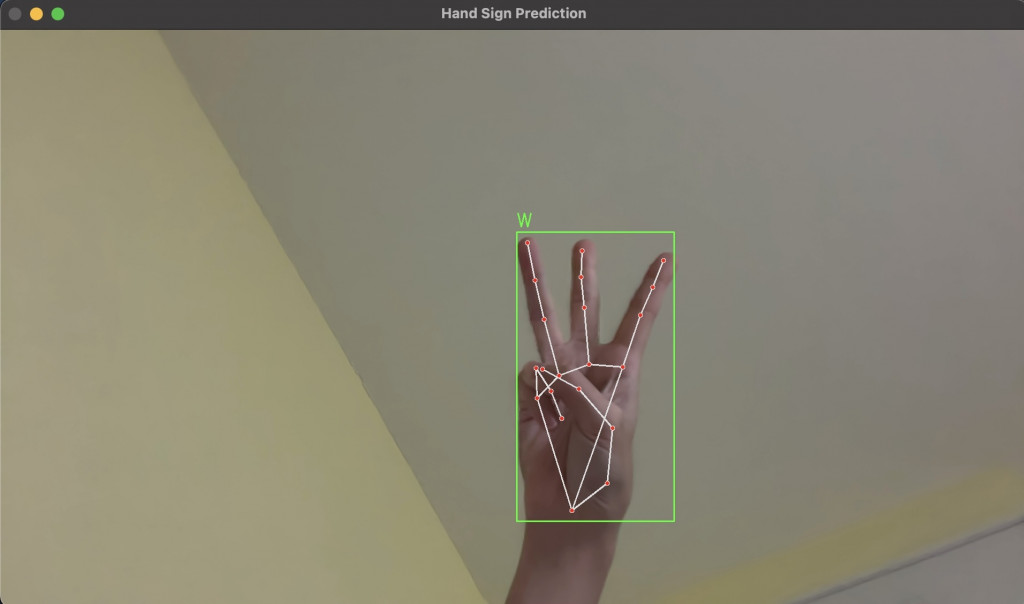
已成功將靜態手語辨識模型整合到即時鏡頭中,並透過 MediaPipe 自動擷取手勢位置,達成互動式手語辨識。
接下來可以延伸的應用:
輸入完整單字或句子或結合動作軌跡判斷「動態手勢」(如 J、Z)

