在 Day 10,我們打造了一個功能完整的 BaseSelect 元件。
我們在表單中將它展示出來,手動選擇選項,看起來一切正常。但這就夠了嗎?
想像一下,未來我們為了某個新需求,修改了 BaseSelect 的程式碼。
還記得 Day 9 我們為 BaseButton 寫測試時提到的「迴歸測試 (Regression Testing)」嗎?今天我們要為 BaseSelect 建立同樣的安全網。
相較於 BaseButton,Select 元件的測試有幾個特別需要注意的地方:
1.選項渲染 - 動態渲染的 options 是否正確顯示
2.v-model 雙向綁定 - 這是 Select 最核心的功能
3.禁用選項 - disabled 屬性是否正常運作
4.無障礙設計 - label 與 select 的關聯性
BaseSelect 測試首先一樣先建立 src/components/BaseSelect.spec.js
// 從 vitest 引入測試需要的基本函式
import { describe, it, expect } from 'vitest'

// 從 @testing-library/vue 引入測試工具
import { render, screen, fireEvent } from '@testing-library/vue'

// 引入我們要測試的元件
import BaseSelect from './BaseSelect.vue'

// 測試用 options props
const mockOptions = [
  { value: '', text: '請選擇...', disabled: true },
  { value: 'op1', text: '選項一' },
  { value: 'op2', text: '選項二' },
]

// 開始描述一組關於 BaseSelect 的測試
describe('BaseSelect', () => {

  // Case 1: 基本渲染測試
  it('should render the label and options correctly', () => {
    // 1. 渲染元件,傳入必要的 props
    render(BaseSelect, {
      props: {
        label: '測試選單',
        options: mockOptions,
      }
    })

    // 2. 標籤應該要被渲染出來
    expect(screen.getByText('測試選單')).toBeTruthy()

    // 3. 所有選項都應該被渲染出來
    // screen.getByRole 會找到 <select> 元素
    const select = screen.getByRole('combobox')
    expect(select.children.length).toBe(mockOptions.length)

    // 4. 選項的文字和值應該是正確的
    const option2 = screen.getByText('選項二')
    expect(option2).toBeTruthy()
    expect(option2.value).toBe('op2')
  })
這個測試確保了我們的 Select 能正確渲染所有選項。注意這裡使用 screen.getByRole('combobox') 來找到 select 元素,這是更語義化的方式。
Select 最重要的功能就是 v-model 雙向綁定,這個測試至關重要:
 // ... 接續上方程式碼

// Case 2: v-model 互動測試
  it('should emit update:modelValue on selection change', async () => {
    // 1. 渲染元件,並傳入一個初始的 v-model 值
    const { emitted } = render(BaseSelect, {
      props: {
        label: '測試選單',
        options: mockOptions,
        'onUpdate:modelValue': (e) => e, // 讓 emitted() 可以捕捉到事件
      }
    })

    // 2. 找到 select 元素和我們想選擇的選項
    const select = screen.getByLabelText('測試選單') // 透過 label 文字找到 select

    // 3. 模擬使用者互動:選擇「選項二」
    // fireEvent.update 或是 fireEvent.change 都可以
    await fireEvent.update(select, 'op2')

    // 4. 元件是否發出了 `update:modelValue` 事件
    expect(emitted()).toHaveProperty('update:modelValue')

    // 5. 發出的事件,其值是否為我們所選擇的 'op2'
    // emitted()['update:modelValue'] 是一個陣列,[0] 代表第一次觸發,[0] 代表第一個參數
    expect(emitted()['update:modelValue'][0][0]).toBe('op2')
  })
注意這裡的 'onUpdate:modelValue': (e) => e 是關鍵!沒有它,emitted() 就無法捕捉到事件。
確保禁用的選項真的無法被選擇:
// ... 接續上方程式碼

// Case 3: 禁用選項測試
  it('should have disabled options', () => {
    render(BaseSelect, {
      props: {
        label: '測試選單',
        options: mockOptions,
      }
    })

    // 找到那個被禁用的選項
    const disabledOption = screen.getByText('請選擇...')

    // 該選項的 disabled 屬性應該為 true
    expect(disabledOption.disabled).toBe(true)
  })
// ... 接續上方程式碼

// Case 4: Accessibility (a11y) 測試
it('should link label and select with for/id', () => {
    render(BaseSelect, {
      props: {
        label: '測試選單',
        options: mockOptions,
        id: 'custom-id-for-test' // 傳入一個固定的 id 以便測試
      }
    })

    const label = screen.getByText('測試選單')
    const select = screen.getByRole('combobox')

    // label 的 for 屬性 和 select 的 id 屬性應該一致
    expect(label.getAttribute('for')).toBe('custom-id-for-test')
    expect(select.id).toBe('custom-id-for-test')
  })
})
當基本測試都通過後,讓我們考慮一些更複雜的場景。
// ... 接續上方程式碼

  // Case 5: 測試多次選擇變化
  it('should handle multiple selection changes', async () => {
    const { emitted } = render(BaseSelect, {
      props: {
        label: '測試選單',
        options: mockOptions,
        'onUpdate:modelValue': (e) => e
      }
    })

    const select = screen.getByLabelText('測試選單')

    // 連續選擇不同選項
    await fireEvent.update(select, 'op1')
    await fireEvent.update(select, 'op2')
    await fireEvent.update(select, '')

    // 應該發出三次事件
    expect(emitted()['update:modelValue']).toHaveLength(3)

    // 驗證每次的值
    expect(emitted()['update:modelValue'][0][0]).toBe('op1')
    expect(emitted()['update:modelValue'][1][0]).toBe('op2')
    expect(emitted()['update:modelValue'][2][0]).toBe('')
  })

  // Case 6: 測試空選項陣列
  it('should handle empty options array', () => {
    render(BaseSelect, {
      props: {
        label: '空選單',
        options: []
      }
    })

    const select = screen.getByRole('combobox')
    expect(select.children.length).toBe(0)
  })

  // Case 7: 測試初始值設定
  it('should set initial value correctly', () => {
    render(BaseSelect, {
      props: {
        label: '測試選單',
        options: mockOptions,
        modelValue: 'op1'
      }
    })

    const select = screen.getByRole('combobox')
    expect(select.value).toBe('op1')
  })
最後我們來執行測試
npm run test
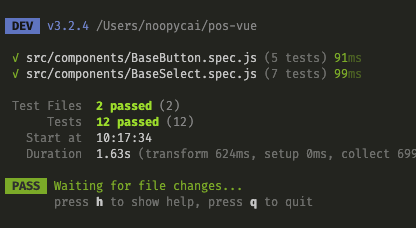
今天,我們為 BaseSelect 完成了全面的測試覆蓋。相較於 BaseButton,Select 的測試有其獨特之處:
有了這些測試,每當需要修改或擴充功能時,只要測試依然通過,我們就能確信沒有破壞既有功能。
明天,Day 12:[Componentの呼吸・伍之型] Card容器 - 資訊卡片元件製作。心を燃やせ 🔥!


 iThome鐵人賽