
在 Day 16 我們已經透過 Ingress NGINX 建立了 L7 規則的流量入口,但這還不夠。要讓外部流量真的打進來,還需要有 AWS 端的 Load Balancer。這就是今天的主角 —— AWS Load Balancer Controller (LBC)。
它的角色是:幫我們把 Kubernetes 的 Service / Ingress,對應到 AWS 上的 NLB / ALB。
雖然我們使用 Helm 這個工具來部署,但 AWS Load Balancer Controller 本質上是一個 Kubernetes Controller。它監控叢集中的 Ingress 與 Service(type=LoadBalancer),且基本上只做兩件事:
並且 LB Controller 會以 Pod 的形式跑在 cluster 中。簡單來說,它不是負載平衡器本身,而是把「K8s 資源」翻譯成「AWS Load Balancer」的橋樑。
至於什麼情境下要採用哪種 Load Balancer 的架構呢?我們可以從「誰當 ingress controller」的角度切入。當我們採用 ALB 時,等於將 ingress controller 設置為 ALB;這樣做的好處是,AWS 幫忙管理 ingress controller,不需要自己維護,不過同時這也代表我們能操控的彈性下降。至於如果我們採用 NLB,也就是將 nginx 等工具設置為 ingress controller 時,雖然管理上可能會有額外成本,但我們對於路由規則會有更高度的掌握,可以調整各式各樣的客製化規則。
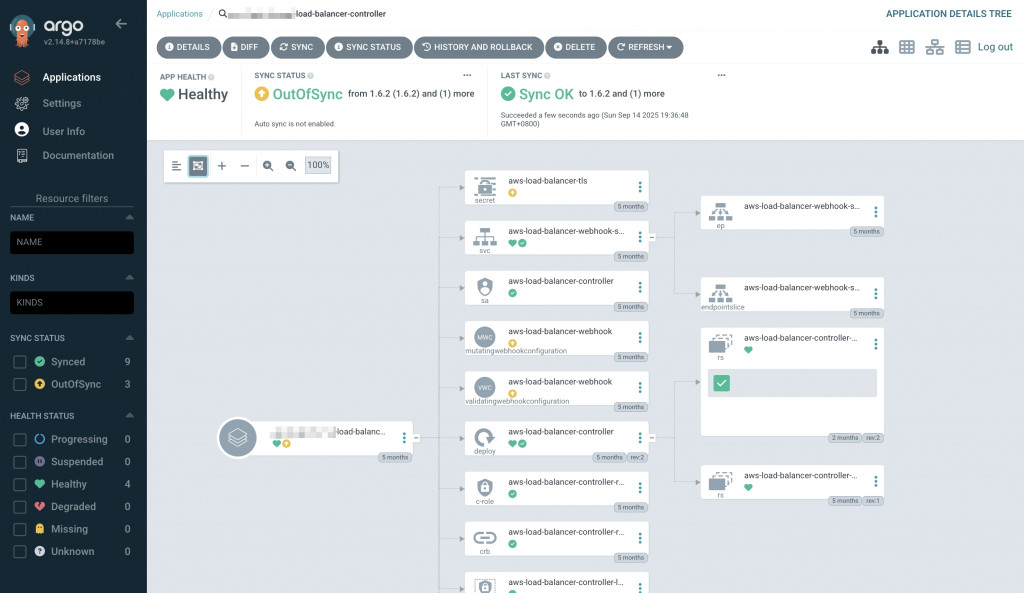
我們一樣用 ApplicationSet + Helm Chart 來部署 LB Controller:
apiVersion: argoproj.io/v1alpha1
kind: ApplicationSet
metadata:
  name: load-balancer-controller
  namespace: {{ .Values.applicationSetNs }}
spec:
  goTemplate: true
  goTemplateOptions: ["missingkey=error"]
  generators:
    - git:
        repoURL: {{ .Values.repoURL }}
        revision: main
        directories:
          - path: infra-charts/load-balancer-controller/*-internal
          - path: infra-charts/load-balancer-controller/in-cluster/*-internal
  template:
    metadata:
      name: '{{"{{"}} .path.basename {{"}}"}}-load-balancer-controller'
    spec:
      project: {{ .Values.project }}
      sources:
        - repoURL: 'https://aws.github.io/eks-charts'
          chart: aws-load-balancer-controller
          targetRevision: 1.6.2
          helm:
            releaseName: aws-load-balancer-controller
            valueFiles:
              - $sharedValues/infra-charts/load-balancer-controller/shared-values.yaml
              - $sharedValues/{{"{{"}} .path.path {{"}}"}}/values.yaml
        - repoURL: {{ .Values.repoURL }}
          targetRevision: main
          ref: sharedValues
      destination:
        name: '{{"{{"}} index .path.segments 2 {{"}}"}}'
        namespace: kube-system
  syncPolicy:
    preserveResourcesOnDeletion: true
🔑 注意:ApplicationSet 使用上有些特殊語法,基本 template 細節可以參考文件。另外我們採用的是 Git Generator,這個 generator 可用的參數也可以參考這篇文件。
此外,這邊的 value files 架構與昨天相同,因此不再贅述架構細節。我只會在程式碼裡面的註解,寫上需要注意的地方哦 O.<
Shared values 範例
replicaCount: 1
rbac:
  create: true
serviceAccount:
  create: true
  name: aws-load-balancer-controller

### 昨天在 ingress-nginx 部署時已指定為 nginx
createIngressClassResource: false
region: ap-northeast-1

### 我們讓 infra-charts 都會跑在 system nodes 上面
tolerations:
  - key: SystemOnly
    operator: Exists
podLabels:
  app: "aws-load-balancer-controller"
nodeSelector:
  usage: system
Cluster values 範例
replicaCount: 1
clusterName: example-internal

### 給定 LB Controller Role,因為他需要開 NLB 的權限
serviceAccount:
  annotations:
    eks.amazonaws.com/role-arn: arn:aws:iam::XXXXXXXXXXXX:role/load-balancer-controller
region: ap-northeast-1
vpcId: vpc-xxxxxxxxxxxxxxxxx
resources:
  requests:
    memory: 50Mi
在 Day 16 我們先留白,現在來補充:這些 annotation 是 LBC 判斷要怎麼建立 NLB 的「提示」,必須寫在 Service 本身,因為 Service(type=LoadBalancer) 才是聲明「要建外部 LB」的物件。
Shared values(跨叢集共用設定)
### 前兩項設定 external + internet-facing → 建立外部 NLB
service.beta.kubernetes.io/aws-load-balancer-type: external
service.beta.kubernetes.io/aws-load-balancer-scheme: internet-facing

### 透過 service 直送 Pod
service.beta.kubernetes.io/aws-load-balancer-nlb-target-type: ip

### TLS 在 NLB 終結(SSL ports=https),轉發給 NGINX 時用 HTTP
service.beta.kubernetes.io/aws-load-balancer-ssl-ports: "https"
service.beta.kubernetes.io/aws-load-balancer-backend-protocol: http

### 保留 client ip
service.beta.kubernetes.io/aws-load-balancer-target-group-attributes: preserve_client_ip.enabled=true
Cluster values(每個叢集差異設定)
### 指定 NLB 名稱(方便辨識)
service.beta.kubernetes.io/aws-load-balancer-name: example-internal
### 指定 NLB 落在哪些子網(public / private)
service.beta.kubernetes.io/aws-load-balancer-subnets: subnet-id1, subnet-id2
### 指定 ACM 憑證 ARN,讓 NLB 綁定 TLS 憑證
service.beta.kubernetes.io/aws-load-balancer-ssl-cert: arn:aws:acm:ap-northeaxxx
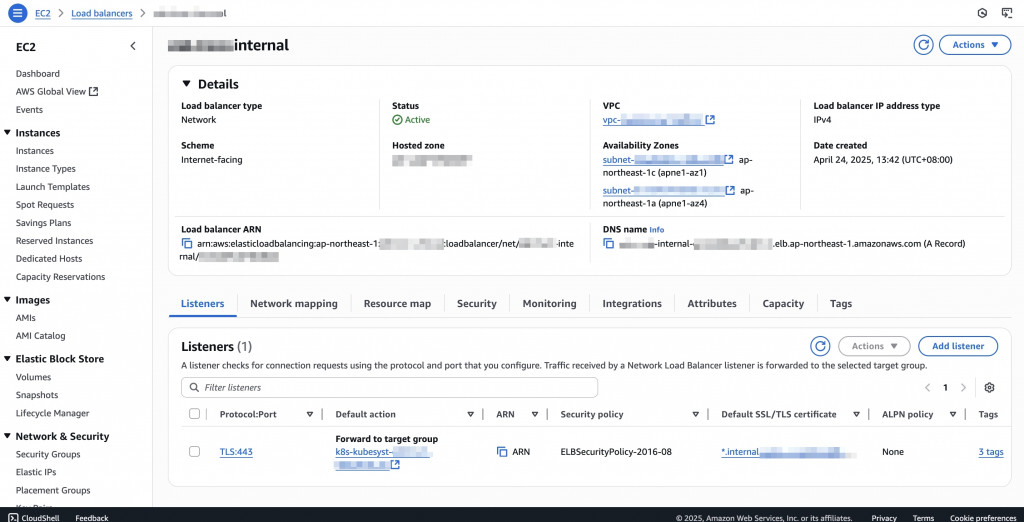
最後我們的 client request 流量會如下圖:

今天我們安裝了 AWS Load Balancer Controller,讓 Kubernetes 的 Ingress 與 Service 能自動對應到 AWS 的 ALB / NLB:
有了 LBC,流量不只進得來,還能正確落到 AWS 的 LB 上。
接下來在 Day 18,我們會介紹 ExternalDNS,讓 ALB / NLB 自動綁定 DNS,不需要再手動更新 Route53。
