在前面幾天,我們先後解決了多應用管理 (Day 13)、同一應用跨 cluster 部署 (Day 14),以及節點的自動供應 (Day 15) 等等基本的 cluster 架構管理議題。今天,我們要把鏡頭拉到「流量怎麼進到叢集裡」的問題。
稍微 recap 一下,在 Kubernetes 裡,Service 解決了 Pod IP 不穩定的問題(詳細可以看 Day 6 提過的 ClusterIP / LoadBalancer / ExternalName 的差別),而 Ingress 才是把外部流量導向正確 Service 的「規則」。但 Ingress 本身不是一個能接收請求的物件,它需要 Ingress Controller 來實作這些規則。
今天的主角 Ingress NGINX,就是最常見的 L7 Ingress Controller。
在深入介紹之前,想先聊一下基本的概念。很多人會因為功能相似,而把 Reverse Proxy、API Gateway、Load Balancer 混為一談,其實它們強調的重點不同:
- Reverse Proxy 的核心在於「隱藏後端伺服器」,把所有請求先集中到代理上,再決定要轉給誰
- API Gateway 的重點是「統一進入點」,除了代理轉發之外,還會負責認證、流控、版本管理等 API 管理能力
- Load Balancer 則是專注在「分配流量」,確保多個後端之間的流量能均衡分散。
像 NGINX 這類工具,本身就能同時扮演這三種角色,但我們在討論時,要意識到這些名詞分別指涉的概念與職責,而不是單純的產品名稱。而在 Kubernetes 的世界裡,Ingress Controller 就是利用這些概念來實現 Ingress 規則的導流與控制。
Ingress NGINX 是 Kubernetes 世界裡最常見的 Ingress Controller,負責把 Ingress 資源中的 L7 規則(例如 Hostname、Path、Header)實際落地成可運作的反向代理設定。換句話說,它就是那個「執行規則的人」。
換句話說,它是把「叢集內的服務」和「外部使用者」銜接起來的第一道橋樑。
當然,Ingress Controller 並不只有 Ingress NGINX 一個選擇。像 Traefik、HAProxy Ingress、甚至雲廠商提供的 ALB Ingress Controller 都能勝任類似角色。不同工具在性能、功能擴充性、整合性上各有優劣。例如 Traefik 除了基本的 L7 路由外,還內建簡單的 API Gateway 功能。
我們延續 Day 14 / Day 15 的 Helm Manager 架構,把 Ingress NGINX 也納入 infra chart 之中。以下是 ApplicationSet 的範例:
apiVersion: argoproj.io/v1alpha1
kind: ApplicationSet
metadata:
  name: ingress-nginx
  namespace: {{ .Values.applicationSetNs }}
spec:
  goTemplate: true
  goTemplateOptions: ["missingkey=error"]
  generators:
    - git:
        repoURL: {{ .Values.repoURL }}
        revision: main
        directories:
          - path: infra-charts/ingress-nginx/*-internal
          - path: infra-charts/ingress-nginx/in-cluster/*-internal
  template:
    metadata:
      name: '{{"{{"}} .path.basename {{"}}"}}-ingress-nginx'
    spec:
      project: {{ .Values.project }}
      sources:
        - repoURL: 'https://kubernetes.github.io/ingress-nginx'
          chart: ingress-nginx
          targetRevision: 4.9.0
          helm:
            valueFiles:
              - $sharedValues/infra-charts/ingress-nginx/shared-values.yaml
              - $sharedValues/{{"{{"}} .path.path {{"}}"}}/values.yaml
        - repoURL:  {{ .Values.repoURL }}
          targetRevision: main
          ref: sharedValues
      destination:
        name: '{{"{{"}} index .path.segments 2 {{"}}"}}'
        namespace: kube-system
  syncPolicy:
    preserveResourcesOnDeletion: true
🔑 注意:ApplicationSet 使用上有些特殊語法,基本 template 細節可以參考文件。另外我們採用的是 Git Generator,這個 generator 可用的參數也可以參考這篇文件。
今天我們的 Helm chart source 採用的是現成的 chart,不是我們自己客製的。但就算這樣,我們還是希望可以寫一個 shared-values.yaml 作為所有 Application 生成的基本設定。因此,我們參考了這篇文件的設定,讓我們可以同時可以設定多個 sources,來達到 shared value 的效果。
另外也要特別注意的是,我們會先寫 shared value 的路徑,再寫 cluster value 的路徑;因為對 ArgoCD 來說,valueFiles 這個欄位是有序的,也就是比較後面的 value file、會覆蓋掉前面的 value file。
架構回顧:我們用 Service(type=LoadBalancer) 把 Ingress NGINX 對外暴露,AWS Load Balancer Controller 看到這個 Service 會自動幫我們建 NLB。配置如前一段所述,會分成 shared-values.yaml 以及 /<cluster>/values.yaml,細節如下:
shared-values.yaml(共用)
# https://artifacthub.io/packages/helm/ingress-nginx/ingress-nginx/4.9.0
controller:
  name: nginx
  containerName: nginx
  # force http requests become https requests
  addHeaders:
    Content-Security-Policy: upgrade-insecure-requests
  allowSnippetAnnotations: true
  ingressClassResource:
    name: nginx
    enabled: true
    default: true
  ingressClass: nginx
  kind: Deployment
  tolerations:
    - key: SystemOnly
      operator: Exists

  service:
    enabled: true
    type: LoadBalancer
    enableHttp: false
    enableHttps: true
    annotations:
	    ### Load Balancer Controller 相關,明天再詳細介紹
      service.beta.kubernetes.io/aws-load-balancer-xxx: xxx
      service.beta.kubernetes.io/aws-load-balancer-yyy: yyy
    external:
      enabled: true
    externalTrafficPolicy: Local
    ### 搭配 NLB 做 TLS 終結 → 解密後以 HTTP 丟到 ingress-nginx
    targetPorts:
      https: http
  metrics:
    enabled: true
    service:
      annotations:
	      ### 允許 Prometheus 用 scrape annotation 直接抓 metrics
	      ### 還沒安裝 Prometheus Operator 時使用
        prometheus.io/scrape: "true"
        prometheus.io/port: "10254"
    serviceMonitor:
      ### 先安裝 Prometheus CRD monitoring.coreos 再 enable service monitor
      ### 給 Prometheus Operator 看,讓他自動抓 ingress-nginx 的 metrics
      enabled: false
      additionalLabels:
        release: "kube-prometheus-stack"

serviceAccount:
  create: true
  name: ingress-nginx
  automountServiceAccountToken: true
在這份 shared-values.yaml 裡,我們主要做了幾件事:
nginx 的 IngressClass 並設為 default,讓沒有指定 IngressClass 的規則自動由它處理;同時讓 snippet annotations、並加上 toleration 讓它能排程到身上打著 system taint 的節點。type=LoadBalancer 搭配 AWS Load Balancer Controller,幫我們自動生成 NLB,並強制所有流量走 HTTPS(含 idle timeout、client IP 保留、NLB TLS 終結等設定);差異像 NLB 是要內網還是外網、ACM 憑證 ARN,則放在每個叢集的 values 去覆寫。透過這樣的設定,Ingress NGINX 就能在多叢集環境中統一以 NLB 對外暴露,同時保留靈活性(例如 TLS 終結位置、NLB scheme)可在叢集層級調整。
/<cluster>/values.yaml(各叢集差異)
# infra-charts/ingress-nginx/example-internal/values.yaml
controller:
  service:
    loadBalancerSourceRanges: []
    annotations:
      ### Load Balancer Controller 相關,明天再詳細介紹
      service.beta.kubernetes.io/aws-load-balancer-ssl-cert: [aws-acm-arn]
      service.beta.kubernetes.io/aws-load-balancer-xxx: xxx
  config:
    whitelist-source-range: xxx.xx.xx.xx/32, xxx.xx.xx.yy/32, xxx.xx.xx.zz/32
  metrics:
    # install CRD monitoring.coreos first then enable service monitor
    serviceMonitor:
      enabled: true
  resources:
    requests:
      memory: 160Mi
在這個 cluster 專屬的 value file 中,我們定義了 LB Controller 會用到的一些 annotation,像是 ACM arn 等。將這個 value file 放到 repo 後,ApplicationSet(git 目錄 generator) 會自動偵測到 /<cluster>/values.yaml,在對應叢集生成一個 ingress-nginx Application。
幾個重點
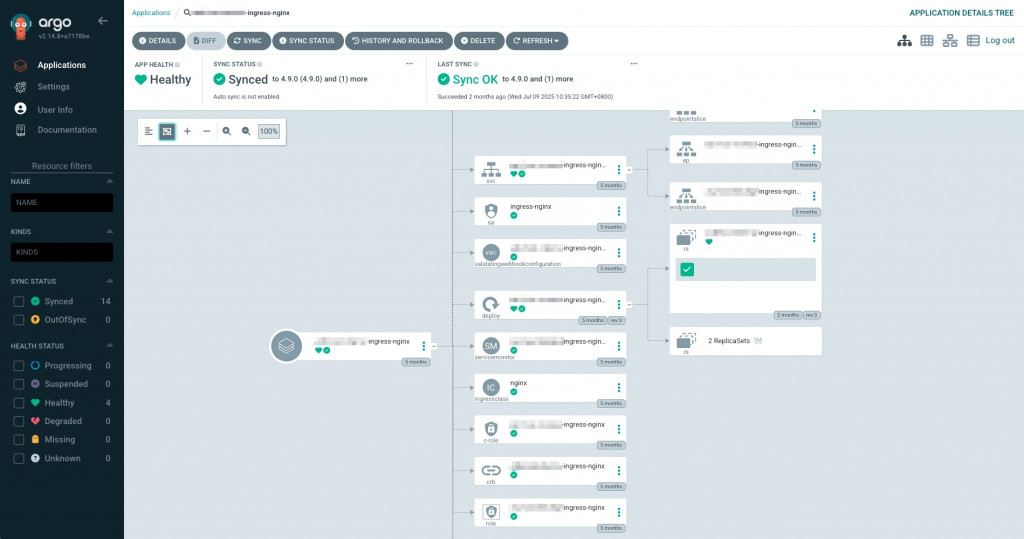
今天我們安裝了 Ingress NGINX,把叢集的流量入口建構了起來:
節點有了 Karpenter,流量入口有了 Ingress NGINX,叢集的基礎就越來越完整。
在 Day 17,我們會繼續探討 AWS Load Balancer Controller,它會把 Kubernetes 的 Service / Ingress 與雲端的 ALB / NLB 做整合,讓流量不只進得來,還能對應到正確的 AWS 負載平衡器。

