在這篇文章,我要把還沒出生的後端專案建置起來,並且確認與資料庫串接、能夠正確處理基本的資料存取
前一天我已經把資料庫架設好,並且把兩張基本的資料表都新增了,以此為基礎我要來建置後端專案,並且新增兩個基本功能來測試資料庫串接是否正常。
我打算新增兩個基本功能來測試:新增活動及查詢所有活動
今天要完成的事情:
## 技術棧

 **Java 17**
- **Spring Boot 3.2.0**
- **Spring Data JPA**
- **PostgreSQL**
- **Maven**
- **Docker**
- **Springdoc OpenAPI (Swagger)**
- **Lombok**
- **IntelliJ IDEA**
開始:
首先創建一個新的專案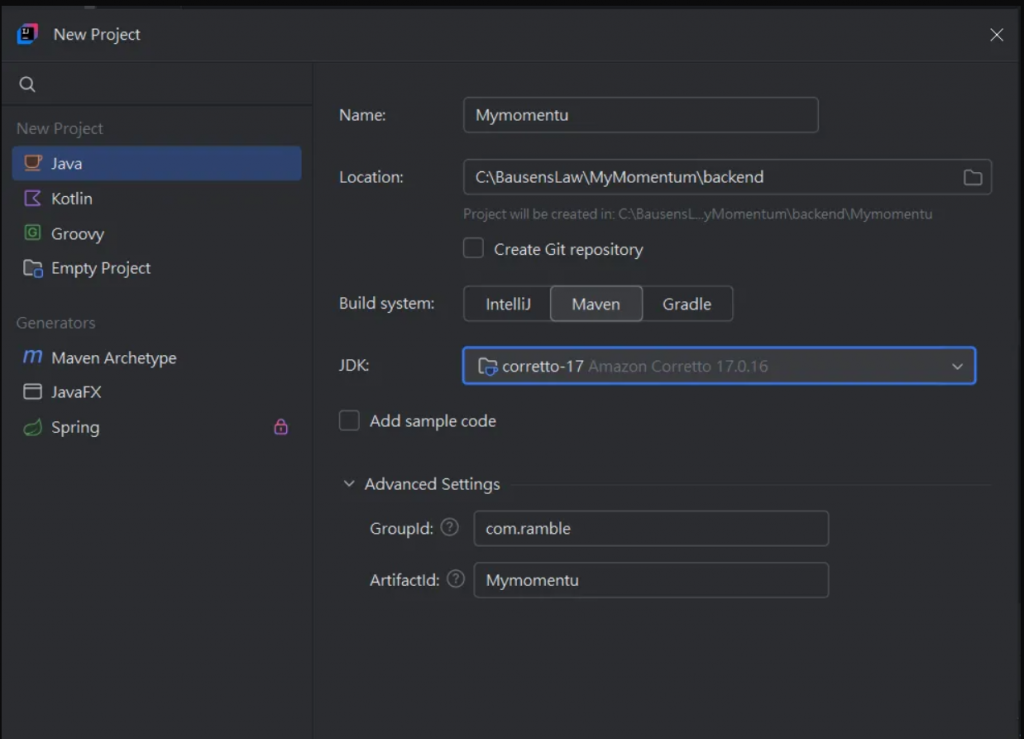
application.yml 設定(資料庫設定):
spring:
  application:
    name: mymomentum

  datasource:
    url: jdbc:postgresql://localhost:5432/mymomentumdb
    username: mymomentum
    password: secret123
    driver-class-name: org.postgresql.Driver

  jpa:
    hibernate:
      ddl-auto: update
    show-sql: true
    properties:
      hibernate:
        dialect: org.hibernate.dialect.PostgreSQLDialect
        format_sql: true
    database-platform: org.hibernate.dialect.PostgreSQLDialect

server:
  port: 8080

logging:
  level:
    org.hibernate.SQL: DEBUG
    org.hibernate.type.descriptor.sql.BasicBinder: TRACE
    com.ramble.mymomentum: DEBUG

# OpenAPI/Swagger Configuration
springdoc:
  api-docs:
    path: /api-docs
  swagger-ui:
    path: /swagger-ui.html
    operations-sorter: method
  info:
    title: MyMomentum API
    description: Super momentum management API
    version: 1.0.0
    contact:
      name: Ramble Team
簡單挑一些比較重要的說明一下:
資料庫連線設定
  datasource:
    url: jdbc:postgresql://localhost:5432/mymomentumdb
    username: mymomentum
    password: secret123
    driver-class-name: org.postgresql.Driver
這段設定了我架在本機的資料庫,指定JDBC driver 連接
JPA / Hibernate 設定
  jpa:
   hibernate:
     ddl-auto: update
   show-sql: true
   properties:
     hibernate:
       dialect: org.hibernate.dialect.PostgreSQLDialect
       format_sql: true
   database-platform: org.hibernate.dialect.PostgreSQLDialect
ddl-auto: update:每次啟動專案時會自動根據 Entity 同步資料表show-sql: true:在 console 顯示執行的 SQLformat_sql: true:讓 SQL 看起來比較容易閱讀 (如下圖)dialect:指定 Hibernate 產生 PostgreSQL 兼容的 SQL 語法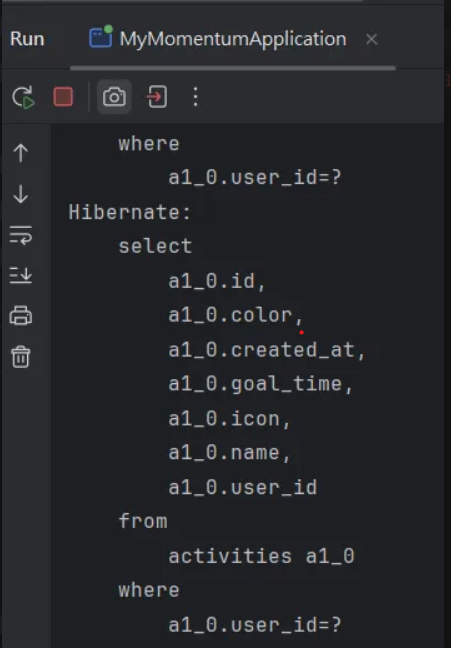
Swagger / OpenAPI 設定
springdoc:
 api-docs:
   path: /api-docs
 swagger-ui:
   path: /swagger-ui.html
   operations-sorter: method
 info:
   title: MyMomentum API
   description: Super momentum management API
   version: 1.0.0
   contact:
     name: Ramble Team
Swagger是一個可以自動生成文檔、並能在瀏覽器中直接測試API的工具
過往使用Postman 測試的後端工程師可以不用那麼麻煩,後面會實作一次,真的很方便!
依賴跟基本設定都好了之後,可以來實作新增活動及查詢所有活動的功能
我們要
建立Entity與Repository 乃至Service的部分,主要是一些基礎的CRUD功能及簡單的封裝JPA存取,這裡就不贅述
直接看Controller
Controller
@RestController
@RequestMapping("/api/activities")
@RequiredArgsConstructor
@Slf4j
@Tag(name = "Activity Management", description = "活動管理")
public class ActivityController {

    private final ActivityService activityService;

    @PostMapping
    @Operation(
        summary = "創建新活動",
        description = "為指定用戶創建新活動"
    )
    @ApiResponses(value = {
        @ApiResponse(
            responseCode = "201",
            description = "活動創建成功",
            content = @Content(schema = @Schema(implementation = Activity.class))
        ),
        @ApiResponse(
            responseCode = "400",
            description = "Bad request - 活動名稱已存在"
        )
    })
    public ResponseEntity<Activity> createActivity(
            @Parameter(description = "用戶ID", example = "123e4567-e89b-12d3-a456-426614174000")
            @RequestParam UUID userId,
            @RequestBody CreateActivityRequest request) {

        log.info("Creating activity for user: {}", userId);
        Activity createdActivity = activityService.createActivity(userId, request);
        return ResponseEntity.status(HttpStatus.CREATED).body(createdActivity);
    }

    @GetMapping
    @Operation(
        summary = "獲取用戶的所有活動",
        description = "獲取指定用戶的所有活動"
    )
    @ApiResponses(value = {
        @ApiResponse(
            responseCode = "200",
            description = "活動獲取成功",
            content = @Content(schema = @Schema(implementation = Activity.class))
        )
    })
    public ResponseEntity<List<Activity>> getActivities(
            @Parameter(description = "用戶ID", example = "123e4567-e89b-12d3-a456-426614174000")
            @RequestParam UUID userId) {

        log.info("Fetching activities for user: {}", userId);
        List<Activity> activities = activityService.getActivitiesByUserId(userId);
        return ResponseEntity.ok(activities);
    }
}
這邊要特別針對與swagger有關的註解說明一下,因為比較少見(應該吧?)
@Tag(name = "Activity Management", description = "活動管理")
public class ActivityController {
該Controller的簡介
@Operation(
    summary = "創建新活動",
    description = "為指定用戶創建新活動"
)
該API的標題與描述
@ApiResponses(value = {
    @ApiResponse(
        responseCode = "201",
        description = "活動創建成功",
        content = @Content(schema = @Schema(implementation = Activity.class))
    ),
    @ApiResponse(
        responseCode = "400",
        description = "Bad request - 活動名稱已存在"
    )
})
對可能的HTTP狀態碼進行描述
@Schema(implementation = Activity.class)
回傳的資料結構
@Parameter(description = "用戶ID", example = "123e4567-e89b-12d3-a456-426614174000")
@RequestParam UUID userId
說明參數的內容並且給一個範例
以上所有註解都與Swagger有關,到時候在”文件” 頁面就會有個非常詳細的文件頁。
測試:
把系統跑起來後,造訪:http://localhost:8080/swagger-ui/index.html 將會看到我們設定了很久的Swagger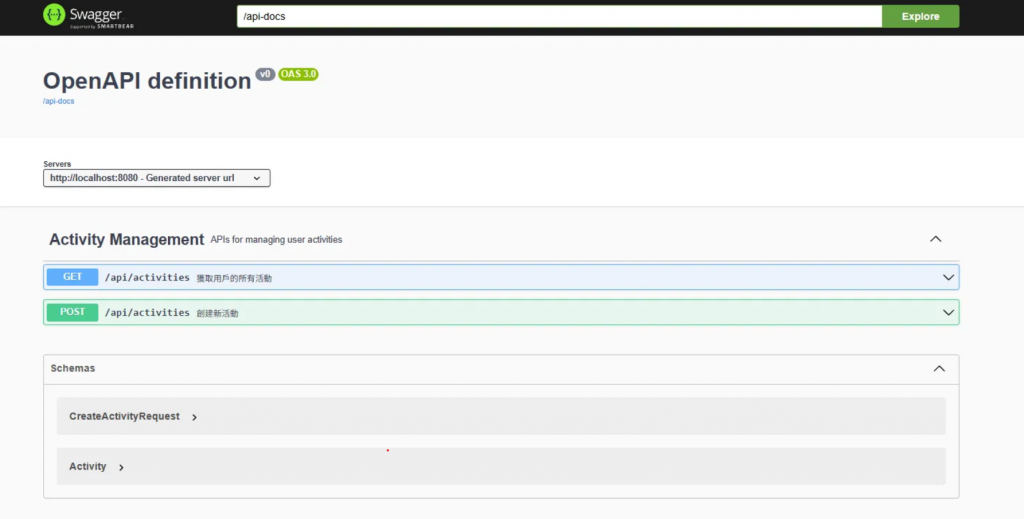
進入測試環節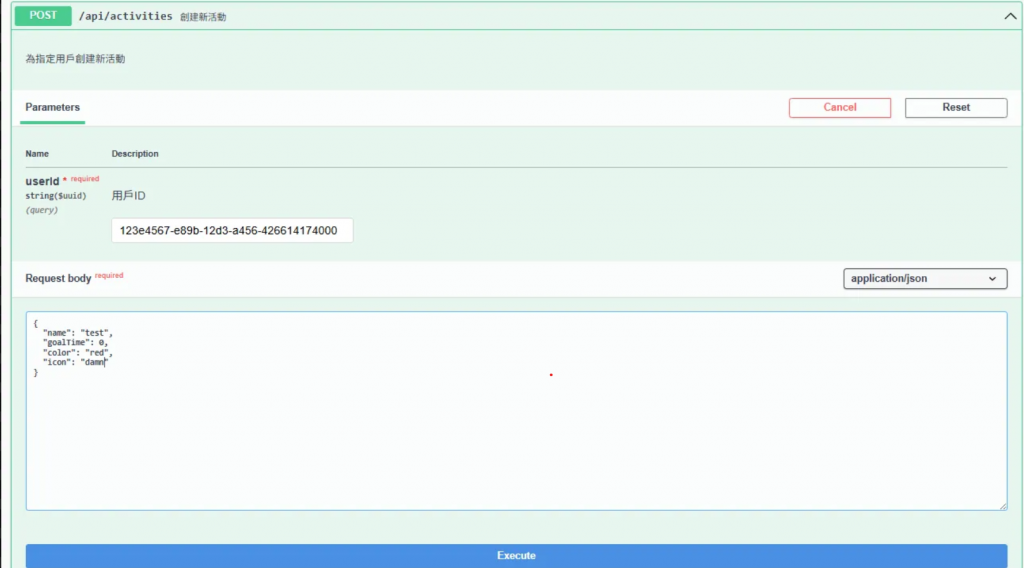
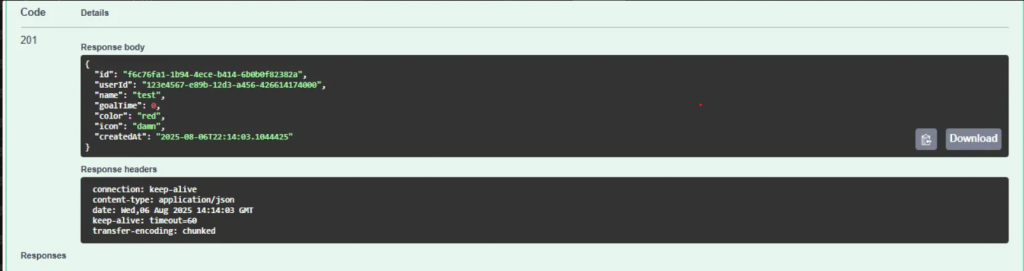

回傳201 並且資料庫成功新增資料
那麼以上就完成了今天計畫的內容,有些我覺得理所當然的內容/程式碼就沒有細講,因為這篇的重點是後端建置與資料庫串接,預期接下來開始做一些比較重要的內容。

