n8n-test)、選你的 workspace。ntn_xxx...),先複製好。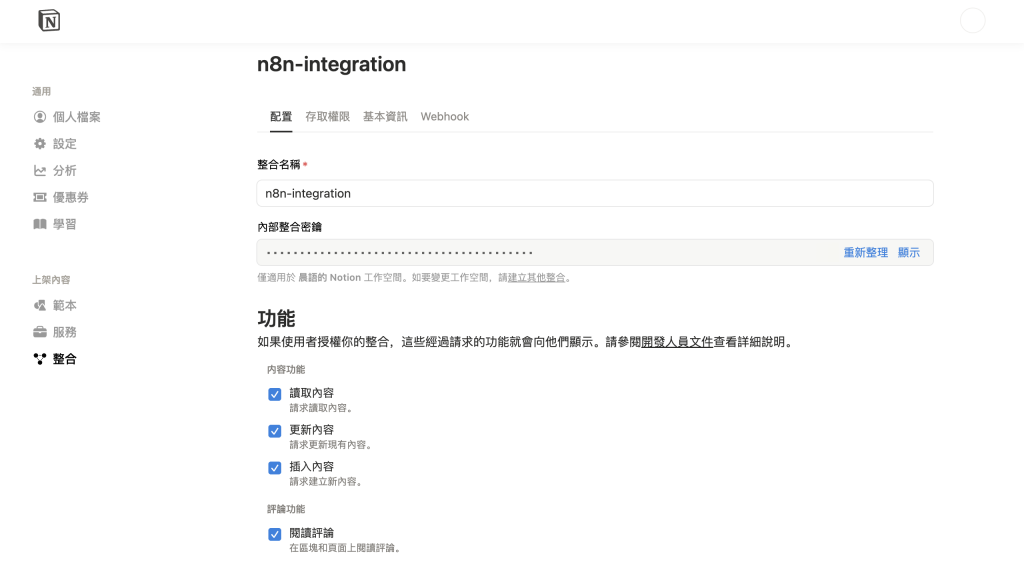
n8n-test)。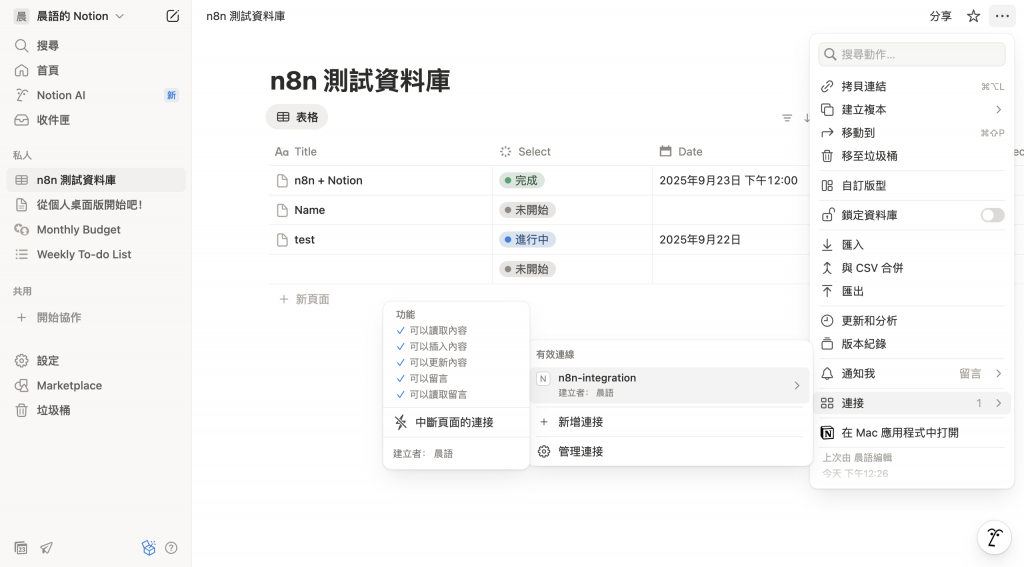
ntn_xxx...。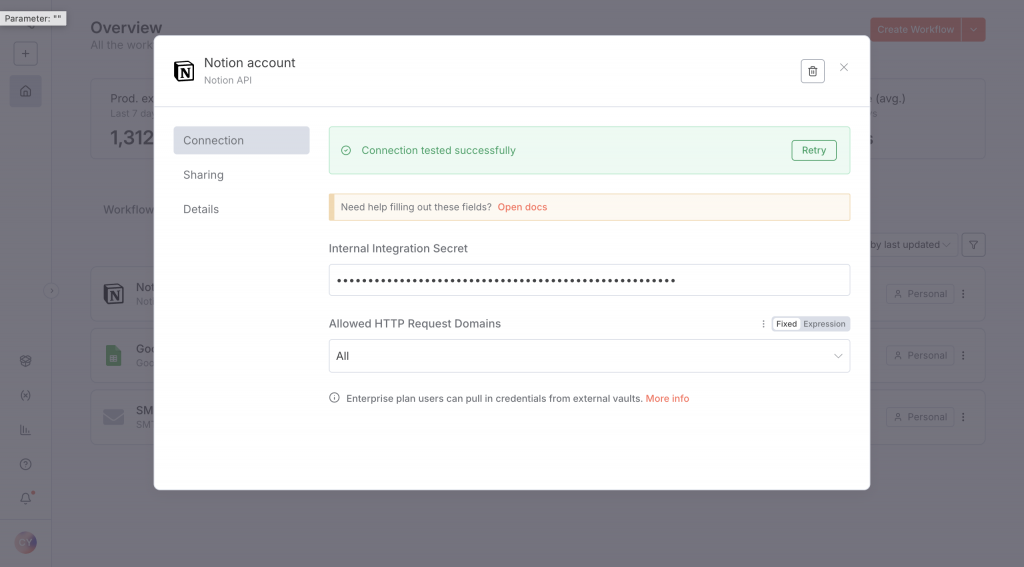
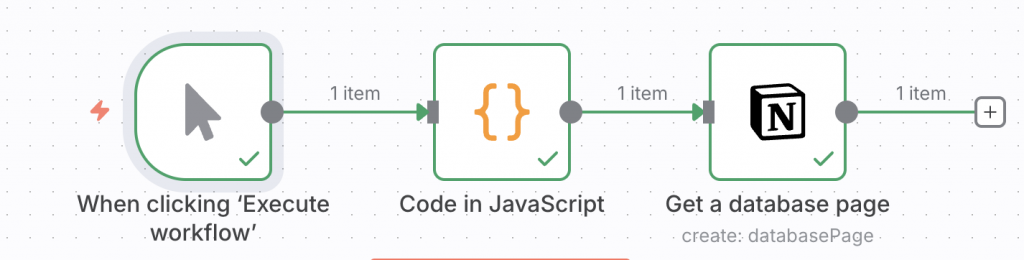
新增 Manual Trigger node:
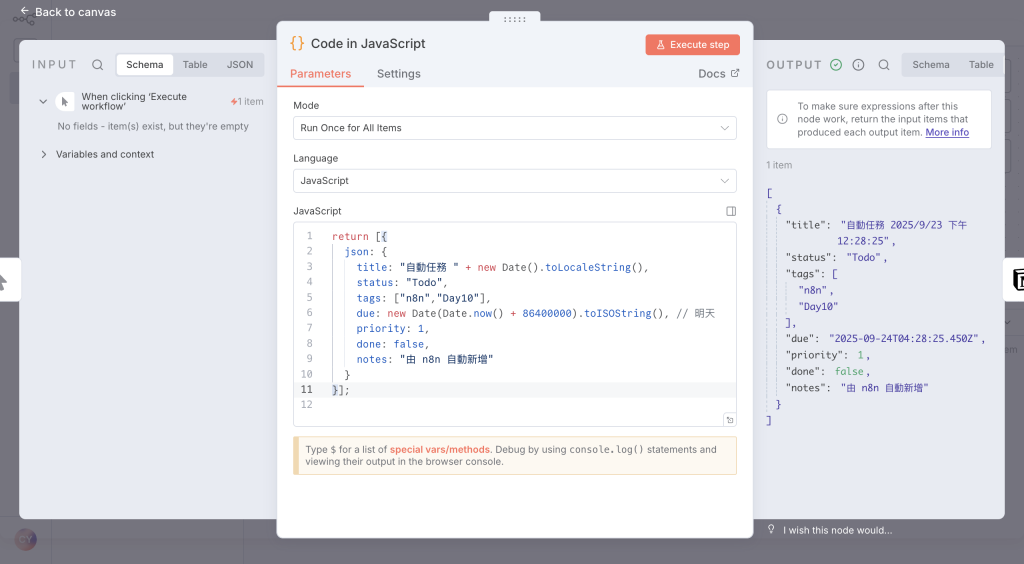
新增 Function node:
return [{
  json: {
    title: "自動任務 " + new Date().toLocaleString(),
    status: "Todo",
    tags: ["n8n","Day10"],
    due: new Date(Date.now() + 86400000).toISOString(), // 明天
    priority: 1,
    done: false,
    notes: "由 n8n 自動新增"
  }
}];
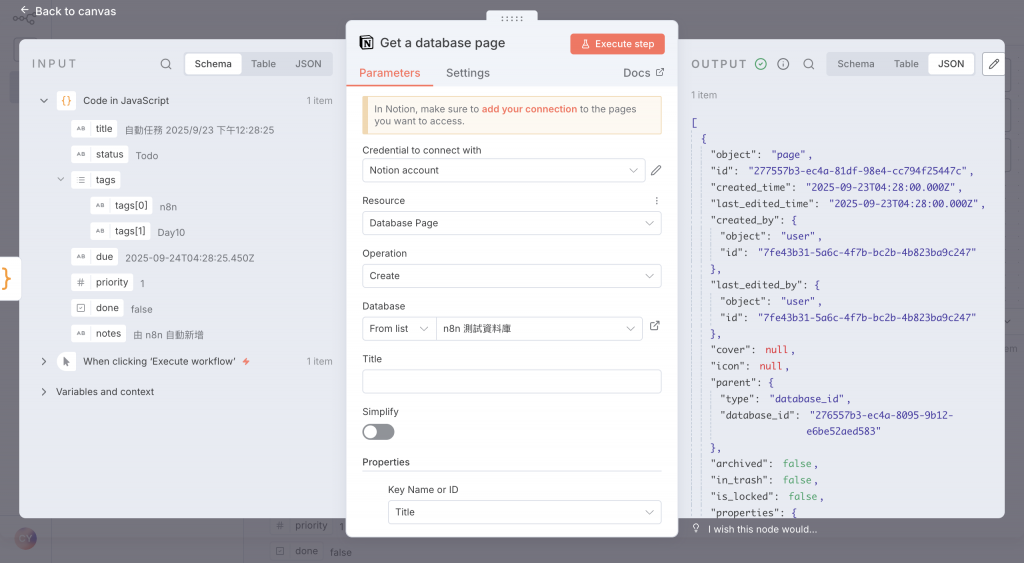
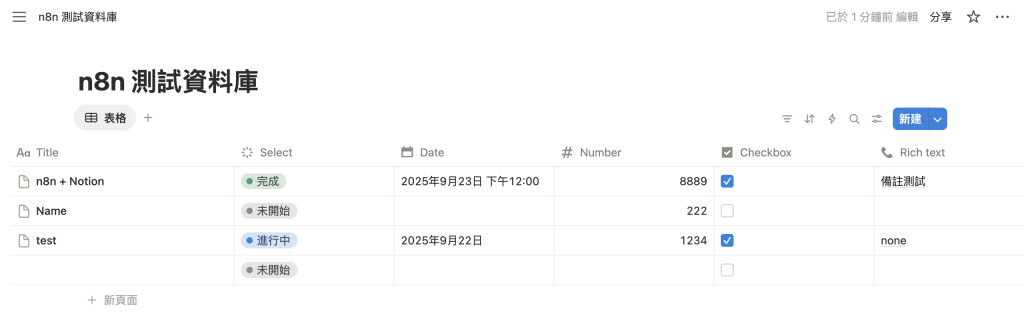
3. 新增 Notion node:
Resource 選 Page
Operation 選 Create
Credential 選剛建好的 Notion
Database ID 貼上你 Notion database 的 id(網址中間那串 UUID)
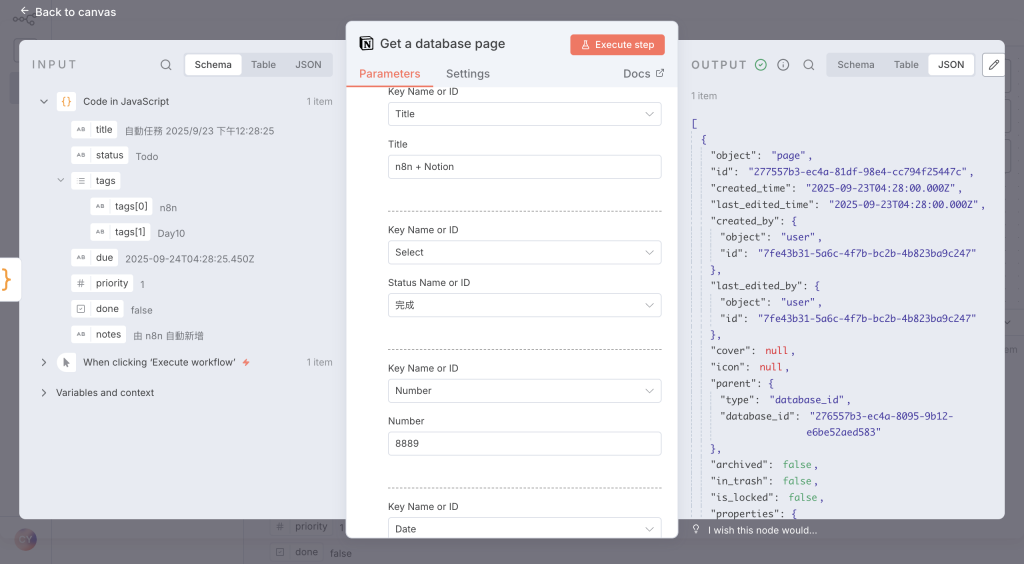
Properties Mapping:
Name (Title) → ={{$json["title"]}}
Status (Select) → ={{$json["status"]}}
Tags (Multi-select) → ={{$json["tags"]}}
Due (Date) → ={{$json["due"]}}
Priority (Number) → ={{$json["priority"]}}
Done (Checkbox) → ={{$json["done"]}}
Notes (Rich text) → ={{$json["notes"]}}


 iThome鐵人賽