Taipei,或直接放 latitude / longitude)https://geocoding-api.open-meteo.com/v1/search?name={{city}}&count=1 → 取得 lat/lon台北 現在溫度 25°C,風速 3.5 m/s)並回傳(在 Execution Log 查看)在 Terminal 執行:
n8n start
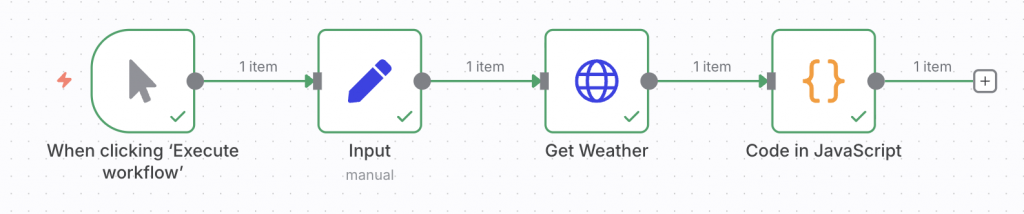
Workflows → New,命名:Day14_Weather_API
+ → 搜尋 Manual Trigger,新增。在 Manual Trigger 右側 + → 搜尋 Set,新增節點名稱 Input。
在 Values 加欄位:
latitude 與 longitude(Number)例如:25.0330, 121.5654
儲存。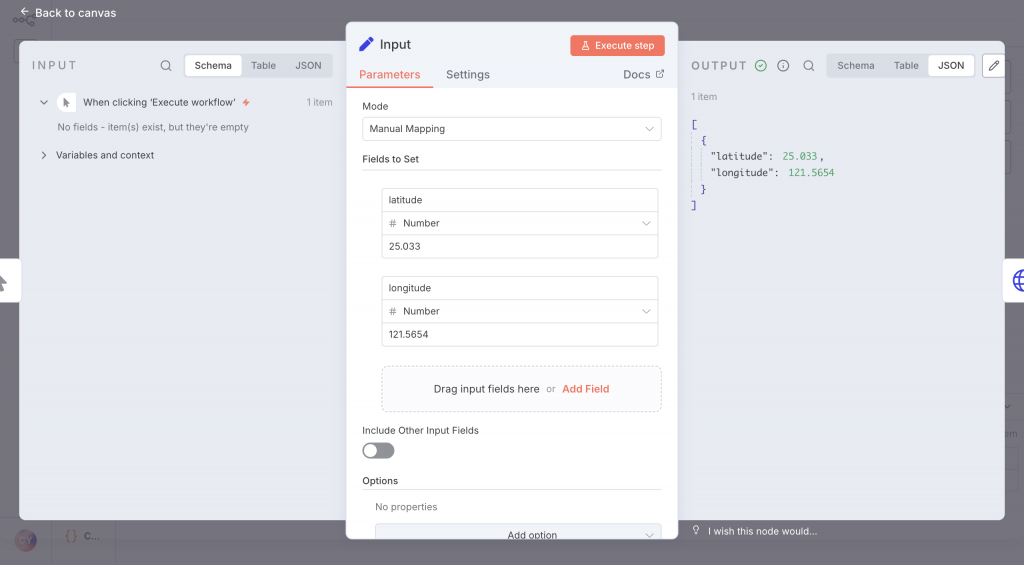
新增一個 HTTP Request node,命名 Get Weather。
設定 URL(使用 Expression):
https://api.open-meteo.com/v1/forecast?latitude={{ $json["latitude"] }}&longitude={{ $json["longitude"] }}¤t_weather=true&timezone=Asia%2FTaipei

說明:current_weather=true 會回傳 current_weather 物件(含 temperature, windspeed, winddirection, weathercode)。timezone 指輸出時間區域。
3. HTTP Method:GET
4. 連線:如果用 Geocoding,請把 Geocoding → Get Weather 連起來;若直接用 Set,連 Input → Get Weather。
5. 點 Execute Node 測試。你會在 Output 頁籤看到 JSON,範例(節錄):
   [
  {
    "latitude": 25,
    "longitude": 121.625,
    "generationtime_ms": 0.03039836883544922,
    "utc_offset_seconds": 28800,
    "timezone": "Asia/Taipei",
    "timezone_abbreviation": "GMT+8",
    "elevation": 12,
    "current_weather_units": {
      "time": "iso8601",
      "interval": "seconds",
      "temperature": "°C",
      "windspeed": "km/h",
      "winddirection": "°",
      "is_day": "",
      "weathercode": "wmo code"
    },
    "current_weather": {
      "time": "2025-09-27T20:15",
      "interval": 900,
      "temperature": 28,
      "windspeed": 7.6,
      "winddirection": 87,
      "is_day": 0,
      "weathercode": 1
    }
  }
]
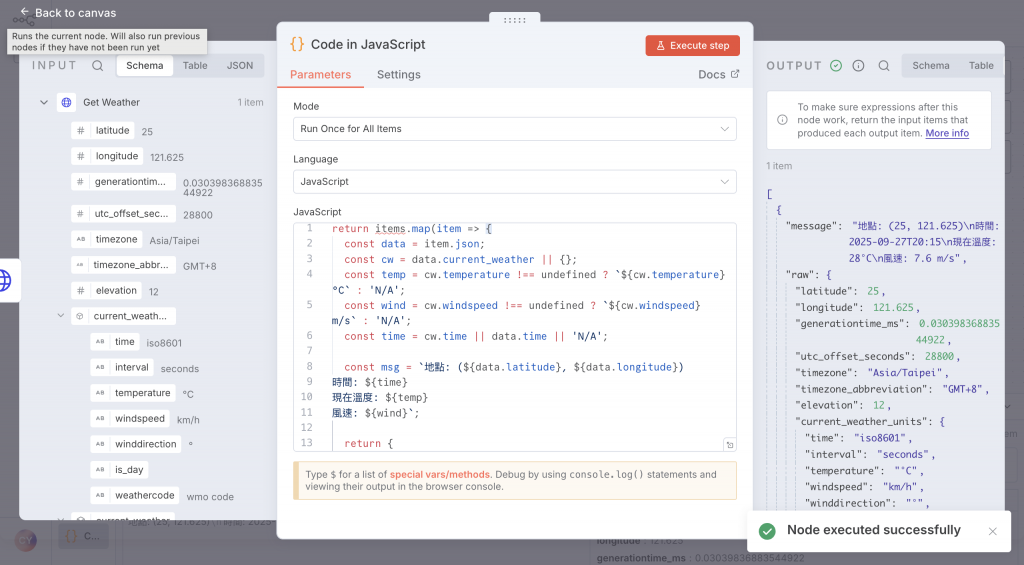
Get Weather 右側新增 Function 節點,命名 Format Message。// 取第一筆 item(HTTP Request 傳回的資料)
return items.map(item => {
const data = item.json;
const cw = data.current_weather || {};
const temp = cw.temperature !== undefined ? `${cw.temperature}°C` : 'N/A';
const wind = cw.windspeed !== undefined ? `${cw.windspeed} m/s` : 'N/A';
const time = cw.time || data.time || 'N/A';
// 你也可以根據 weathercode 顯示文字,這裡用簡單示範
const msg = `地點: (${data.latitude}, ${data.longitude})\n時間: ${time}\n現在溫度: ${temp}\n風速: ${wind}`;
return {
json: {
message: msg,
raw: data
}
};
});
3. 將 Get Weather → Format Message 連起來。
4. 點 Execute Workflow。
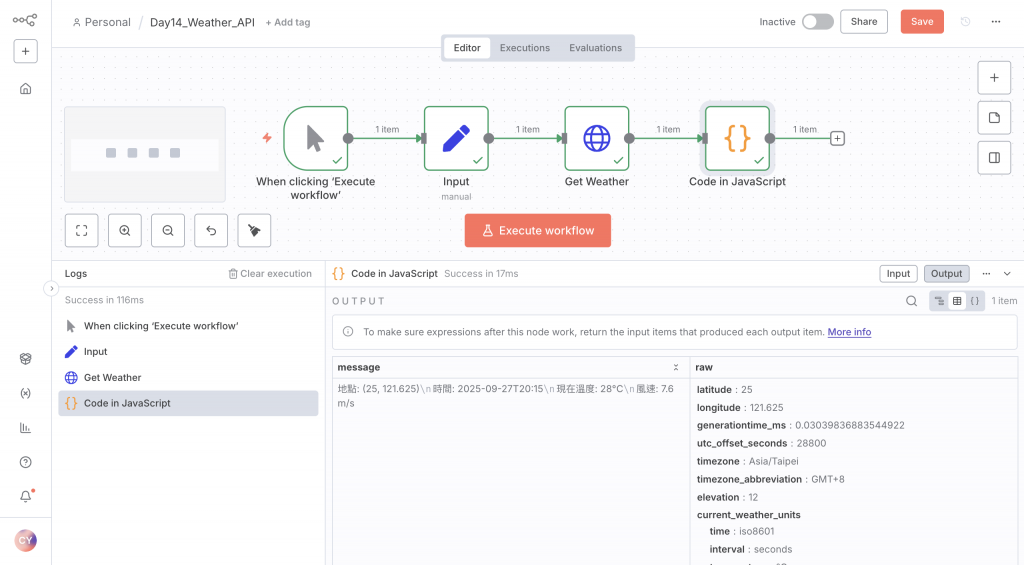
5. 在 Execution Log 裡,展開 Format Message 的 Output → JSON,你會看到 message 欄位。
點右側或上方的 Executions(或在 node 上按 Execution icon),找到剛剛的執行紀錄,點開逐節點查看 Input / Output JSON。
Format Message 的 message 欄會是可讀字串,例如:
地點: (25, 121.625)
時間: 2025-09-27T20:15
現在溫度: 28°C
風速: 7.6 m/s


 iThome鐵人賽