目標:外部系統用 HTTP POST 把資料送到你的 n8n webhook,n8n 將資料處理並自動 Append row 到 Google Sheets,最後給呼叫者一個回應(成功/失敗)。
n8n 能啟動並開在 http://localhost:5678(或你自架的域名)。
你已在 Day8 設定好 Google Sheets 的 Credential(OAuth 或 Service Account)且具有寫入權限。
創建一個 Google Sheet,第一列為欄位標題,例如:
ID | Name | Email | Message | CreatedAt
Workflow 節點順序:
Webhook (POST) → Function (normalize) → Google Sheets (Append row) → Respond to Webhook (或 Webhook Wait)
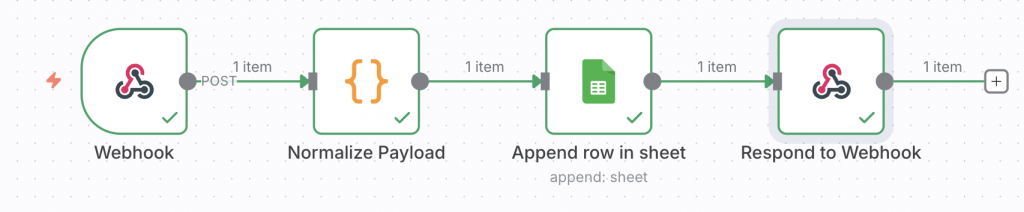
Workflows → New,命名 Day17_Webhook_To_Sheet,然後 Save。新增 Webhook node:
POST
form-submit(或你自定義)None(測試用;正式請設 API key 或簽章)Wait for Execution(希望在處理完再把結果回傳給發送端)按 Save,點 Listen for test event(或不按,若要 Activate 作生產)
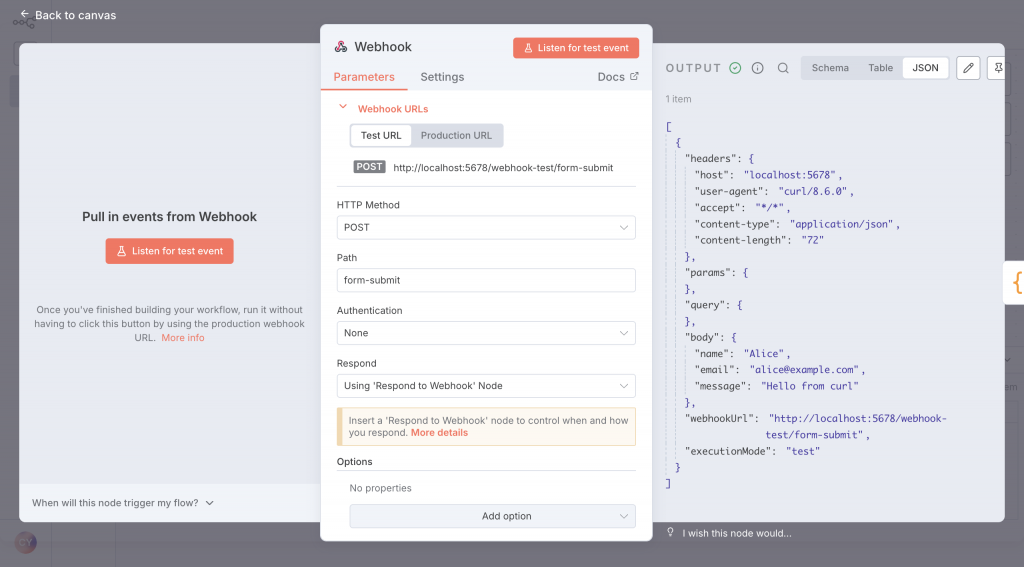
之後 Test URL 顯示類似:
http://localhost:5678/webhook-test/form-submit或http://localhost:5678/webhook/form-submit(視 n8n 版本)
Function node,命名 Normalize Payload,把 Webhook 連到此 node。// Normalize incoming JSON to fixed fields and generate ID + createdAt
return items.map(item => {
const body = item.json || {};
const name = body.name || body.fullname || '';
const email = body.email || body.mail || '';
const message = body.message || body.msg || body.content || '';
const id = body.id || `${Date.now()}-${Math.random().toString(36).slice(2,6)}`;
const createdAt = new Date().toISOString();
// output values array (順序須對應 Google Sheet 的欄位)
return {
json: {
id,
name,
email,
message,
createdAt,
// 傳給 Sheets node 的格式(陣列)
values: [id, name, email, message, createdAt]
}
};
});

說明:我們把資料統一成
id,name,email,message,createdAt,並在json.values放一個陣列,方便後續直接用{{$json["values"]}}傳到 Sheets。
新增 Google Sheets node,連接 Normalize Payload → Google Sheets。
設定重點:
Credential:選你已建立的 Google Sheets 憑證。
Resource / Operation:選 Append row in sheet(或版本中相似名稱)。
Document:選 By URL → 貼入你的 Google Sheet 網址(或選 From list)。
Sheet:選分頁名稱(例如 Sheet1 或 Form Responses 1)。
Row Values:輸入 Expression:
{{ $json["values"] }}
(或依版本把每個 cell 分別用 {{$json["id"]}}、{{$json["name"]}} 等填入)
儲存 node。
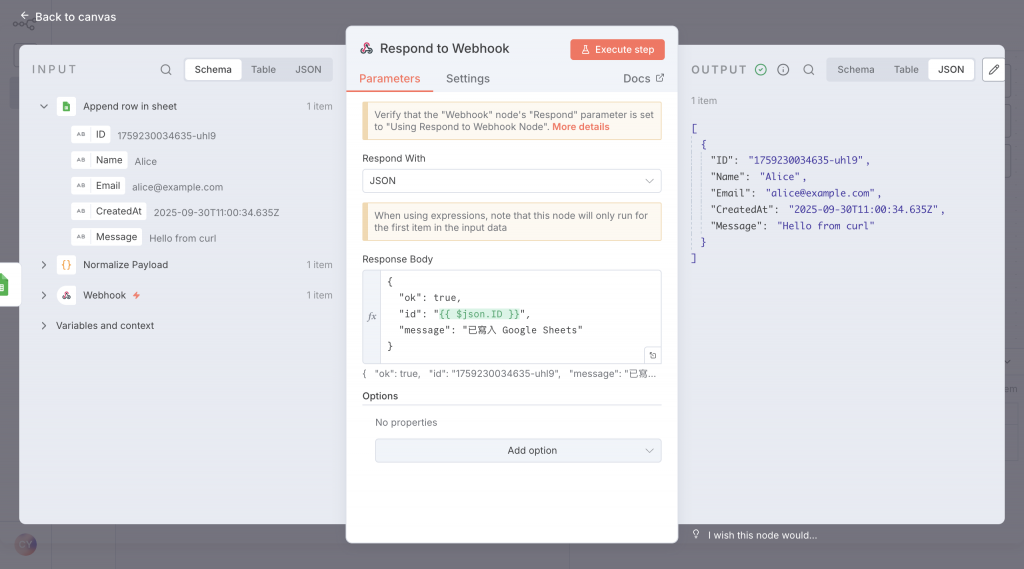
如果你在 Webhook node 選了 Wait for Execution,n8n 會自動用 workflow 最終輸出的 item 當 HTTP 回應;為更清楚可新增 Respond to Webhook node(n8n 有此 node),並連 Google Sheets 到 Respond node,讓其輸出回應例如 { ok:true, id: "..."}
範例回應 JSON(在 Respond node 的 Output 設定):
{
  "ok": true,
  "id": "{{ $json["id"] }}",
  "message": "已寫入 Google Sheets"
}
Listen for test event。curl -X POST "http://localhost:5678/webhook-test/form-submit" \
-H "Content-Type: application/json" \
-d '{"name":"Alice","email":"alice@example.com","message":"Hello from curl"}'
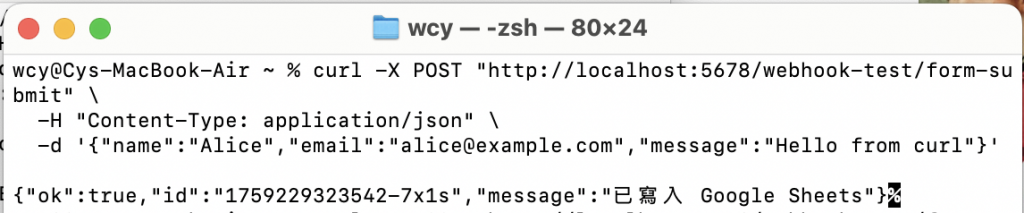
3. 檢查:
Executions 裡查看每個 node 的 Input/Output(Webhook → Function → Sheets → Respond)。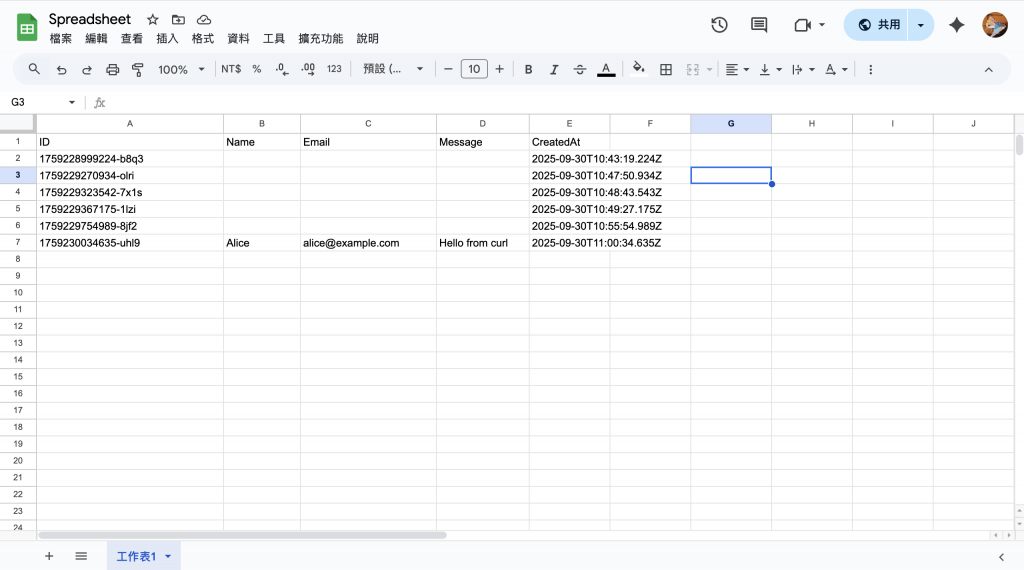
5.輸入成功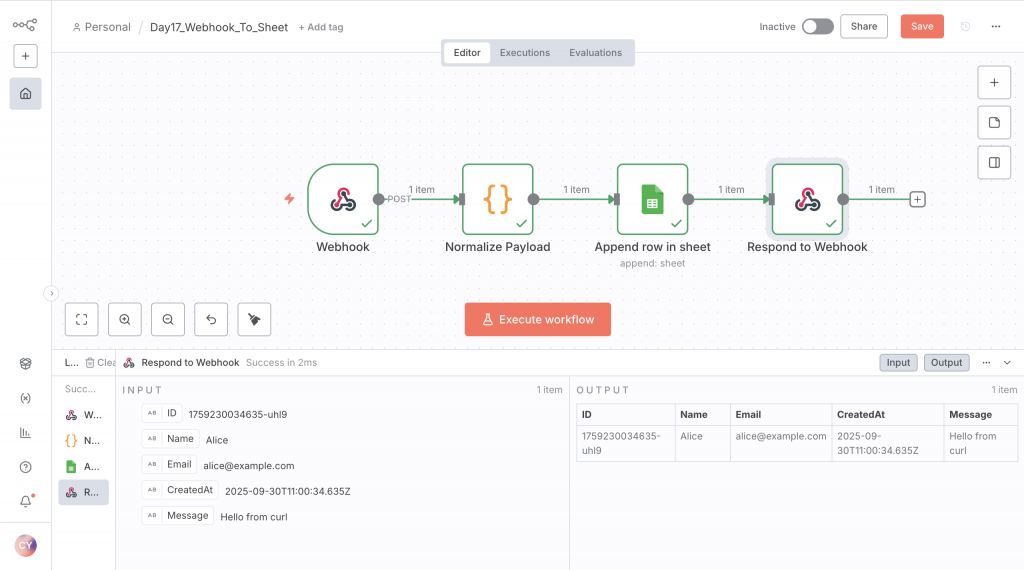


 iThome鐵人賽