昨天我們設計了 LIFF 訂單表單(前端 UX + 驗證),但要真正跑起來還需要部署方式與 LINE 綁定。
今天將帶你用「純靜態檔 + ngrok」快速讓表單在手機 LINE 中開啟,並示範如何把 LIFF 網址綁到 Rich Menu,讓顧客一鍵就能打開下單表單。
本地 localhost 無法被手機 LINE 打開。
LIFF Endpoint URL 必須是公開 HTTPS 網址。
使用 ngrok 可快速將本機專案公開測試。
liff-form/
├─ index.html
└─ app.js
index.html
<!doctype html>
<html lang="zh-Hant">
<head>
  <meta charset="utf-8" />
  <meta name="viewport" content="width=device-width, initial-scale=1" />
  <title>LIFF 訂單表單</title>
  <script src="https://static.line-scdn.net/liff/edge/2/sdk.js"></script>
  <script src="https://cdn.jsdelivr.net/npm/axios/dist/axios.min.js"></script>
</head>
<body>
  <h1>下單表單</h1>
  <form id="orderForm">
    <input type="hidden" id="userId" />
    <label>商品<select id="product"><option value="">請選擇</option><option value="紅茶拿鐵">紅茶拿鐵</option><option value="起司蛋餅">起司蛋餅</option></select></label>
    <label>數量<input type="number" id="quantity" min="1" /></label>
    <label>電話<input type="tel" id="phone" placeholder="09xxxxxxxx" /></label>
    <label>取貨方式<select id="pickup"><option value="">請選擇</option><option value="自取">自取</option><option value="外送">外送</option></select></label>
    <button id="submitBtn" type="submit" disabled>送出</button>
  </form>
  <script src="./app.js"></script>
</body>
</html>
app.js
const LIFF_ID = "YOUR_LIFF_ID";
const API_BASE = "https://你的後端或ngrok域名";

async function init() {
  await liff.init({ liffId: LIFF_ID });
  if (!liff.isLoggedIn()) return liff.login();
  const profile = await liff.getProfile();
  document.getElementById("userId").value = profile.userId;
  document.getElementById("submitBtn").disabled = false;
}

document.getElementById("orderForm").addEventListener("submit", async (e) => {
  e.preventDefault();
  const payload = {
    lineUserId: document.getElementById("userId").value,
    items: [{ productName: document.getElementById("product").value, quantity: Number(document.getElementById("quantity").value), price: 60 }],
    phone: document.getElementById("phone").value,
    pickup: document.getElementById("pickup").value
  };
  if (!payload.items[0].productName || payload.items[0].quantity <= 0 || !/^09\\d{8}$/.test(payload.phone) || !payload.pickup) {
    return alert("請確認輸入資料是否正確");
  }
  await axios.post(`${API_BASE}/orders`, payload);
  alert("訂單已送出!");
  if (liff.isInClient()) liff.closeWindow();
});

init();
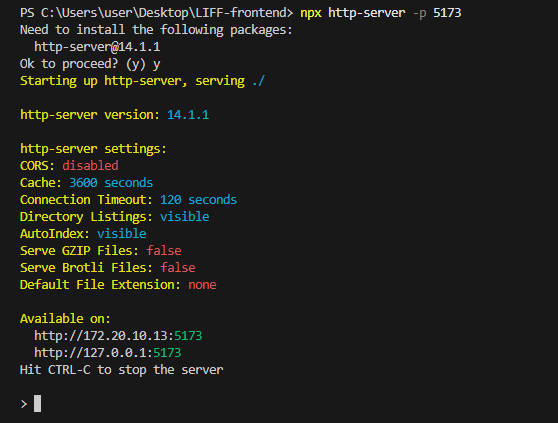
npx http-server -p 5173
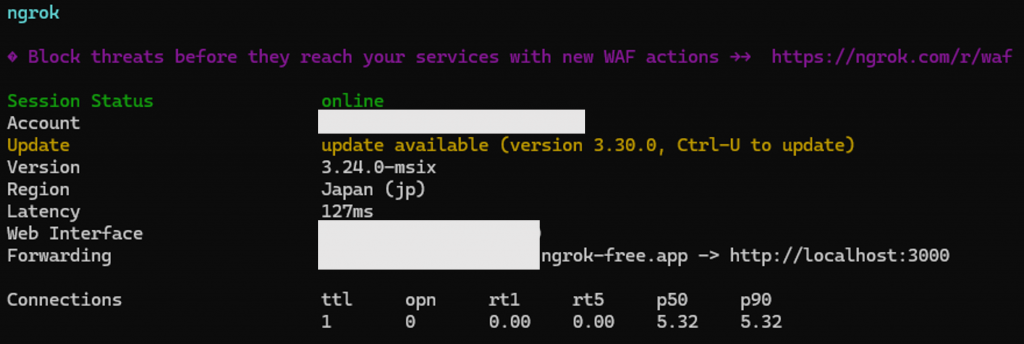
ngrok http 5173
拿到 https://xxxx.ngrok-free.app/index.html → 設定為 LIFF Endpoint URL。
取得後,就可以填入昨天建立 LIFF 的 Endpoint URL 選項中。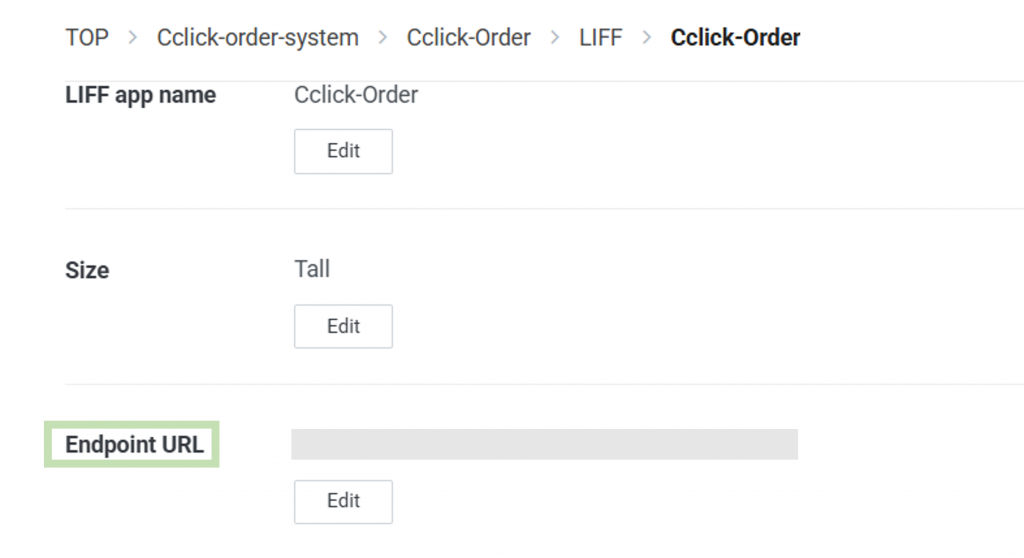
小提醒!
如果忘記 ngrok 該如何使用,可以去回顧 Day 7 ~
LINE OA 後台 → Rich Menu → 新增。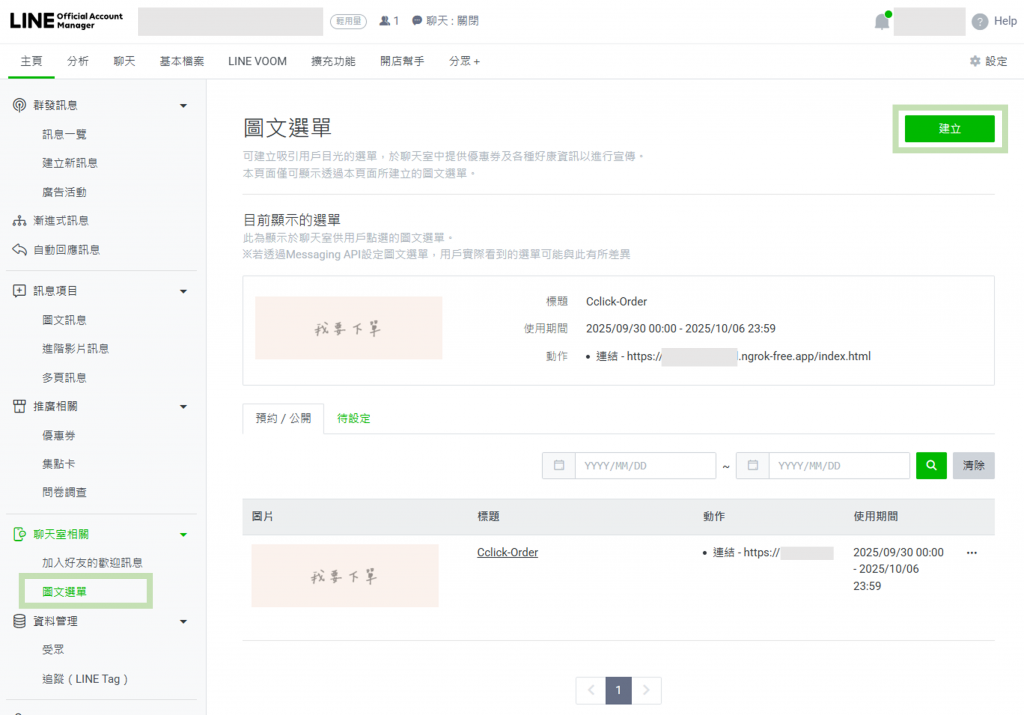
按鈕動作:開啟網址 → 填入 https://xxxx.ngrok-free.app/index.html。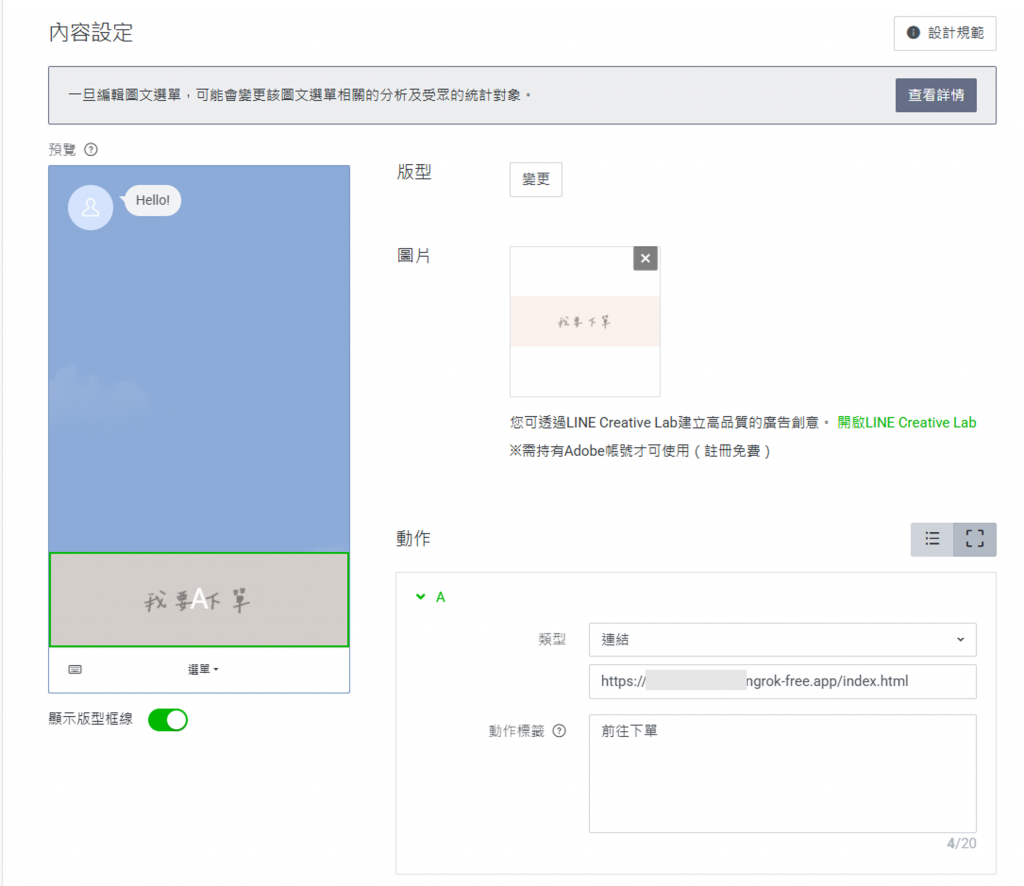
儲存並套用。
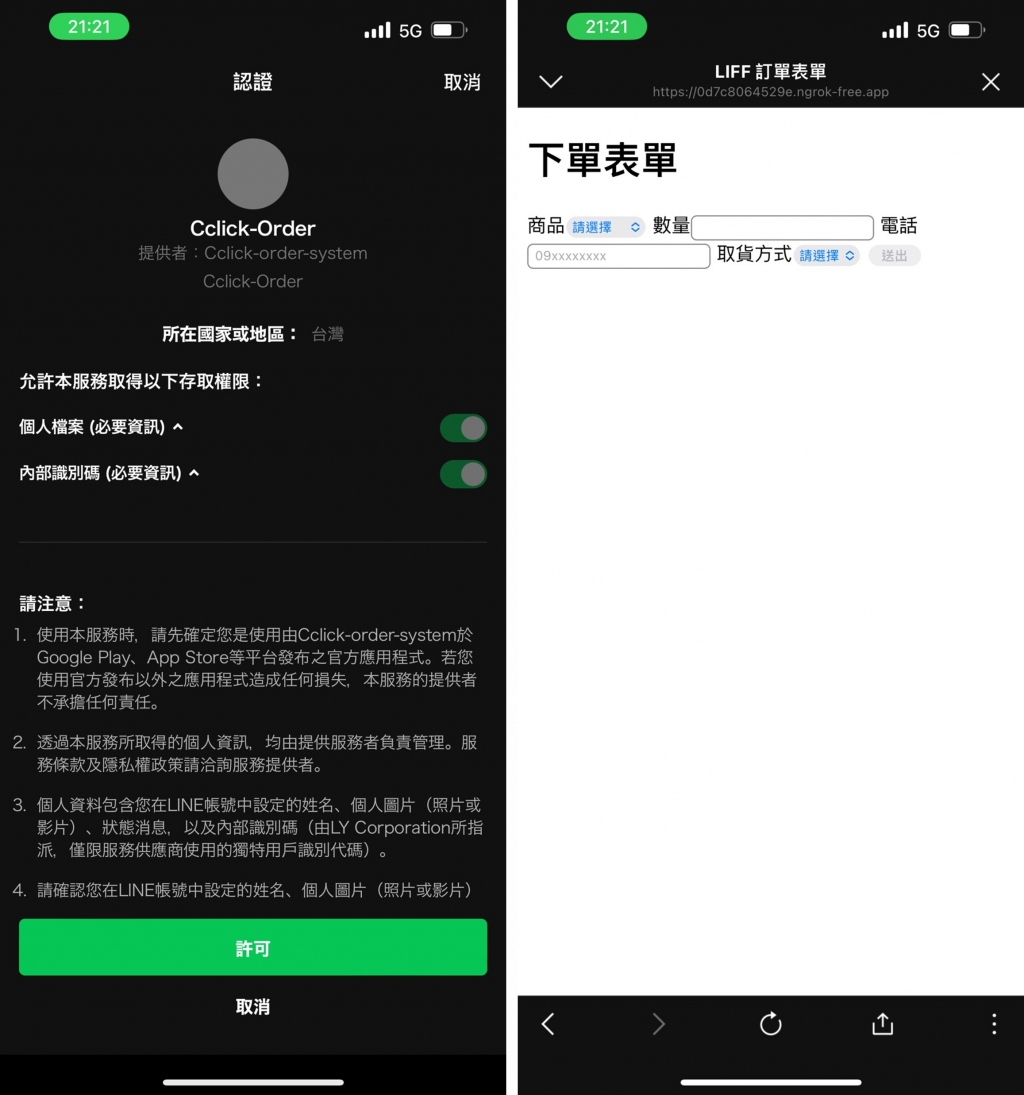
顧客在 LINE Rich Menu 點「我要下單」。
LIFF App 開啟 → 顯示表單。
填寫資料並送出 → API /orders 寫入 DB。
後端回覆成功 → 顧客看到「訂單已送出!」。
抱歉各位,我無法做測試,不確定是不是因為 LINE 在維護,導致 LIFF 的連結我沒辦法更新,後續我會再將寫入 DB 測試這塊補上!
LIFF 表單要能跑,Endpoint URL 必須是公開 HTTPS。
用 ngrok 最快測試,不用額外伺服器。
Rich Menu 綁定 Endpoint URL,顧客就能一鍵開啟表單。
到這裡,我們已完成 「從聊天 → 表單 → 真機測試」 的閉環。
ngrok 免費帳號一次只能開 1 條 tunnel,如果前端、後端各開一條,就會報錯:
authentication failed: Your account is limited to 1 simultaneous ngrok agent sessions.
const path = require("path");
app.use(express.static(path.join(__dirname, "liff-form")));
把 liff-form/index.html 與 app.js 交給 Express 提供,API 仍在 /orders。
await axios.post("/orders", payload);
node index.js
ngrok http 3000
https://<ngrok-subdomain>.ngrok-free.app/index.html
→ 好處:免 CORS、免兩條 ngrok、體驗更貼近正式上線。
把 index.html、app.js push 到 GitHub repo。
到 Settings → Pages 開啟 Pages。
Endpoint URL 會是:
https://<user>.github.io/<repo>/index.html
app.js 裡的 API_BASE 指到你的 ngrok 後端,例如:const API_BASE = "https://abcd-1234.ngrok-free.app";
app.use(cors({ origin: [/^https:\/\/.*\.github\.io$/] }));
→ 好處:前端有固定網址,後端仍用 ngrok。正式環境可再搬到 Vercel/Netlify。
以上兩種方式都能解決 ngrok 免費限制的問題,大家可依需求選擇。

