昨天我們打造了一個簡易留言板,成功實現了新增留言的功能。但一個只能新增、不能修改的 App 還不夠完整!
今天,我們就要為這個專案進行關鍵升級,加入編輯與刪除兩大核心功能,讓它從一個簡單的練習,進化成一個功能齊全的實用工具。
我們將實作:
1.點擊編輯:點擊列表中的任一則留言,內容會自動回填至輸入框,方便使用者修改。
2.滑動刪除:使用者可以透過優雅的左滑手勢,快速刪除不需要的留言。
準備好讓你的 App 變得更強大、更完整了嗎?
didSelectRowAt 偵測點擊,並將資料回填至輸入框Int?) 追蹤編輯狀態,判斷是「新增」還是「更新」模式UITableViewDataSource 的相關方法,實現滑動刪除功能insertRows、reloadRows 與 deleteRows 來實現帶有動畫的列表刷新editingIndex 紀錄編輯狀態與目前編輯留言索引TextField 並設定編輯狀態先新增一個變數,用來記錄目前是否在編輯,以及目前正在編輯哪筆留言:
var editingIndex: Int? = nil
修改 didSelectRowAt 內容,當用戶點擊留言時,會將文字帶回 TextField 並記錄索引:
func tableView(_ tableView: UITableView, didSelectRowAt indexPath: IndexPath) {
    editingIndex = indexPath.row
    txfMessage.text = messages[indexPath.row]
    print("你點了第 \(indexPath.row + 1) 筆留言:\(messages[indexPath.row])")

    tableView.deselectRow(at: indexPath, animated: true)
}
按送出時,有編輯索引就更新留言,否則新增留言:
@IBAction func didTapButton(_ sender: UIButton) {
    guard let text = txfMessage.text?.trimmingCharacters(in: .whitespacesAndNewlines), !text.isEmpty else {
        return
    }

    if let index = editingIndex {
        messages[index] = text
        editingIndex = nil
    } else {
        messages.append(text)
    }

    tbvMessage.reloadData()
    txfMessage.text = ""
}
在 viewDidLoad() 中初始化按鈕文字為「送出」:
override func viewDidLoad() {
    super.viewDidLoad()

    btnEnter.setTitle("送出", for: .normal)

    let nib = UINib(nibName: "MainTableViewCell", bundle: nil)
    tbvMessage.register(nib, forCellReuseIdentifier: "MainTableViewCell")

    tbvMessage.dataSource = self
    tbvMessage.delegate = self
    }
修改 didTapButton,在編輯結束時將按鈕文字恢復成「送出」:
@IBAction func didTapButton(_ sender: UIButton) {
    guard let text = txfMessage.text?.trimmingCharacters(in: .whitespacesAndNewlines), !text.isEmpty else {
        return
    }

    if let index = editingIndex {
        messages[index] = text
        editingIndex = nil
        btnEnter.setTitle("送出", for: .normal)
    } else {
        messages.append(text)
    }

    tbvMessage.reloadData()
    txfMessage.text = ""
    }
同時在 didSelectRowAt 中,切換按鈕文字為「更新」:
func tableView(_ tableView: UITableView, didSelectRowAt indexPath: IndexPath) {
    editingIndex = indexPath.row
    txfMessage.text = messages[indexPath.row]
    btnEnter.setTitle("更新", for: .normal)
    print("你點了第 \(indexPath.row + 1) 筆留言:\(messages[indexPath.row])")

    tableView.deselectRow(at: indexPath, animated: true)
}
在 UITableViewDataSource、UITableViewDelegate 中新增以下程式碼,實作左滑刪除留言:
// 允許 TableView 支援編輯(刪除)
func tableView(_ tableView: UITableView, canEditRowAt indexPath: IndexPath) -> Bool {
    return true
}

// 編輯左滑刪除的動作
func tableView(_ tableView: UITableView, commit editingStyle: UITableViewCell.EditingStyle, forRowAt indexPath: IndexPath) {
    if editingStyle == .delete {
        // 移除資料
        messages.remove(at: indexPath.row)

        // 如果目前正在編輯的留言被刪除了,清除 editingIndex
        if let editing = editingIndex, editing == indexPath.row {
            editingIndex = nil
            btnEnter.setTitle("送出", for: .normal)
            txfMessage.text = ""
        } else if let editing = editingIndex, editing > indexPath.row {
            // 若 editingIndex 在刪除列的後方,刪除後要往前移一格
            editingIndex = editing - 1
        }

        // 刪除該列動畫
        tableView.deleteRows(at: [indexPath], with: .automatic)
    }
}
執行後會發現左滑刪除的按鈕文字是 Delete,如果想改成其他文字,可以再加上一段程式:
// 自訂左滑刪除按鈕文字
func tableView(_ tableView: UITableView, titleForDeleteConfirmationButtonForRowAt indexPath: IndexPath) -> String? {
    return "刪除" // 可以改成你想要顯示的文字
}
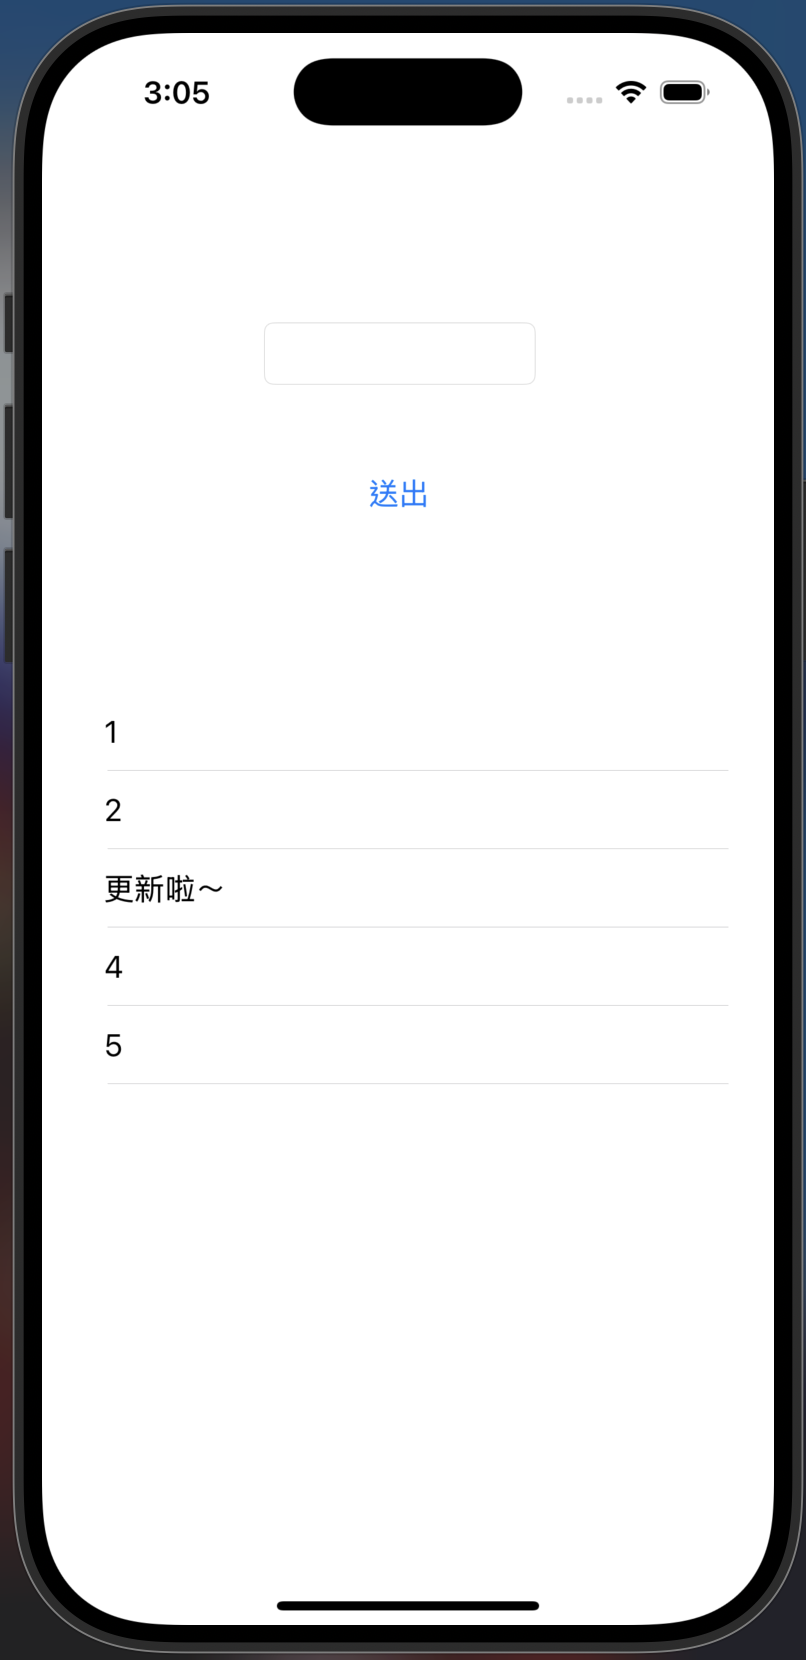
輸入留言,點擊送出,留言會新增並顯示在列表:

點擊任一筆留言,該留言會帶回輸入框,送出按鈕變成「更新」:
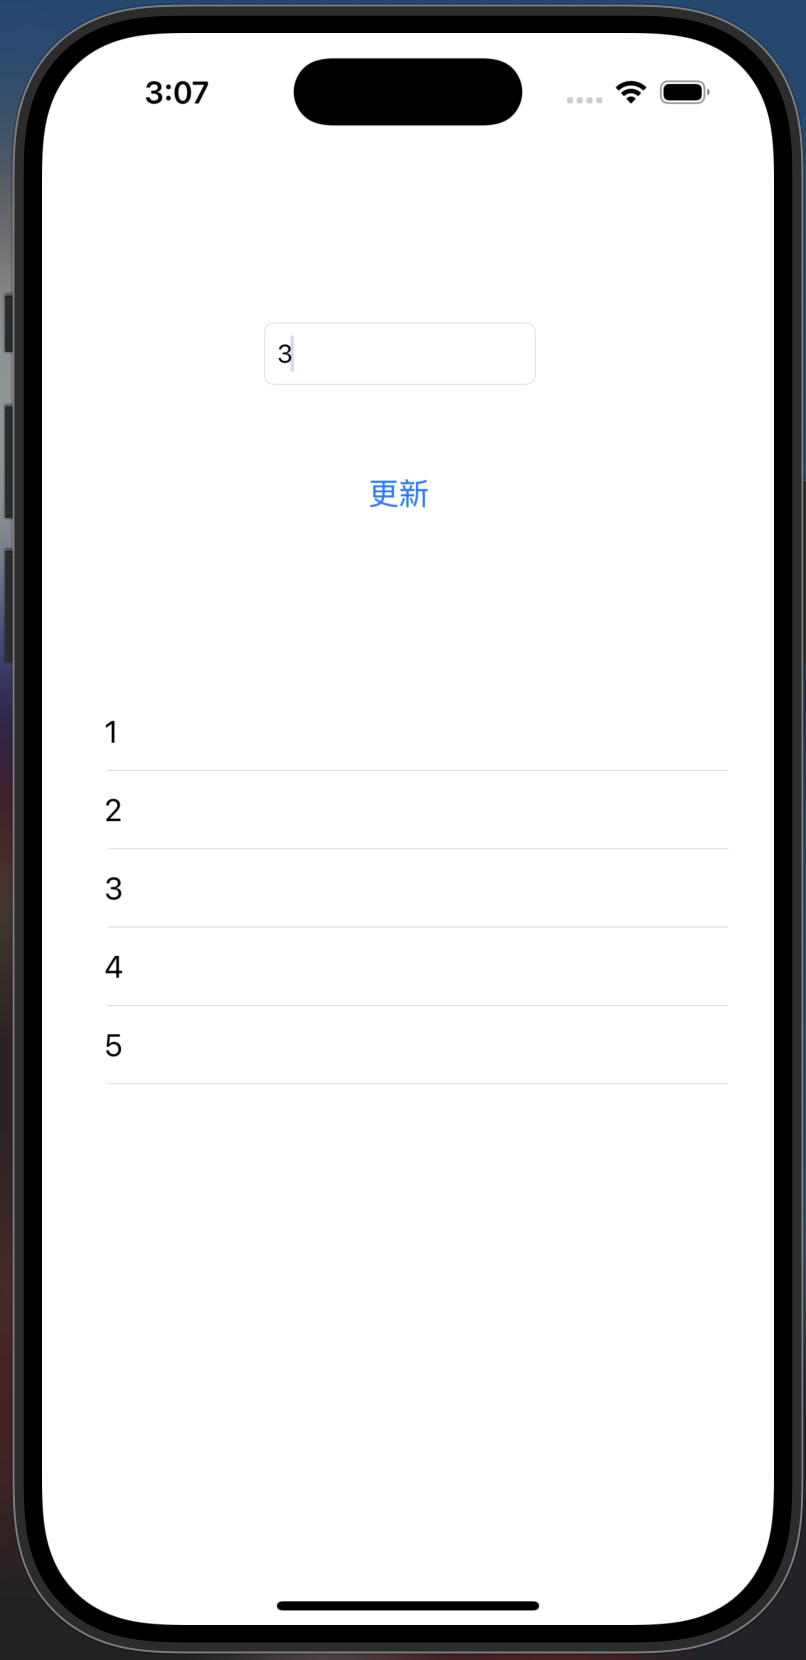
修改留言內容,點擊「更新」按鈕,該筆留言會被更新,列表立即刷新:
嘗試左滑刪除任一筆留言:
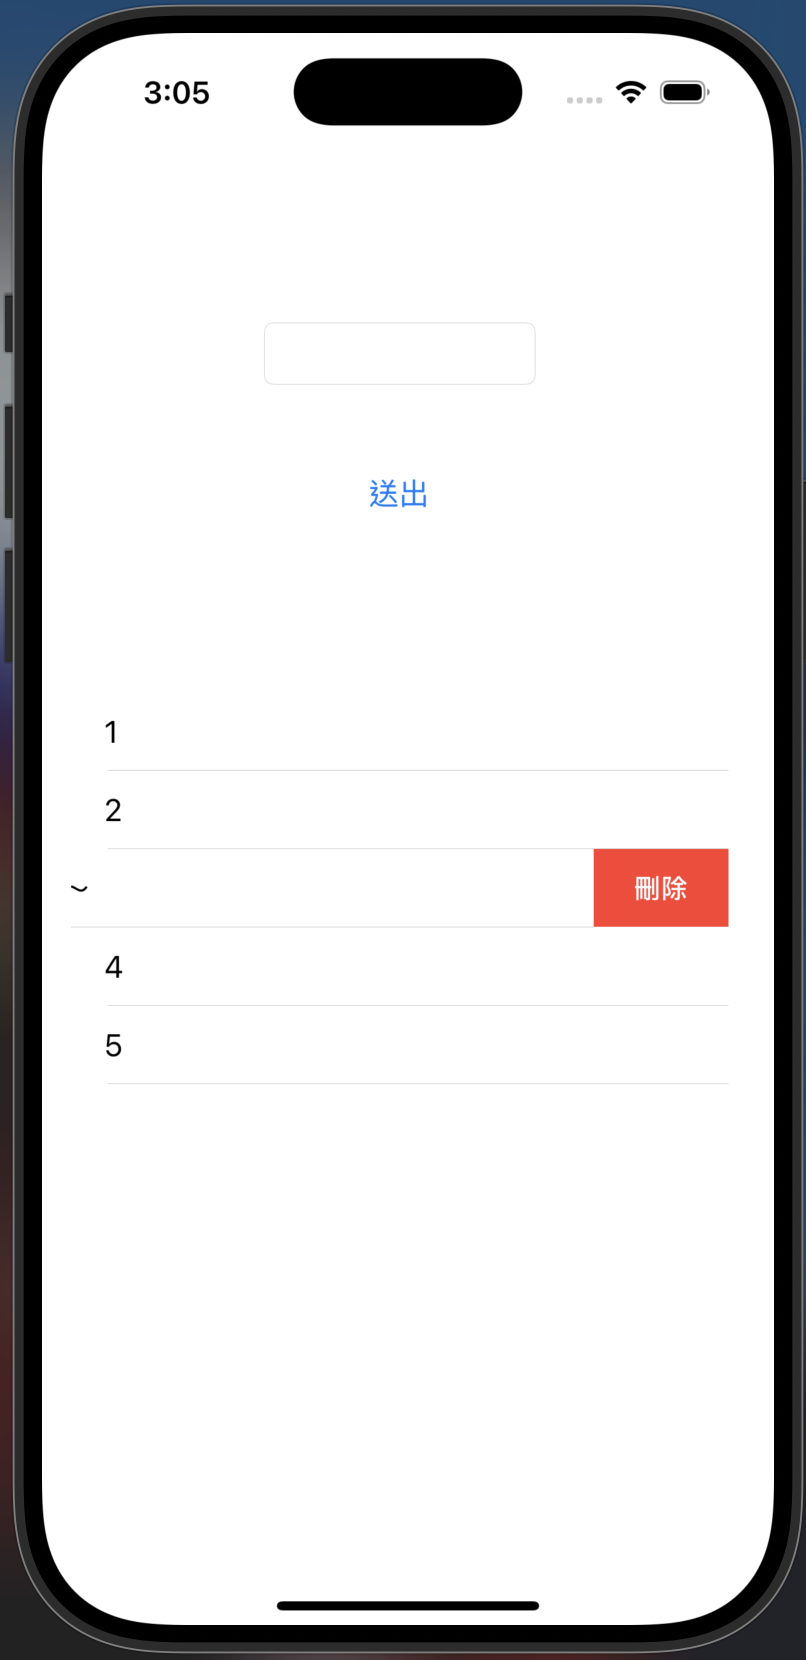
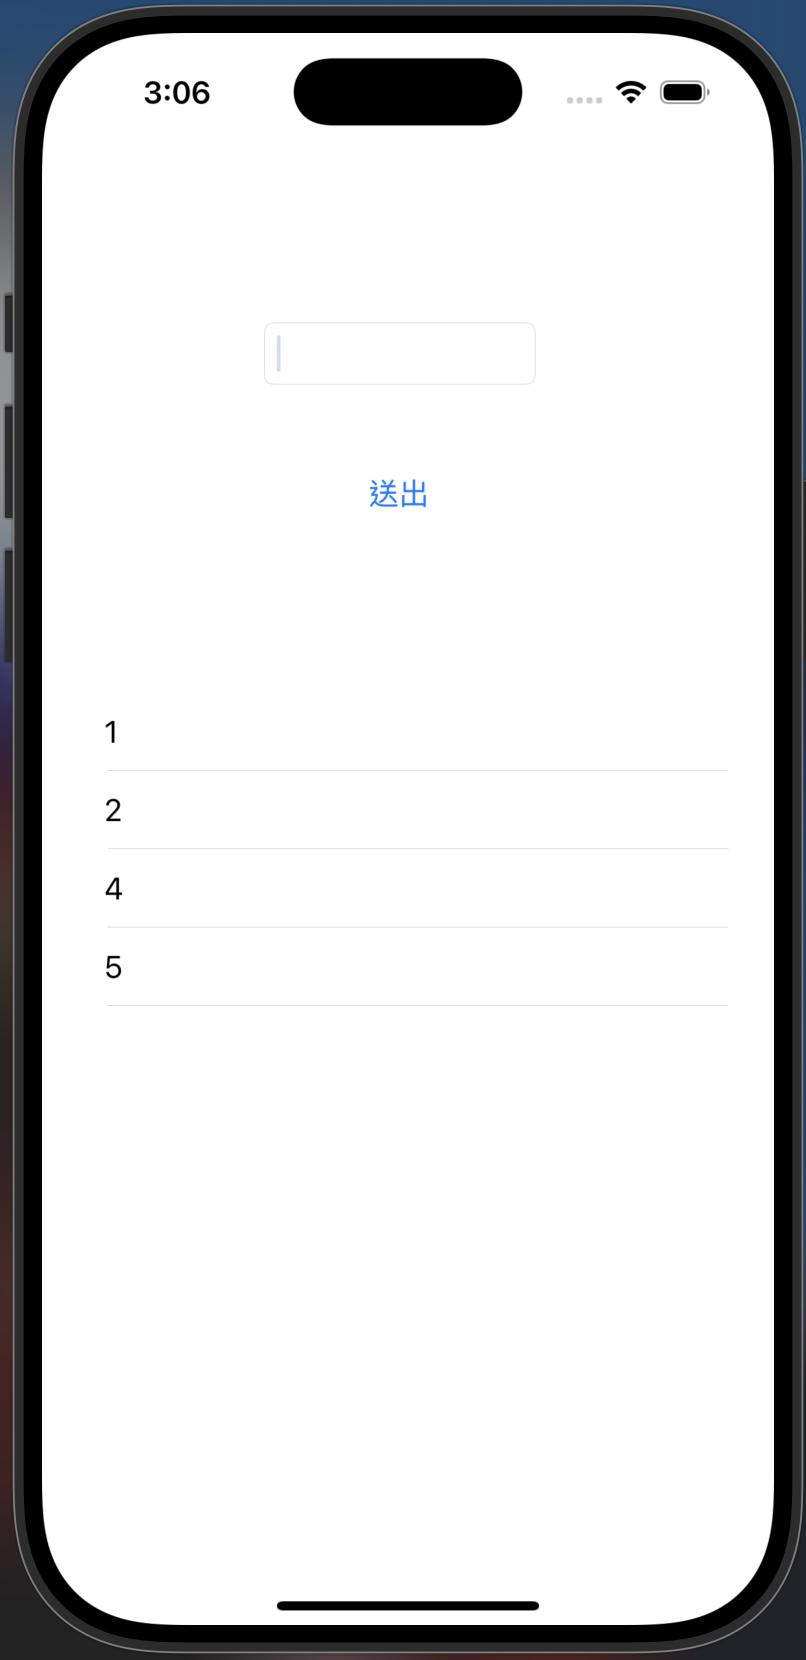
按下「刪除」鍵後,該留言就能成功被刪除:
如果能成功執行到這邊,代表在程式撰寫方面已經順利完成啦!
今天,我們成功地為留言板加上了編輯與刪除兩大核心功能,讓它從一個簡單的展示工具,升級為一個功能完整的應用!
我們透過 editingIndex 這個「狀態旗標」,巧妙地讓同一個按鈕能處理新增與更新兩種不同邏輯。更重要的是,你學會了 TableView 中新增 (insertRows)、更新 (reloadRows) 與刪除 (deleteRows) 的精準動畫操作,這讓 App 的使用者體驗提升了一個檔次。
掌握這些技巧,你已經可以為任何列表型資料加上完整的編輯與刪除功能,讓 App 互動性大幅提升。
隨著我們的 App 功能越來越多,程式碼是不是開始變得像一團打結的毛線,不知道該把新功能寫在哪?
明天,我們要從「寫程式」升級為「設計架構」!我們將學習 iOS 開發中最經典的設計模式:MVC(Model-View-Controller)。你可以把它想像成經營一家餐廳:
學會 MVC,你就能讓程式碼各司其職、井然有序,為未來打造大型、可維護的 App 奠定最重要的基礎!
敬請期待《Day 23|Xcode 架構教學:掌握 MVC 設計模式》


 iThome鐵人賽