你會覺得使用java -cp com.mycompany.Main有點麻煩,就會想有沒有更簡單的java -jar MyApp,以USER的角度而言只想無腦double click執行exe檔,這也就是我們今天要討論的範疇
想要包成exe執行檔主要有幾種方式請參考如下
| 功能 / 工具 | Launch4j | jpackage | exe4j |
|---|---|---|---|
| 來源 | 開源 (免費) | Oracle JDK 內建 (JDK 14+) | 商業軟體 (收費,提供試用版) |
| 主要用途 | 將 JAR 包裝成 Windows EXE 啟動器 | 產生跨平台自包含安裝包 (EXE, MSI, DMG, PKG, DEB, RPM) | 將 JAR 包裝成 Windows EXE 啟動器 |
| 是否需要 JRE | 可指定外部 JRE 或內嵌 | 可打包 JRE (自包含應用) | 可指定外部 JRE 或內嵌 |
| 跨平台支援 | 僅支援 Windows | Windows / macOS / Linux | 僅支援 Windows |
| Maven/Gradle 插件支援 | 有第三方 plugin (如 launch4j-maven-plugin) |
可透過 exec plugin 或 jdk toolchain 呼叫 | 有官方 plugin (exe4j-maven-plugin) |
| 安裝包功能 | ❌ (僅生成 EXE,無安裝程式) | ✅ (可生成 EXE/MSI installer,或 dmg/pkg/deb/rpm) | ✅ (可搭配 install4j 產生安裝程式) |
| 配置彈性 | 高(可設定 JVM 參數、icon、splash screen) | 中(偏向簡化,較多規範化設定) | 高(更多 GUI 設定選項) |
| 易用性 | 較簡單,適合輕量需求 | 內建於 JDK,命令列操作直觀 | GUI 工具操作簡單,但需授權 |
| 典型應用場景 | 簡單 JAR → EXE 啟動器 | 發布跨平台桌面應用 | 商業級 Windows 桌面應用 |
註:以上由ChatGPT協助整理
我們必須用到先前的觀念,先把專案包成Uber/Fat JAR再透過launch4j-maven-plugin將我們的Uber JAR包成exe的執行檔,這邊採用前一日的專案進行改寫
<plugins>
      <!-- Maven Shade Plugin for creating fat JAR -->
      <plugin>
        <groupId>org.apache.maven.plugins</groupId>
        <artifactId>maven-shade-plugin</artifactId>
        <version>3.5.0</version>
        <executions>
          <execution>
            <phase>package</phase>
            <goals>
              <goal>shade</goal>
            </goals>
            <configuration>
              <createDependencyReducedPom>false</createDependencyReducedPom>
              <transformers>
                <transformer implementation="org.apache.maven.plugins.shade.resource.ManifestResourceTransformer">
                  <mainClass>com.mycompany.app.App</mainClass>
                </transformer>
              </transformers>
            </configuration>
          </execution>
        </executions>
      </plugin>

      <!-- Launch4j Maven Plugin for creating Windows executable -->
      <plugin>
        <groupId>com.akathist.maven.plugins.launch4j</groupId>
        <artifactId>launch4j-maven-plugin</artifactId>
        <version>2.5.0</version>
        <executions>
          <execution>
            <id>l4j-clui</id>
            <phase>package</phase>
            <goals>
              <goal>launch4j</goal>
            </goals>
            <configuration>
              <!-- 生成的 exe 檔案名稱 -->
              <outfile>target/MyApp.exe</outfile>
              <!-- 包裝的 jar 檔案 -->
              <jar>target/MyApp.jar</jar>
              <!-- JRE 最低版本 -->
              <minVersion>11.0.0</minVersion>
              <!-- JRE 最大版本 (可選) -->
              <maxVersion></maxVersion>
              <!-- 主類別 -->
              <mainClass>com.mycompany.app.App</mainClass>
              <!-- 設定為 console 應用程式 -->
              <headerType>console</headerType>
              <!-- 程式圖示 (可選,需要 .ico 檔案) -->
              <!-- <icon>src/main/resources/icon.ico</icon> -->
              <!-- Windows 程式資訊 -->
              <versionInfo>
                <fileVersion>1.0.0.0</fileVersion>
                <txtFileVersion>1.0.0</txtFileVersion>
                <fileDescription>MyApp - Java Application</fileDescription>
                <copyright>Copyright © 2025</copyright>
                <productVersion>1.0.0.0</productVersion>
                <txtProductVersion>1.0.0</txtProductVersion>
                <productName>MyApp</productName>
                <companyName>My Company</companyName>
                <internalName>MyApp</internalName>
                <originalFilename>MyApp.exe</originalFilename>
              </versionInfo>
              <!-- JVM 選項 -->
              <jre>
                <bundledJre64Bit>false</bundledJre64Bit>
                <!-- 自帶JRE的選項 true則需設置路徑讓它包進去-->
                <bundledJreAsFallback>true</bundledJreAsFallback>
                <path></path> <!-- 指向相對於 exe 的 JRE 目錄 -->
                <minVersion>11.0.0</minVersion>
                <jdkPreference>preferJre</jdkPreference>
                <runtimeBits>64/32</runtimeBits>
              </jre>
              <!-- 記憶體配置 -->
              <opt>-Xms64m</opt>
              <opt>-Xmx256m</opt>
            </configuration>
          </execution>
        </executions>
      </plugin>
    </plugins>
產出結果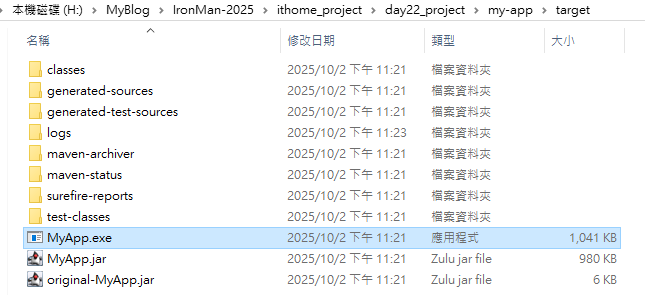
執行結果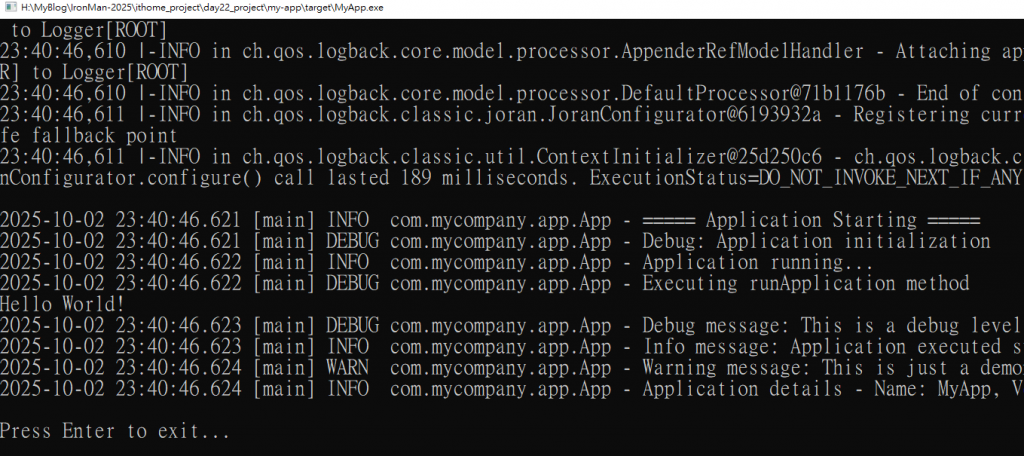
my-app-clean project
<!-- JPackage Maven Plugin for creating native installers -->
<plugin>
<groupId>org.panteleyev</groupId>
<artifactId>jpackage-maven-plugin</artifactId>
<version>1.6.5</version>
<configuration>
<!-- 應用程式基本資訊 -->
<name>MyApp</name>
<appVersion>1.0.0</appVersion>
<vendor>My Company</vendor>
<description>MyApp - Java Application with bundled JRE</description>
<!-- 主類別和模組設定 -->
<mainClass>com.mycompany.app.App</mainClass>
<mainJar>MyApp.jar</mainJar>
<!-- 輸出目錄 -->
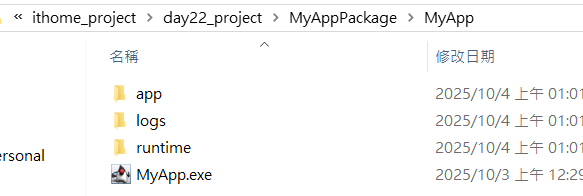
<destination>C:\MyAppPackage</destination>
<!-- 應用程式類型 (app-image 創建目錄結構) -->
<type>APP_IMAGE</type>
<!-- 包含的檔案 -->
<input>target</input>
<!-- Windows console 應用程式 -->
<winConsole>true</winConsole>
<!-- JVM 選項 -->
<javaOptions>
<option>-Xms64m</option>
<option>-Xmx256m</option>
</javaOptions>
<!-- 資源檔案 (可選) -->
<!-- <resourceDir>src/main/resources</resourceDir> -->
</configuration>
<executions>
<execution>
<id>jpackage</id>
<phase>verify</phase>
<goals>
<goal>jpackage</goal>
</goals>
</execution>
</executions>
</plugin>


 iThome鐵人賽