在前面的章節中,我們學習了不同類型的 JAR 打包方式,包括 Library JARJAR、Fat JAR 和 Distribution JAR。今天我們要探討另一個重要的打包格式:WAR (Web Application Archive)。
WAR 檔案是專門為 Web 應用程式設計的打包格式,主要用於部署到 Servlet 容器(如 Tomcat、Jetty)或應用伺服器(如 WildFly、WebLogic),今天就讓我們好好了解WAR的結構以及我們如何使用cargo-maven3-plugin來進行部署
WAR (Web Application Archive) 是專門用於打包 Web 應用程式。它遵循特定的目錄結構規範,包含了 Web 應用程式運行所需的所有元件,Application Server透過標準化的檔案結構與DD檔就能夠知道如何運行這個WEB應用程式。
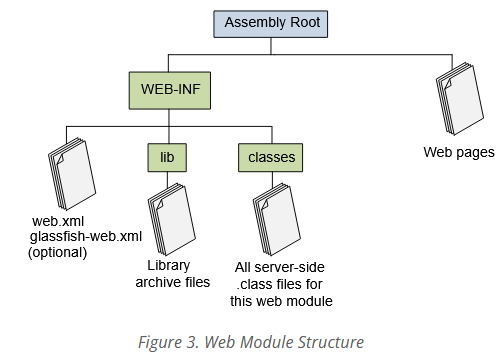
註:圖片來源為Eclipse官方文件
1. WEB-INF: 必定要有為受保護資料夾,外部無法直接存取
2. lib: 存放程式相依的第三方套件
3. class: 主要程式編譯過後的classes存放路徑
4. Assembly Root: 存放可公開存取的靜態資源,例如:index.jsp
5. Web application deployment descriptor: 部署描述檔DD,web.xml 在 Servlet 3.0+ 可用註解替代,但仍建議保留。另外也會依據Application Server的不同可能會需要配置專用的DD檔,例如glassfish-web.xml、payara-web.xml、ibm-web-bnd.xml等等
6. META-INF: 為OPTIONAL,此為可以放置一些Application Server層級的設定檔,例如:tomcat的context.xml、jboss的jboss-deployment-structure.xml,或MANIFEST.MF資訊等
上述為標準部署到AP Server的標準格式結構,以程式開發便利的角度會與標準格式不同,最終只要打包成標準格式的WAR就行了,以下是常見的Maven Web結構說明
web-project
├── pom.xml
├── src/
│   ├── main/
│   │   ├── java/
│   │   │   └── com/example/mywebapp/  (Java source code, following package structure)
│   │   ├── resources/
│   │   │   └── application.properties  (Non-Java resources for the application)
│   │   └── webapp/
│   │       ├── WEB-INF/
│   │       │   ├── web.xml           (Web application deployment descriptor)
│   │       │   └── classes/          (Compiled Java classes and resources from src/main/resources)
│   │       │   └── lib/              (JARs of project dependencies)
│   │       ├── index.jsp             (Example JSP page)
│   │       └── css/                  (Static web resources like CSS)
│   │       └── js/                   (Static web resources like JavaScript)
│   └── test/
│       ├── java/
│       │   └── com/example/mywebapp/  (Java unit test code)
│       └── resources/
│           └── test-config.properties  (Resources for unit tests)
└── target/                           (Build output, including the WAR file)
註:以上由Gemini AI整理
Cargo 是一個強大的 Java 工具,專門用於自動化部署和管理各種 Java 應用伺服器和 Servlet 容器。它提供了統一的 API 和工具集,讓開發者可以用一致的方式來操作不同的容器,而不需要學習每個容器特定的部署方式。
問題背景:
Cargo 的解決方案:
本基的設定提供兩種模式
target/cargo/configurations
可以進行遠端正在運行的Application Server部署
| 指令 | 功能說明 |
|---|---|
cargo:start |
啟動AppServer,會伴隨Maven instance停止而結束 |
cargo:stop |
停止容器 |
cargo:run |
啟動AppServer並部署,需CTRL + C才會停止AppServer |
cargo:deploy |
部署應用到運行中的AppServer |
cargo:undeploy |
從AppServer移除應用 |
cargo:redeploy |
從AppServer移除應用在重新部署 |
接下來我們將示範如何在 Maven 專案中配置 Cargo,實現 WAR 檔案的自動化部署。
創建WebApp
mvn archetype:generate ^
  -DgroupId=com.mycompany.webapp ^
  -DartifactId=webapp ^
  -DarchetypeArtifactId=maven-archetype-webapp ^
  -DarchetypeVersion=1.5
下載Tomcat11.0.11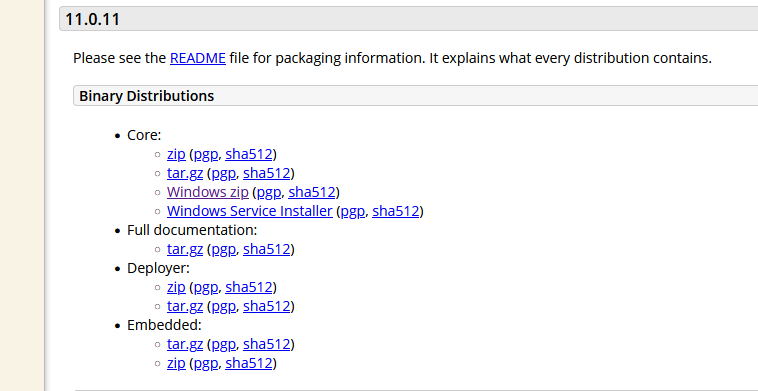
pom.xml設置 - standalone
<plugins>
  <plugin>
    <!-- https://mvnrepository.com/artifact/org.codehaus.cargo/cargo-maven3-plugin -->
    <groupId>org.codehaus.cargo</groupId>
    <artifactId>cargo-maven3-plugin</artifactId>
    <version>1.10.22</version>
    <configuration>
      <container>
        <containerId>tomcat11x</containerId>
        <!-- 指定下載解壓縮後的app server路徑 -->
        <home>H:/Java/apache-tomcat-11.0.11</home>
      </container>
      <configuration>
        <type>standalone</type>
        <properties>
          <cargo.servlet.port>8080</cargo.servlet.port>
        </properties>
      </configuration>
    </configuration>
  </plugin>
</plugins>
pom.xml設置 - existing
<plugins>
  <plugin>
    <!-- https://mvnrepository.com/artifact/org.codehaus.cargo/cargo-maven3-plugin -->
    <groupId>org.codehaus.cargo</groupId>
    <artifactId>cargo-maven3-plugin</artifactId>
    <version>1.10.22</version>
    <configuration>
      <container>
        <containerId>tomcat11x</containerId>
        <!-- 指定下載解壓縮後的app server路徑 -->
        <home>H:/Java/apache-tomcat-11.0.11</home>
      </container>
      <configuration>
        <!-- 配置type可以直接部署至安裝路徑     -->
        <type>existing</type>
        <home>H:/Java/apache-tomcat-11.0.11</home>
        <!-- 透過properties可以修改配置 -->
        <properties>
          <cargo.servlet.port>8080</cargo.servlet.port>
        </properties>
      </configuration>
    </configuration>
  </plugin>
</plugins>
執行command
mvn package cargo:run
pom.xml設置
<plugins>
  <plugin>
    <!-- https://mvnrepository.com/artifact/org.codehaus.cargo/cargo-maven3-plugin -->
    <groupId>org.codehaus.cargo</groupId>
    <artifactId>cargo-maven3-plugin</artifactId>
    <version>1.10.22</version>
    <configuration>
      <container>
        <containerId>tomcat11x</containerId>
        <type>remote</type>
      </container>
      <configuration>
        <type>runtime</type>
        <properties>
          <cargo.remote.username>admin</cargo.remote.username>
          <cargo.remote.password>admin</cargo.remote.password>
          <cargo.tomcat.manager.url>http://localhost:8080/manager</cargo.tomcat.manager.url>
        </properties>
      </configuration>
    </configuration>
  </plugin>
</plugins>
執行命令
mvn cargo:deploy
今日我們深入討論了WAR檔打包的檔案結構與Cargo部署工具,可做為日後自動化測試與CI/CD流程自動化的基礎


 iThome鐵人賽