
摘要:
首先需要先安裝mosquitto作為broker,工具使用MQTTX模擬MQTT的運作,再用vite快速建立Vue3新專案,然後引用mqtt.js來與MQTT建立連線並顯示從設備機台傳送來的數據。
本文:
mosquitto
首先到 mosquitto 下載並安裝。
安裝完成後,以PowerShell或CMD確認是否安裝成功:
cd "C:\Program Files\mosquitto"

.\mosquitto.exe -h
若有出現版本與參數說明,代表安裝成功。
MQTTX
再來到 MQTTX下載並安裝。
安裝完後打開MQTTX在Connections按+->New Connection建立新連線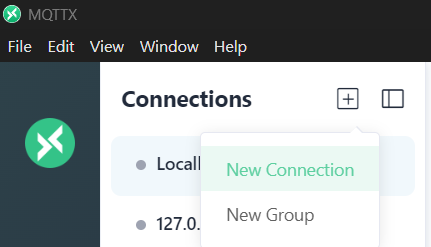
輸入內容如下,Client ID不用指定,再按Connect: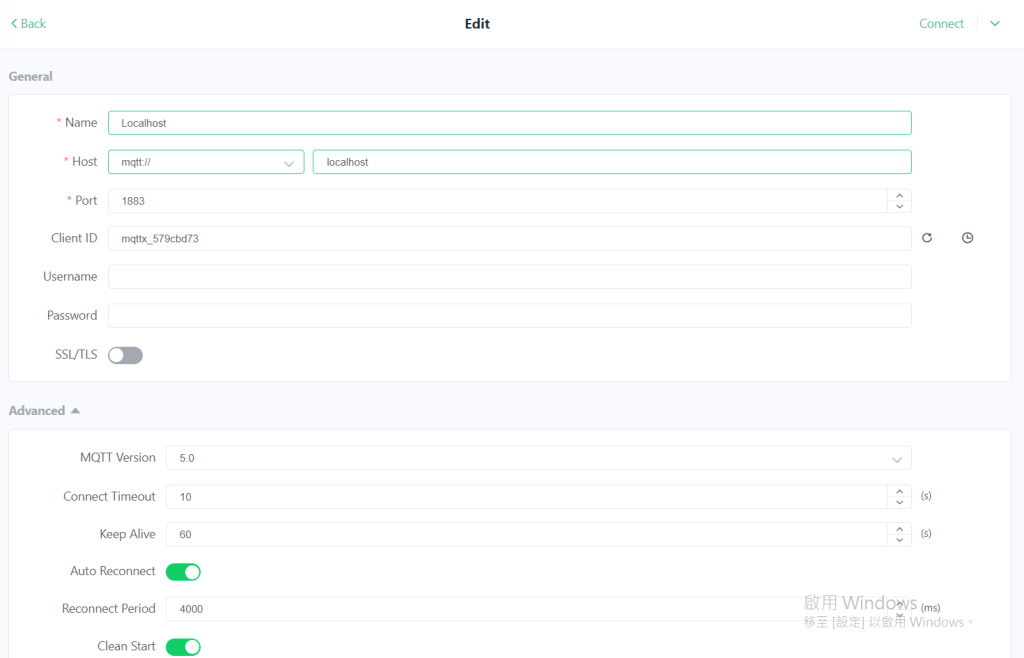
Vue3 Vite
由於瀏覽器需要WebSocket,例如:
ws://localhost:9001
因此要再回到 mosquitto的安裝目錄下找 mosquitto.conf
設定增加 WebSocket listener如下:
listener 1883
protocol mqtt

listener 9001
protocol websockets

allow_anonymous true
再打開工作管理員重新啟動mosquitto服務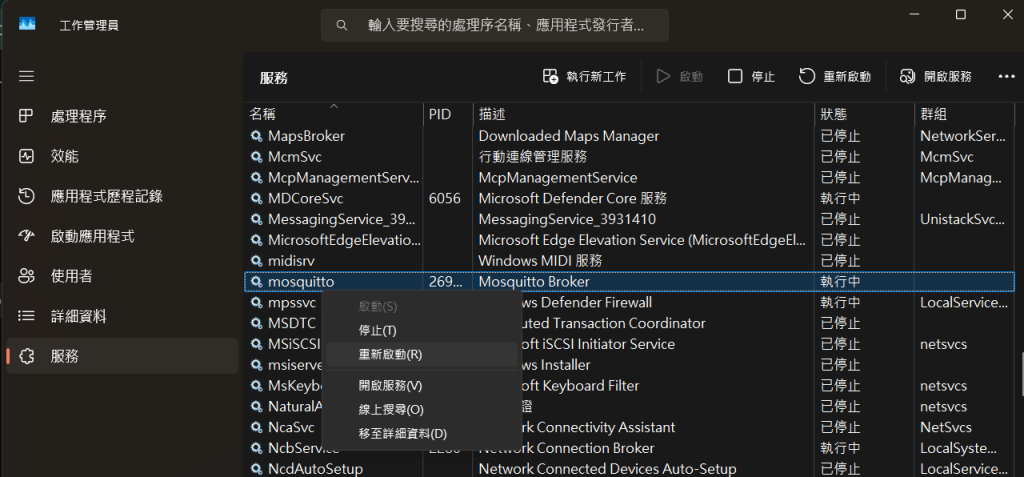
撰寫Vue3+TypeScript內容如下:
<template>
  <h3>接收到的訊息:{{ receiveMessage }}</h3>
</template>
<script setup lang="ts">
import { ref } from 'vue';
import mqtt, { type MqttClient } from 'mqtt';

const receiveMessage = ref();

const client: MqttClient = mqtt.connect('ws://localhost:9001');

client.on('connect', () => {
  console.log('MQTT connected');

  client.subscribe('factory/machine01/data');
});

client.on('message', (topic, message) => {
  receiveMessage.value = message.toString();
  console.log(topic, message.toString());
});
</script>
Web頁面會收到訊息如下圖:
如此可以實現模擬監控IOT設備聯網,進階的IOT機台儀表板示意圖如下:
歡迎與我們聯絡資訊如下,讓我們為您們Demo說明解決方案AIoT 智聯網 。

 hotmaneil

 iThome鐵人賽
 看影片追技術