今天先跟大家分享controller最後一個小主題:UrlMppings.groovy設定檔,主要跟大家介紹簡單新增ErrorControoler及自訂404及500網頁顯示,每次醜醜的404、500網頁總不好看吧,再來跟大家分享Grails Tag,之前陸陸續續已有介紹一些,今天將介紹常用的tag,最後是Grails的版面管理的library-SiteMesh,在Java框架裡常見的版面管理library,之前所看到的GSP網頁基本上Header/Footer以及預設的css檔都預先定義好了,只是依據不同的內容組合成最後的GSP,以下今日的介紹。
重新定義404/500網頁顯示,就必須先到conf/UrlMappings.groovy修改欲導向之網頁,程式碼如下:
class UrlMappings {

	static mappings = {
		"/$controller/$action?/$id?"{
			constraints {
				// apply constraints here
			}
		}

		"/"(view:"/index")
		//"500"(view:"error") 這是原版
		"500"(controller:'error', action:'500')
		"404"(controller:'error', action:'404')
		//新增發生404時該導向哪個網頁
	}
}
就是用一個ErrorController來處理404,ErrorController以及404.gsp code如下(原error.gsp可提供troubleshooting訊息故未修改指重新命名為500.gsp)
1.ErrorController
class ErrorController {

    def index(HandleErrorCommand erc) {
		redirect(action:"${erc.code}")
	}
	def '500'(){

	}
	def '404'(){

	}

}
class HandleErrorCommand{
	String code
}
2.404.gsp
<%@ page contentType="text/html;charset=UTF-8" %>


<meta http-equiv="Content-Type" content="text/html; charset=UTF-8"/>
<meta name="layout" content="main"/>
<title>404</title>


  <div class="body">
  		<Strong><ul>The Requested Page is not Found</ul></Strong>
  </div>
若輸入一個不存在的網址,則網頁會導向404.gsp

接著是分享Grails Tag,Tag分很多種:
1.Set Variable Scope tag:
2.Iterative tag:
<g:each in= "${collection}">
   ${it.(properties)}
</g:each>


<g:set scope= "page" var="i" expr="${User.list().size()}"/>
//scope就是變數的生命週期,page代表本頁,另外有flash、session等
//expr表示陳述式如何取得資料
<g:while test="${i>0}">
  <g:set scope= "page" var="i" expr="${i-1}"/>
</g:while>
3.Logical tag:
<g:if test="(boolean)">
    ....dosomthing
</g:if>
<g:else>
    .....do anotherthing
</g:else>
4.Filtering tag
<g:findAll in="${user}" expr="${it.userId.contains('Chen')}">
  <li>${it.profile.education}</li>
</g:findAll>
5.Link tag: g:link可以很彈性,可以指定controller以及action也可以指定URL,沒有意外地也可以帶params參數,可以說是<a href=""/>的加強版吧,
<g:link controller:"user" action:"search" params:"${user.userId}"
    搜尋
</g:link>
跟<g:link>不太一樣的<g:createlink>,後者只是把連結resoure而已,例如連結css檔或是圖片檔,或是導向Controller,前者有跟g:resource tag相同功能,如
<img src="${createlink(dir: 'images', file: 'mylogo.png')}"/>


<img src="${createLink(controller:'image', action: 'showImage'}"/>
後來好像被g:resoruce tag漸漸取代
<img src="${resource(dir: 'images', file: 'mylogo.png')}"/>
6.Form and Field tag:<g:form>與<g:uploadForm>之前已經介紹過了,不過其對應的UI部分尚未介紹,如下
<g:checkbox name="receviedEmail" value="${false}"/>
//創造一個checkbox,default未勾選


<g:select name="city"
from="$[Taipei, New Taipei, TaoYuan, HsinChu, Taichung, Tainan]}"
Value="{profile.city}"/>
//建立一個下拉式選單,from="${cities}"也可以從資料庫來


<g:radio name="gender" value="Male" checked="true">Male</g:radio>
<g:radio name="gender" value="Female">Female</g:radio>
//建立一組radio button
6.Validation tag:用來驗證輸入資料的Tag
<g:hasErrors bean="${user}" field="${password}">
  <g:eachError bean="${user}" field="${password}" var="err">
      <p><g:message error="${err}"></p>
  </g:eachError>
</g:hasErrors>
//驗證password,驗證條件來自於domain class的constraint
7.Pagination tag:
<g:paginate controller="Post" action="posthistory" total="${postCount}" max="2"/>
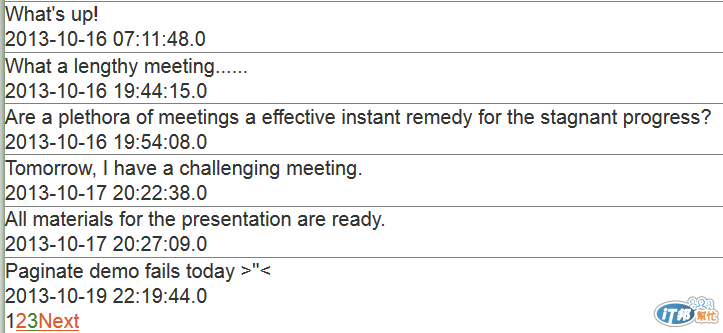
Pagination的demo今天失敗了,明天再補給大家
再來是有關Grails所採用的版面(layout)管理的部分,SiteMesh的示意圖(擷取自http://wiki.sitemesh.org/display/sitemesh/Home)

圖中的的Brrwser-theme.jsp即為母版,事先定義好Header、footer以及相關的resource,如logo, css檔等,對應對Grails這邊即為view/layouts/main.gsp
<!--[if lt IE 7 ]> <html lang="en" class="no-js ie6"> <![endif]-->
<!--[if IE 7 ]>    <html lang="en" class="no-js ie7"> <![endif]-->
<!--[if IE 8 ]>    <html lang="en" class="no-js ie8"> <![endif]-->
<!--[if IE 9 ]>    <html lang="en" class="no-js ie9"> <![endif]-->
<!--[if (gt IE 9)|!(IE)]><!--> <html lang="en" class="no-js"><!--<![endif]-->

		<meta http-equiv="Content-Type" content="text/html; charset=UTF-8">
		<meta http-equiv="X-UA-Compatible" content="IE=edge,chrome=1">
		<title><g:layoutTitle default="Welcome!"/>-Jason's MicroBlog</title>
		<meta name="viewport" content="width=device-width, initial-scale=1.0">
		<link rel="shortcut icon" href="${resource(dir: 'images', file: 'favicon.ico')}" type="image/x-icon">
		<link rel="apple-touch-icon" href="${resource(dir: 'images', file: 'apple-touch-icon.png')}">
		<link rel="apple-touch-icon" sizes="114x114" href="${resource(dir: 'images', file: 'apple-touch-icon-retina.png')}">
		<link rel="stylesheet" href="${resource(dir: 'css', file: 'main.css')}" type="text/css">
		<link rel="stylesheet" href="${resource(dir: 'css', file: 'mobile.css')}" type="text/css">
		<g:layoutHead/>
		<r:layoutResources />


		<div id="myLogo" role="banner"><img src="${resource(dir: 'images', file: 'mylogo.png')}" alt="JasonMicroBlog"/></div>
		<g:layoutBody/>
		<div class="footer" role="contentinfo">
			<div id="footerText" align="center">Jason's MicroBlog Powered by Grails</div>
		</div>
		<div id="spinner" class="spinner" style="display:none;"><g:message code="spinner.alt" default="Loading…"/></div>
		<g:javascript library="application"/>

		<r:layoutResources />
由排除Grail tag以外,在這個網頁code就如同剛剛所述,告訴我們main.css已經套用在母版上,LOGO的位置,故改CSS樣式時將套用到所用的網頁,Layout部份我們還會看到一些Grail tags,如<g:layoutHead/>用途在於將母版部分output到最後例如profile.gsp的網頁,同理各自網頁(search.gsp, posthistory.gsp)中的內容將放在母版<g:layoutBody/>的地方,讓GSP像是在組合一樣。
當然我們也可以自己建立Template,或是產生Template的fragment然後用<g:render>,讓每個網頁都出現我們指定的template fragment,範例明天再行說明,因為我還一時想不出來放什麼,或許是導覽列或使用者登入吧,另外明天希望跟大家分享Ajax Grail Tags
個人小心得:View部分除了書以外,要搞到觀念清楚還須查詢官方API,書有時候也沒有定義很清楚。