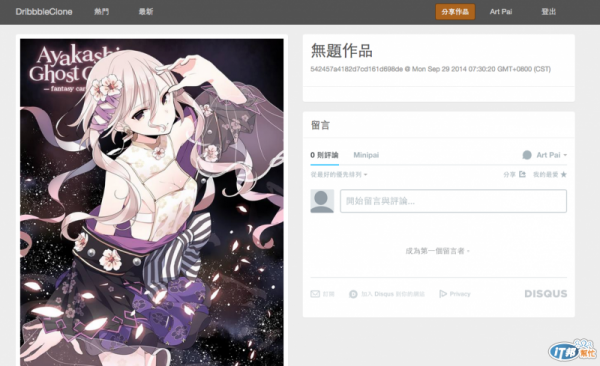
今天我們來完成獨立作品頁面。現在是這樣:
這麼這麼空呢?因為就真的沒什麼東西。一張圖的資料就只有標題,作者跟時間而已。
不過現在那些空白的地方是要放留言板的,讓使用者可以用「交談」一下。但是留言板說簡單很簡單,要做得好也是要花很多的功夫的,所以我們又要「外包」一下了。
我們要使用最有名的 disqus
使用 disqus 很簡單,只要到官網註冊帳號,然後按照指示貼他們提供的JavaScript
script(type="text/javascript").
    /* * * CONFIGURATION VARIABLES: EDIT BEFORE PASTING INTO YOUR WEBPAGE * * */
    var disqus_shortname = 'minipai'; // required: replace example with your forum shortname


    /* * * DON'T EDIT BELOW THIS LINE * * */
    (function() {
        var dsq = document.createElement('script'); dsq.type = 'text/javascript'; dsq.async = true;
        dsq.src = '//' + disqus_shortname + '.disqus.com/embed.js';
        (document.getElementsByTagName('head')[0] || document.getElementsByTagName('body')[0]).appendChild(dsq);
    })();

noscript
    | Please enable JavaScript to view the <a href="http://disqus.com/?ref_noscript">comments powered by Disqus.</a>
p <a href="http://disqus.com" class="dsq-brlink">comments powered by <span class="logo-disqus">Disqus</span></a>
就完成了!