在前面的 SVG 研究之路裡,不斷看到 defs 這個元素的身影,從顏色的填充、線段的圖案、濾鏡的定義...等許多的效果,都必須使用 defs 來定義,因此就直接寫了這篇關於 defs 的文章,也把這個常見但用法又時常不同的元素,一次做一個整理,也方便之後使用的參考。( oxxostudio.tw 同步發表:SVG 研究之路 (18) - 再談 defs )

defs 顧名思義就是「definitions」:定義,我們可以把許多重複性質高的元素,放入 defs 元素內,讓它變成一個可以重複利用的物件,原理就有點類似當年 flash 裏頭把一些動畫或是圖案轉換成物件一樣;首先我們來看到最常見的 defs 例子:「重複的圖形」,下面利用 defs 定義了一個矩形的長寬顏色,再使用 use 元素把矩形表現在畫面上,而 use 元素具有 x 與 y 的座標屬性,就可以輕鬆的做出許多不同位置的矩形。

<defs>
  <rect id="rect1" width="100" height="50" x="10" y="10" fill="#c00"/>
</defs>
<use xlink:href="#rect1"/>
<use xlink:href="#rect1" x="110"/>
也可以將 g 元素 ( 群組 ) 放在 defs 元素裏頭:

<defs>
    <g id="g1">
        <rect id="rect1" width="100" height="50" x="10" y="10" fill="#c00"/>
        <circle id="circle1" cx="30" cy="30" r="10" fill="#00c"/>
    </g>
</defs>
<use xlink:href="#g1"/>
<use xlink:href="#rect1" x="110"/>
<use xlink:href="#circle1" x="210"/>
定義漸層色 ( SVG 研究之路 (7) - fill 填色 ):

<defs>
   <linearGradient id="a1">
     <stop offset="5%" stop-color="#F00" />
     <stop offset="95%" stop-color="#ff0" />
   </linearGradient>
</defs>
<rect x="50" y="250" width="100" height="100" stroke="#000" stroke-width="5" fill="url(#a1)"></rect>
<circle cx="220" cy="300" r="50" stroke="#000" stroke-width="5" fill="url(#a1)"></circle>
<rect x="290" y="250" width="100" height="100" stroke="url(#a1)" stroke-width="5" fill="none"></rect>
定義文字路徑 ( SVG 研究之路 (8) - text 文字 ):

<defs>
  <path id="a1" d="M0 50 C150 150 100 -50 300 50" stroke="#000" fill="none"/>
</defs>
<text>
   <textPath xlink:href="#a1">這是隨著路徑跑的文字,很酷吧
  </textPath>
</text>
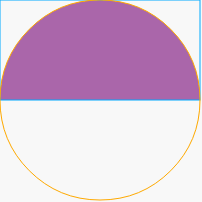
定義剪裁 Cliping ( SVG 研究之路 (9) - Clipping and Masking ):

<defs>
  <clipPath id="a1">
  <rect x="0" y="0" width="200" height="100" />
</clipPath>
</defs>
<circle cx="100" cy="100" r="100" clip-path="url(#a1)" fill="#000" />
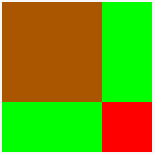
定義剪裁 ( SVG 研究之路 (9) - Clipping and Masking ):

<defs>
  <mask id="mask1">
    <rect  x="50" y="50" width="100" height="100" fill="#ccc"/>
    <rect  x="150" y="150" width="50" height="50" fill="#fff"/>
  </mask>
</defs>
  <rect id="box1" x="50" y="50" width="150" height="150" fill="#0f0"/>
  <rect id="box2" x="50" y="50" width="150" height="150" fill="#f00" mask="url(#mask1)"/>
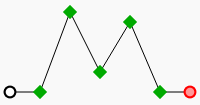
定義線段 marker ( SVG 研究之路 (17) - Stroke-marker ):

<defs>
  <marker id="r" viewBox="-10 -10 70 70" refX="25" refY="25" markerWidth="15" markerHeight="15" orient="auto" >
      <circle fill="#fff" stroke="#000" stroke-width="10" cx="25" cy="25" r="25"/>
  </marker>
    <marker id="g" viewBox="0 0 50 50" refX="25" refY="25" markerWidth="10" markerHeight="10" orient="45" >
      <rect fill="#0a0" width="50" height="50"/>
  </marker>
  <marker id="b" viewBox="-10 -10 70 70" refX="25" refY="25" markerWidth="15" markerHeight="15" orient="auto" >
      <circle fill="#f99" stroke="#f00" stroke-width="10" cx="25" cy="25" r="25"/>
  </marker>
</defs>
<polyline points="20,100 50,100 80,20 110,80 140,30 170,100 200,100" fill="none" stroke="black" stroke-width="1" marker-end="url(#b)" marker-start="url(#r)" marker-mid="url(#g)"></polyline>
使用 defs 定義 filter ( SVG 研究之路 (13) - filter - feGaussianBlur ):

<defs>
<filter width="200" height="200" x="0" y="0" id="blur" filterUnits="userSpaceOnUse">
  <feGaussianBlur stdDeviation="5" />
</filter>
</defs>
<rect x="30" y="30" width="70" height="70" fill="#a00" filter=url("#blur") />
除了最後一個 filter,其他的應該都在之前的章節介紹過,後續會再介紹 filter 的用法喔~ ^_^
