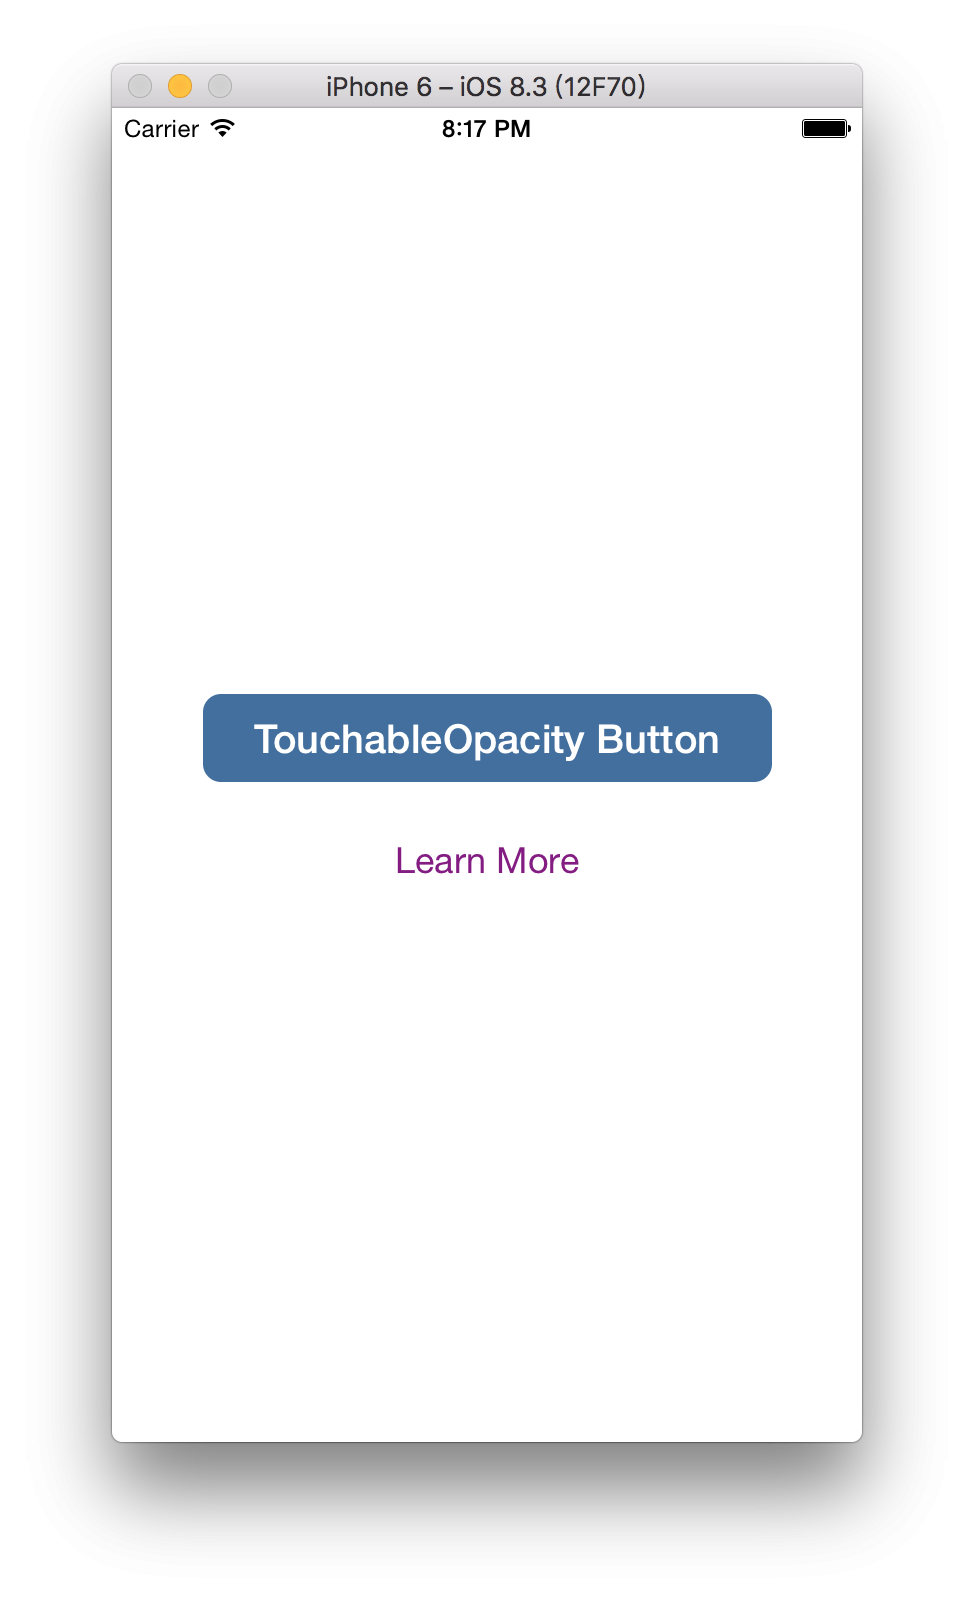
Button 在 React Native 其實算是特殊的,0.38 版以前的 React Native 並沒有 Button 這個元件的,都要用 <TouchableOpacity> 這個很像 <View> 的元件,但是點下去後會變透明的元件來做按鈕,裡面再放一個 <Text> 排個版,就是一顆自己的按鈕了,但是現在 0.38 後出現了 <Button> 元件,所以現在能直接使用,不過有個缺點,在 IOS 跟 Android 的樣子長得不一樣,所以為了要統一按鈕形狀,通常我都還是會自己嗑一個自己喜歡的按鈕。
使用 SOP : import { TouchableOpacity } from 'react-native';
使用範例
<TouchableOpacity style={styles.button} onPress={function(){ console.log('按到我了') }}>
  <Text style={styles.buttonText}> TouchableOpacity Button </Text>
</TouchableOpacity>
從 onPress 這個 props 名稱上我們可以猜到這是 TouchableOpacity 的點擊事件,當點擊後會出發這個 function。
跟其他 Component 一樣使用 SOP: import { Button } from 'react-native';
使用範例
<Button
  onPress={function(){ console.log('按到我了') }}
  title="Learn More"
  color="#841584"
/>
Button 一樣有 onPress 可以使用,跟 TouchableOpacity 的使用方法大同小異。
最後來一個完整的範例:
import React, { Component } from 'react';
import {
  StyleSheet,
  View,
  Text,
  TouchableOpacity,
  Button
} from 'react-native';

export default (props) => (
  <View style={styles.center}>
    <TouchableOpacity style={styles.button}>
      <Text style={styles.buttonText}> TouchableOpacity Button </Text>
    </TouchableOpacity>
    <Button
      title="Learn More"
      color="#841584"
    />
  </View>
);

const styles = StyleSheet.create({
  center: {
    flex: 1,
    justifyContent: 'center',
    alignItems: 'center',
  },
  button: {
    margin: 20,
    padding: 10,
    paddingLeft: 20,
    paddingRight: 20,
    backgroundColor: '#406E9F',
    borderRadius: 9,
    alignItems: 'center',
    justifyContent: 'center',
  },
  buttonText: {
    color: '#fff',
    fontSize: 20,
    fontWeight: 'bold',
  },
});
結果長這樣
這裡我們能發現一個跟之前範例當中不一樣的地方,我們 export 時適用
export default (props) => ();
之前的範例當中都是
export default class HelloReactNative extends Component {}
這裡個有什麼差別呢?
export function 的是 pure function 我們稱之為 dump Component, export class 的我們稱之為 smart function,這個章節中我們不深入的介紹,有興趣的朋友可以看這篇 『React 最佳實踐與實用函式』,簡單來說就是 pure function 的 Component 只是一層皮,沒有狀態的單純做顯示,可以方便的除錯和重用。
那這種 pure function 怎麼使用呢?
我們可以這樣
import ButtonSample from './src/ButtonSample';
然後在 render 中使用
<View style={{ flex: 1 }}>
  <ButtonSample />
</View>
未來有機會再更詳細的介紹 dump Component、 smart Component
有問題歡迎來 React Native Taiwan 問喔
創科資訊
