在行車記錄器與網路發達的年代,我們應該都有用過 Google Maps,甚至也看過許多把感測器資訊拋到 Google Maps 上頭顯示的實例 ( 目前最夯的大概就是 PM2.5 了吧 ),接下來兩篇將會帶大家實作 Google Maps 和 Webduino 的應用,並且在上頭顯示開關燈資訊,例如某地的電燈打開了,在地圖上的小燈泡也會跟著打開,甚至你去點選地圖上的小燈泡,也可以控制那個地方真正的燈泡喔!
這篇將會介紹基本的控制原理 ( 啟用 API、金鑰、基礎地圖操控、加入地址資訊 ),當我們已經熟稔 Google 地圖的用法後,下一篇就會透過 Webduino 將燈泡資訊顯示在地圖上。
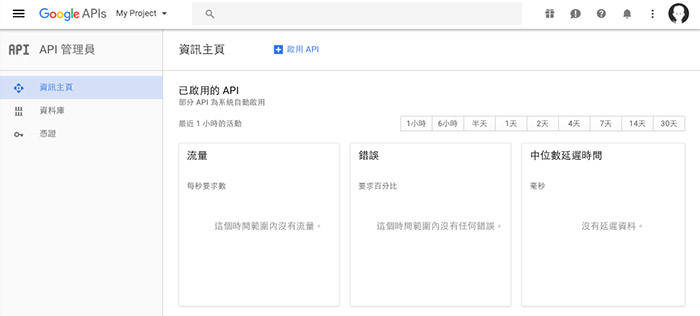
要使用 Google Maps 首先要進入 Google API Console ( https://console.developers.google.com/?hl=zh-tw ),在上面 Google 提供了各式各樣的服務,而且每種服務都有提供一個以上的 API 讓開發者使用。
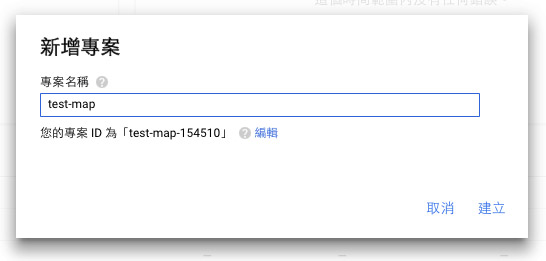
登入進去之後,建立一個專案。
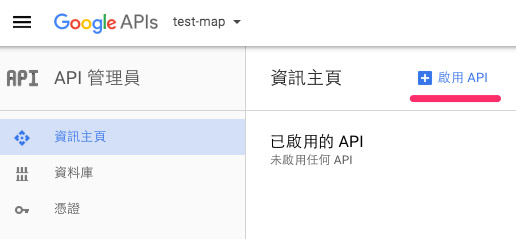
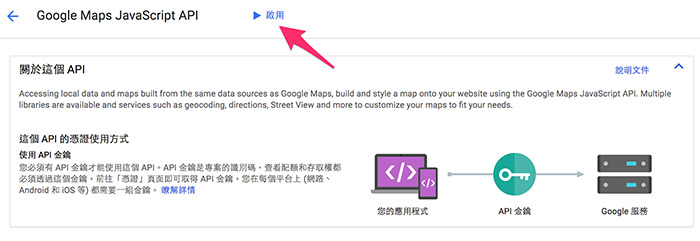
專案建立之後,點選「啟用 API」,新增我們在地圖操作所需的 API。
這裡我們要使用的是「Google Maps JavaScript API」和「Google Maps JavaScript API」,Google Maps JavaScript API 是主要的 API,Google Maps JavaScript API 則是幫我們轉換地點。( 不然就只能輸入不直覺的經緯度 )
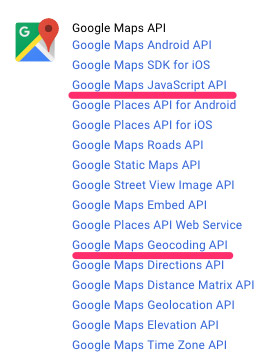
點選 API 名稱將其一一啟用。
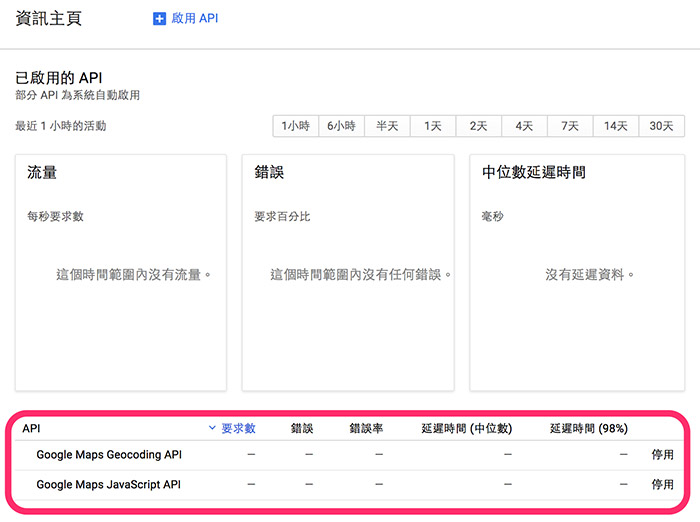
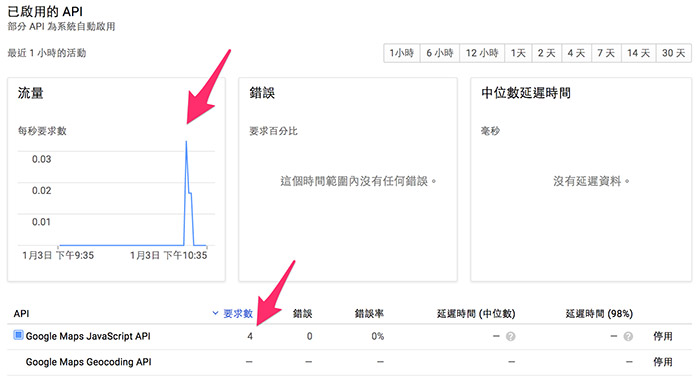
資訊主頁的下方會顯示啟用了哪些 API。
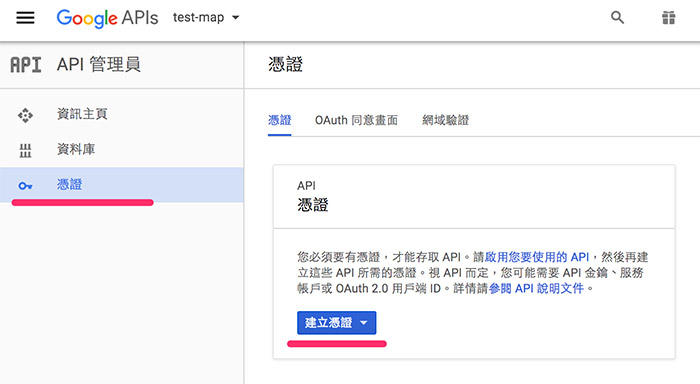
接著就是要申請憑證,畢竟 Google 也是要賺錢,不會讓你白白用他的服務。( 不過一定的流量內的確是讓你白白用沒錯ㄎㄎ )
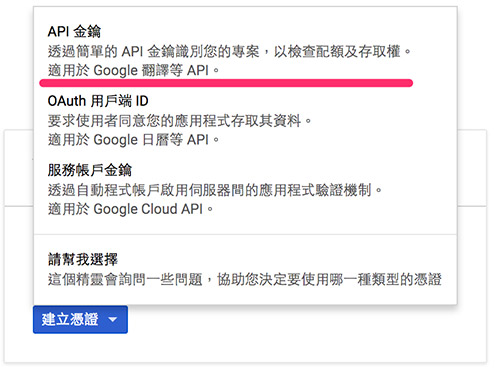
這邊我選擇第一個,建立 API 金鑰,也就是只要有這個金鑰就可以使用剛剛的 API 了。
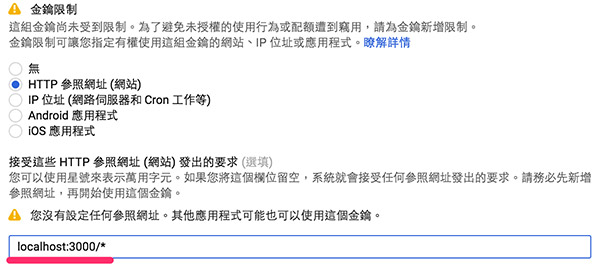
為了安全性起見,通常都會勾選下面的一些設定 ( 我自己會綁網域或是 IP ),因為這邊要做範例,就先不綁了( 而且範例做完這組金鑰我也會砍掉,所以大家還是要自己申請自己的來測試 )
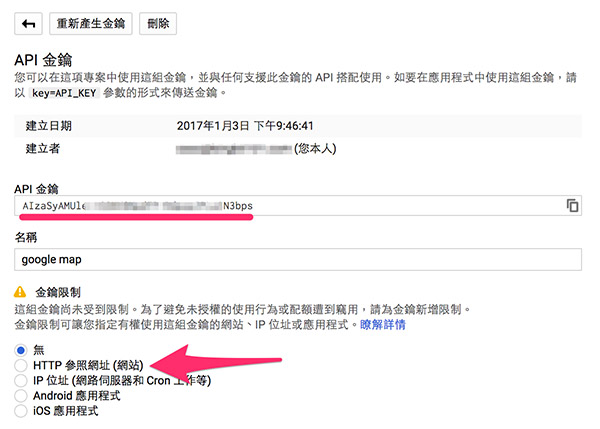
如果你要在本地端測試,可以勾選 HTTP 參照網址,允許 localhost:3000/* 即可。( port 自訂 )
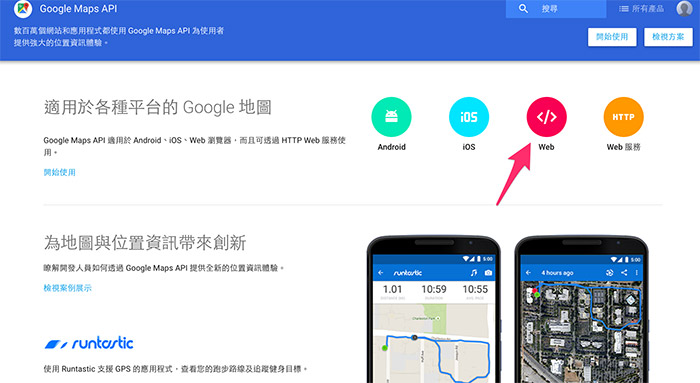
要使用 Google 地圖除了剛剛的 API 與金鑰之外,最重要的就是閱讀開發者網站:Google Maps API,裡面提供相當多的 API 用法以及範例介紹,因為我們是使用 Web 控制,就直接點選 Web 進入。
( 參考資源:Google Maps JavaScript API V3 Reference )
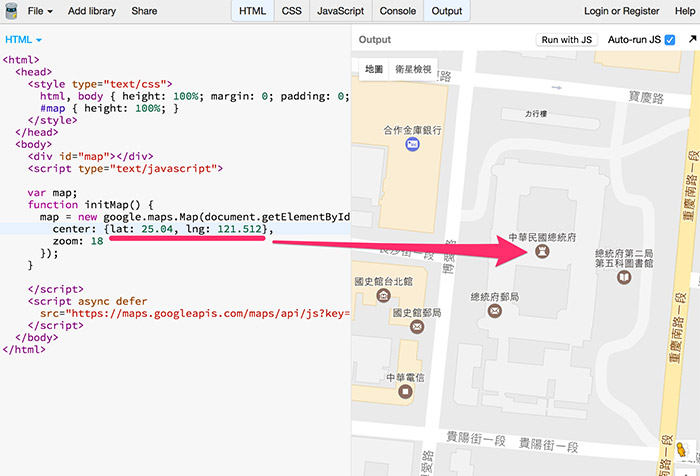
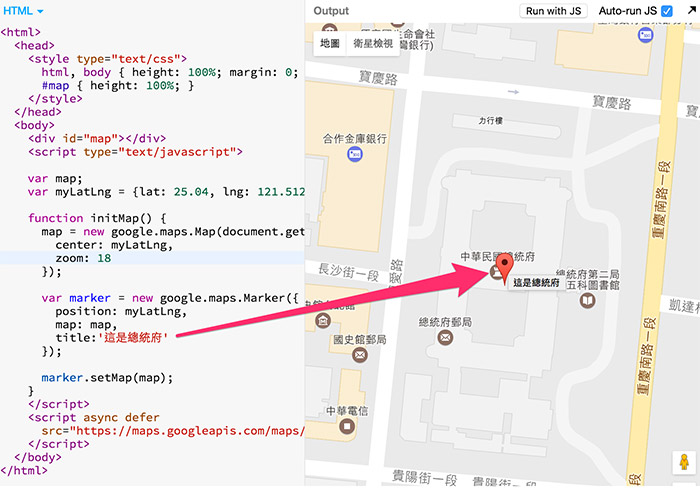
首先我們來做第一個範例,在畫面上放入一個 div 載入地圖,接著透過 .Map 的方法定義中心點,lat 是緯度 latitude,lng 是經度 longitude,zoom 數字越大放越大,而最下面的 Script 就是你的金鑰以及要執行的流程名稱。
( 參考:https://developers.google.com/maps/documentation/javascript/tutorial?hl=zh-tw )
<html>
  <head>
    <style type="text/css">
      html, body { height: 100%; margin: 0; padding: 0; }
      #map { height: 100%; }
    </style>
  </head>
  <body>
    <div id="map"></div>
    <script type="text/javascript">

    var map;
    function initMap() {
      map = new google.maps.Map(document.getElementById('map'), {
        center: {lat: 25.04, lng: 121.512},
        zoom: 18
      });
    }

    </script>
    <script async defer
      src="https://maps.googleapis.com/maps/api/js?key=你的金鑰&callback=initMap">
    </script>
  </body>
</html>
當你執行這個網頁的時候,回到 API 管理員裡面,就可以看到取用的次數,基本上一般使用都不會爆量,當然如果爆量就不能用了,或是要花錢買更大的數量來使用。
會使用地圖之後,接著來試試看在地圖裡加入「Marker」,因為會共用到經緯度,所以用一個變數來裝經緯度的物件,然後這裡會透過 new google.maps.Marker 的方法來新增一個 marker 到地圖上,這邊我只介紹幾個常見的用法,畢竟光是 Google Map 應該又可以寫個 30 天了 XD。
( 參考:https://goo.gl/D4TGqQ )
var map;
var myLatLng = {lat: 25.04, lng: 121.512};

function initMap() {
  map = new google.maps.Map(document.getElementById('map'), {
    center: myLatLng,
    zoom: 18
  });

  var marker = new google.maps.Marker({
    position: myLatLng,
    map: map,
    title:'這是總統府'
  });

  marker.setMap(map);
}
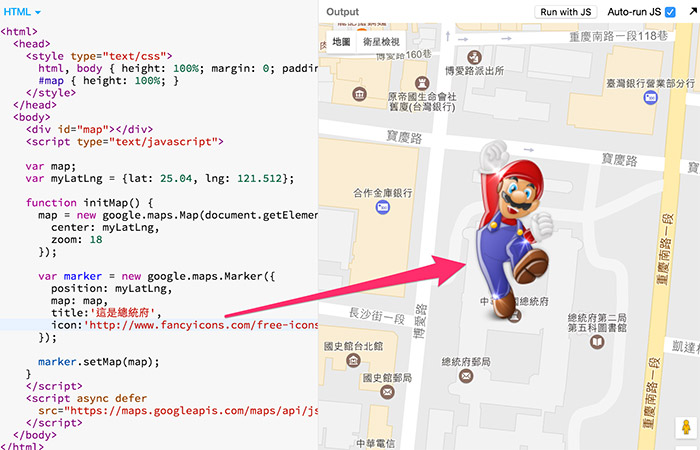
而我們也可以透過 marker 的屬性 icon 來指定 marker 的圖片。
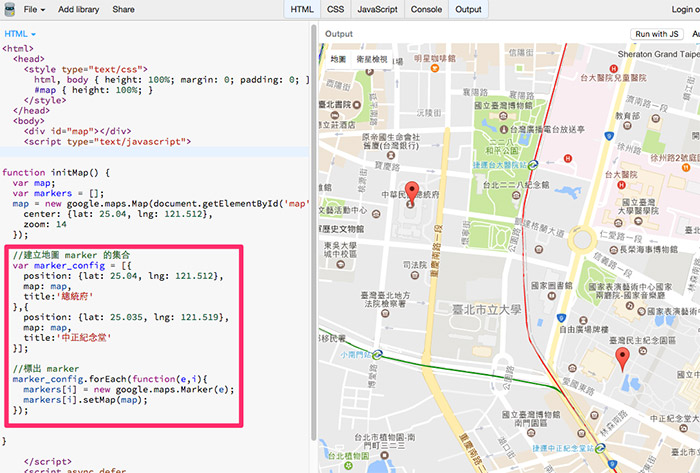
如果你把 marker 集合成一個陣列,就可以標記多個 marker 在地圖上。( 如果使用 .setMap(null) 就可以清除該 marker )
function initMap() {
  var map;
  var markers = [];
  map = new google.maps.Map(document.getElementById('map'), {
    center: {lat: 25.04, lng: 121.512},
    zoom: 14
  });

  //建立地圖 marker 的集合
  var marker_config = [{
    position: {lat: 25.04, lng: 121.512},
    map: map,
    title:'總統府'
  },{
    position: {lat: 25.035, lng: 121.519},
    map: map,
    title:'中正紀念堂'
  }];

  //標出 marker
  marker_config.forEach(function(e,i){
    markers[i] = new google.maps.Marker(e);
    markers[i].setMap(map);
  });
}
Info windows 是在我們點選 maker 的時候會彈出來的資訊視窗,透過 new google.maps.InfoWindow 可以建立一個新的資訊視窗,內容就是純 HTML,可以用 CSS 控制,亦可放入圖片。
var contentString = ‘網頁內容’; //要顯示的 HTML 內容

var infowindow = new google.maps.InfoWindow({
  content: contentString
});

marker.addListener('click', function() {
  infowindow.open(map, marker); //設定點選 marker 打開資訊視窗事件
});
同樣的可以用一個陣列,放入多組不同的內容,是其對應到不同的 marker 裡面。
透過 google.maps.Geocoder() 可以解析地址,將地址轉換成對應的經緯度,回傳之後存在 results[0].geometry.location 內,就可以標記出對應的地點。
( 參考:https://developers.google.com/maps/documentation/javascript/geocoding?hl=zh-tw )
var geocoder = new google.maps.Geocoder();
geocoder.geocode( { 'address': address}, function(results, status) {
  if (status == google.maps.GeocoderStatus.OK) {
    map.setCenter(results[0].geometry.location);
    var marker = new google.maps.Marker({
        map: map,
        position: results[0].geometry.location
    });
  } else {
    alert("Geocode was not successful for the following reason: " + status);
  }
});
不過因為每次都要寫這樣一段實在有點複雜,原本是想要用 return 把地址轉出來的經緯度吐出來,不過發現沒辦法,所以我這邊用一個流程 _geocoder 把它包起來,裡面包含一個 callback 的流程,這樣就可以重複利用了。
function initMap() {
var markers = [];
var infoWindows = [];
var loaction;
var geocoder = new google.maps.Geocoder();
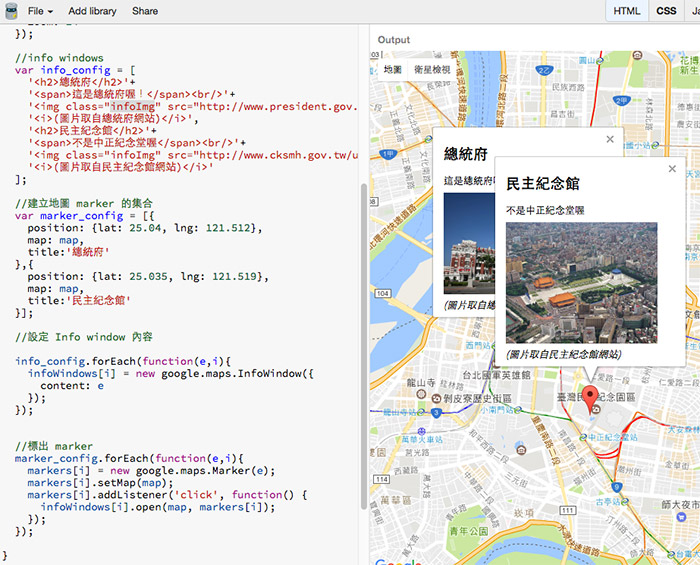
var info_config = [
'<h2>總統府</h2>'+
'<span>這是總統府喔!</span><br/>'+
'<img class="infoImg" src="http://www.president.gov.tw/Portals/0/images/PresidentOffice/BeautyBuliding/President/m_000064_342436.jpg"><br/>'+
'<i>(圖片取自總統府網站)</i>',
'<h2>民主紀念館</h2>'+
'<span>不是中正紀念堂喔</span><br/>'+
'<img class="infoImg" src="http://www.cksmh.gov.tw/upload/article/4248b77496baac99a290f6f202bfe786.jpg"><br/>'+
'<i>(圖片取自民主紀念館網站)</i>'
];
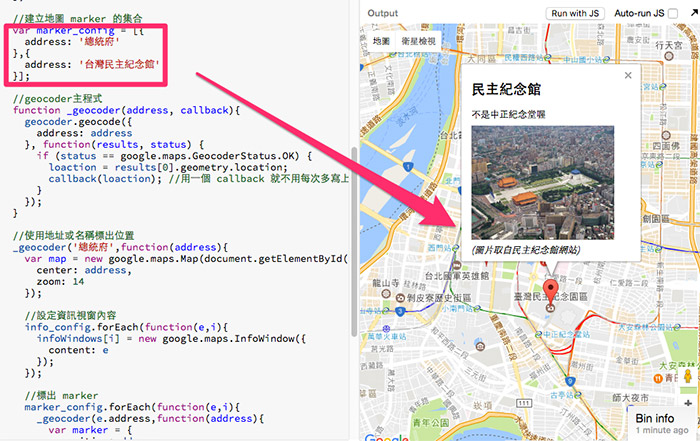
//建立地圖 marker 的集合
var marker_config = [{
address: '總統府'
},{
address: '台灣民主紀念館'
}];
//geocoder主程式
function _geocoder(address, callback){
geocoder.geocode({
address: address
}, function(results, status) {
if (status == google.maps.GeocoderStatus.OK) {
loaction = results[0].geometry.location;
callback(loaction); //用一個 callback 就不用每次多寫上面這段
}
});
}
//使用地址或名稱標出位置
_geocoder('總統府',function(address){
var map = new google.maps.Map(document.getElementById('map'), {
center: address,
zoom: 14
});
//設定資訊視窗內容
info_config.forEach(function(e,i){
infoWindows[i] = new google.maps.InfoWindow({
content: e
});
});
//標出 marker
marker_config.forEach(function(e,i){
_geocoder(e.address,function(address){
var marker = {
position:address,
map:map
}
markers[i] = new google.maps.Marker(marker);
markers[i].setMap(map);
markers[i].addListener('click', function() {
infoWindows[i].open(map, markers[i]);
});
});
});
});
}
( 完整程式碼,記得要填入金鑰:http://bin.webduino.io/moro/1/edit?html,output )
今天的重點大致上就到這邊,如果你前面都有實作出來,基本上就已經可以隨心所欲的操控地圖了。
下一篇將會透過 Webduino,實際把燈泡和 Google 地圖結合,如果沒有先透過這篇的原理介紹,實際上要合併的時候,腦袋就會冒出許多問號了。
參考:


 iThome鐵人賽