Passport模組有一個很好的設計模式在裏頭-策略模式,它本身不負責做驗證這工作,我們自個定義驗證方式,給定策略名稱,再經由Passport模組導入驗證策略,執行驗證工作,這讓驗證變得更有彈性好擴充,我們也可以使用第三方驗證不需要自定義驗證邏輯,一樣再透過驗證策略的切換,將第三方驗證作為網站驗證方式。
npm install --save passport passport-jwt @types/passport-jwt jsonwebtoken
cd src/app & mkdir Auth\Passport
import * as jwt from 'jsonwebtoken';
import { Component, Inject } from '@nestjs/common';
import { UsersServices } from '../Users/users.service';

@Component()
export class AuthService {

    constructor(private readonly usersServices: UsersServices) { }

    public async createToken(id: number) {
        //token到期時間
        const expiresIn = 60*5;
        //重要,盡可能複雜些
        const secret = 'donttalk';
        /*
        payload不建議放淺顯易懂的敏感資料,如要放敏感資料最好有加密過,
        這邊以不重複的id作替代,對應的是資料表ID欄位。
        */
        const token = jwt.sign(id, secret, { expiresIn });
        return {
            expires_in:expiresIn,
            token: token
        }
    }

    public async validate(payload: object): Promise<boolean> {
        //給定where條件,依據token payload的ID作為where條件。
        let queryCondition = { where: { ID: payload['ID'] } };
        const user = await this.usersServices.findOne(queryCondition);
        //有該筆資料,回傳true
        if (user) {
            return true;
        }
        //沒該筆資料回傳false
        else {
            return false;
        }
    }
}
import { Controller, Post, HttpStatus, HttpCode, Get, Body } from '@nestjs/common';
import { AuthService } from './auth.service';
@Controller('auth')
export class AuthController {
constructor(private readonly authService: AuthService) { }
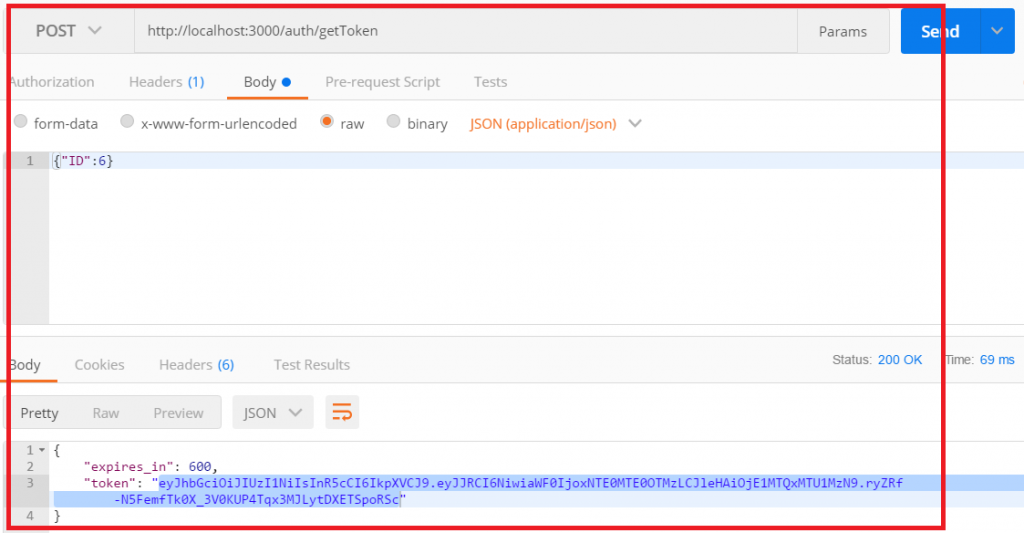
@Post('getToken')
@HttpCode(HttpStatus.OK)
public async getToken( @Body() ID: number) {
return await this.authService.createToken(ID);
}
}
準備一隻可以產生Token的route,等等我們要手動加到HTTP Header測試一下。
import * as passport from 'passport';
import { ExtractJwt, Strategy } from 'passport-jwt';
import { Component, Inject } from '@nestjs/common';
import { AuthService } from '../auth.service';

@Component()
export class JwtStrategy extends Strategy {
    constructor(private readonly authService: AuthService) {
        super({
            //用來帶入驗證的函式
            jwtFromRequest: ExtractJwt.fromAuthHeaderAsBearerToken(),
            //設成true就可以在verify的callback中使用
            passReqToCallback: true,
            secretOrKey: 'donttalk',
        },
            async (req, payload, next) => await this.verify(req, payload, next)
        );
        passport.use(this);
    }

    public async verify(req, payload, done) {
        //呼叫authService.validate(),會去撈表確認有無資料
        const isValid = await this.authService.validate(payload);
        if (!isValid) {
            return done('驗證失敗', false);
        }
        done(null, payload);
    }
}
import * as passport from 'passport';
import {
    Module,
    NestModule,
    MiddlewaresConsumer,
    RequestMethod
} from '@nestjs/common';
import { AuthService } from './auth.service';
import { JwtStrategy } from './Passport/jwt.strategy';
import { AuthController } from './auth.controller';
import { UsersServices } from '../Users/users.service';
import { UsersProvider } from '../Users/users.providers';
import { DatabaseModule } from '../database.module';
import { UsersController } from '../Users/modules/users.controller';

@Module({
    modules: [DatabaseModule],
    components: [UsersServices,UsersProvider, AuthService, JwtStrategy],
    controllers: [AuthController,UsersController]
})
export class AuthModule implements NestModule {
    //全域middleware
    public configure(consumber: MiddlewaresConsumer) {
        //apply、forRoute方法允許傳入多個參數
        consumber.apply(passport.authenticate('jwt', { session: false }))
            .forRoutes({ path: '/users', method: RequestMethod.ALL });
    }
}
@Module({
    modules: [UsersModule, AuthModule]
})
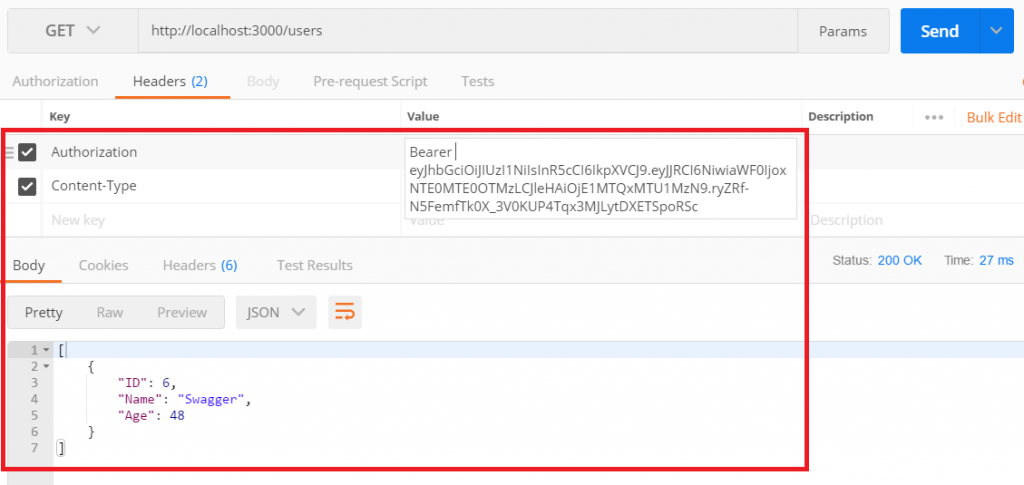
大功告成,可以訪問請求到資源,如果沒帶token或token解析驗證錯誤,都會得到
Unauthorized。
程式碼都在github