基本的CRUD完成後,我們要試著挑戰稍微進階一點的功能,例如今天的上傳圖片。
首先我們在產品的model中新增圖片的欄位:
$ mix ecto.gen.migration add_photo_to_product
* creating priv/repo/migrations/20171228003556_add_photo_to_product.exs
編輯migration
  def change do
    alter table(:products) do
      add :photo, :string, default: ""
    end
  end
model的schema要手動新增欄位
  schema "products" do
    field :description, :string
    field :price, :integer
    field :quantity, :integer
    field :title, :string
    field :photo, :string, default: ""

    timestamps()
  end
然後執行mix ecto.migrate。
就像在ruby我們會使用像是carrierwave來處理圖片,在Elixir我們也會使用mix來處理圖片上傳,這邊我們安裝arc_ecto與arc,打開mix.exs:
  defp deps do
    [
      ...
      {:arc_ecto, "~> 0.4.4"},
      {:arc, "~> 0.5.3"}
    ]
  end
接著執行mix deps.get來安裝套件。如果安裝時出現錯誤訊息:Hex dependency resolution failed,可以試著更新所有相關的套件mix deps.update --all
有了arc以後,我們就可以建立upoader:
$ mix arc.g photo_uploader
...
* creating web/uploaders/photo_uploader.ex
因為這是Phoenix 2.1.5以前的結構,所以我們手動調整一下:
$ mkdir lib/shop_web/uploaders
$ mv web/uploaders/photo_uploader.ex lib/shop_web/uploaders/photo_uploader.ex
$ rm -r web
然後對檔案做下面的修正:
defmodule ShopWeb.PhotoUploader do
    use Arc.Definition
    use Arc.Ecto.Definition

    @versions [:original, :thumb]
    def transform(:thumb, _) do
      {:convert, "-strip -thumbnail 100x100^ -gravity center -extent 100x100 -format png", :png}
    end
    def __storage, do: Arc.Storage.Local
    def filename(version,  {file, scope}), do: "#{version}-#{file.file_name}"
end
記得修改model的部分(貼上有加號的行數,加號記得刪除):
defmodule Shop.Goods.Product do
  use Ecto.Schema
 +use Arc.Ecto.Schema
  import Ecto.Changeset
  alias Shop.Goods.Product

  schema "products" do
    field :description, :string
    field :price, :integer
    field :quantity, :integer
    field :title, :string
   +field :photo, ShopWeb.PhotoUploader.Type

    timestamps()
  end

  @doc false
  def changeset(%Product{} = product, attrs) do
    product
   +|> cast_attachments(attrs, [:photo])
    |> cast(attrs, [:title, :description, :quantity, :price])
    |> validate_required([:title, :description, :quantity, :price])
  end
end
完成後執行mix ecto.migrate
# lib/shop_web/templates/admin/product/form.html.eex
<%= form_for @changeset, @action, [multipart: true], fn f -> %>
  ...
  <div class="form-group">
    <%= label f, :photo, class: "control-label" %>
    <%= file_input f, :photo, class: "form-control" %>
    <%= error_tag f, :photo %>
  </div>
  ...
打開畫面,就可以看到出現了photo檔案選擇的欄位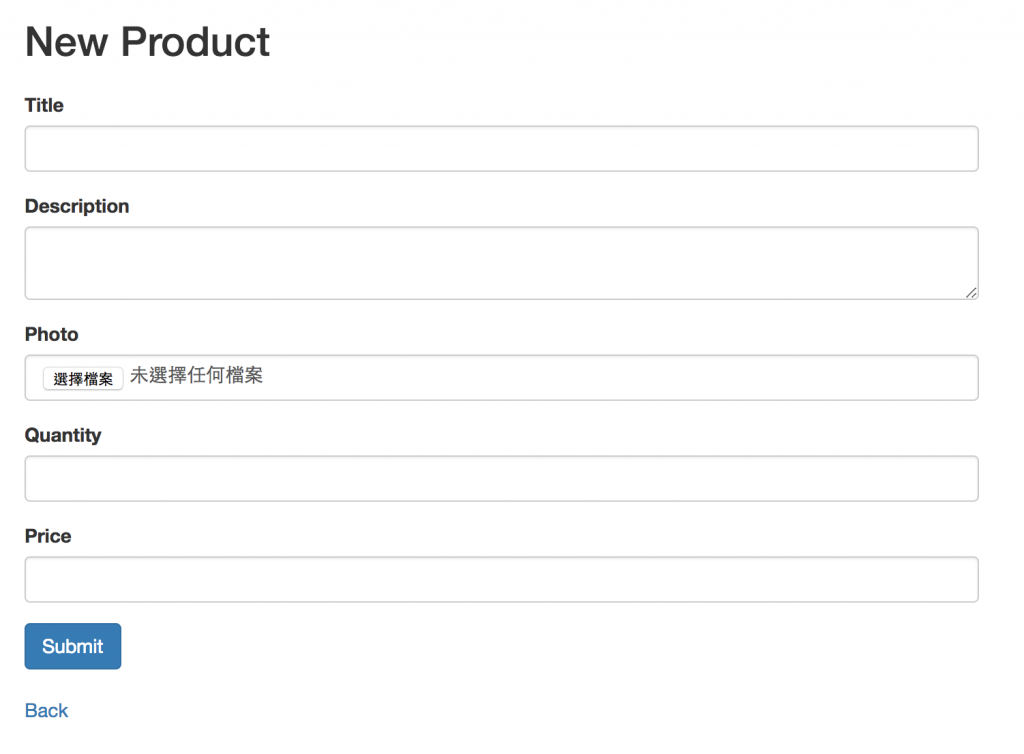
如果你試著上傳圖片,很可能會遇到跟我一樣的錯誤:找不到crypto.rand_bytes方法,這時候請到deps/arc/lib/arc/transformations/convert.ex,手動把他改為crypto.strong_rand_bytes,然後編譯mix deps.compile,這時候再重開伺服器,應該就可以解決了。
首先在新增下面這段,不要把原本的plug Plug.Static覆蓋掉:
# lib/shop_web/endpoint.ex
plug Plug.Static,
    at: "admin/uploads", from: Path.expand('./uploads'), gzip: false
接著在index.html.eex新增下面這段(或任何你希望出現圖片的地方)
...
<%= product.title %>
<%= if product.photo.file_name != "" do %>
  <img class="thumbnail"
     src="<%= Shop.PhotoUploader.url({product.photo, product}, :thumb) %>"/>
<% end %>
...
這樣圖片就可以顯示了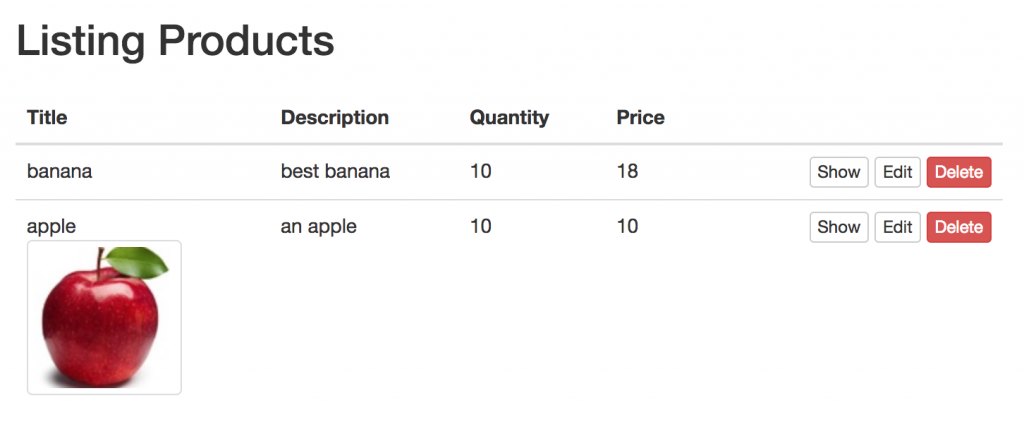
參考資料:上傳圖片