git clone https://github.com/jerryhsieh/ngrx-demo.git
跟著下列步驟一起做
第一步:如果您還沒安裝過 angular-cli,請先安裝
npm install -g @angular/cli
當然前提是您已經安裝了 Node.js, 如果還沒安裝過的話,請依照這個官方文件安裝
第二步:接著用 angular-cli 產生新的專案,這個可以參考這篇官方文章
ng new ngrx-demo --routing
等待系統下載完所以必須的檔案,您就可以用
cd ngrx-demo
npm start
來產生專案,在瀏覽器打入 http://localhost:4200 可以即時看到程式修改的結果。
我們預計會用到 @angular/materail 及 @angular/flex-layout,詳細安裝解說請看官方文件
第一步:安裝套件
npm install --save @angular/material @angular/cdk @angular/flex-layout
第二步:Animations
加入 BrowerAnimationsModule 到 src/app/app.module.ts
import { BrowserModule } from '@angular/platform-browser';
import { NgModule } from '@angular/core';
import { BrowserAnimationsModule } from '@angular/platform-browser/animations';
import { AppRoutingModule } from './app-routing.module';
import { AppComponent } from './app.component';
@NgModule({
    declarations: [
        AppComponent
    ],
    imports: [
        BrowserModule,
        AppRoutingModule,
        BrowserAnimationsModule
    ],
    providers: [],
    bootstrap: [AppComponent]
})
第三步:加入 Share Module,將所有用到的 Material 集中放在一個 module, 這樣就不用到處 import
ng generate module share
修改 src/app/share/share.module.ts
import { NgModule } from '@angular/core';
import { CommonModule } from '@angular/common';
import { MatButtonModule } from '@angular/material';
@NgModule({
    imports: [
        CommonModule,
        MatButtonModule
    ],
    exports: [
        MatButtonModule
    ],
    declarations: []
})
記得在 app.module.ts 做 import,以後的 Module 也會共用到這個模組
import { ShareModule } from './share/share.module';
// ...
@ngModule({
    // ...
    imports: [
        //...
        ShareModule
    ]
})
第四步:加入佈景主題
將以下這一行加入 src/styles.css
@import "~@angular/material/prebuilt-themes/indigo-pink.css";
第五步:加入手勢
npm install --save hammerjs
修改 src/main.ts, 加入這一行
import 'hammerjs';
第六步: 使用 Materail Icon, 將這一行加入 src/index.html
<link href="https://fonts.googleapis.com/icon?family=Material+Icons" rel="stylesheet">
根據前面的需求及規劃,我們預計產生兩個主要模組(modules), user 跟 member
ng generate module user --routing
ng generate module member --routing
我們之後再來處理這兩個模組。
我們先建立最上層用到的元件, 在 src/app 底下
ng generate component home
ng generate component navbar
第一步:將 app.componenet.ts import navbar 如下
import { Component } from '@angular/core';
import { NavbarComponent } from './navbar/navbar.component';
@Component({
    selector: 'app-root',
    templateUrl: './app.component.html',
    styleUrls: ['./app.component.css']
})
export class AppComponent {
    title = 'app';
}
第二步:將 app.components.html 修改如下
<app-navbar></app-navbar>
<router-outlet></router-outlet>
第三步:修改 src/app-routing.module.ts 如下
import { NgModule } from '@angular/core';
import { Routes, RouterModule } from '@angular/router';
import { HomeComponent } from './home/home.component';
const routes: Routes = [{
    path: '', children: [
        { path: 'home', component: HomeComponent },
        { path: '', redirectTo: '/home', pathMatch: 'full' }
    ]
}];

@NgModule({
    imports: [RouterModule.forRoot(routes)],
    exports: [RouterModule]
})
export class AppRoutingModule { }
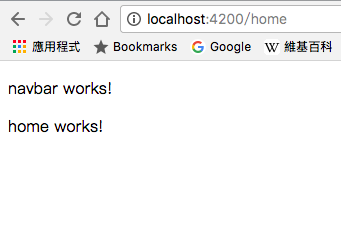
好了,我們把最基本的架構先留下來,接著就要一個一個填空,這時首頁會產生
我們接下來就要先做這個首頁
