今天的目標是做出像充電螢幕那樣,裡面實心外圍邊緣漸進的動畫。
首先定義出一個 CAShapeLayer 叫做 shapeLayer。
    let shapeLayer = CAShapeLayer()
    view.layer.addSublayer(shapeLayer)
開始刻 CAShapeLayer 。
    let circularPath = UIBezierPath(arcCenter: center, radius: 100, startAngle: 0,
    endAngle: 2 * CGFloat.pi, clockwise: true)
    let center = view.center
    shapeLayer.path = circularPath.cgPath
    shapeLayer.strokeColor = UIColor.cyan.cgColor // 邊緣顏色 cyan
    shapeLayer.lineWidth = 8 // 邊緣寬度 = 8
此時我們的動畫看起來就像這樣: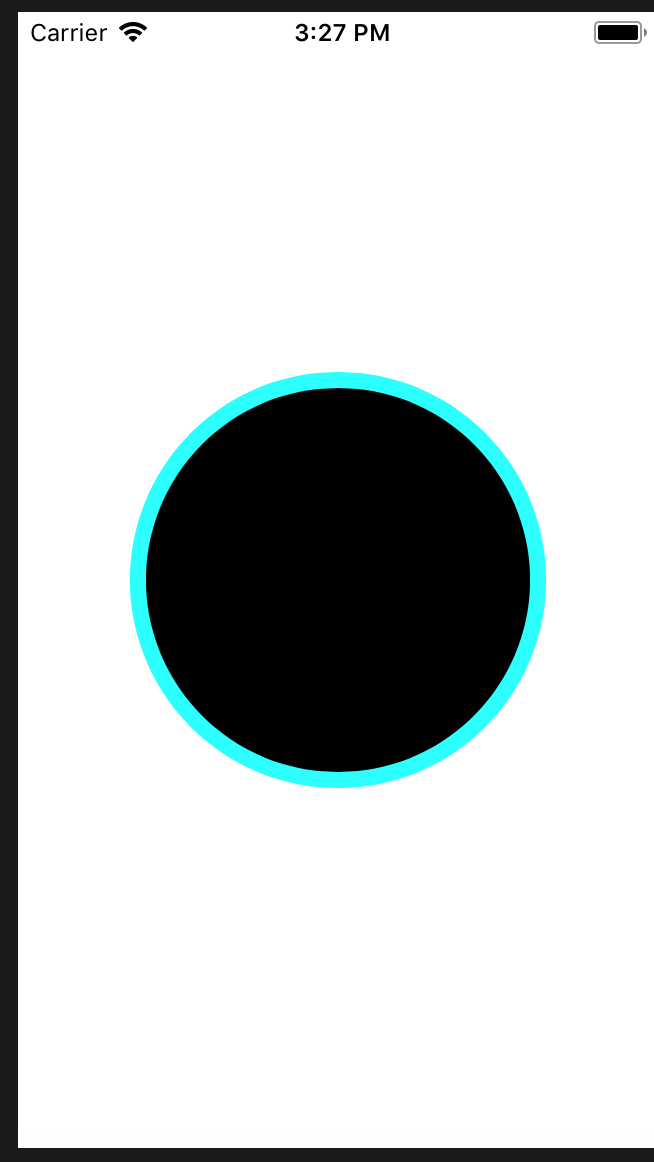
設定動畫 basicAnimation
    let basicAnimation = CABasicAnimation(keyPath: "strokeEnd")
    basicAnimation.toValue = 1 // 1 為最終值
    basicAnimation.duration = 2.5  // 設定動畫長度為 2.5 秒
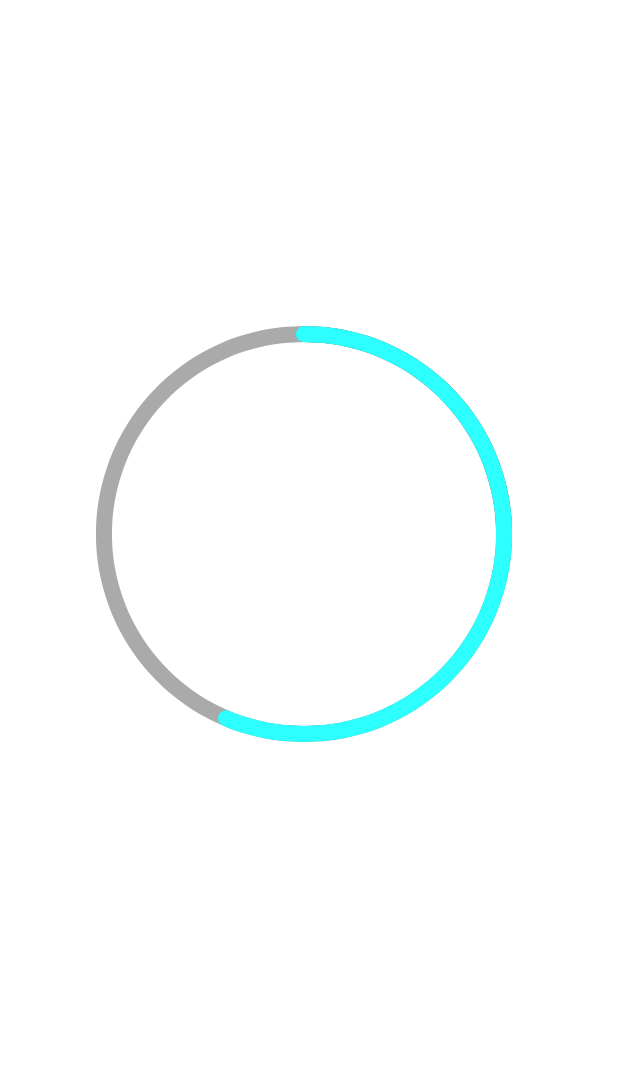
不過此時我們的漸進式邊緣是從 90度角的地方開始的。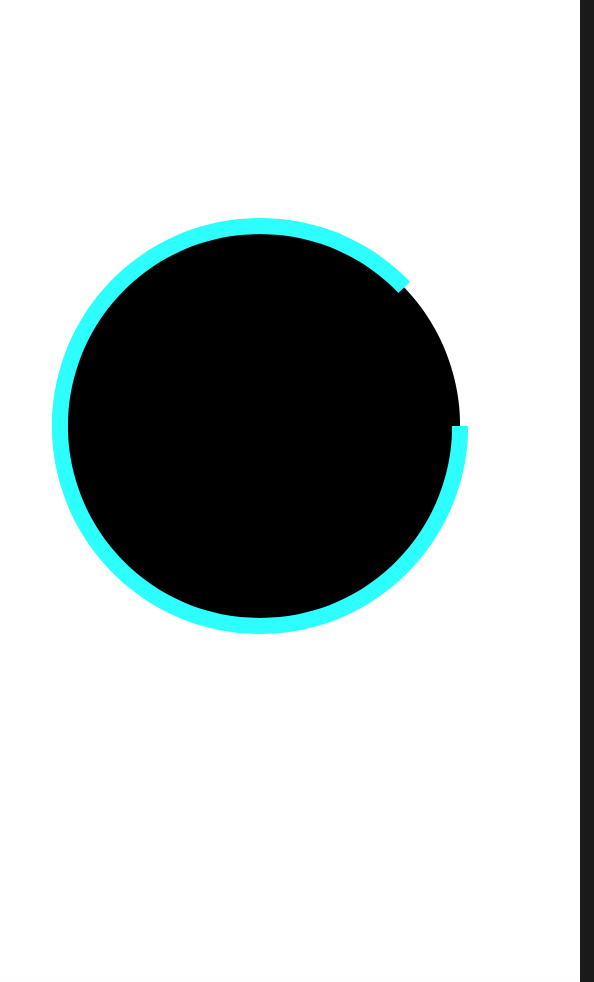
我們可以透過修改 circularPath 的 startAngle 從原本的 0 成為 - 1/ 2 pi 修正這個地方。
let circularPath = UIBezierPath(arcCenter: center, radius: 100, startAngle: -CGFloat.pi / 2, endAngle: 2 * CGFloat.pi, clockwise: true)
並再稍作調整
    shapeLayer.lineCap = kCALineCapRound // 邊線圓角
    shapeLayer.fillColor = UIColor.clear.cgColor  // 去掉裡面的圓的顏色
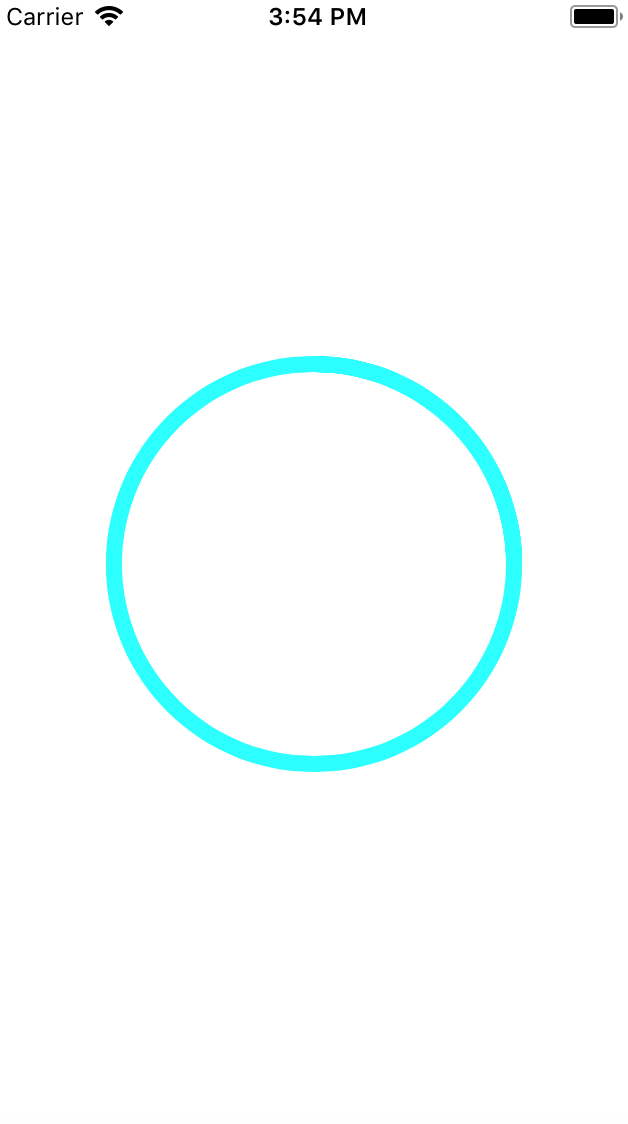
最後成果:
動畫總時間為 3 秒鐘,點擊一下螢幕會開始順時針漸進。