這次做個橫向移動的卡片佈局。

如上面的動畫顯示,卡片可以左右滑動,當滑動經過 x 軸中央時,卡片會向左後方或者右後方凹折過去。
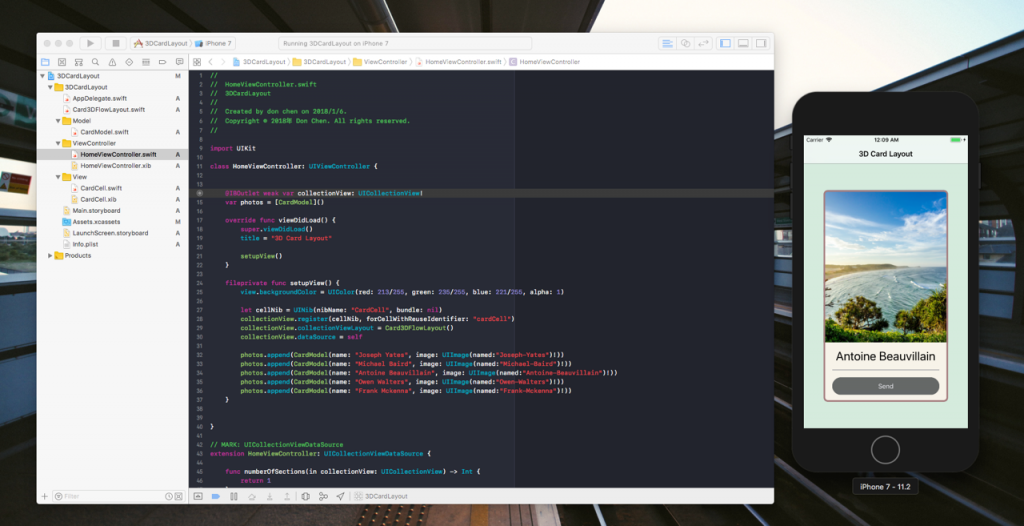
卡片的樣式,可以放一張圖片以及對應的文字。

資料通過 CardModel 封裝,在 cell 內部設定圓角、邊框顏色等,對外提供一個 loadContent 方法來加載內容。
class CardCell: UICollectionViewCell {

    @IBOutlet weak var imageView: UIImageView!
    @IBOutlet weak var titleLabel: UILabel!
    @IBOutlet weak var actionButton: UIButton!

    var data:Any?

    override func awakeFromNib() {
        super.awakeFromNib()

        backgroundColor = UIColor(red: 247/255, green: 243/255, blue: 233/255, alpha: 1)
        layer.cornerRadius = 10
        layer.borderWidth = 4
        layer.borderColor = UIColor(red: 166/255, green: 126/255, blue: 128/255, alpha: 1).cgColor

        actionButton.layer.cornerRadius = 20
    }

    func loadContent() {
        if let model = data as? CardModel {
            imageView.image = model.image
            titleLabel.text = model.name
        }
    }

}
從 itemSize 以及 Inset 開始設定。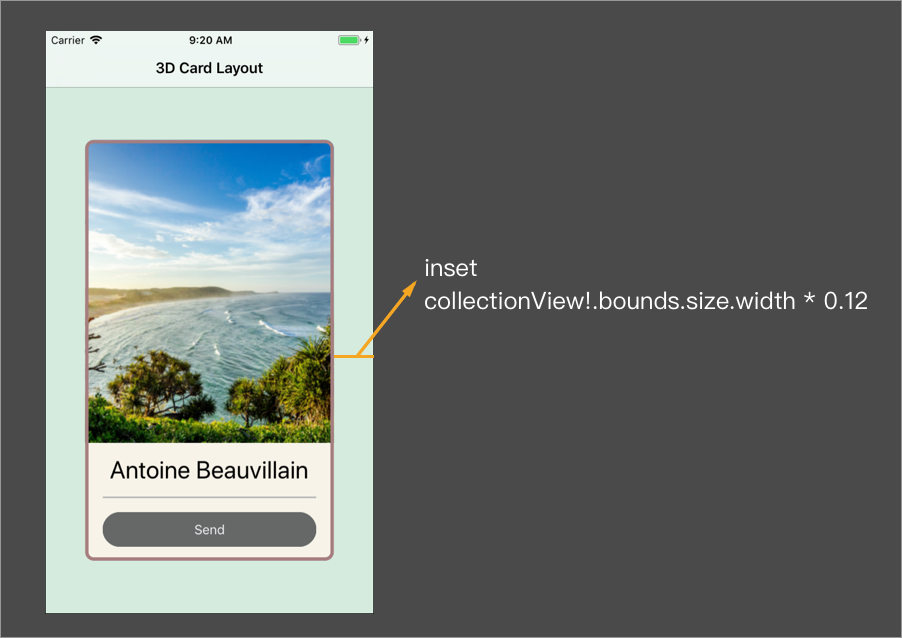
我們希望一個完整的畫面中只會出現一張卡片,而卡片的兩側要有邊距。
卡片的寬度由 collectionView.bounds 去掉兩邊的邊距。
一開始左邊的邊距通過 sectionInset 來的,而卡片之間的邊距通過 minimumLineSpacing 而來。
override func prepare() {
    super.prepare()
    setupLayout()
}

fileprivate func setupLayout() {
    collectionView?.isPagingEnabled = true
    scrollDirection = .horizontal

    let inset:CGFloat = collectionView!.bounds.size.width * 0.12
    itemSize = CGSize(width: (collectionView!.bounds.size.width - 2 * inset),
                      height: collectionView!.bounds.size.height * 4/5)

    minimumLineSpacing = inset * 2
    sectionInset = UIEdgeInsets(top: 0, left: inset, bottom: 0, right: inset)

}
根據 collectionView 滑動的情況,改變 mainIndexPath / movingInIndexPath / difference / previousOffset 的值。
針對 mainIndexPath 和 movingInIndexPath 給予不同的 attributes
override func layoutAttributesForElements(in rect: CGRect) -> [UICollectionViewLayoutAttributes]? {
    let attributes = super.layoutAttributesForElements(in: rect)
    var cellIndices = self.collectionView!.indexPathsForVisibleItems

    if cellIndices.count == 0 {
        return attributes

    } else if cellIndices.count == 1 {
        mainIndexPath = cellIndices.first
        movingInIndexPath = nil

    } else if cellIndices.count > 1 {
        let firstIndexPath = cellIndices.first
        if firstIndexPath == mainIndexPath {
            // scroll left
            movingInIndexPath = cellIndices[1]
        } else {
            // scroll right
            movingInIndexPath = cellIndices.first
            mainIndexPath = cellIndices[1]
        }
    }

    difference = collectionView!.contentOffset.x - previousOffset
    previousOffset = collectionView!.contentOffset.x

    for attribute in attributes! {
        applyTransformToLayoutAttributes(attribute: attribute)
    }

    return attributes
}

fileprivate func applyTransformToLayoutAttributes(attribute:UICollectionViewLayoutAttributes) {
    if(collectionView == nil){ return }

    var cell:UICollectionViewCell?
    if attribute.indexPath.row == mainIndexPath?.row {
        cell = collectionView!.cellForItem(at: mainIndexPath!)
        attribute.transform3D = transformFromView(view: cell!)

    } else if attribute.indexPath.row == movingInIndexPath?.row {
        cell = collectionView!.cellForItem(at: movingInIndexPath!)
        attribute.transform3D = transformFromView(view: cell!)

    }

}
卡片是通過 CATransform3D 變形的,而變形的方式是根據 collectionView 滑動的情況來改變的。
以畫面中心為標準,當卡片向左滑動的時候執行
CATransform3DRotate(transform, angle, 1.0, 1.0, 0.0)
當卡片向右滑動的之後執行
transform = CATransform3DRotate(transform, angle, -1.0, 1.0, 0.0)
而變形的角度就根據卡片距離中心點移動的距離。
fileprivate func transformFromView(view:UICollectionViewCell) -> CATransform3D {
    let angle = angleForView(view: view)
    return transformFromAngle(angle: angle, with: view)

}

fileprivate func angleForView(view:UICollectionViewCell) -> CGFloat {
    let baseOffsetForCurrentView = CGFloat(collectionView!.indexPath(for: view)!.row) * collectionView!.bounds.size.width
    let currentOffset = collectionView!.contentOffset.x
    let scrollViewWidth = collectionView!.bounds.size.width
    let angle = (currentOffset - baseOffsetForCurrentView) / scrollViewWidth
    return angle
}

fileprivate func transformFromAngle(angle:CGFloat, with view:UICollectionViewCell) -> CATransform3D {
    var transform:CATransform3D = CATransform3DIdentity
    transform.m34 = 1.0 / -500

    let baseOffsetForCurrentView = CGFloat(collectionView!.indexPath(for: view)!.row) * collectionView!.bounds.size.width
    let currentOffset = collectionView!.contentOffset.x
    let offset = currentOffset - baseOffsetForCurrentView
    var isScrollingLeft = false
    if offset >= 0 { isScrollingLeft = true }

    if isScrollingLeft {
        transform = CATransform3DRotate(transform, angle, 1.0, 1.0, 0.0)
    } else {
        transform = CATransform3DRotate(transform, angle, -1.0, 1.0, 0.0)
    }
    return transform
}
讓 collectionView 使用我們自己的佈局樣式(Card3DFlowLayout)
collectionView.collectionViewLayout = Card3DFlowLayout()