今天來介紹如何使用Google Chrome的擴充工具Advanced REST client(ARC)來做REST資源請求的測試與介紹@RestController的相關的參數
文字說明:
點擊右上角工具列->更多工具->擴充功能->將視窗移到最下方->取得更多擴充功能->搜尋Advanced REST client->當你只看到ARC cookie exchange 先點擊此圖示不要安裝!!!!->跳出浮動視窗後點選上方Menu(相關項目)->看到Advanced REST client後點擊安裝->新增此應用程式->等待安裝完成後瀏覽器輸入(chrome://apps/ )就可以看到他了->點擊開啟ARC
圖片說明:
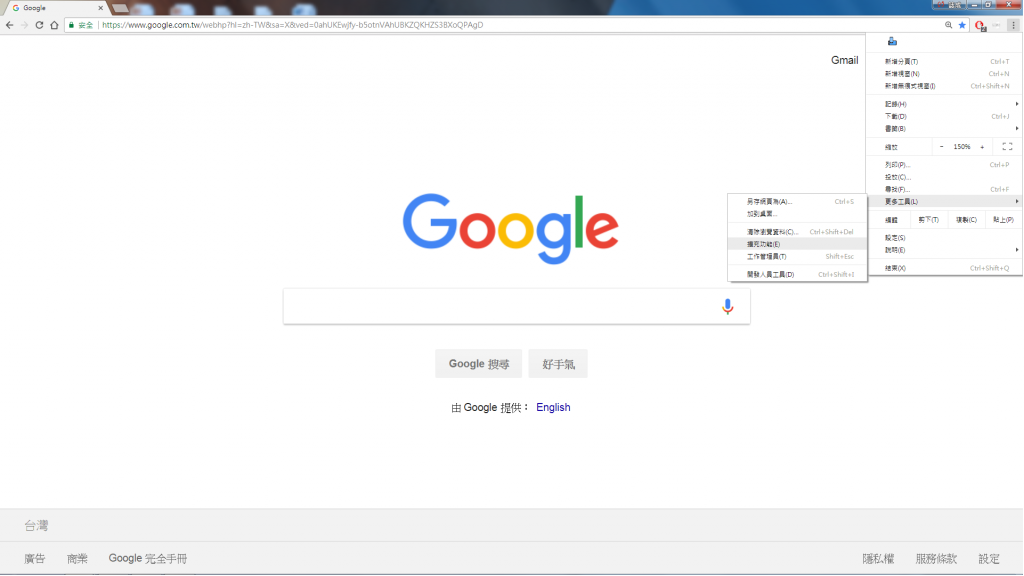
圖1:擴充工能位置
圖2:更多擴充工具按鈕位置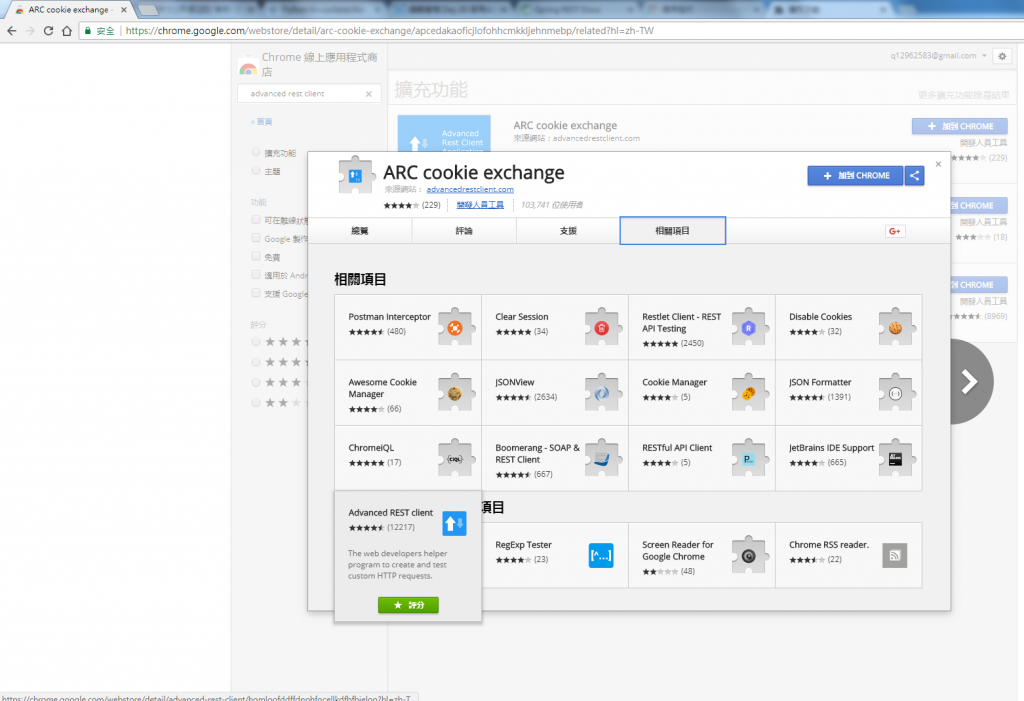
圖3:搜尋ARC擴充工具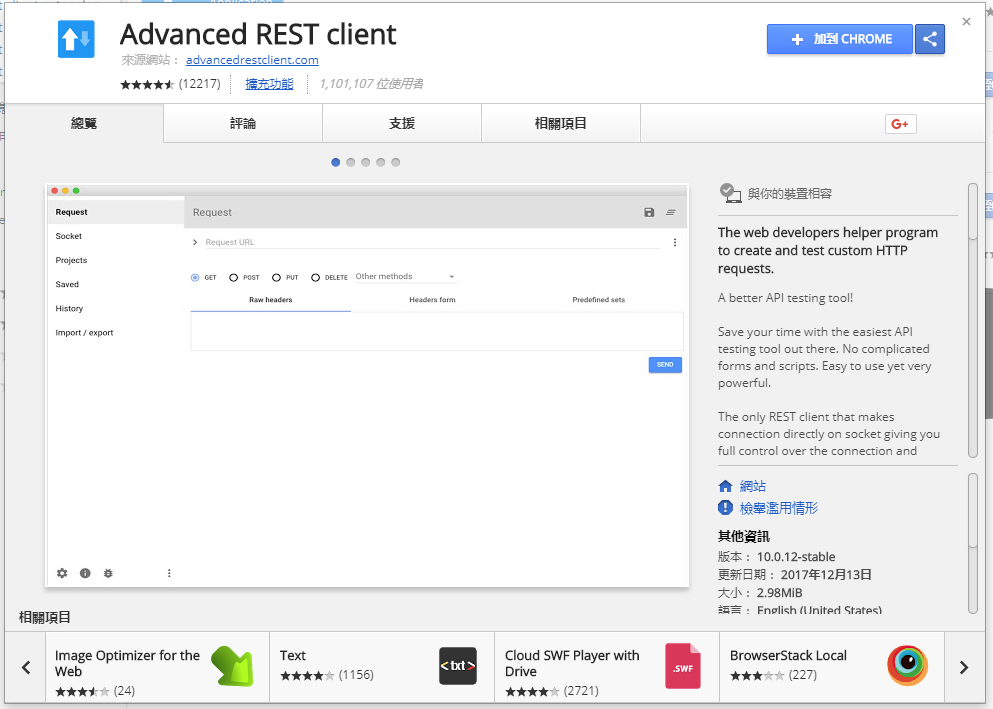
圖4:ARC安裝浮動視窗頁面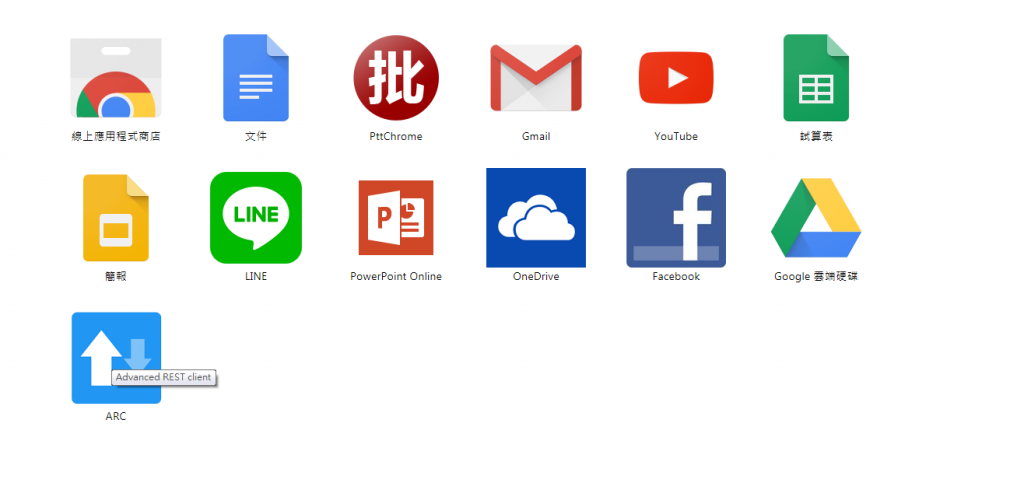
圖5:安裝完成後的圖示(Icon)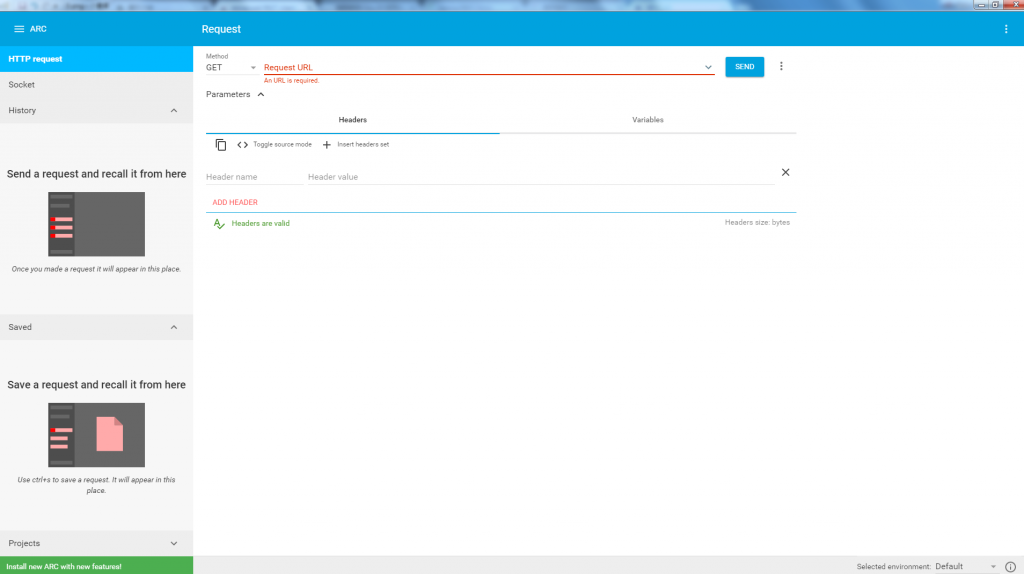
圖6:ARC介面
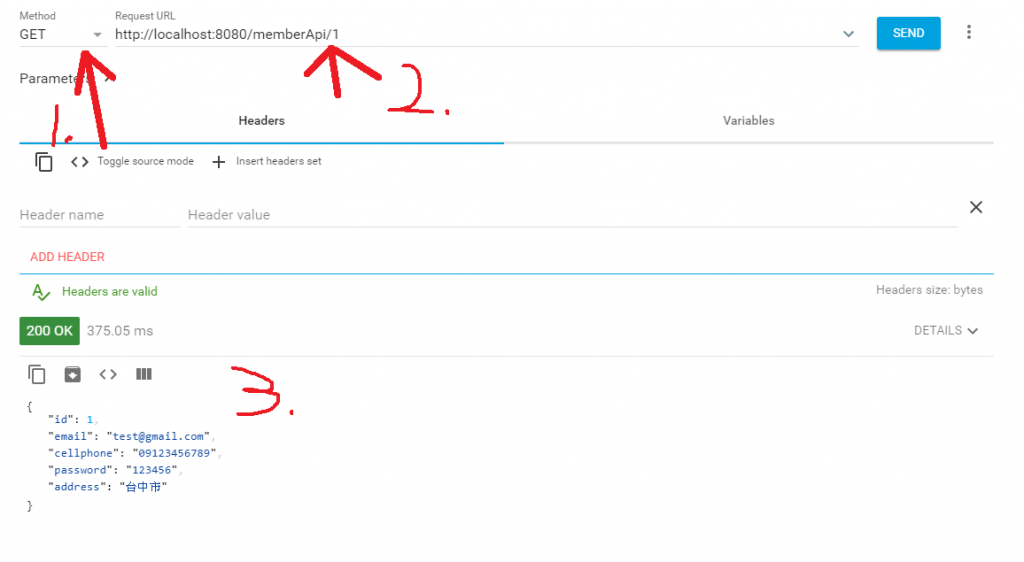
圖7:請求方法選擇GET的使用,URL輸入為伺服器資源位址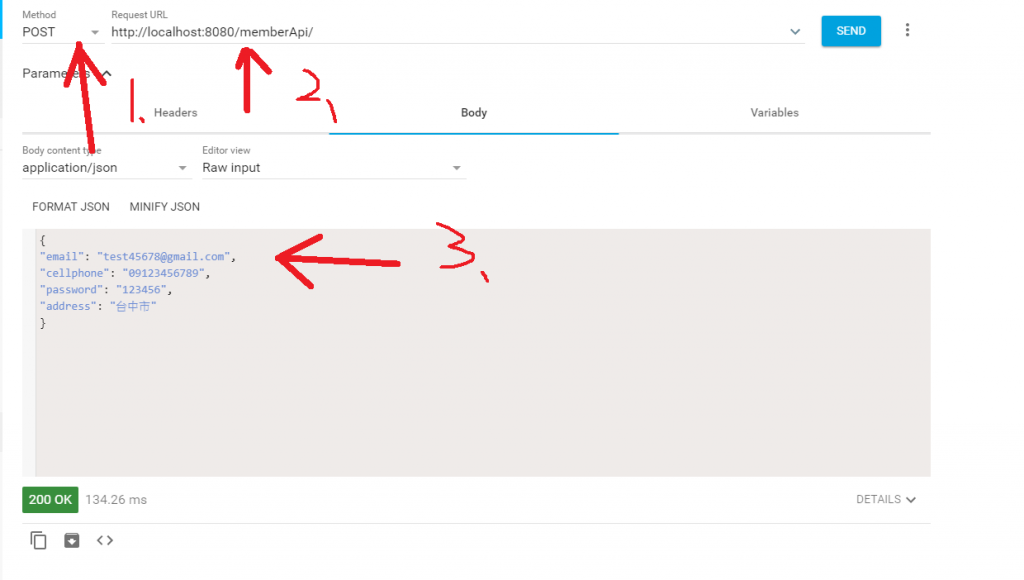
圖8:請求方法選擇POST的使用,URL輸入為伺服器資源位址,注意!! BODY中ID必須拿掉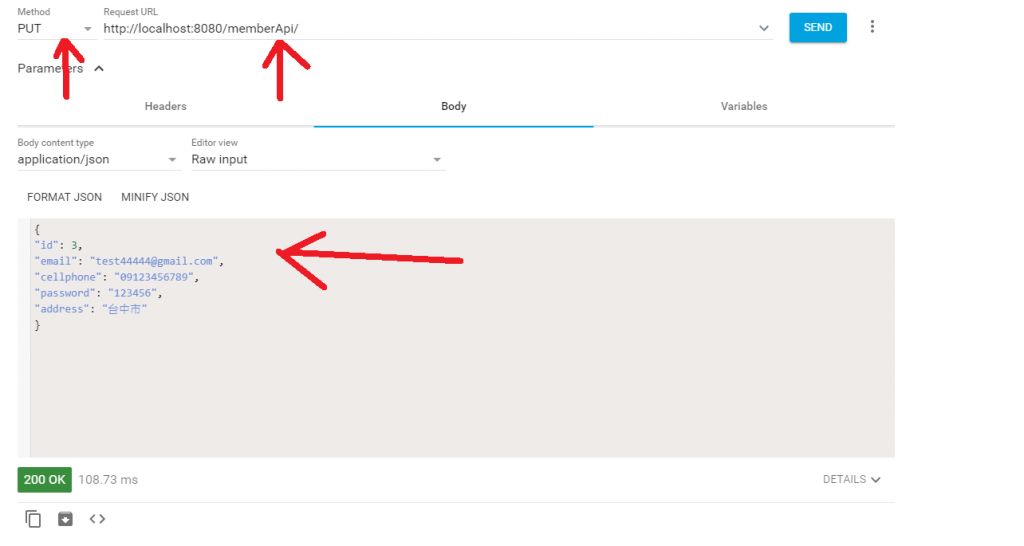
圖9:請求方法選擇PUT的使用,URL輸入為伺服器資源位址,加上ID 遇到有存在的ID則做UPDATE
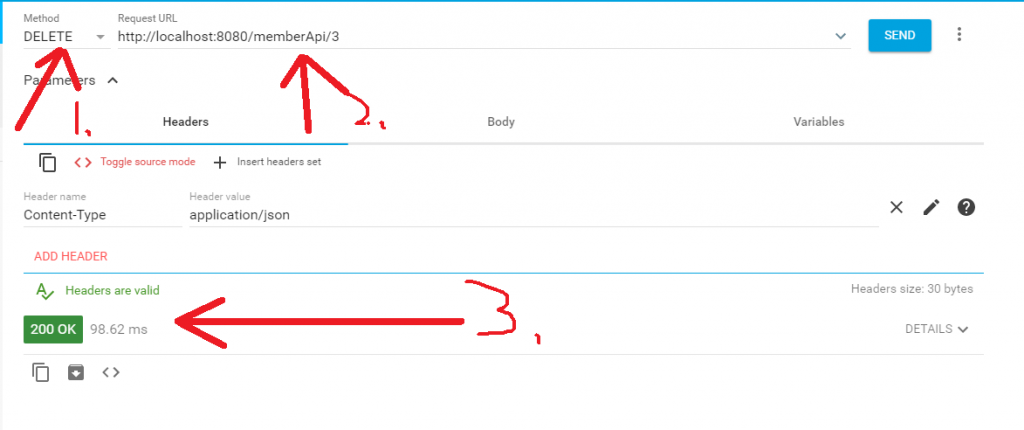
圖10:請求方法選擇DELETE的使用,URL輸入為伺服器資源位址,加上ID 遇到有存在的ID則做DELETE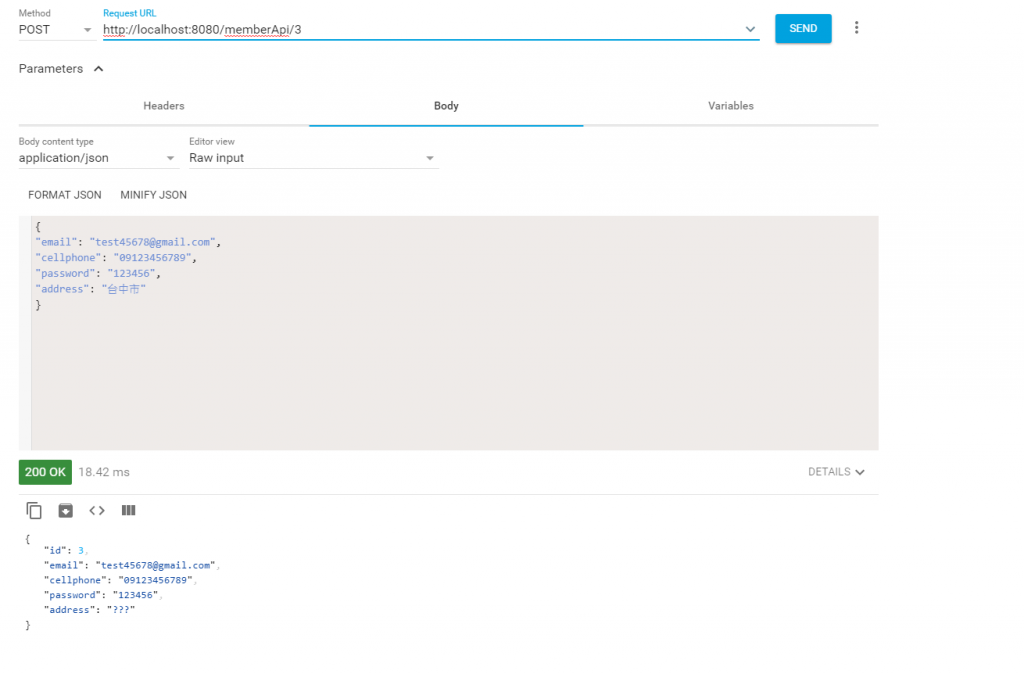
圖11:請求方法選擇GET的使用,測試剛Create的資源
註解用來映射Web請求(設定訪問的路徑參數)
ex:
1.註解在類別上為訪問此類別的路徑,如下程式碼
@RequestMapping("/memberApi")
public class MemberApiController {
}
2.produces可以設定返回的response的媒體類型和文字的編碼,ex:返回為JSON格式,字元編碼為UTF-8
@RequestMapping(value="/{id}",produces={"application/json;charset=UTF-8"})
public Optional<Memberaccount> read(@PathVariable long id) {
		return memberapiRepository.findById(id);
	 }
3.consumes: 指定處理請求的類型(Content-Type),ex:application/json
@RequestMapping(method = RequestMethod.POST, consumes = MediaType.APPLICATION_JSON_VALUE)
	 public void create(@RequestBody Memberaccount memberaccount) {
		memberapiRepository.save(memberaccount);
	 }
4.value :指定請求的實際資源位址 ex:可以是數字id,也可以是個路徑 ex:value="/{id}"
5.@PathVariable : 指定請求參數中要含有某一項參數,如下圖程式演示
@RequestMapping(value="/{id}")
	 public Optional<Memberaccount> read(@PathVariable long id) {
		return memberapiRepository.findById(id);
	 }
method:指定請求類型(只接受何種請求)
@RestController是組合的註解,結合了@Controller和@ResponseBody,如果只開發一個和頁面交換數據的路口時,可以選擇使用@RestController,若是使用@Controller則要有@ResponseBody註解
1.這三天的範例是做一個簡單的REStful Web Service你可以依照你的需求在數據訪問層中(JPA)再加上分頁,排序等搜尋
2.如果你知道Spring DATA REST的話,請不要將Spring DATA JPA與Spring DATA REST兩個方法混在一個專案中使用,你會遇到非常多的麻煩,當然如果要客製化的話或許也有方法,不過我會分開介紹這兩項
3.Spring DATA REST會自動將訪問的資源轉成一個完整的REST資源如下圖: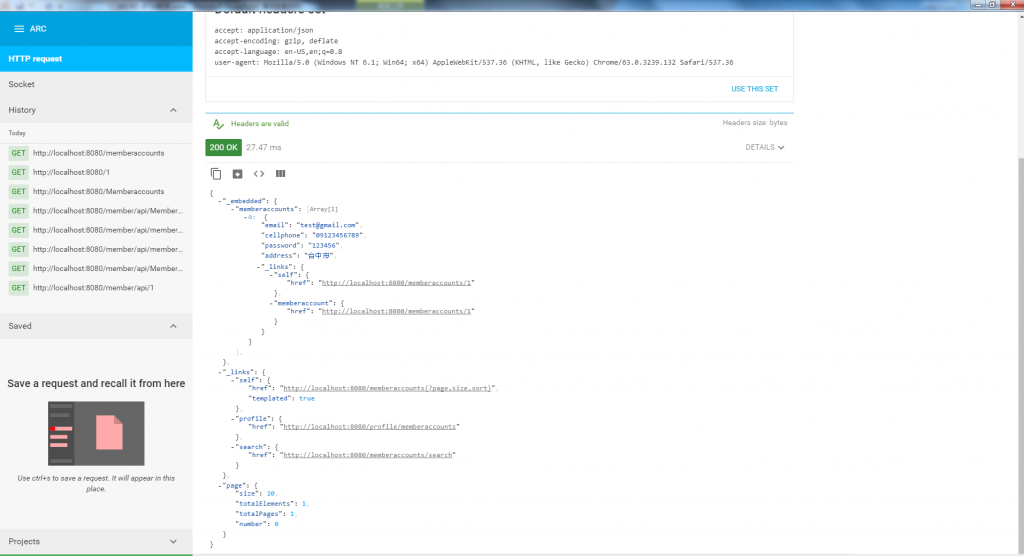
4.明天打算介紹Spring Boot TEST ,有沒有覺得我們的專案越來越完美了!!! 不要擔心,只是30天就讓我們學會建構了一個網站,當然這後面的幸苦我雖然是花了3個月的時間學習,不過在之前就有在閱讀些文章了,去年整年的成果就在今年展示了!!

应该改为:
@GeneratedValue(strategy = GenerationType.IDENTITY)
否则POST和PUT不会成功