基本上每寫完一個Controller你要有個習慣去對這個Controller去撰寫一個測試程式,那你可能會問說,這樣不就會讓我們的產出下降嗎?
是的,撰寫測試程式的確會造成產出的下降,但是為何我們還是要去撰寫測試程式呢?
原因是因為撰寫測試程式的好處在於提升程式交付的品質.
為何不趕快將程式趕完直接開工下個專案賺錢呢?
在交付程式之前你有辦法確保說程式不是因為工程師的你而導致發生的錯誤嗎?
如果我們事先撰寫了測試程式,而最後交付到了使用者手上是否能證明了並非是工程師的問題而導致了程式發生了錯誤.但是還是會有漏洞產生,為了要將程式不斷的改善與整合,最近幾年的DevOps就誕生了,創造了一個新的軟體工程的開發,最終目的達到持續整合,持續改善,持續交付
-java application標準
-提供了對Spring Boot應用程式的支持
-斷言函式庫
-匹配器對象函式庫
-JSON斷言函式庫
-用於JSON的Xpath函式庫
1.在創建Spring Boot專案時在我們的檔案管理左方就已經為我們創建好目錄及package了,把她打開來吧!如下圖: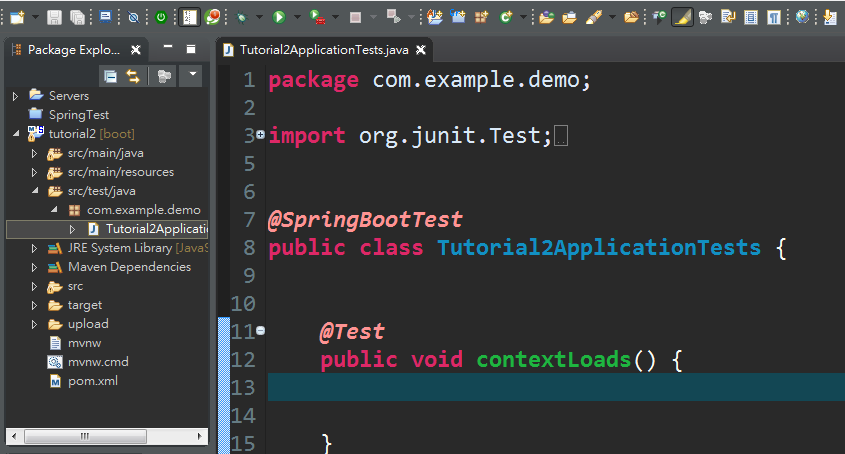
└── src
    └── test
        └── java
            └── Tutorial2ApplicationTests.java
    <dependency>
        <groupId>org.springframework.boot</groupId>
		<artifactId>spring-boot-starter-test</artifactId>
        <scope>test</scope>
	</dependency>
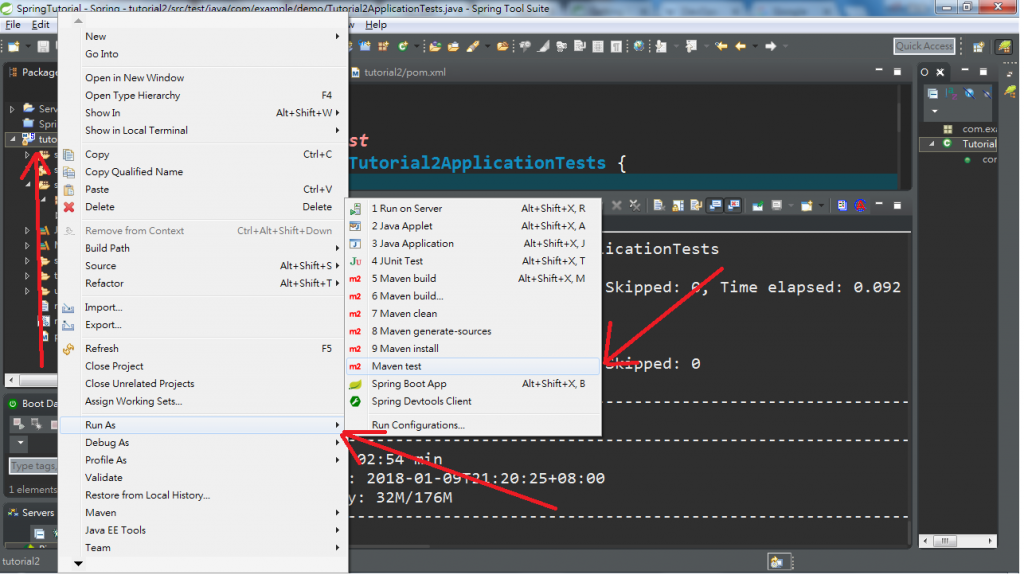
點擊Maven右鍵->Run as->Maven test
點擊之後將會開始下載spring-boot-starter-test依賴jar包
當下載完成,並且執行完畢之後會看到紅框內的測試訊息,Build Success,run: 1, Failures: 0, Errors: 0, Skipped: 0代表著我們的測試程式沒有問題,可以正常運行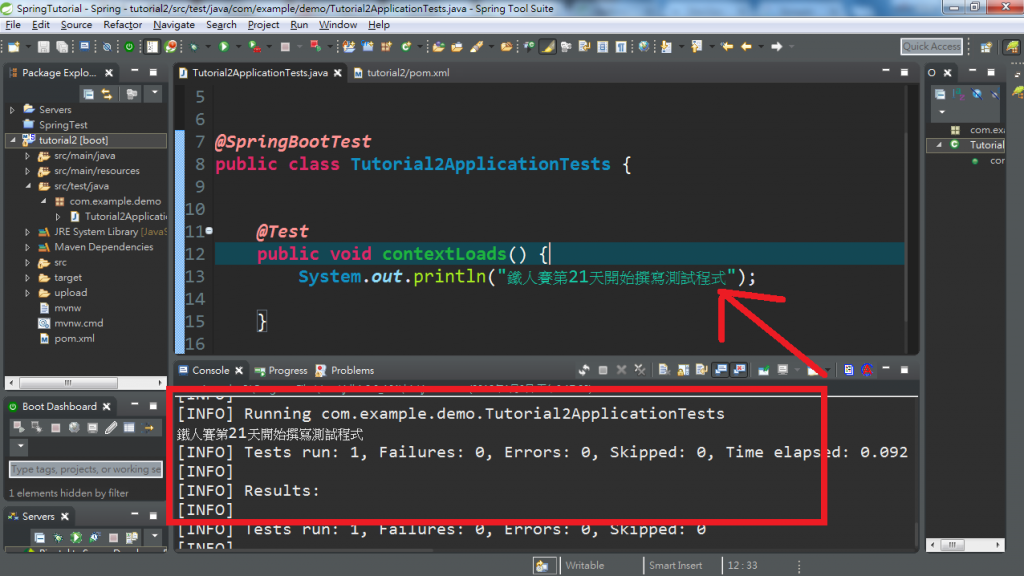
package com.example.demo;

import org.junit.Assert;
import org.junit.Before;
import org.junit.Test;
import org.junit.runner.RunWith;
import org.springframework.beans.factory.annotation.Autowired;
import org.springframework.boot.test.context.SpringBootTest;
import org.springframework.http.MediaType;
import org.springframework.test.context.junit4.SpringJUnit4ClassRunner;
import org.springframework.test.context.web.WebAppConfiguration;
import org.springframework.test.web.servlet.MockMvc;
import org.springframework.test.web.servlet.MvcResult;
import org.springframework.test.web.servlet.request.MockMvcRequestBuilders;
import org.springframework.test.web.servlet.setup.MockMvcBuilders;
import org.springframework.web.context.WebApplicationContext;

import com.tutorial.Tutorial2Application;
import com.tutorial.Dao.MemberApiRepository;


@RunWith(SpringJUnit4ClassRunner.class)
@SpringBootTest(classes = Tutorial2Application.class)
@WebAppConfiguration
public class Tutorial2ApplicationTests {
	@Autowired
	private MemberApiRepository memberApiRepository; //加入MemberRepository
	@Autowired
    private WebApplicationContext webApplicationContext;
	MockMvc mvc; //創建MockMvc類的物件

	@Before
	public void setup(){
//		Memberaccount memberaccount = new Memberaccount();
//		memberaccount.setId(1);
		mvc = MockMvcBuilders.webAppContextSetup(webApplicationContext).build();
	}


	@Test
	public void contextLoads() throws Exception {
		String uri = "/memberApi/1";
		MvcResult result = mvc.perform(MockMvcRequestBuilders.get(uri).accept(MediaType.APPLICATION_JSON)).andReturn();
		int status = result.getResponse().getStatus();
		System.out.println(status);
		Assert.assertEquals("錯誤",200,status);
	}

}
1.假日會介紹發佈我們的Spring Boot專案建構的Spring MVC網站
2.下一篇介紹測試框架MockMVC,明天介紹會連同錯誤的配置及版本問題不同一起做介紹網路上的教學有些不適用於2.0.0.BUILD-SNAPSHOT的Spring Boot版本及全部配置的解析
1.(https://spring.io/guides/gs/testing-web/ )
2.(https://docs.spring.io/spring-boot/docs/current/reference/html/boot-features-testing.html )
3.(https://docs.spring.io/spring-boot/docs/current-SNAPSHOT/reference/htmlsingle/ )


 iThome鐵人賽