Remix 進階篇涵蓋測試與除錯,兩大範疇。
Remix 內建了陽春版測試功能,怎麼說陽春呢?花個五分鐘從 remix-test 模組文件:https://github.com/ethereum/remix/tree/master/remix-tests,就可以一覽而盡所有的功能。
_test.sol 結尾的為測試程式beforeAll、beforeEach
斷言函式庫
| 函式名稱 | 支援的類別 |
|---|---|
| Assert.ok() | bool |
| Assert.equal() | uint, int, bool, address, bytes32, string |
| Assert.notEqual() | uint, int, bool, address, bytes32, string |
| Assert.greaterThan() | uint, int |
| Assert.lesserThan() | uint, int |
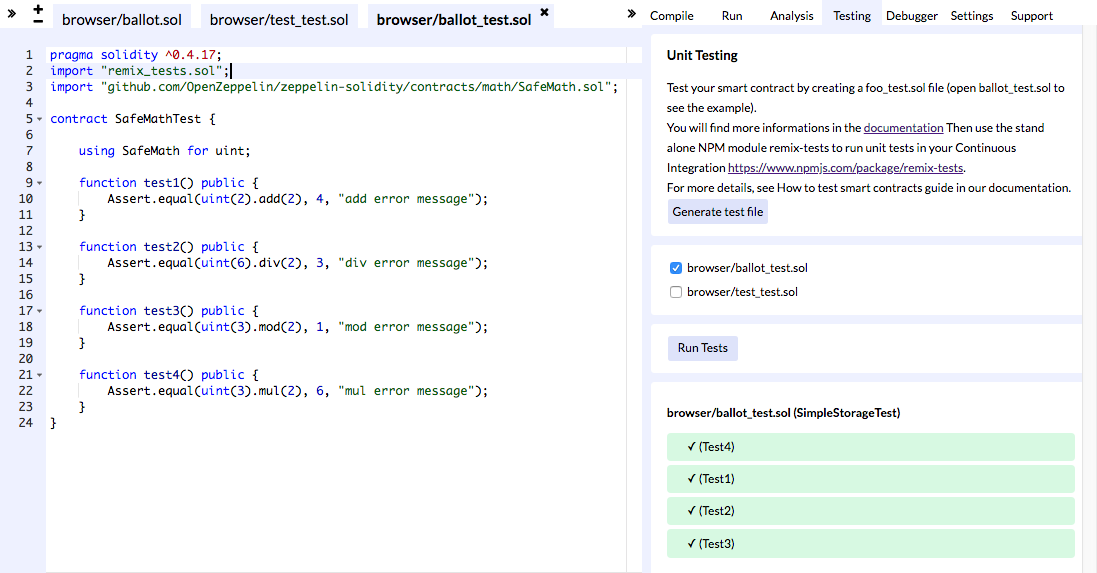
Testing 頁籤有兩個明顯的按鈕
Generate test file 按鈕:產生一個測試程式範例Run Test 按鈕:執行測試程式核選方塊 (checkbox) 則是讓你可以勾選,只執行哪些測試程式。

這個原始碼內容,就是你按下 Generate test file 按鈕後,Remix 產生的測試範例程式。
pragma solidity ^0.4.0;

// Remix 會自動注入這個合約,這個合約讓你可以在 Remix 環境識別 hook 跟 Assert 等特別的語法。

import "remix_tests.sol";

// 檔名需要以 _test.sol 結尾
contract test_1 {

    function beforeAll () {}

    function check1 () public {
      // 函式沒有 constant 修飾符時,使用斷言函式庫來判斷測試結果。
      Assert.equal(uint(2), uint(1), "error message");
      Assert.equal(uint(2), uint(2), "error message");
    }

    function check2 () public constant returns (bool) {
      // 函式有加 constant 修飾符時,使用回傳值 boolean 來判斷測試的結果。
      return true;
    }
}

contract test_2 {

    function beforeAll () {}

    function check1 () public {
      Assert.equal(uint(2), uint(1), "error message");
      Assert.equal(uint(2), uint(2), "error message");
    }

    function check2 () public constant returns (bool) {
      return true;
    }
}
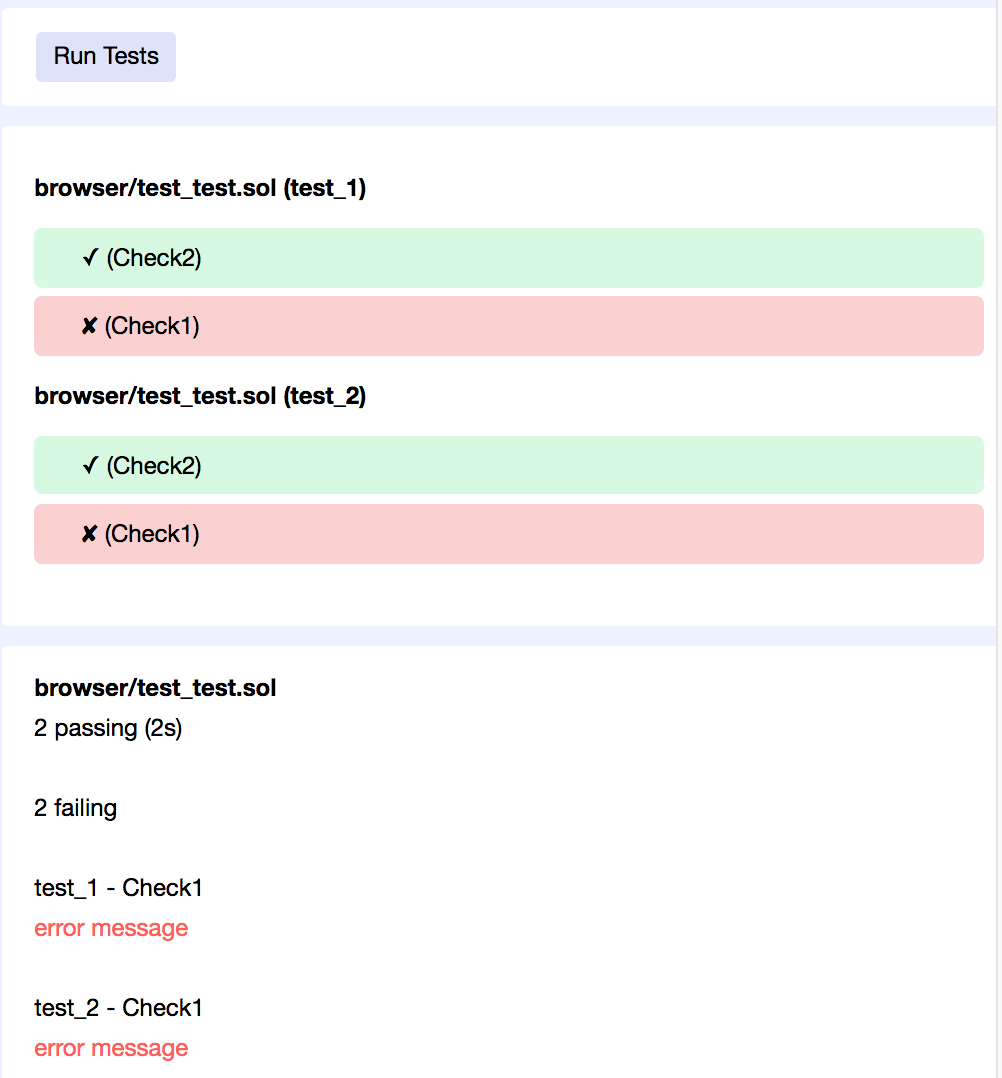
當你按下 Run Test 按鈕後,就可以看到按鈕下方多了一個區塊,這個區塊就是用來呈現測試結果。

現在大致上知道怎麼使用了,那我們就來手動建立一個 SafeMath 合約:https://openzeppelin.org/api/docs/math_SafeMath.html 的測試程式吧。
_test.sol 結尾,例如 ballot_test.sol。import "remix_tests.sol"; 語法來匯入 remix_tests.sol 合約。pragma solidity ^0.4.17;
import "remix_tests.sol";
import "github.com/OpenZeppelin/zeppelin-solidity/contracts/math/SafeMath.sol";
contract SafeMathTest {
using SafeMath for uint;
function test1() public {
Assert.equal(uint(2).add(2), 4, "add error message");
}
function test2() public {
Assert.equal(uint(6).div(2), 3, "div error message");
}
function test3() public {
Assert.equal(uint(3).mod(2), 1, "mod error message");
}
function test4() public {
Assert.equal(uint(3).mul(2), 6, "mul error message");
}
}
在 Remix 上真實執行的畫面

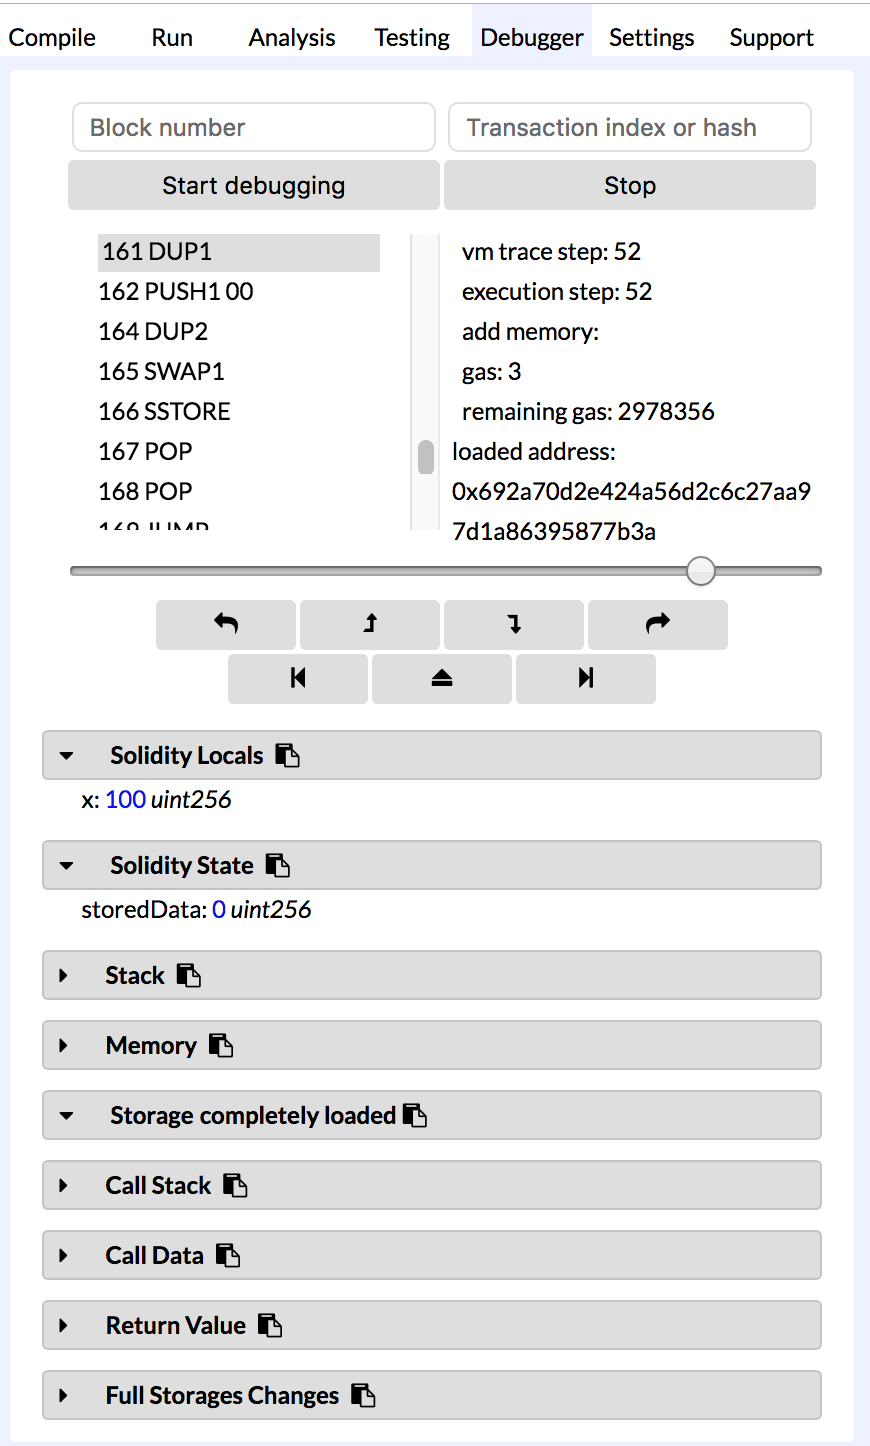
除錯是一位開發者非常重要的課題,好的除錯技能可以讓你省非常多時間,這讓我們來看看它提供了哪些功能。
從下面這張圖很明顯地看到兩個輸入框跟兩個按鈕,第一個輸入框可以填入區塊編號 (Block number),第二個輸入框可以填入交易 hash,至於按鈕就不多做解釋了,就如字面上的一樣。

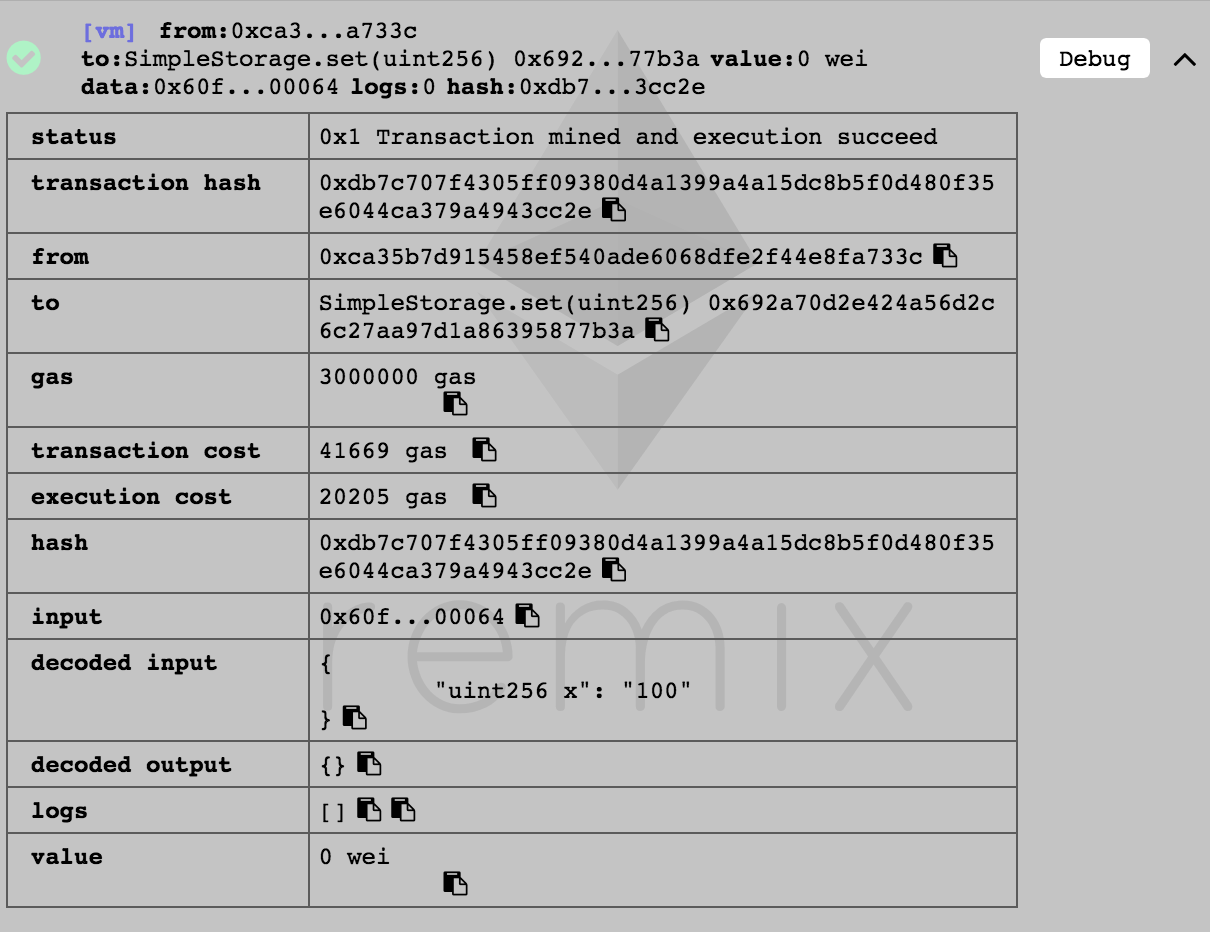
這時候你可能會想到,debug 會需要交易 hash 值 (transaction hash),那我到底要怎麼知道這個值呢?請先把你的視線轉到 Remix 下方的主控台 (terminal) 區塊,每當你發佈合約或呼叫函式時,這裡都會出現一些新的 log。

試著把 log 展開可以看到更詳細的內容,看到了嗎?transaction hash 就在這裡。
另一個更簡便的方法,按一下 Debug 按鈕,它可以自動帶入 transaction hash 並立即執行 debugging 模式。


線上版的 Remix 畢竟是多人共用,如果你覺得太慢,可以裝本機端的 Remix,步驟非常的簡單。
npm install remix-ide -g
remix-ide

然後開啟 http://localhost:8080/

請問如果我在Remix IDE裏create 了一個test.sol ,它是儲存在那裏?
我是在以下這裏下載Remix ide來使用。
https://github.com/ethereum/remix-desktop/releases