今天延續前兩篇文章對Debug做一個超進化,加上Azure獨有Snapshot神器:Exception偵錯快照。
是否讀者有過這樣經歷,使用者說: "XXX功能有BUG啦,我現在都不能使用,幫我看甚麼問題!" ,結果幫忙處理時,發現沒有任何問題。這是因為當時的時間、環境、變數都不一樣了,要還原一樣情景測試是非常困難的一件事,可能某個變數的不一樣,就會造成結果的不同。要避免上述情況,通常要寫複雜程式,做好LOG保存當下的變數值。
而Azure提供Snapshot Exception偵錯快照功能,可以把當初錯誤的環境、變數值自動保存起來,以下是使用方式跟介紹。
【第一步】:安裝Microsoft.ApplicationInsights.SnapshotCollector、 Microsoft.ApplicationInsights.AspNetCore NuGet套件
Install-Package Microsoft.ApplicationInsights.SnapshotCollector -Version 1.3.1
Install-Package Microsoft.ApplicationInsights.AspNetCore -Version 2.5.1
【第二步】:Snapshot在Startup註冊步驟:
// Snapshot在Startup註冊步驟
//      1.引用ApplicationInsights、SnapshotCollector Lib
using Microsoft.ApplicationInsights.SnapshotCollector;
using Microsoft.Extensions.Options;
using Microsoft.ApplicationInsights.AspNetCore;
using Microsoft.ApplicationInsights.Extensibility;

public class Startup
{
		//..略
        //      2.建立Snapshot工廠類別
        private class SnapshotCollectorTelemetryProcessorFactory : ITelemetryProcessorFactory
        {
                private readonly IServiceProvider _serviceProvider;

                public SnapshotCollectorTelemetryProcessorFactory(IServiceProvider serviceProvider) =>
                _serviceProvider = serviceProvider;

                public ITelemetryProcessor Create(ITelemetryProcessor next)
                {
                var snapshotConfigurationOptions = _serviceProvider.GetService<IOptions<SnapshotCollectorConfiguration>>();
                return new SnapshotCollectorTelemetryProcessor(next, configuration: snapshotConfigurationOptions.Value);
                }
        }

        public void ConfigureServices(IServiceCollection services)
        {
                //      3.註冊Service服務
                services.Configure<SnapshotCollectorConfiguration>(Configuration.GetSection(nameof(SnapshotCollectorConfiguration)));
                services.AddSingleton<ITelemetryProcessorFactory>(sp => new SnapshotCollectorTelemetryProcessorFactory(sp));
        }
        //..略
}
【第三步】:對想要監控程式區塊做Snapshot快照的步驟:
public class HomeController : Controller
{
        //對想要監控程式區塊做Snapshot快照的步驟:
        //      1.建立TelemetryClient物件
        TelemetryClient _telemetryClient = new TelemetryClient();
        public IActionResult Index()
        {
                //      2.使用Try Catch包住想要監控的程式區塊,並使用TrackException方法傳遞Exception物件觸發快照
                try
                {
                        var zero = 0;
                        var error = 1 / zero;
                }
                catch (Exception ex)
                {
                        _telemetryClient.TrackException(ex);
                        throw ex;
                }
                return View();
        }
}
【第四步】:添加appsettings.json環境變數設定
{
  "SnapshotCollectorConfiguration": {
    "IsEnabledInDeveloperMode": false,
    "ThresholdForSnapshotting": 1,
    "MaximumSnapshotsRequired": 3,
    "MaximumCollectionPlanSize": 50,
    "ReconnectInterval": "00:15:00",
    "ProblemCounterResetInterval": "1.00:00:00",
    "SnapshotsPerTenMinutesLimit": 1,
    "SnapshotsPerDayLimit": 30,
    "SnapshotInLowPriorityThread": true,
    "ProvideAnonymousTelemetry": true,
    "FailedRequestLimit": 3
  }
}
【第五步】:發行到Azure雲端,檢查環境安裝
確定app service擴充功能有安裝Snapshot Debugger: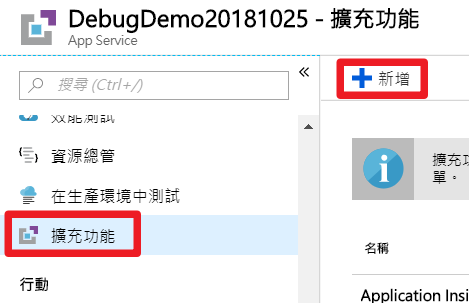
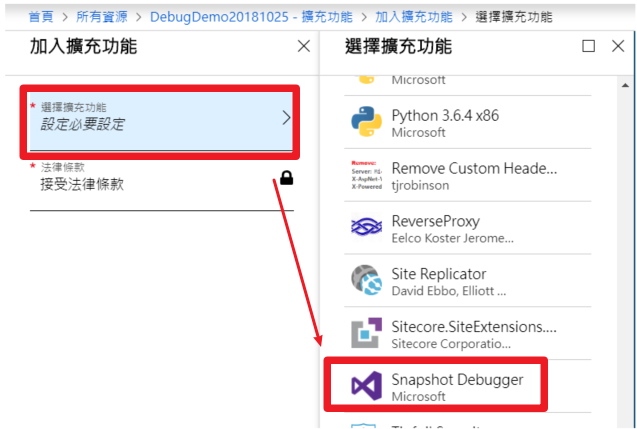
以上就是使用Snapshot前的準備,只需要幾個步驟,接著讓我們來看看效果。
打開 Application Insights > 失敗次數 > 採用動作 > 作業 > 在選取範例作業點擊想查詢的作業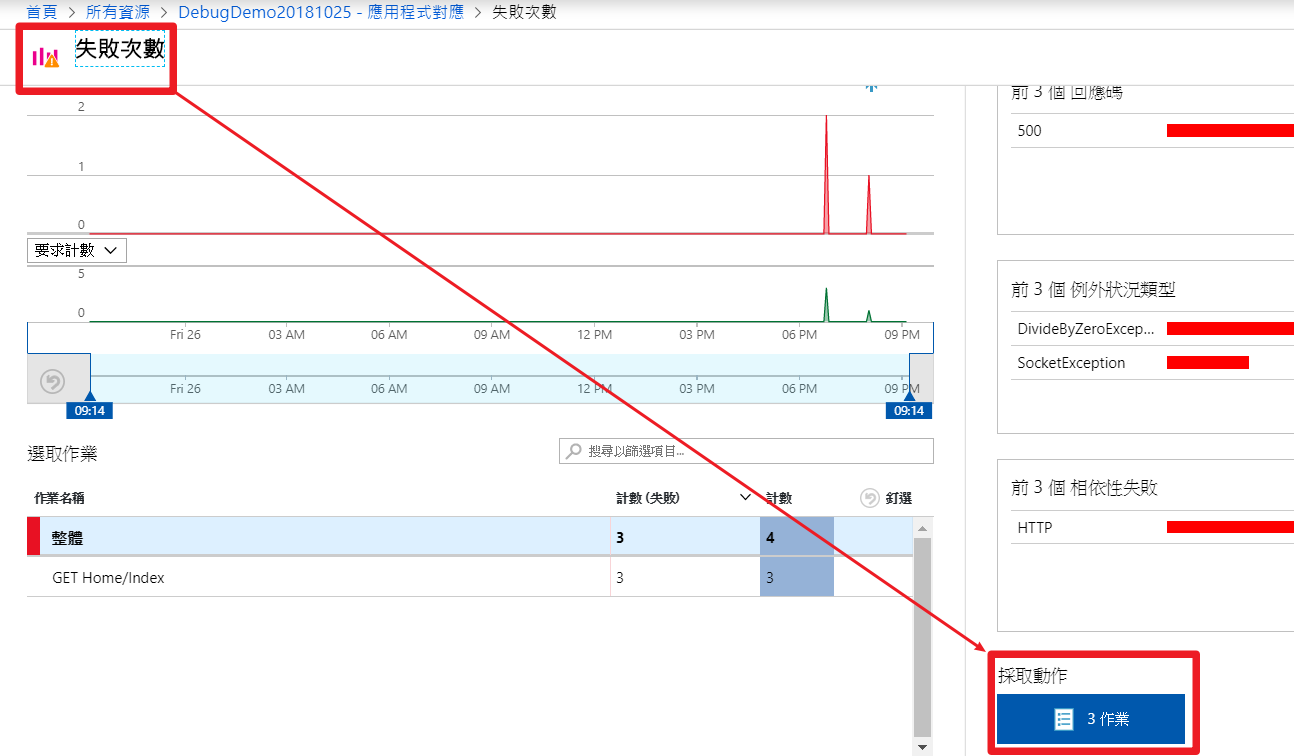
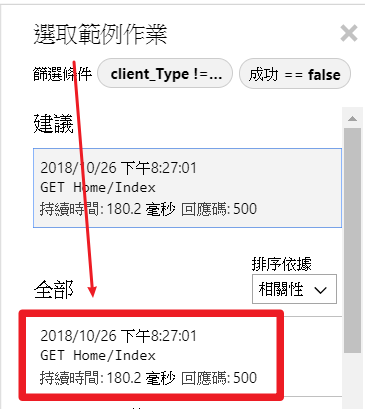
在端對端交易詳細資料 > 點選想查詢的Exception > 開啟 偵錯快照集
登!登!登!
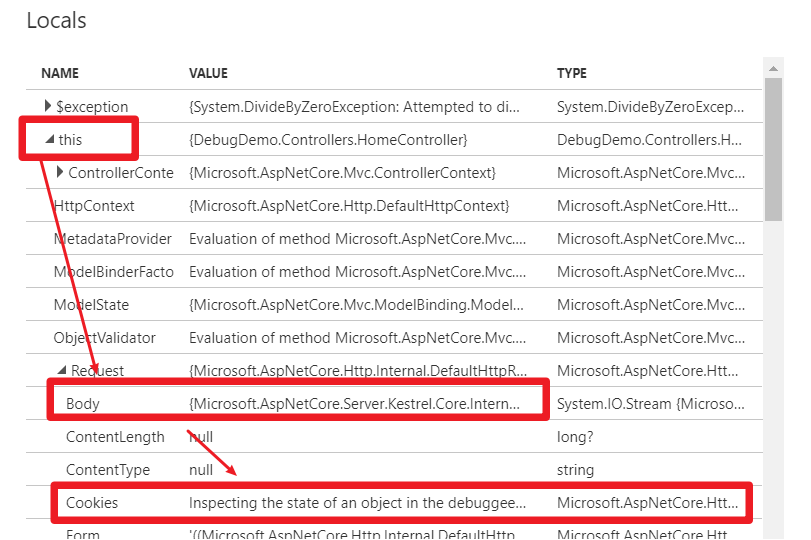
可以在偵錯快照集 > Locals ,看到錯誤當下所使用的變數值 :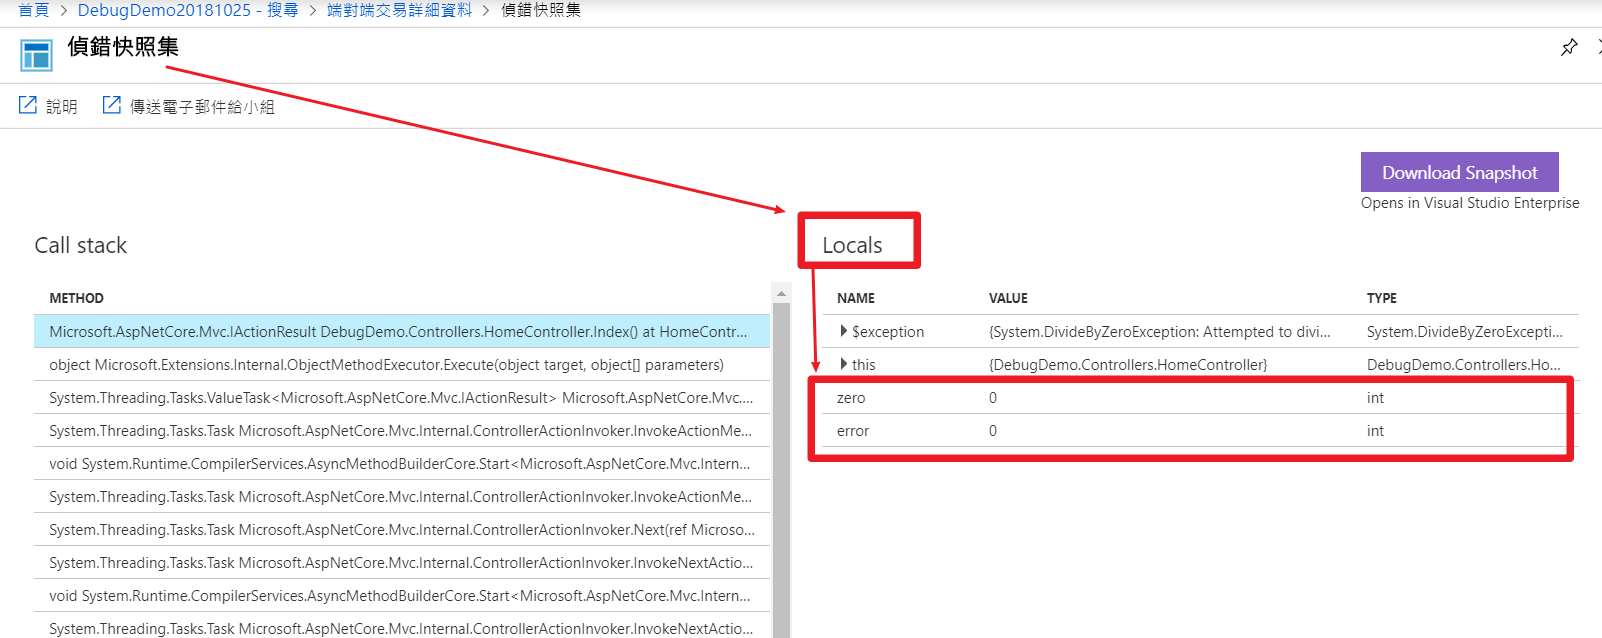
甚至想查出當初引起錯誤的Reqeust資料,像是Body、Cookie都是可以的!當初看到這功能,我起雞皮疙瘩!!