今天要分享的是加入新的活動(Activity)的畫面,
在Android中一個畫面在執行常見的方法是透過Activity,
之前所有的動作都是在同一個Activity裡面做,
現在要將動作拉出來到另外一個Activity做,
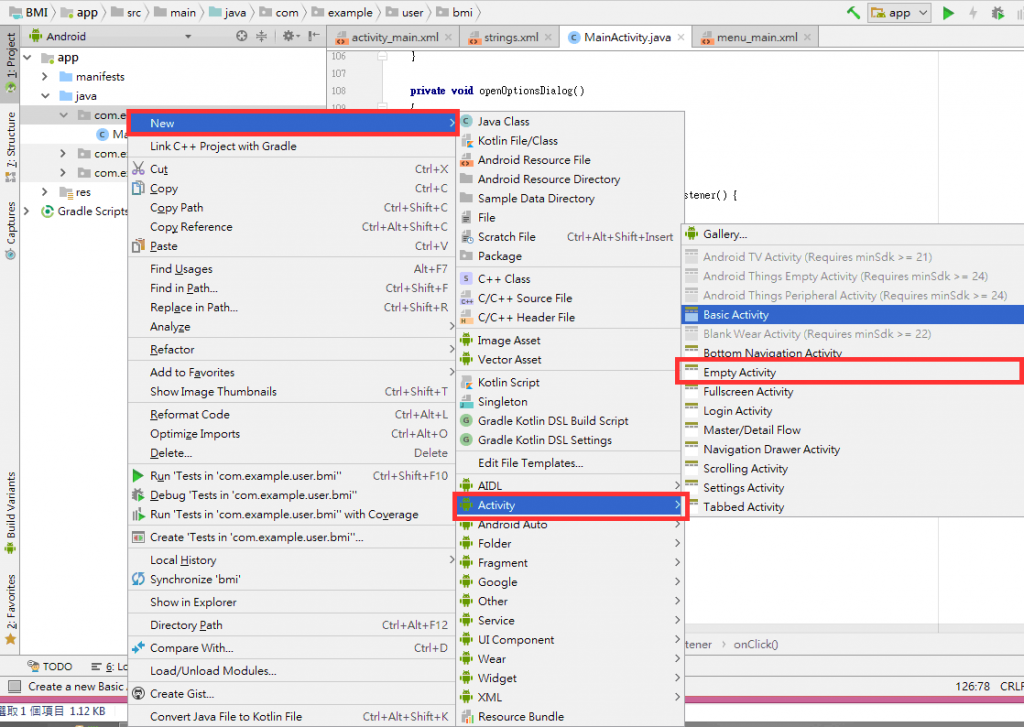
在java底下按右鍵 → New → Activity → Empty Activity
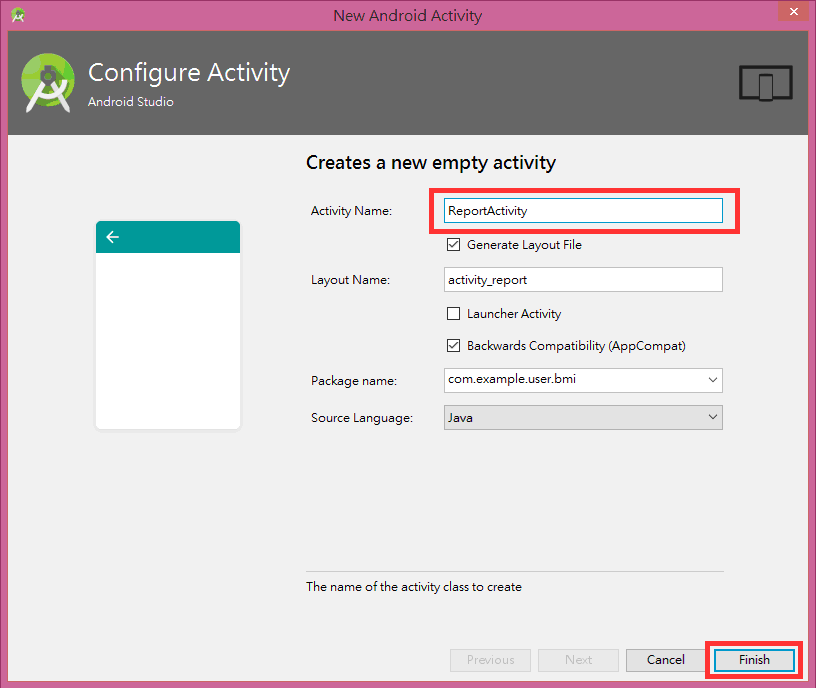
輸入名稱後,點擊Finish
於是我們建立了一個ReportActivity.java以及activity_report.xml兩個檔案,
Android Studio使用上述的方法,會自動產生xml檔案,不用自己產生。
我們加入了一個新的ReportActivity,要使用新的Activity之前,都必須在AndroidManifest.xml檔案中宣告,Android Studio使用上述方法新增Activity也會同時加入宣告,有時候明明有Activity跟xml檔案但是畫面不出來,有可能要檢查一個AndroidManifest.xml裡面是否已經宣告了,以下是AndroidManifest.xml的內容
<?xml version="1.0" encoding="utf-8"?>
<manifest xmlns:android="http://schemas.android.com/apk/res/android"
    package="com.example.user.bmi">

    <application
        android:allowBackup="true"
        android:icon="@mipmap/ic_launcher"
        android:label="@string/app_name"
        android:roundIcon="@mipmap/ic_launcher_round"
        android:supportsRtl="true"
        android:theme="@style/AppTheme">
        <activity android:name=".MainActivity">
            <intent-filter>
                <action android:name="android.intent.action.MAIN" />

                <category android:name="android.intent.category.LAUNCHER" />
            </intent-filter>
        </activity>
        <activity android:name=".ReportActivity"></activity>
    </application>

</manifest>
接著我們在xml檔案中新增一個LinearLayout跟TextView
<?xml version="1.0" encoding="utf-8"?>
<android.support.constraint.ConstraintLayout xmlns:android="http://schemas.android.com/apk/res/android"
    xmlns:app="http://schemas.android.com/apk/res-auto"
    xmlns:tools="http://schemas.android.com/tools"
    android:layout_width="match_parent"
    android:layout_height="match_parent"
    tools:context=".ReportActivity">

    <LinearLayout
        android:layout_width="match_parent"
        android:layout_height="match_parent"
        android:orientation="vertical">

        <TextView
            android:id="@+id/textView"
            android:layout_width="match_parent"
            android:layout_height="wrap_content"
            android:text="@string/report_title" />
    </LinearLayout>
</android.support.constraint.ConstraintLayout>
按鈕事件的地方改成啟動新的Activity
Intent intent = new Intent();
intent.setClass(MainActivity.this, ReportActivity.class);
startActivity(intent);
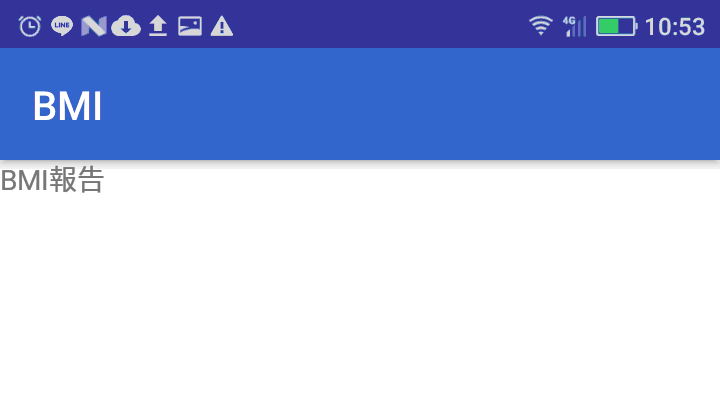
以下是畫面的部分
