上一篇筆記我們已經安裝好 Jenkins 了, 這一篇筆記裡, 我們實際來建立一個 CI/CD pipeline 吧!
(部分資訊將會遮罩)
PS C:\k8s\azure-voting-app-redis> docker-compose up -d
Recreating azure-vote-front ...
Recreating azure-vote-front ... done
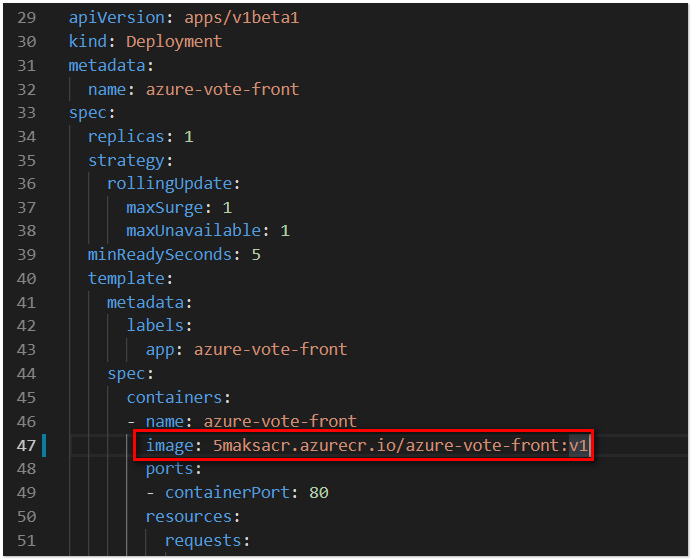
PS C:\k8s\azure-voting-app-redis> docker tag azure-vote-front 15maksacr.azurecr.io/azure-vote-front:v1
PS C:\k8s\azure-voting-app-redis> az acr login -n 15maksacr
Login Succeeded
PS C:\k8s\azure-voting-app-redis> docker push 15maksacr.azurecr.io/azure-vote-front:v1
The push refers to repository [15maksacr.azurecr.io/azure-vote-front]
769f904522cd: Pushing  11.78kB
be08e5ebdf1c: Pushing  522.8kB
<略...>
Note, we have launched a browser for you to login. For old experience with device code, use "az login --use-device-code"
You have logged in. Now let us find all the subscriptions to which you have access...
[
  {
    "cloudName": "AzureCloud",
    "id": "4424e4b1-fb5f-4ad7-8664-????????????",
    "isDefault": false,
    "name": "Visual Studio Ultimate with MSDN",
    "state": "Enabled",
    "tenantId": "293a593f-cc57-451b-b293-????????????",
    "user": {
      "name": "?????@????.com",
      "type": "user"
    }
  }
  <略...>
PS C:\k8s\azure-voting-app-redis> kubectl apply -f azure-vote-all-in-one-redis.yaml
deployment.apps "azure-vote-back" created
service "azure-vote-back" unchanged
deployment.apps "azure-vote-front" created
service "azure-vote-front" created
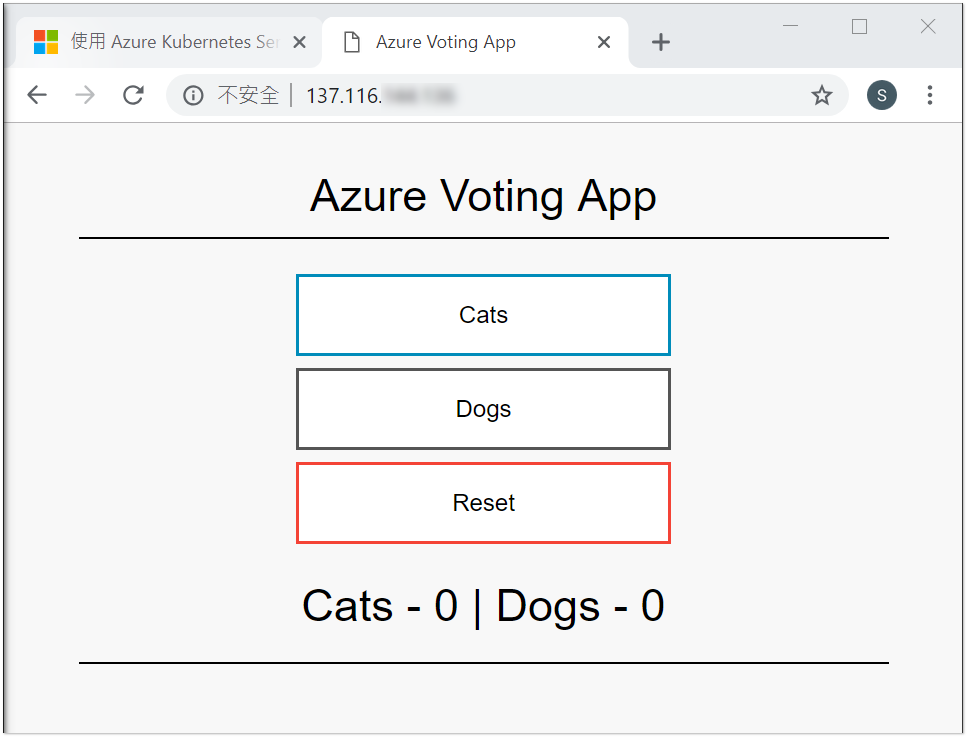
PS C:\k8s\azure-voting-app-redis> kubectl get svc
NAME                   TYPE           CLUSTER-IP     EXTERNAL-IP       PORT(S)        AGE
azure-vote-back        ClusterIP      10.0.226.224   <none>            6379/TCP       3d
azure-vote-front       LoadBalancer   10.0.29.70     137.116.??.??   80:30143/TCP   3d
<略...>
(部分內容將會遮罩)
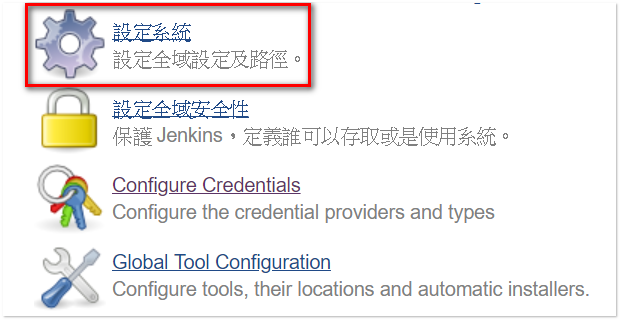
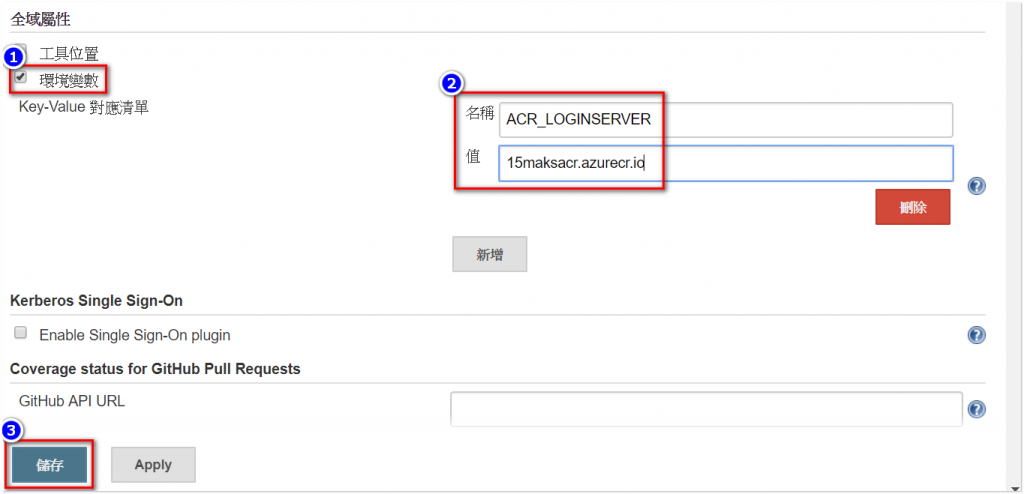
admin/password), 進入 管理 Jenkins >> 設定系統 >> 加入環境變數 ACR_Server 值為 15maksacr.azurecr.io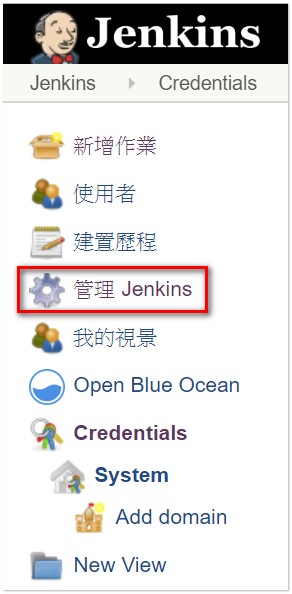
PS C:\k8s\azure-voting-app-redis> az ad sp create-for-rbac --skip-assignment
{
  "appId": "6f863e77-ff87-492d-8ff9-????????????",
  "displayName": "azure-cli-2018-11-04-16-32-32",
  "name": "http://azure-cli-2018-11-04-16-32-32",
  "password": "bd87ab1d-ee46-4577-????????????",
  "tenant": "293a593f-cc57-451b-b293-????????????"
}
(2) 使用命令 $acrid = az acr show --name 15maksacr -g 15maksrg
--query "id" --output tsv 取得 ACR ID
PS C:\k8s\azure-voting-app-redis> $acrid = az acr show --name 15maksacr -g 15maksrg
--query "id" --output tsv
(3) 使用命令 az role assignment create --assignee 6f863e77-ff87
-492d-8ff9-???????????? --role Contributor --scope $acrid assign contributor 角色
PS C:\k8s\azure-voting-app-redis> az role assignment create --assignee 6f863e77-ff87
-492d-8ff9-???????????? --role Contributor --scope $acrid
{
  "canDelegate": null,
  "id": "/subscriptions/11e5233d-dbe1-4167-ac91-4bb39ad526d3/resourceGroups/15maksrg/providers/Microsoft.ContainerRegistry/registries/15maksacr/providers/Microsoft.Authorization/roleAssignments/bdd26d9e-1999-429c-a305-????????????",
  "name": "bdd26d9e-1999-429c-a305-????????????",
  "principalId": "e7d45a29-7b31-4330-af1f-????????????",
  "resourceGroup": "15maksrg",
  "roleDefinitionId": "/subscriptions/11e5233d-dbe1-4167-ac91-????????????/providers/Microsoft.Authorization/roleDefinitions/b24988ac-6180-42a0-ab88-????????????",
  "scope": "/subscriptions/11e5233d-dbe1-4167-ac91-????????????/resourceGroups/15maksrg/providers/Microsoft.ContainerRegistry/registries/15maksacr",
  "type": "Microsoft.Authorization/roleAssignments"
}
User name with password credential, 內容填寫 Service Account AppId 和 Password, Description 填寫 acr-credential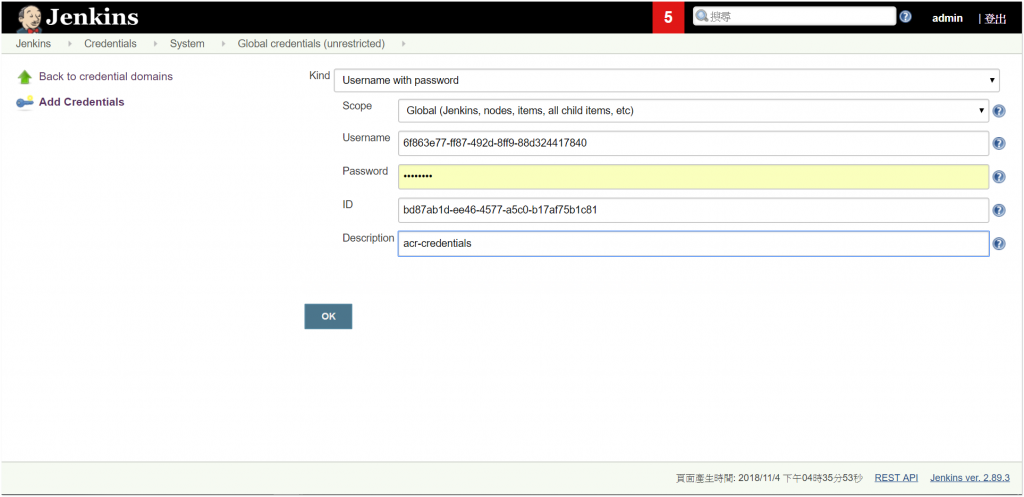

*/1 * * * *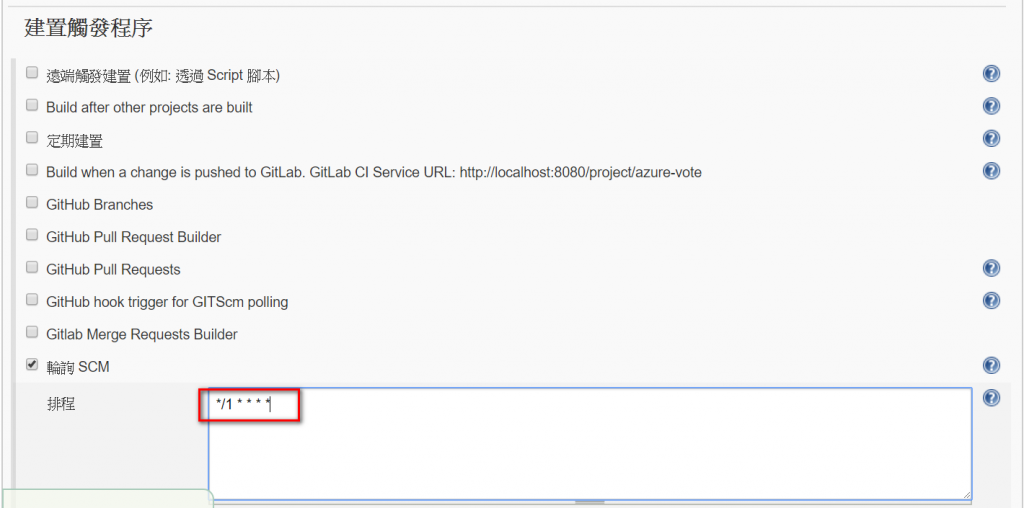
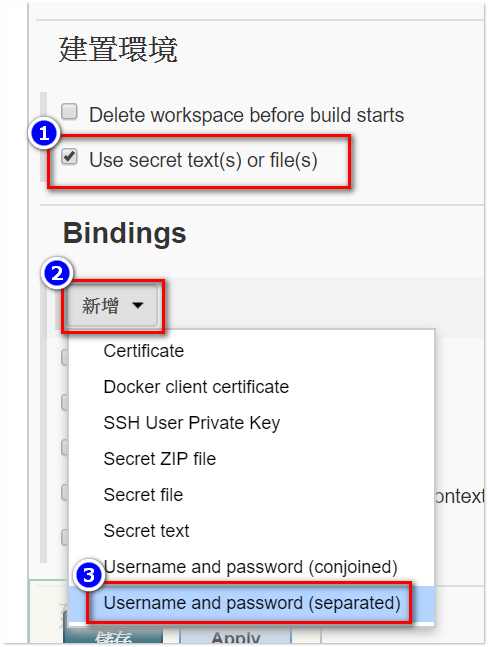
ACR_ID 以及 Password Variable 到 ACR_PASSWORD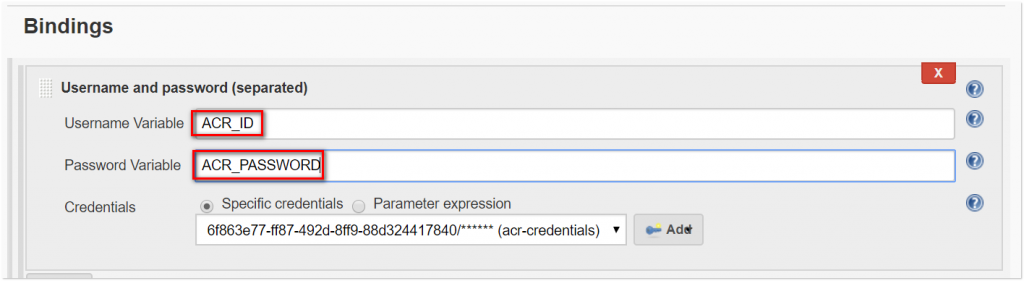
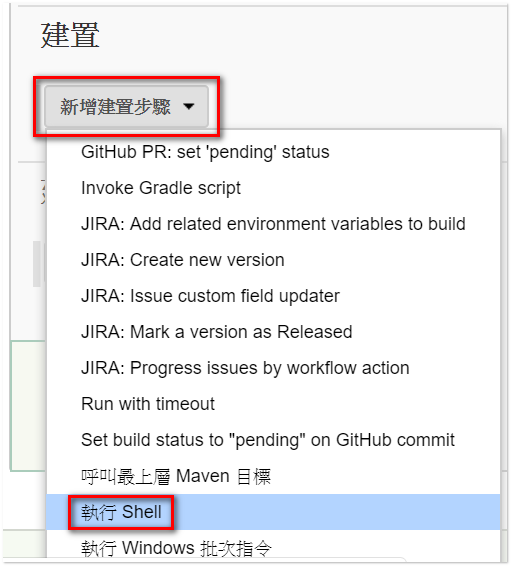
# Build new image and push to ACR.
WEB_IMAGE_NAME="${ACR_LOGINSERVER}/azure-vote-front:kube${BUILD_NUMBER}"
docker build -t $WEB_IMAGE_NAME ./azure-vote
docker login ${ACR_LOGINSERVER} -u ${ACR_ID} -p ${ACR_PASSWORD}
docker push $WEB_IMAGE_NAME
(2) Step 2
# Update kubernetes deployment with new image.
WEB_IMAGE_NAME="${ACR_LOGINSERVER}/azure-vote-front:kube${BUILD_NUMBER}"
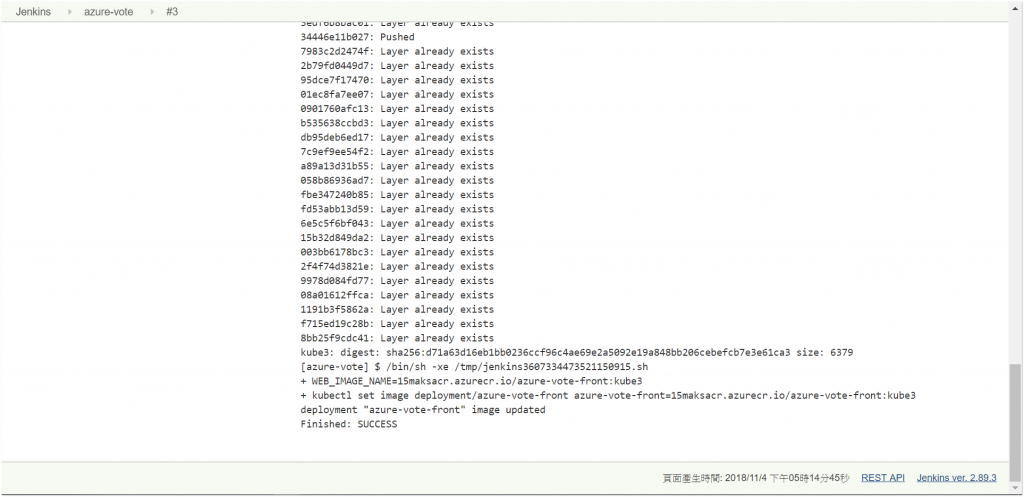
kubectl set image deployment/azure-vote-front azure-vote-front=$WEB_IMAGE_NAME

10. 設定完成後, 從選單中選取 馬上建置, 驗證結果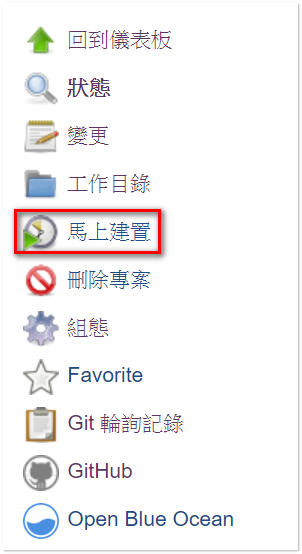
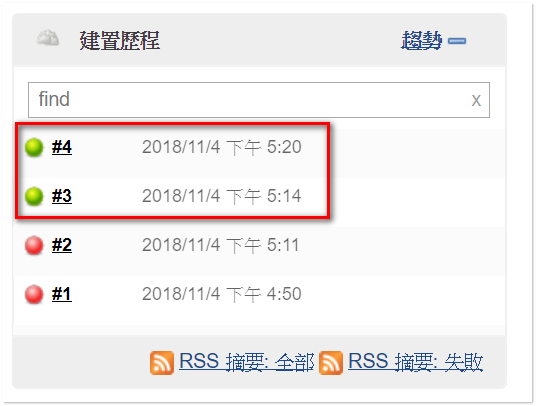
11. 建置過程中可以點選建置號碼觀看內容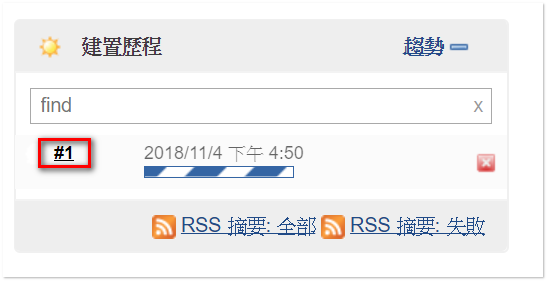
12. 可以從 Console output 觀察建置結果
13. 接下來測試 Auto CI/CD 的結果, 開啟專案內容 index.html 檔案進行修改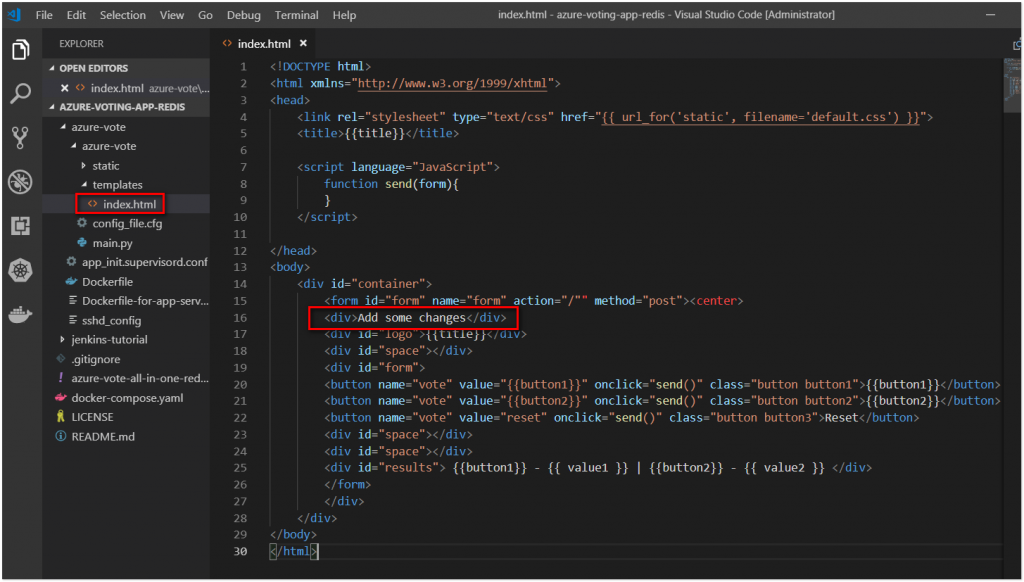
14. 使用命令 git commit -am "make some change to index.html" 將修改完成後檔案 commit
PS C:\k8s\azure-voting-app-redis> git commit -am "make some change to index.html"
[master fd9b1ce] make some change to index.html
 2 files changed, 2 insertions(+), 2 deletions(-)
PS C:\k8s\azure-voting-app-redis> git push
fatal: HttpRequestException encountered.
An error occurred while sending the request.
Username for 'https://github.com': samlintw
Password for 'https://?????@github.com':
Counting objects: 7, done.
Delta compression using up to 4 threads.
Compressing objects: 100% (6/6), done.
Writing objects: 100% (7/7), 555 bytes | 277.00 KiB/s, done.
Total 7 (delta 5), reused 0 (delta 0)
remote: Resolving deltas: 100% (5/5), completed with 5 local objects.
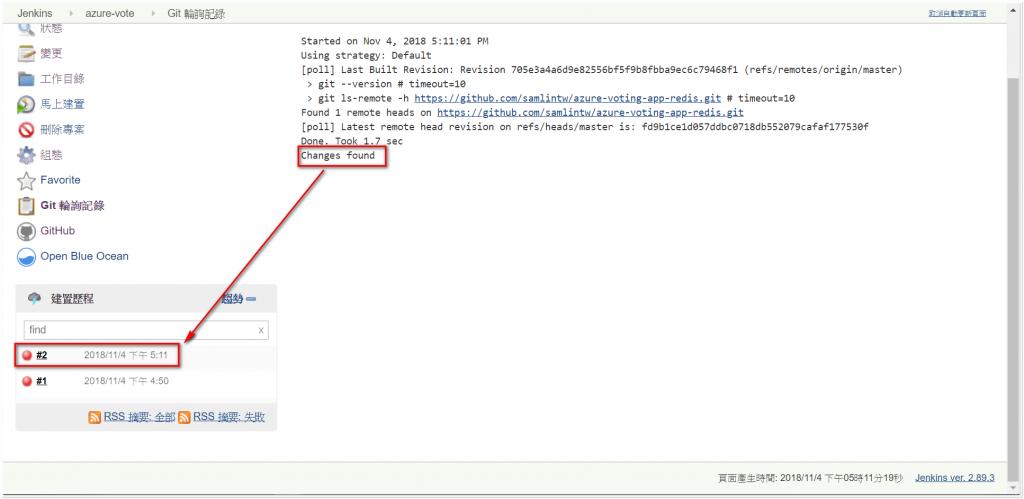
To https://github.com/?????/azure-voting-app-redis.git
705e3a4..fd9b1ce master -> master


 iThome鐵人賽