由於fortinet 60C在某一天的早上突然掛掉,真的好可惜,無法為了這次的鐵人賽出場了 。
。
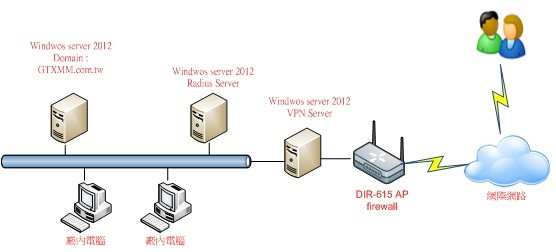
因環境關係我這邊就直接採用一台Windows server來建置VPN服務,並透過內部Radius伺服器做為用戶身份的認證機制。
DIR-615當firewall透過VPN Passthrough功能轉遞至內部VPN Service(1723 port)。
員工可以透過VPN遠端連線至公司內部網路進行存取,並透過RADIUS認證是否可允許登入,不過還是比較建議有專業的防火牆,畢竟VPN一旦連進來,廠內電腦windows內建防火牆都是disable情況下真的是蠻危險的,所以要是有專門的防火牆去設定Policy控管各個Servcies就可達到整體資訊安全的考量了。
至VPN_Server安裝遠端存取服務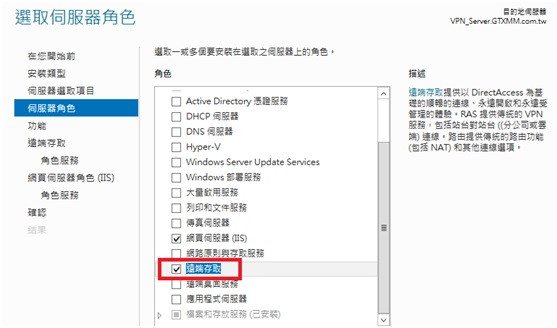
下一步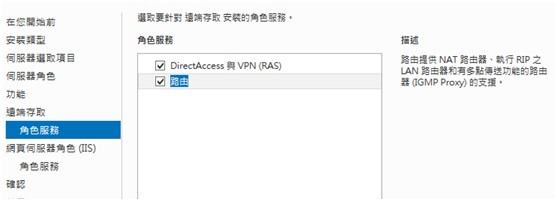
等待安裝完成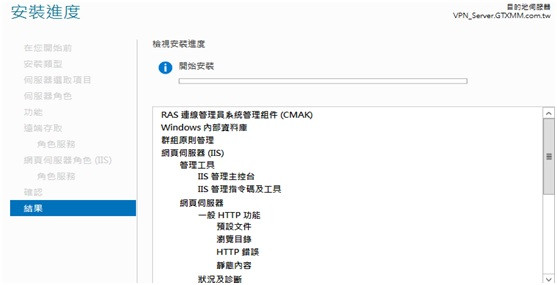
開始設定VPN服務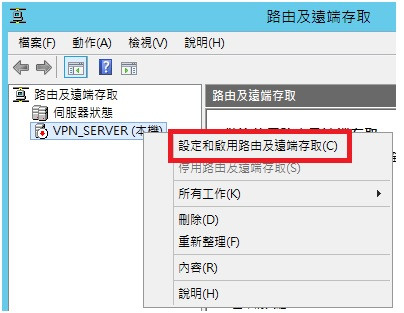
自訂設定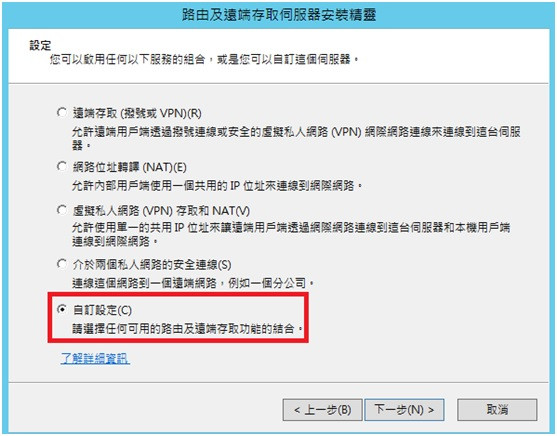
選擇VPN存取及NAT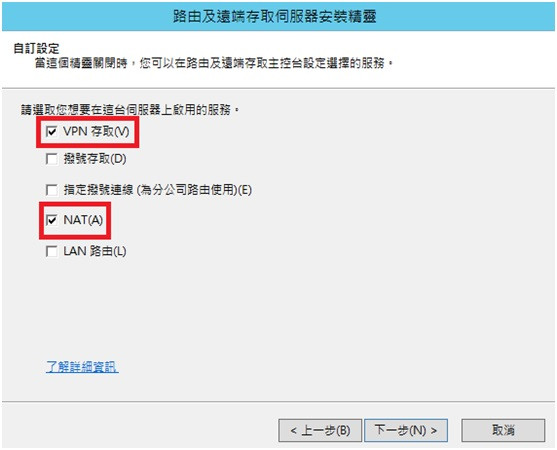
設定VPN內容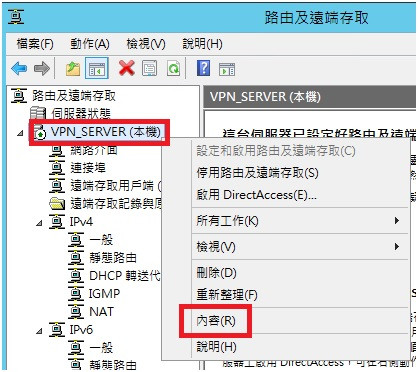
先設定連至VPN的IP位址 (192.168.100.1 ~ 192.168.100.50)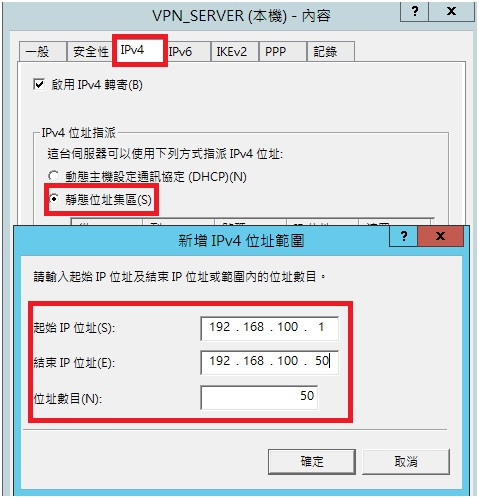
於NAT新增介面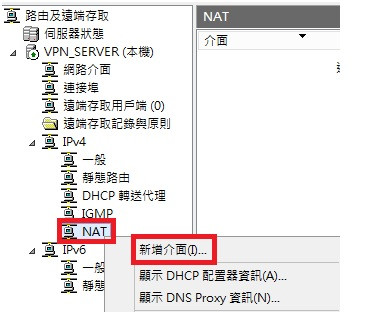
10.連線至公用介面並開啟NAT功能,到這邊VPN伺服器就大致設定OK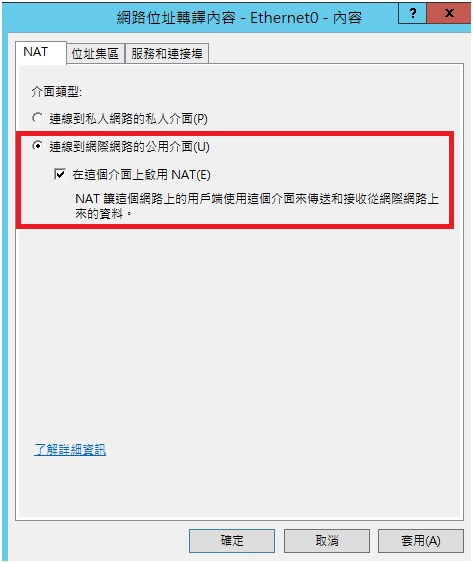
11.接下來至RADIUS伺服器安裝RADIUS服務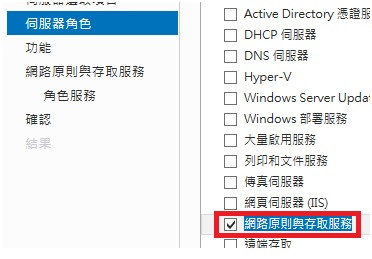
12.下一步,直到安裝完成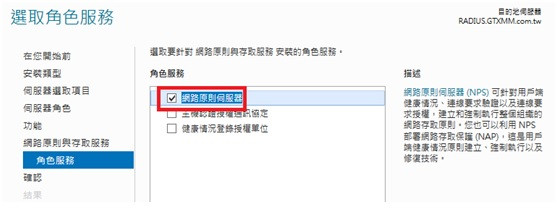
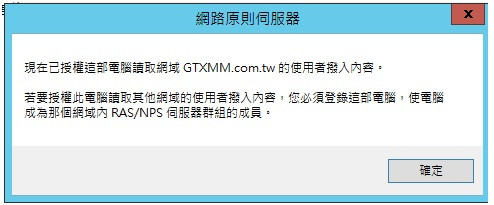
13.在AD中登錄伺服器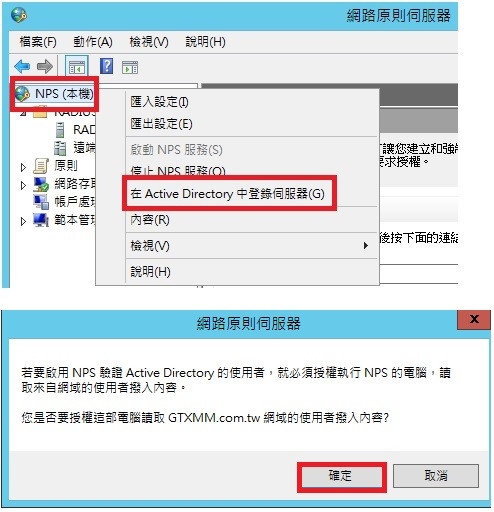
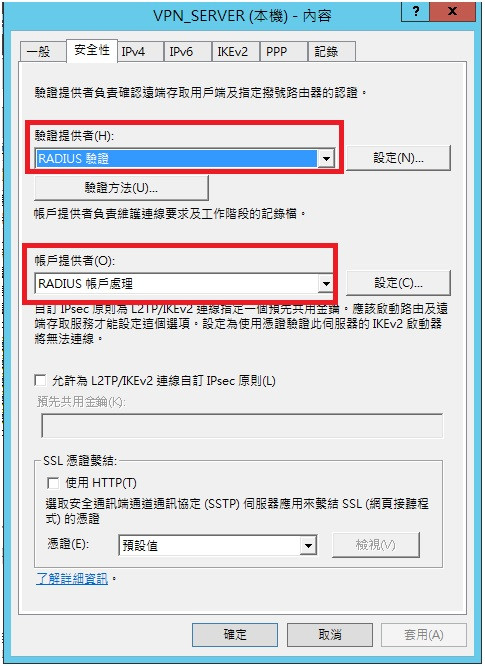
14.至VPN伺服器設定RADIUS資訊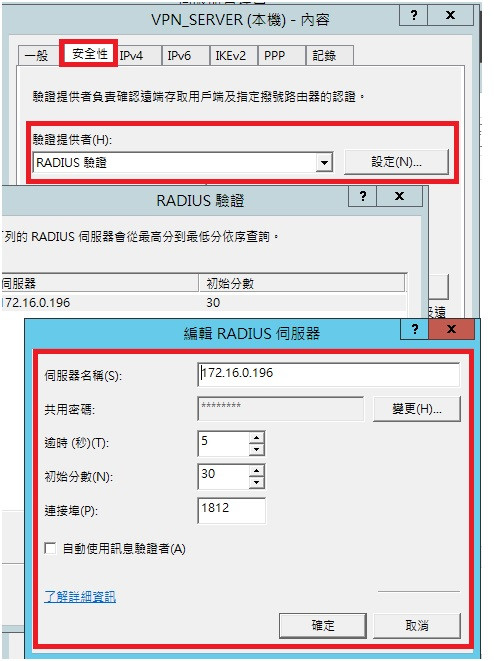
15.回到RADIUS主機新增RADIUS用戶端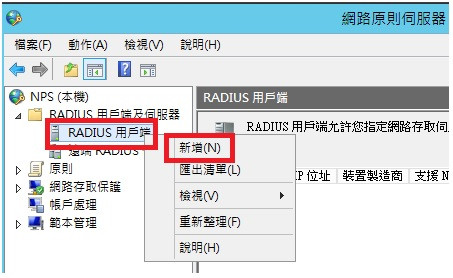
16.輸入VPN伺服器資訊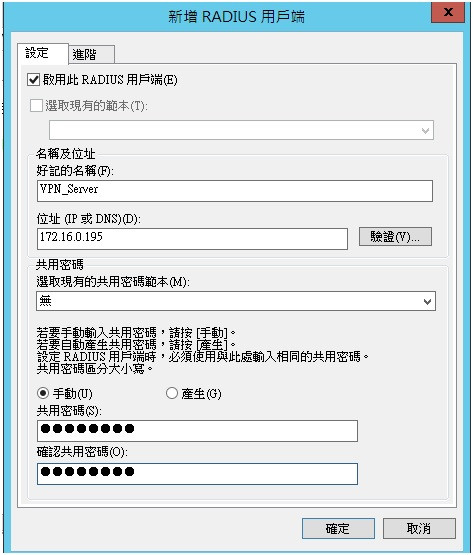
17.RADIUS用戶端新增OK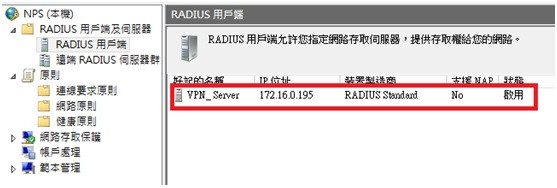
18.開始細部設定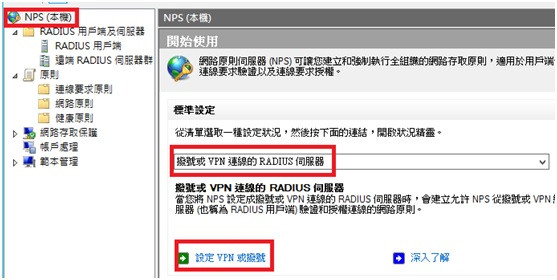
19.選擇虛擬私人網路VPN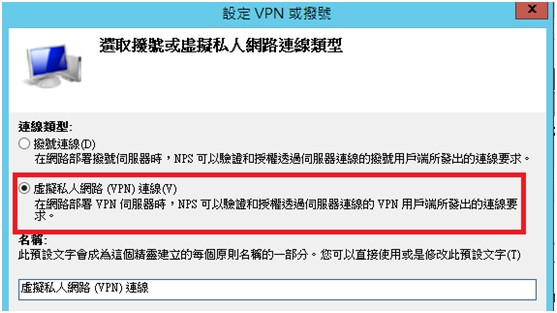
20.選擇VPN伺服器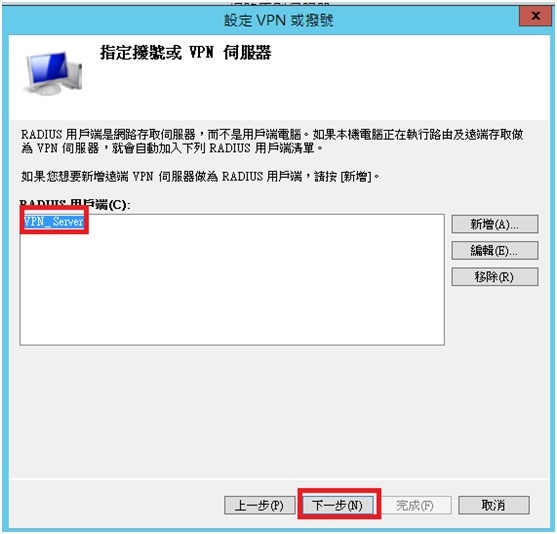
21.下一步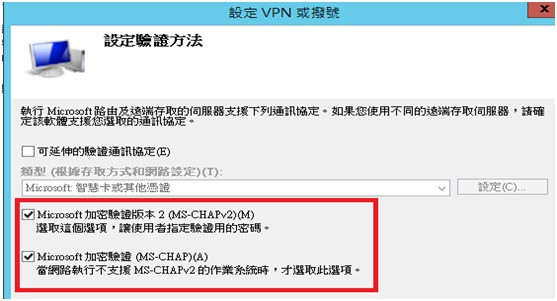
22.這邊指定僅有加到VPN_GROUP群組內的使用者帳號才可以透過認證連線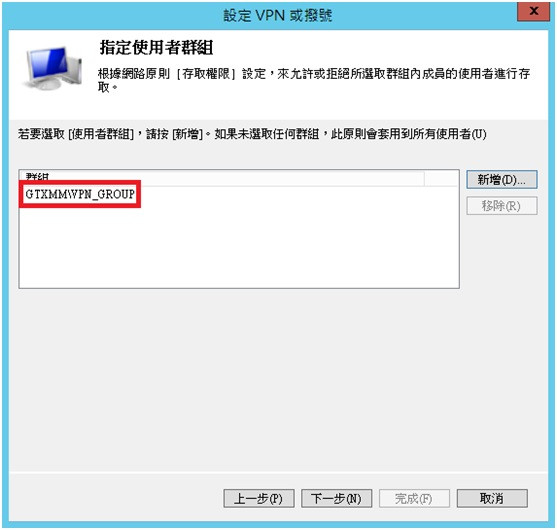
23.下一步
24.完成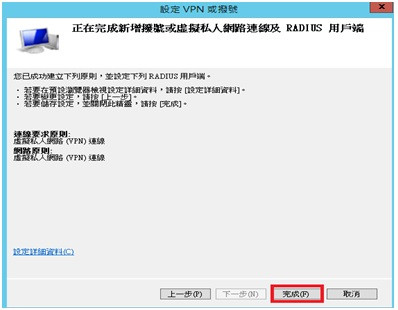
25.於網路原則內容
26.要注意若這邊為空白需手動按新增上去,否則帳號是都不會認證過的唷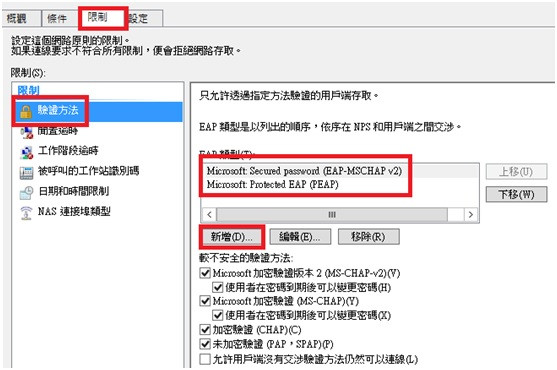
27.如此一來,RADIUS伺服器皆已設定完成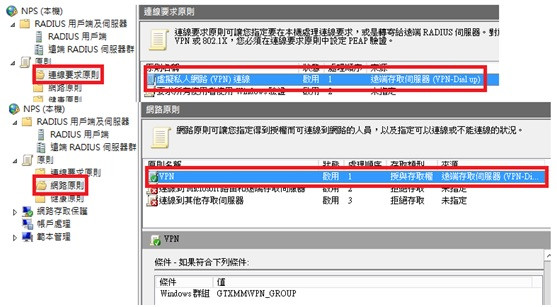
28.mis02是有申請可以VPN權限的使用者,而mis03是沒有申請可以VPN權限的使用者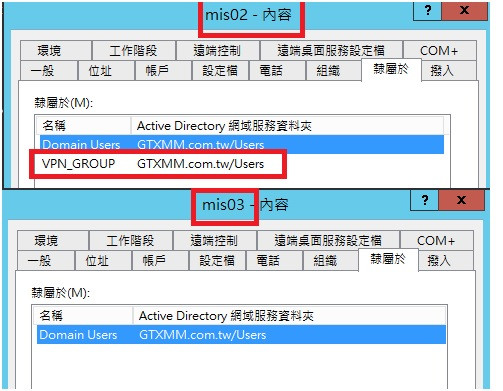
29.Client端測試登入mis02帳號認證成功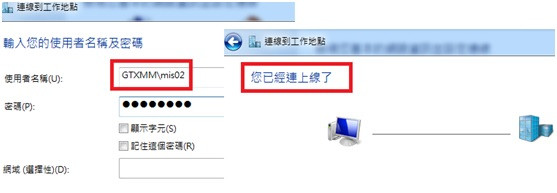
30.嘗試登入mis03帳號因無權限認證故無法與VPN伺服器連線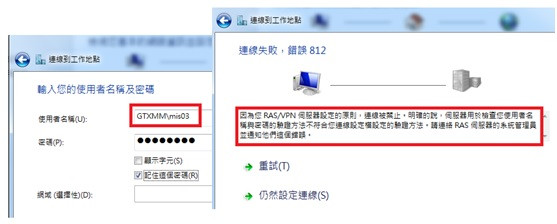
下一篇個人資料夾導向至檔案伺服器空間