容錯移轉功能主要是可預防SQL主機硬體及系統、應用程式意外性的發生,避免企業資訊服務的中斷。
環境架構 :
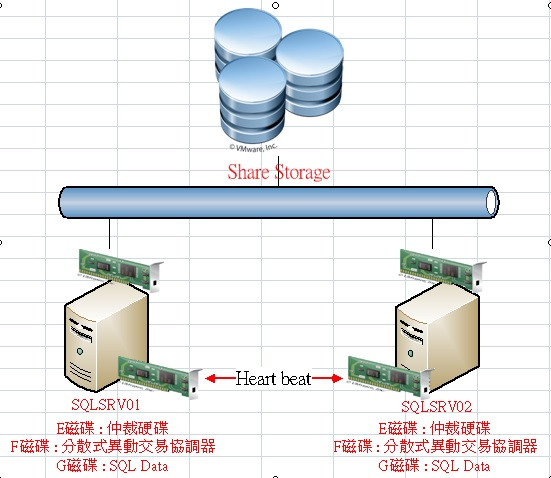
SQLSRV01及SQLSRV02安裝容錯移轉叢集功能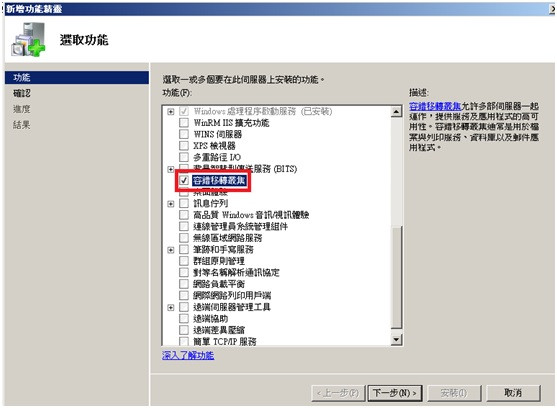
開啟容錯移轉叢集管理員,開始建立叢集服務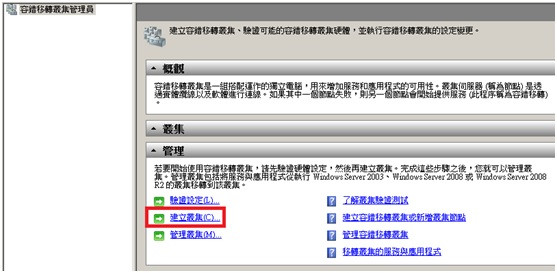
選擇2台SQL主機
輸入管理叢集名稱及IP位址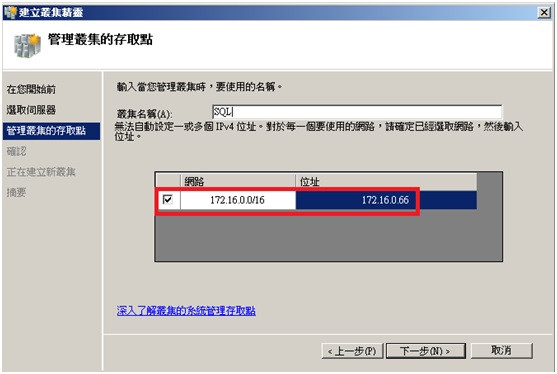
等待建立叢集中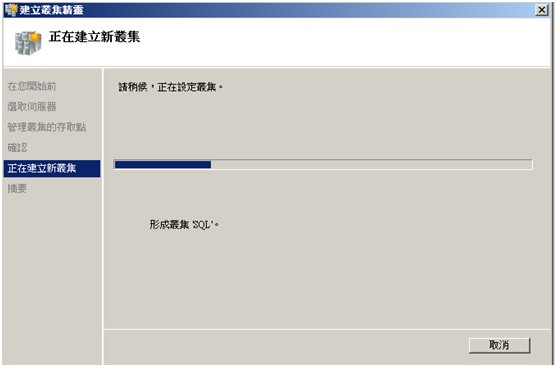
好像出現一些警告訊息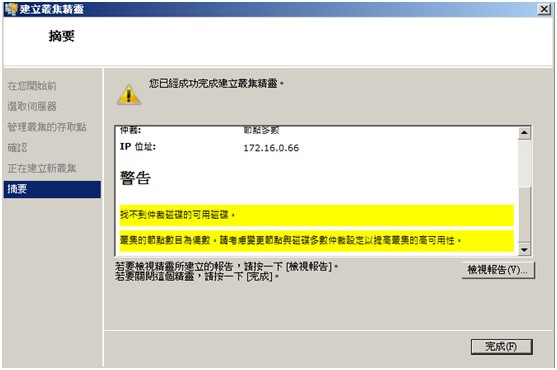
看來要好好研究一下了… (我先將SQLSRV02節點收回)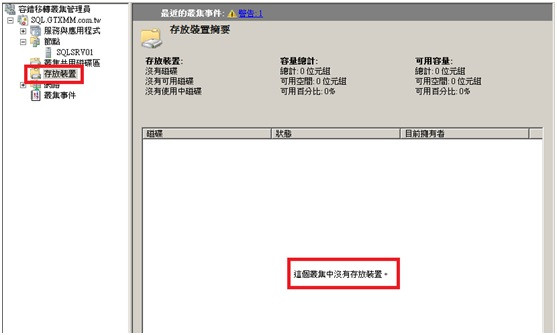
新增磁碟並將3個掛載share storage的磁碟加進去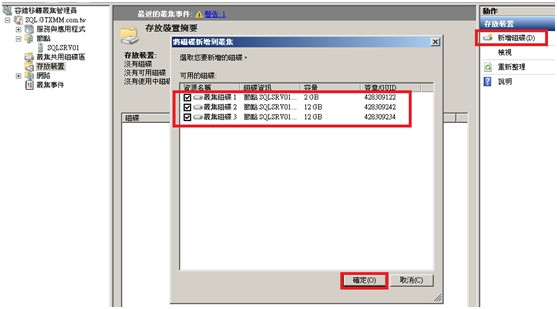
檢查3個磁碟狀況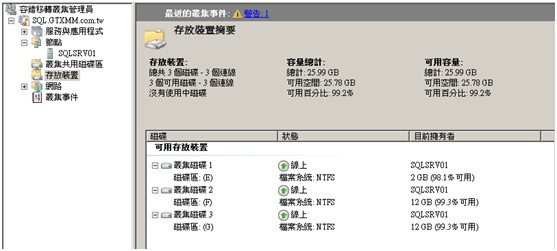
10.接著設定DTC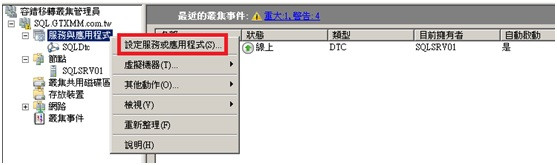
11.選擇DTC服務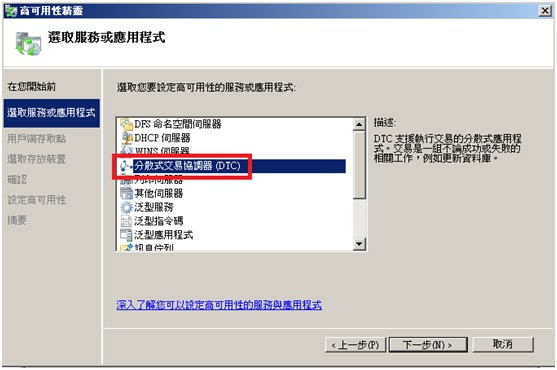
12.輸入DTC服務名稱及IP位址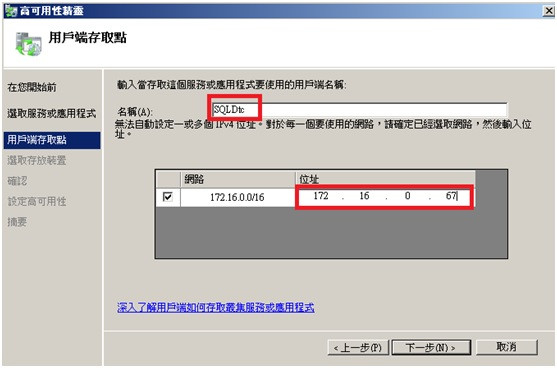
13.選擇存放DTC的磁碟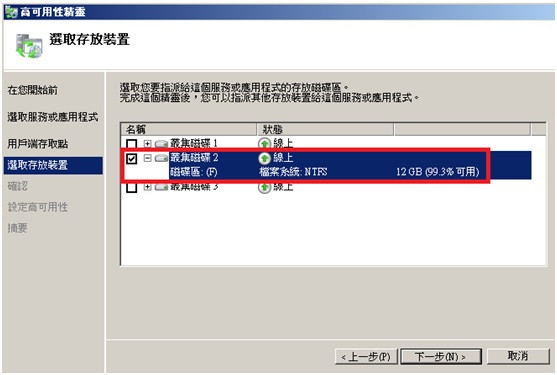
14.DTC建立完成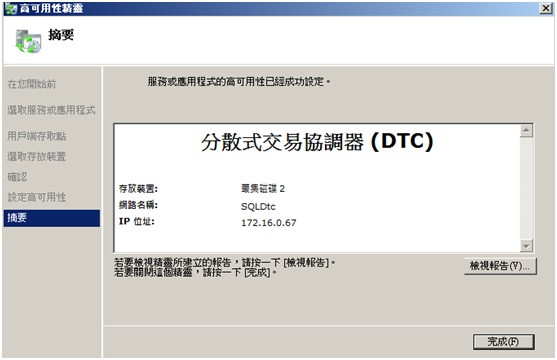
15.測試一下DTC是否可以正常轉移至SQLSRV02主機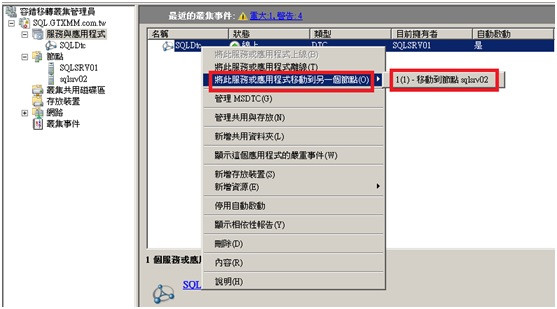
16.測試可成功移轉至SQLSRV02
17.接著仲裁設定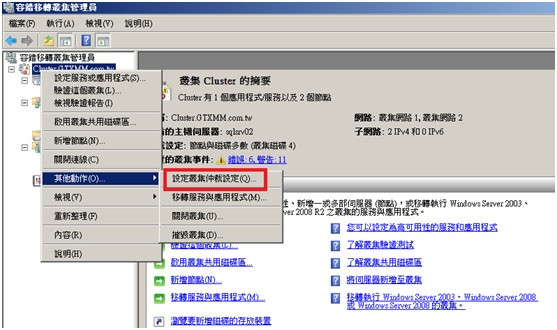
18.下一步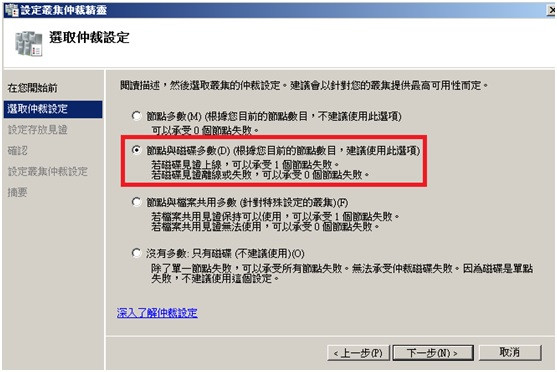
19.選擇叢集群組磁碟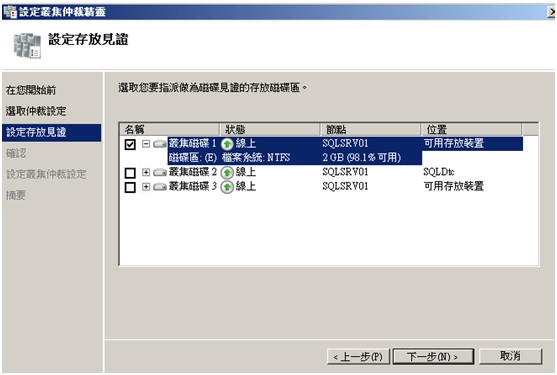
20.仲裁磁碟建立完成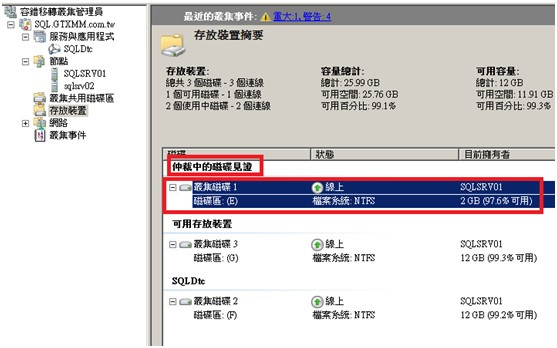
21.於SQLSRV01安裝SQL容錯移轉叢集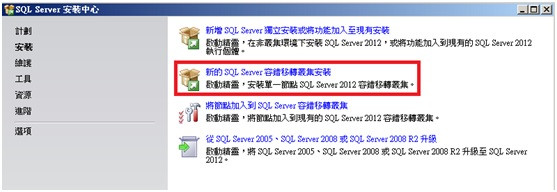
22.出現錯誤訊息了....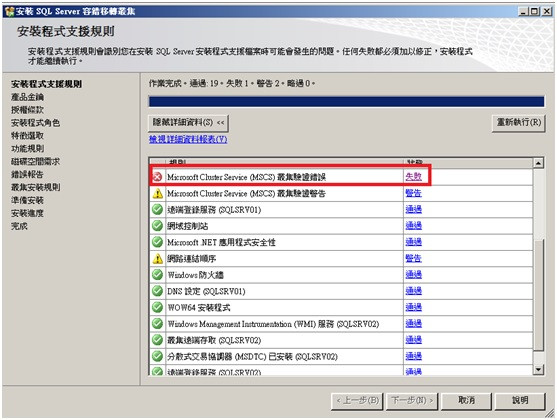
23.只要跑一次驗證叢集驗證成功即可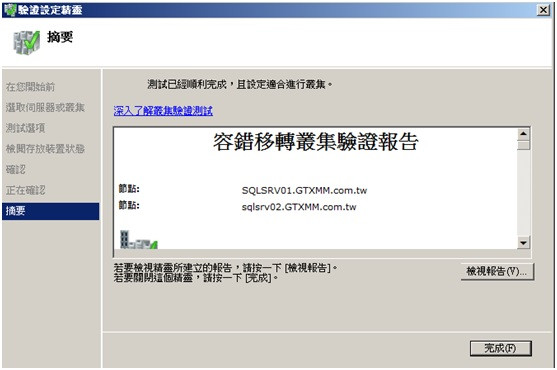
24.可正常安裝SQL容錯轉移叢集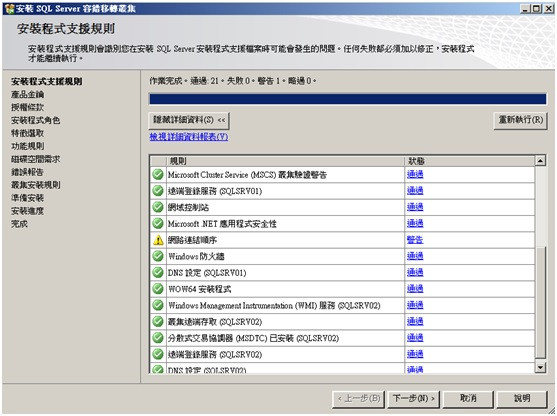
25.設定SQL Server叢集的網路名稱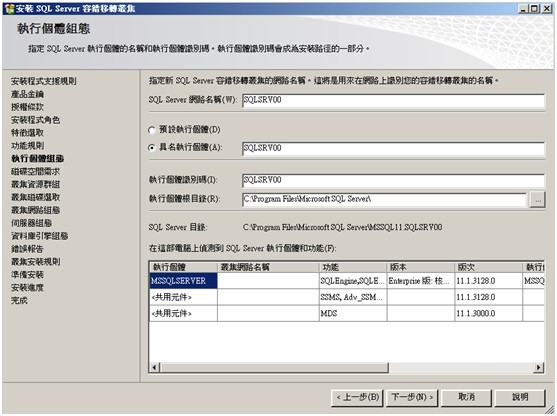
26.設定容錯移轉叢集節點IP位址(172.16.0.68)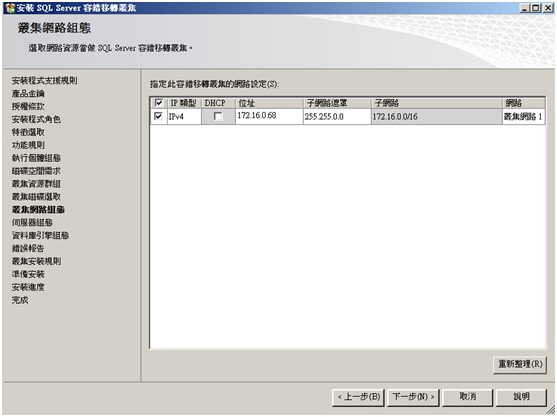
27.陸續設定直到安裝完成即可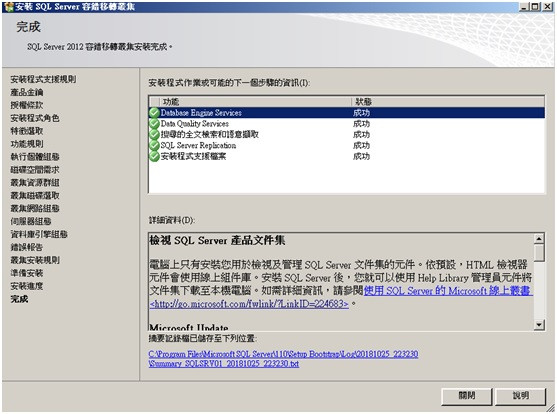
28.至Cluster管理員可以看到剛剛安裝容錯移轉的服務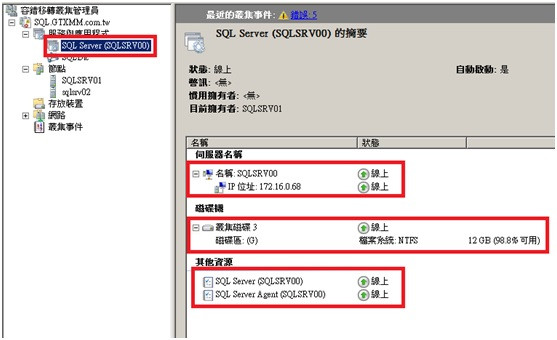
29.接著至SQLSRV02主機將節點加入至SQL容錯移轉叢集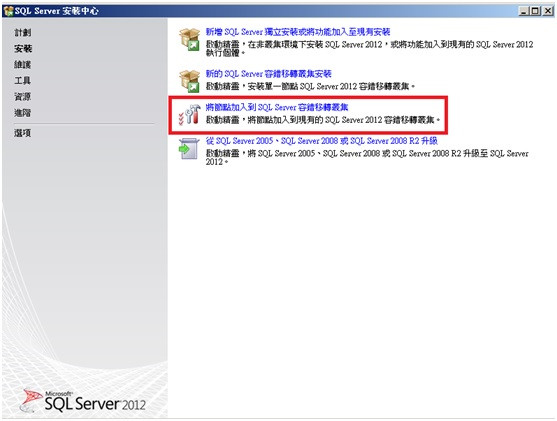
30.輸入叢集SQL名稱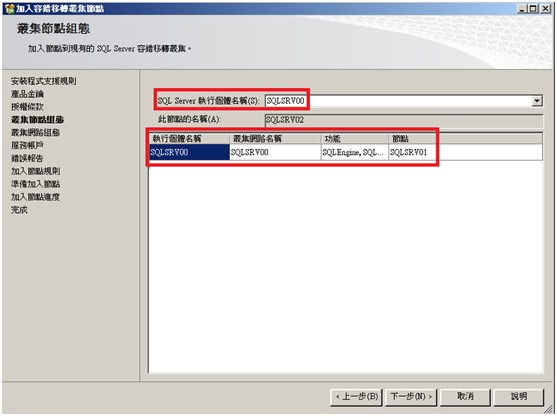
31.下一步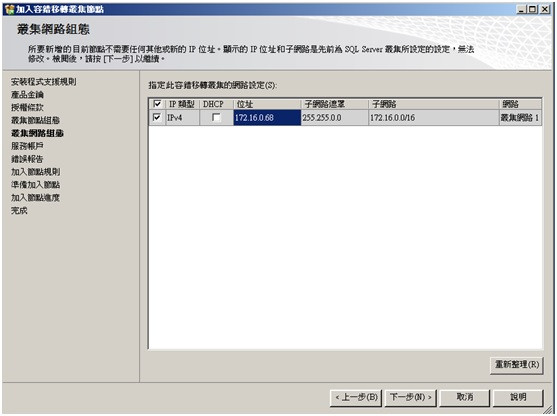
32.完成
33.目前SQLSRV01主機為主要運作的伺服器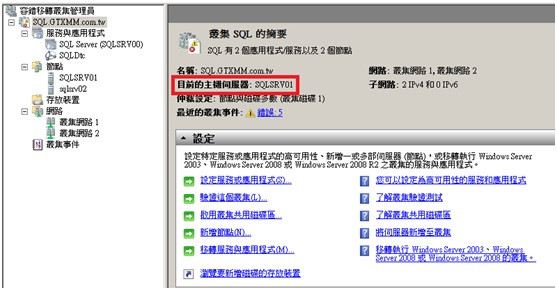
34.測試將SQLSRV01主機關機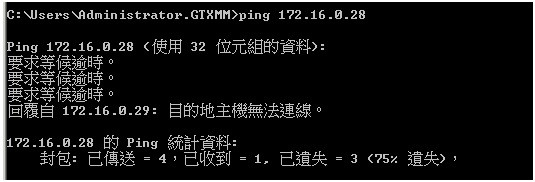
35.SQL服務已移轉至SQLSRV02主機並持續運作中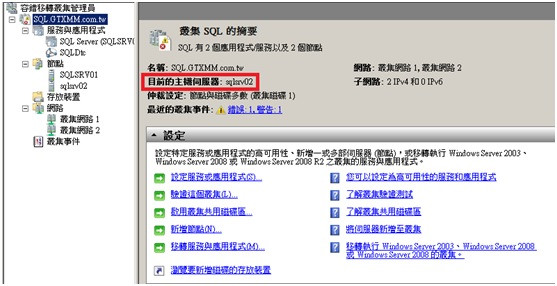
36.這邊可以看到仲裁、DTC、SQL_Data磁碟皆已移轉至SQLSRV02主機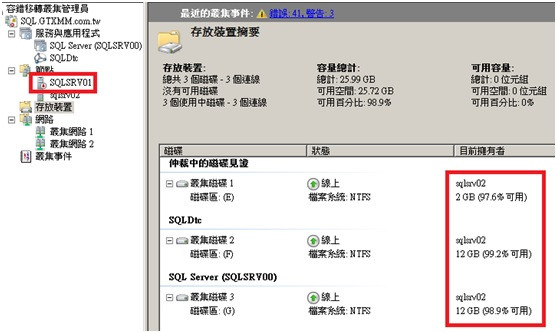
下一篇兩個網域之間信任建置