在五、六月時候參考[1]已經實做過一次,然而現在做起來也比較順手,基本上都依照[1]的理論去實作,但還是有些算法不同,而較不同的地方是每個步驟的演算法都要去實作,不使用OpenCV。
LBP(Local binary patterns)中文是局部二值模式,主要運用局部的像素資訊來描素紋理,而這些紋理就是圖片的特徵,往後可利用這些特徵使用公式訓練,訓練後的資訊即可達到偵測或辨識的效果。這次主要介紹六種LBP特徵取得方式。
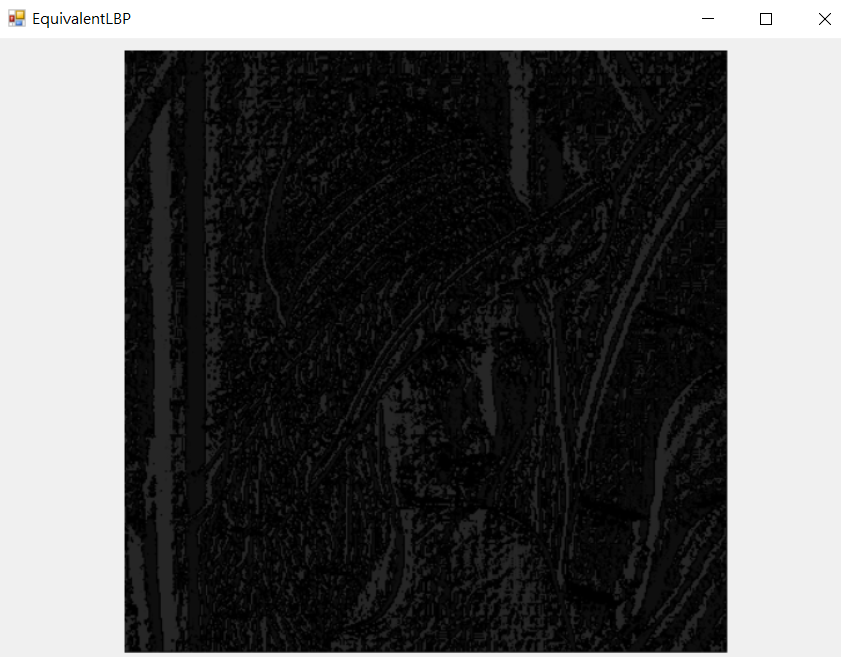
原始LBP是使用當下像素與局部範圍的像素做比對,若比當下像素小設定為0,反之1,全部計算後組成一串二進位即是當下像素的特徵像素,以下舉例。
假設當下像素為5,矩形移動量1,以當下像素當中心移動1,如圖一,依照LBP轉換則變為圖二,從左上方順時針可得到二進位00011110,轉為十進位則是30,該像素的特徵即是30。
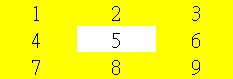
圖一,原始像素圖。
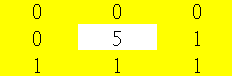
圖二,LBP轉換圖。
void LBP::OriginalLBP(C_UCHAE* src, UCHAE* pur
	, C_UINT32 width, C_UINT32 height)
{
	// 1. padding
	C_UINT32 padWidth = width + 2;
	C_UINT32 padHeight = height + 2;
	UCHAE* padData = new UCHAE[padWidth * padHeight]{ 0 };
	Library lib;

	lib.ImagePadding8bit(src, padData, width, height, 1);


	// 2. calculate original lbp
	Image padImage(padData, padWidth, padHeight, MNDT::ImageType::GRAY_8BIT);

	for (UINT32 row = 1; row < padHeight - 1; row++)
	{
		for (UINT32 col = 1; col < padWidth - 1; col++)
		{
			UCHAE sum = 0;

			sum |= static_cast<UCHAE>(padImage.image[row - 1][col - 1] > padImage.image[row][col]) << 7;
			sum |= static_cast<UCHAE>(padImage.image[row - 1][col] > padImage.image[row][col]) << 6;
			sum |= static_cast<UCHAE>(padImage.image[row - 1][col + 1] > padImage.image[row][col]) << 5;
			sum |= static_cast<UCHAE>(padImage.image[row][col + 1] > padImage.image[row][col]) << 4;
			sum |= static_cast<UCHAE>(padImage.image[row + 1][col + 1] > padImage.image[row][col]) << 3;
			sum |= static_cast<UCHAE>(padImage.image[row + 1][col] > padImage.image[row][col]) << 2;
			sum |= static_cast<UCHAE>(padImage.image[row + 1][col - 1] > padImage.image[row][col]) << 1;
			sum |= static_cast<UCHAE>(padImage.image[row][col - 1] > padImage.image[row][col]);

			*pur = sum;
			pur++;
		}

	}

	delete[] padData;
	padData = nullptr;
}
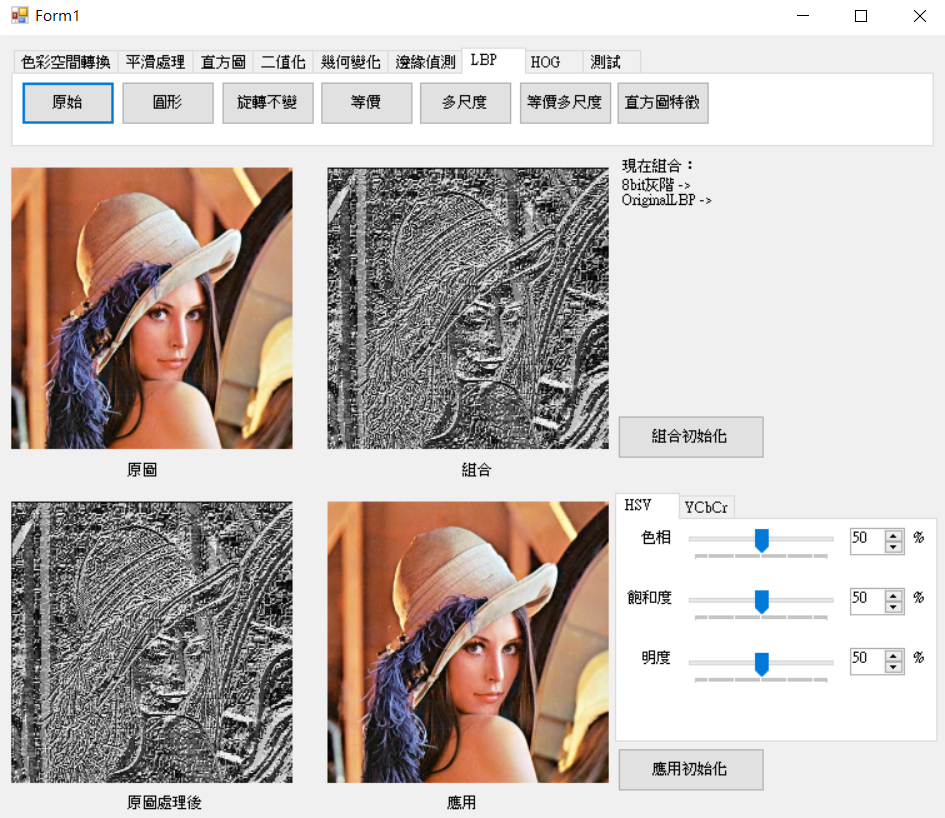
圓形LBP主要是為了適應各種尺寸的變化如下圖一,因尺寸變大相較原始LBP,圓形LBP能保留資訊會較正確,主要是將計算出圓形邊緣的x和y並往上下取整數去做雙線性差值法(幾何文章有介紹過[2]),但這邊基本上還是以半徑1去取得特徵會有比較好的特徵資料與方便計算。
圖一來源[1],圓形特徵。
cos和sin計算角度後乘上半徑即是區域圓周的x和y。並將x和y往上下取出4個點,在計算4組座標的w權重(雙線性差值法)。區域N - 1與原先的像素做or。位移部分也可以從0開始。(走訪主要先計算每個像素在N區域的數值,也可以說是使用廣度計算方式)。void LBP::CircularLBP(C_UCHAE* src, UCHAE* pur
, C_UINT32 width, C_UINT32 height
, C_UINT32 radius, C_UINT32 bin)
{
// 1. padding
C_UINT32 padWidth = width + (radius << 1);
C_UINT32 padHeight = height + (radius << 1);
UCHAE* padData = new UCHAE[padWidth * padHeight]{ 0 };
Library lib;
lib.ImagePadding8bit(src, padData, width, height, radius);
// 2. calculate offset
Image padImage(padData, padWidth, padHeight, MNDT::ImageType::GRAY_8BIT);
Image purImage(pur, width, height, MNDT::ImageType::GRAY_8BIT);
UINT32 offsetBase = bin - 1;
for (UINT32 index = 0; index < bin; index++)
{
C_FLOAT centerX = MNDT::FixValue(static_cast<float>(radius * cos(2.0 * MNDT::PI * index / bin)));
C_FLOAT centerY = MNDT::FixValue(static_cast<float>(radius * sin(2.0 * MNDT::PI * index / bin)));
C_INT32 x1 = static_cast<int32_t>(floor(centerX));
C_INT32 y1 = static_cast<int32_t>(floor(centerX));
C_INT32 x2 = static_cast<int32_t>(ceil(centerX));
C_INT32 y2 = static_cast<int32_t>(ceil(centerX));
C_FLOAT xOffset = centerX - x1;
C_FLOAT yOffset = centerY - y1;
//(y, x) -> (0, 0), (0, 1), (1, 0), (1, 1)
C_FLOAT w1 = (1.0f - xOffset) * (1.0f - yOffset);
C_FLOAT w2 = xOffset * (1.0f - yOffset);
C_FLOAT w3 = (1.0f - xOffset) * yOffset;
C_FLOAT w4 = xOffset * yOffset;
// 3. calcuulate pixel
for (UINT32 row = radius; row < padHeight - radius; row++)
{
for (UINT32 col = radius; col < padWidth - radius; col++)
{
UCHAE pix = 0;
pix = static_cast<UCHAE>(padImage.image[row + y1][col + x1] * w1
+ padImage.image[row + y1][col + x2] * w2
+ padImage.image[row + y2][col + x1] * w3
+ padImage.image[row + y2][col + x2] * w4);
purImage.image[row - radius][col - radius] |= (static_cast<UCHAE>(pix > padImage.image[row][col]) << offsetBase);
}
}
offsetBase--;
}
delete[] padData;
padData = nullptr;
}
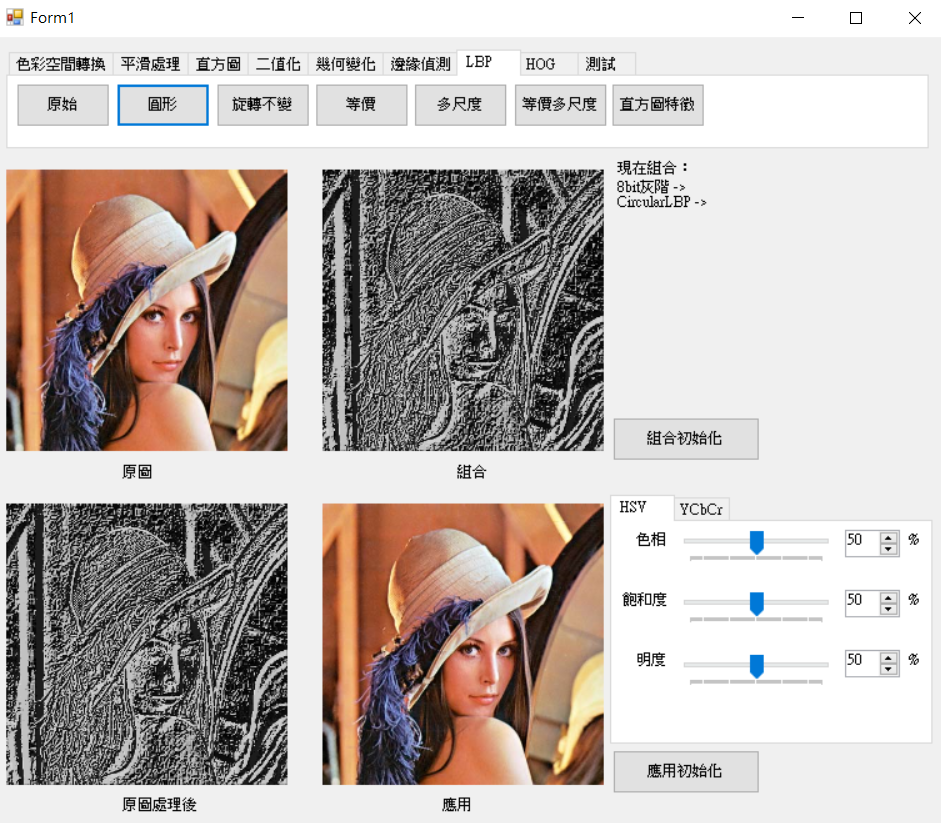
旋轉不變LBP主要是將圓型特徵加強,加強的部分為,假設圖片旋轉的一點點的角度也可以取出雷同的特徵值,而它只比圓型LBP多了一個小技巧,比較所有範圍內的像素並且取得最小像素當特徵,如此一來就能達到旋轉不變的特徵了。
位移和or技巧加快運算。void LBP::InvariantLBP(C_UCHAE* src, UCHAE* pur
, C_UINT32 width, C_UINT32 height
, C_INT32 radius, C_UINT32 bin)
{
// 1. get circular lbp
CircularLBP(src, pur
, width, height
, radius, bin);
// 2. calculate invariant
Image purImage(pur, width, height, MNDT::ImageType::GRAY_8BIT);
for (UINT32 row = 0; row < height; row++)
{
for (UINT32 col = 0; col < width; col++)
{
// 使用位移(二進位)方式循環一次
UCHAE originalPix = purImage.image[row][col];
UCHAE minPix = originalPix;
for (UINT32 index = 1; index < bin; index++)
{
C_UCHAE temp = (originalPix >> index) | (originalPix << index);
if (minPix > temp)
{
minPix = temp;
}
}
purImage.image[row][col] = minPix;
}
}
}
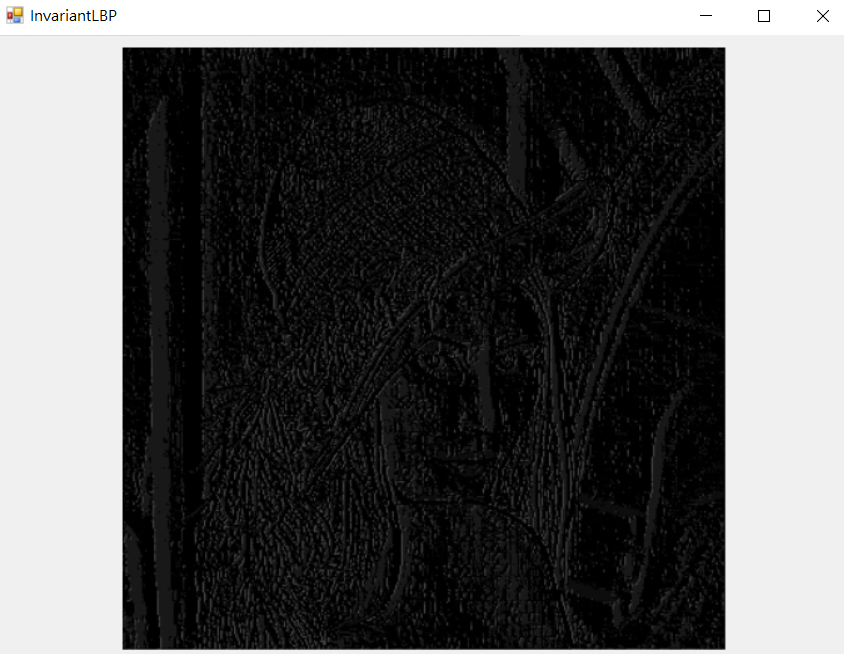
等價LBP的特性只將二進位數值跳變小於兩次的加入特徵,例如00010000為跳變兩次,因為0->1一次1->0兩次,00010100為跳變四次因為0->1一次1->0兩次0->1三次1->0四次,簡單來說就像取得邊緣,若範圍內邊緣數量超過1次就不列入特徵內,而比較要注意的是要將數值看成一個圓所以最後一個還要與第一個比,最後結果即是等價LBP。
void LBP::EquivalentLBP(C_UCHAE* src, UCHAE* pur
	, C_UINT32 width, C_UINT32 height
	, C_INT32 radius, C_UINT32 bin)
{
	// 1. get circular lbp
	CircularLBP(src, pur
		, width, height
		, radius, bin);


	// 2. set everyone equivalent of the pixels
	UCHAE table[256] = { 0 };

	EquivalentTable(table);


	// 3. change to equivalent lbp
	Image purImage(pur, width, height, MNDT::ImageType::GRAY_8BIT);

	for (UINT32 row = 0; row < height; row++)
	{
		for (UINT32 col = 0; col < width; col++)
		{
			purImage.image[row][col] = table[purImage.image[row][col]];
		}
	}
}

void LBP::EquivalentTable(UCHAE* table)
{
	UCHAE pix = 1;

	for (UINT32 index = 0; index < 256; index++)
	{
		UINT32 count = 0;
		std::bitset<8> binary = index;

		for (UINT32 bitIndex = 0; bitIndex < 8; bitIndex++)
		{
			if (binary[bitIndex] != binary[(bitIndex + 1) % 8])
			{
				count++;
			}
		}

		if (count < 3)
		{
			table[index] = pix;
			pix++;
		}
	}
}
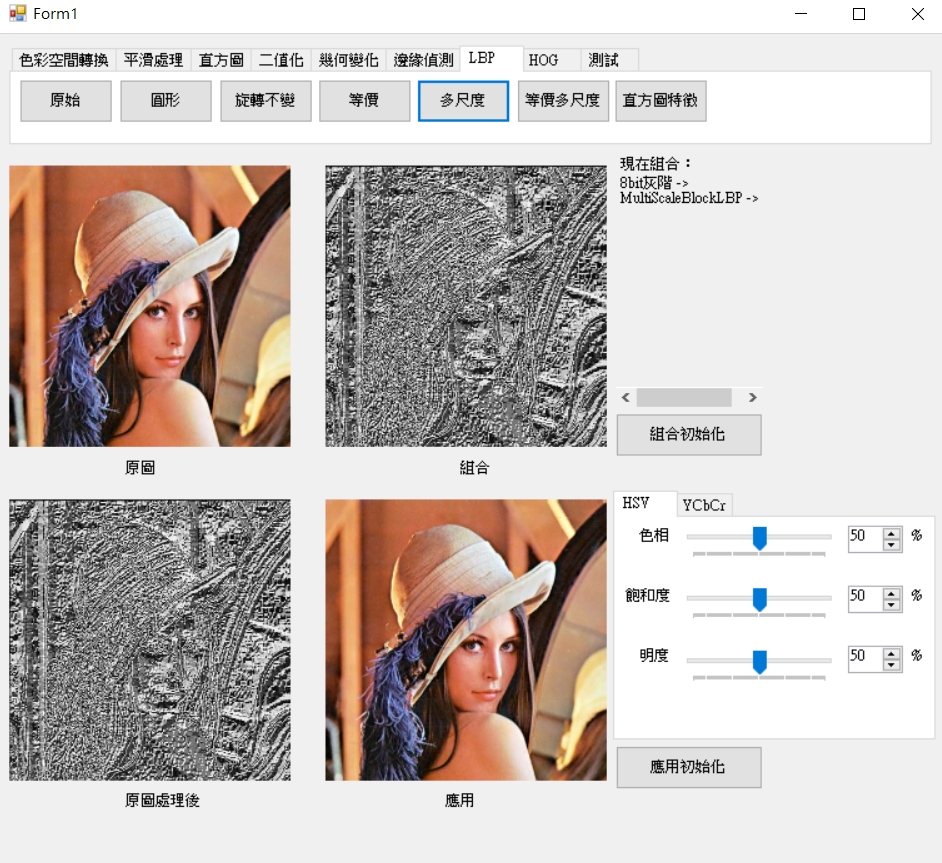
區塊LBP是一種平均連通算法如下圖一,首先計算每個cell內平均像素,接著使用原始LBP,而這時周圍的8個像素即是剛剛計算的平均8個cell即是block。
註:另一種作法則是cell計算平均縮為一個像素,步伐為cell,在使用原始LBP,如結果圖二。
圖一來源[1],多尺度特徵。
cell乘上2的大小,cell由scale計算出來(scale為block數量)。cell區塊的平均值。void LBP::MultiScaleBlockLBP(C_UCHAE* src, UCHAE* pur
, C_UINT32 width, C_UINT32 height
, C_INT32 scale)
{
C_UINT32 cellSize = scale / 3;
C_INT32 cellRadius = cellSize >> 1;
C_UINT32 padWidth = width + (cellRadius << 1);
C_UINT32 padHeight = height + (cellRadius << 1);
UCHAE* avgData = new UCHAE[width * height]{ 0 };
UCHAE* padData = new UCHAE[padWidth * padHeight]{ 0 };
Library lib;
// 1. padding
lib.ImagePadding8bit(src, padData, width, height, cellRadius);
// 2. calculate pixel of avg
Image padImage(padData, padWidth, padHeight, MNDT::ImageType::GRAY_8BIT);
Image avgImage(avgData, width, height, MNDT::ImageType::GRAY_8BIT);
for (UINT32 row = cellRadius; row < padHeight - cellRadius; row++)
{
for (UINT32 col = cellRadius; col < padWidth - cellRadius; col++)
{
int32_t sum = 0;
for (int32_t cellRow = -cellRadius; cellRow < cellRadius; cellRow++)
{
for (int32_t cellCol = -cellRadius; cellCol < cellRadius; cellCol++)
{
sum += padImage.image[row + cellRow][col + cellCol];
}
}
avgImage.image[row - cellRadius][col - cellRadius] = static_cast<UCHAE>(sum / (cellSize * cellSize));
}
}
delete[] padData;
padData = nullptr;
// 3. calculate original lbp
OriginalLBP(avgData, pur, width, height);
delete[] avgData;
avgData = nullptr;
}
圖一,區塊LBP。
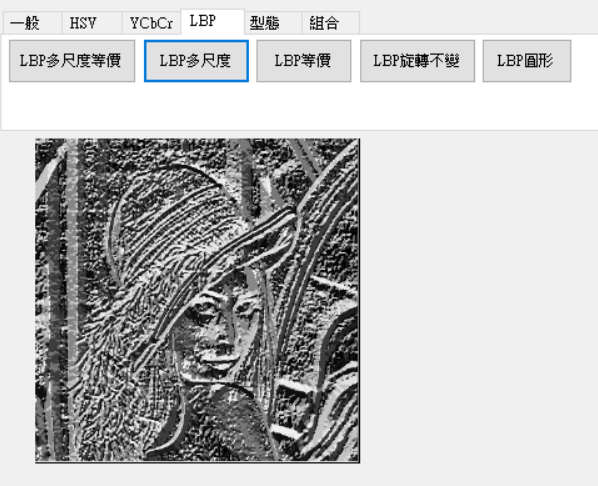
圖二,備註所產出的結果圖。
這裡的多尺度是使用區塊LBP特徵轉為直方圖累加做排序,並且只取前面63個最大值,其餘的都為0,所以最後只剩下64個像素特徵來表示圖片。
註:排序預設小到大,所以下面我直接用255-index取得最大。
void  LBP::SEMultiScaleBlockLBP(C_UCHAE* src, UCHAE* pur
	, C_UINT32 width, C_UINT32 height
	, C_INT32 scale)
{
	// 1. get block lbp
	UCHAE* MBLBPData = new UCHAE[width * height]{ 0 };

	MultiScaleBlockLBP(src, MBLBPData
		, width, height
		, scale);


	// 2. get histogram of the block lbp
	Library lib;
	int32_t histogram[256] = { 0 };
	int32_t sortHistogram[256] = { 0 };

	lib.SetHistogram8bit(MBLBPData, histogram
		, width, height);


	// 3. copy and sort the histogram
	memcpy(sortHistogram, histogram, 256 * sizeof(int32_t));
	std::sort(sortHistogram, sortHistogram + 256);


	// 4. found top 64 of the sort histogram
	UCHAE table[256] = { 0 };

	for (UINT32 index = 0; index < 63; index++)
	{
		for (UINT32 hisIndex = 0; hisIndex < 256; hisIndex++)
		{
			if (sortHistogram[255 - index] == histogram[hisIndex])
			{
				table[hisIndex] = index;
			}
		}
	}


	// 5. set new pixel
	UINT32 size = height * width;

	for (UINT32 index = 0; index < size; index++)
	{
		pur[index] = table[MBLBPData[index]];
	}

	delete[] MBLBPData;
	MBLBPData = nullptr;
}
因為很不明顯所以多加了190像素。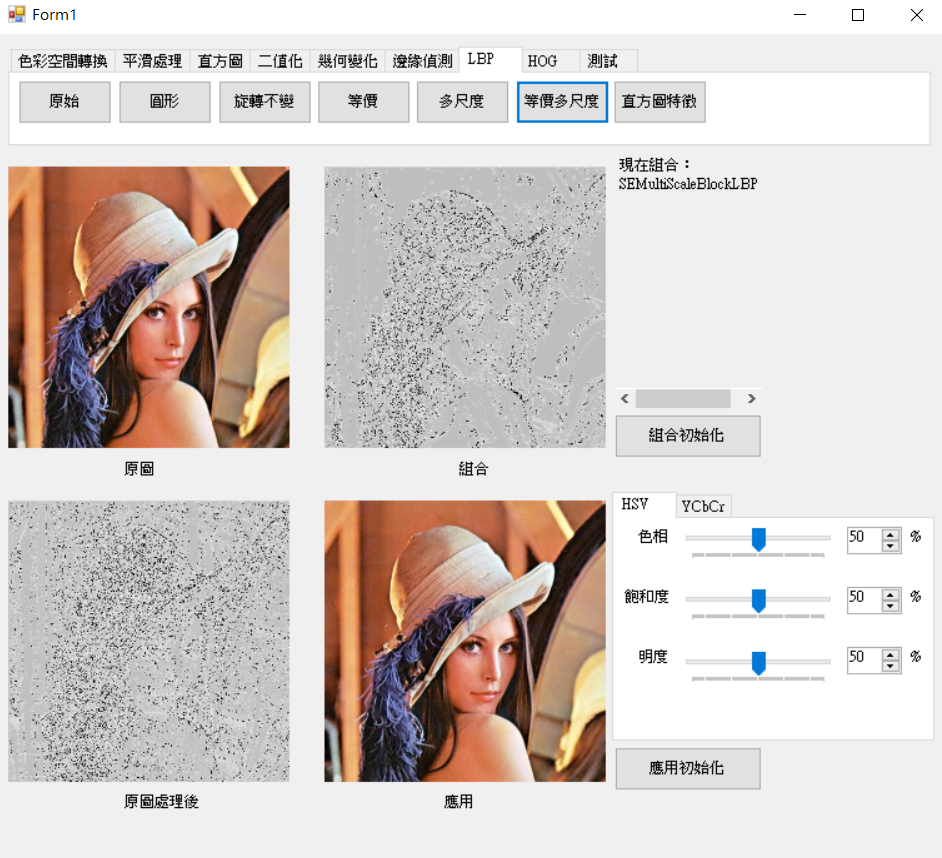
前面介紹了取得特徵的方法,最後要介紹如何將特徵轉為可訓練得資料。首先固定取XY大小的區域,在計算每個區域的自訂數量直方圖後規一化,最後將XY個直方圖串再一起即是訓練資料。
void LBP::LBPHistogram(C_UCHAE* src, UCHAE* pur
	, C_UINT32 width, C_UINT32 height
	, C_UINT32 gridX, C_UINT32 gridY
	, C_UINT32 bin)
{
	// 1. init params
	Image srcImage(const_cast<UCHAE*>(src), width, height, MNDT::ImageType::GRAY_8BIT);
	C_UINT32 cellWidth = width / gridX;
	C_UINT32 cellHeight = height / gridY;
	float* histogram = new float[gridX * gridY * bin]{ 0 };

	// 2. calculate histogram
	for (UINT32 row = 0; row < height; row++)
	{
		UINT32 hisRowIndex = row / cellHeight * gridX;

		for (UINT32 col = 0; col < width; col++)
		{
			UINT32 hisColIndex = col / cellWidth;
			UINT32 hisIndex = (hisColIndex + hisRowIndex) * bin;

			histogram[hisIndex + (srcImage.image[row][col] % bin)]++;
		}
	}

	// 3. normalized histogram
	Library lib;
	C_UINT32 histogramSize = gridX * gridY;

	for (UINT32 index = 0; index < histogramSize; index++)
	{
		lib.SetNormalizedHistogram8bit(histogram + index * bin, bin, MNDT::Normalized::L1);
	}

	//C_UINT32 allSize = gridX * gridY * bin;

	//for (UINT32 index = 0; index < allSize; index++)
	//{
	//	MNDT::Write(histogram[index]);
	//	MNDT::Write(" ");
	//}
	//MNDT::Write("\n\n\n\n");

	delete[] histogram;
	histogram = nullptr;
}

這次學習到了LBP特徵只要搭配未來會介紹的Adaboost即可訓練資料,然而現今有深度學習但取得特徵的運用或影響還是不可少的。若有錯誤或問題歡迎提問。
[1]senitco(2017). 图像特征提取之LBP特征 from: https://senitco.github.io/2017/06/12/image-feature-lbp/ (2018.11.22).
[2]MNGhost(2018). [筆記]C++ & C#影像處理-幾何變換 from: https://ithelp.ithome.com.tw/articles/10209217 (2018.11.22).
 Kevin
Kevin
