今天會先來講一下coroutines(協程)
這個功能簡單來說是去除callback用的
這樣可以避免撰寫非同步代碼時要塞一堆callback的情況
這樣有啥好處?
舉個例子 平常在call api 或是做一些耗時行為時常常會需要寫一些回調
那假設情況是這樣的
你需要呼叫api拿到一組item id
然後你需要再拿這組id去call 另一支api來獲得item的更多資訊
如果還需要考慮後續情形的話就會導致程式碼可讀性越來越糟
所以有些人會使用RxJava之類的來調整
那今天講coroutines的原因是接下來如果用到google的codelab的範例代碼時
很多專案會有使用到這個功能
所以今天會簡單介紹一下如何使用
首先先來寫一個關於協程的範例
功能很簡單
就是點擊以後會喚醒一個線程 暫停一秒後回調顯示對應訊息
這是今天的代碼
https://github.com/mars1120/jetpackMvvmDemo/tree/coroutines
範例版本:
build.gradle(Module:app)
dependencies {

...

//snackbar
implementation 'com.google.android.material:material:1.0.0'


//線程回調
def coroutines_version = '1.3.0'
implementation "org.jetbrains.kotlinx:kotlinx-coroutines-core:$coroutines_version"
implementation "org.jetbrains.kotlinx:kotlinx-coroutines-android:$coroutines_version"


// ViewModel and LiveData
def lifecycle_version = '2.1.0-beta01'
implementation "androidx.lifecycle:lifecycle-extensions:$lifecycle_version"

//CoroutineScope擴充
implementation "androidx.lifecycle:lifecycle-viewmodel-ktx:$lifecycle_version"


測試相關
androidTestImplementation 'androidx.test:runner:1.2.0'
androidTestImplementation 'androidx.test:rules:1.2.0'
androidTestImplementation "com.google.truth:truth:0.42"
androidTestImplementation "androidx.arch.core:core-testing:$lifecycle_version"
androidTestImplementation "org.jetbrains.kotlinx:kotlinx-coroutines-test:$coroutines_version"

testImplementation 'junit:junit:4.12'
androidTestImplementation 'junit:junit:4.12'
androidTestImplementation 'androidx.test.espresso:espresso-core:3.2.0'
}
傳統的寫thread方式大概會像這樣
Thread {
    Thread.sleep(1000)
    runOnUiThread {
    _snackBar.value = "Hello, from coroutines!"
    }
}.start()
那如果是coroutines的形式會長怎樣呢?
首先先新建一個viewModel並新增click的行為
MainViewModel.kt
fun onMainViewClicked() {
   viewModelScope.launch {
       // 暫停線程
       delay(1_000)
       //之後在主線程調用   _snackbar.value
       _snackBar.value = "Hello, from coroutines!"
   }
}
MainViewModel.kt 完整代碼
class MainViewModel : ViewModel() {
    private val _snackBar = MutableLiveData<String>()
    val snackbar: LiveData<String>
        get() = _snackBar
    fun onMainViewClicked() {
        viewModelScope.launch {
            // 暫停線程
            delay(1_000)
            //之後在主線程調用   _snackbar.value
            _snackBar.value = "Hello, from coroutines!"
        }
    }

    /**
     * Called immediately after the UI shows the snackbar.
     */
    fun onSnackbarShown() {
        _snackBar.value = null
    }
}
主頁代碼 MainActivity.kt
class MainActivity : AppCompatActivity() {

    override fun onCreate(savedInstanceState: Bundle?) {
        super.onCreate(savedInstanceState)
        setContentView(R.layout.activity_main)
        val rootLayout: ConstraintLayout = findViewById(R.id.rootLayout)

        val viewModel = ViewModelProviders.of(this)
            .get(MainViewModel::class.java)

        // When rootLayout is clicked call onMainViewClicked in ViewModel
        rootLayout.setOnClickListener {
            viewModel.onMainViewClicked()
        }

        // Show a snackbar whenever the [ViewModel.snackbar] is updated with a non-null value
        viewModel.snackbar.observe(this, Observer { text ->
            text?.let {
                Snackbar.make(rootLayout, text, Snackbar.LENGTH_SHORT).show()
                viewModel.onSnackbarShown()
            }

        })
    }
}
測試案例
這裡會使用到kotlinx-coroutines-test來做測試
runBlockingTest是coroutines測試時會用到的擴充 模擬在主協程運行
advanceTimeBy是異步時用來躍進時間用的
MainViewModelTest.kt (androidTest)
@Test
fun whenMainViewModelClicked_showSnackbar() = testDispatcher.runBlockingTest {
  //模擬click行為
   subject.onMainViewClicked()
  //推進時間
   advanceTimeBy(1_000)
   Truth.assertThat(subject.snackbar.value)
       .isEqualTo("Hello, from coroutines!")
}
如果沒有advanceTimeBy()快進
那會直接跳到
Truth.assertThat(subject.snackbar.value)
.isEqualTo("Hello, from coroutines!")
的判斷式
在這個時間點subject.snackbar.value的值還沒被更新(此時為null)
所以測試不會過
在執行advanceTimeBy()之後
subject.snackbar.value 的值才會更新為"Hello, from coroutines!"
撰寫完後 右鍵MainViewModelTest.kt 運行測試
位置如下圖 也可點擊class左邊紅框處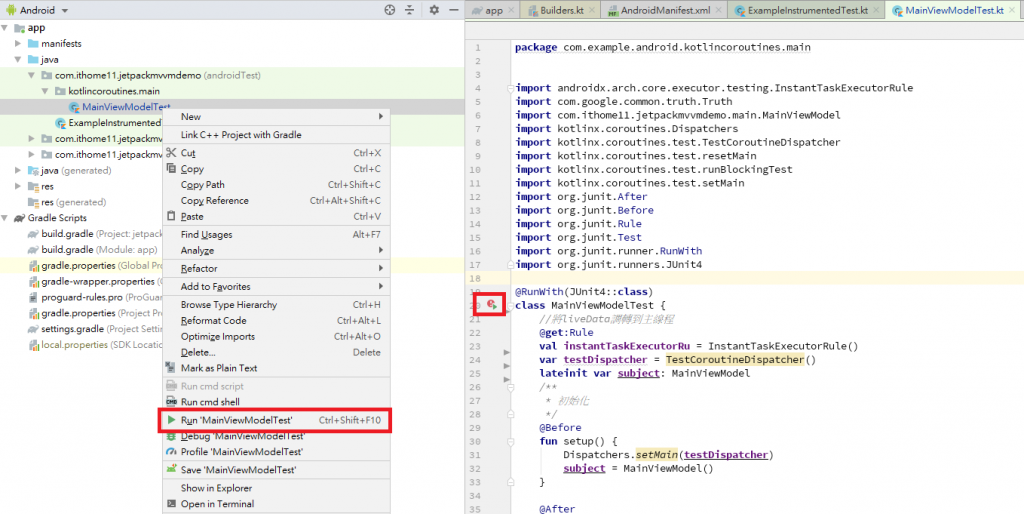
沒問題的話測試會順利通過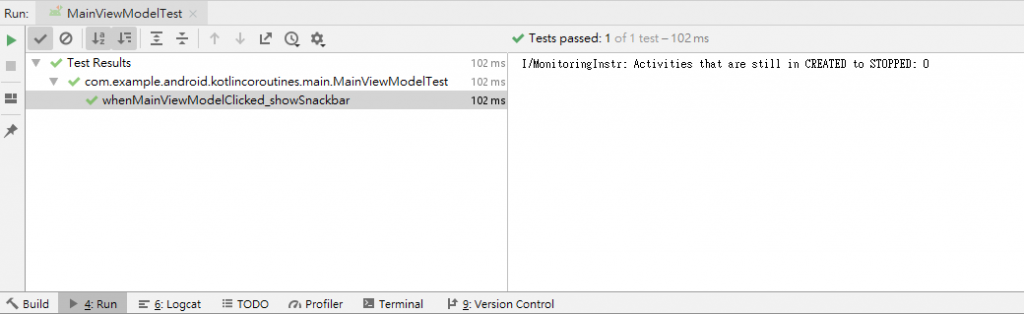
以下是測試的完整代碼
@RunWith(JUnit4::class)
class MainViewModelTest {
    //將liveData調轉到主線程
    @get:Rule
    val instantTaskExecutorRu = InstantTaskExecutorRule()
    var testDispatcher = TestCoroutineDispatcher()
    lateinit var subject: MainViewModel
    /**
     * 初始化
     */
    @Before
    fun setup() {
        Dispatchers.setMain(testDispatcher)
        subject = MainViewModel()
    }

    @After
    fun teardown() {
        Dispatchers.resetMain()
        testDispatcher.cleanupTestCoroutines()
    }

    @Test
    fun whenMainViewModelClicked_showSnackbar() = testDispatcher.runBlockingTest {
        subject.onMainViewClicked()
        advanceTimeBy(1_000)
        Truth.assertThat(subject.snackbar.value)
            .isEqualTo("Hello, from coroutines!")
    }

}
關於coroutines 還有一個suspend沒有介紹到
待其他專案有用到時會再提
有興趣的話可以查看codelabs範例從步驟9開始
https://codelabs.developers.google.com/codelabs/kotlin-coroutines/
其餘參考資料
https://medium.com/androiddevelopers/easy-coroutines-in-android-viewmodelscope-25bffb605471


 iThome鐵人賽