sudo apt-get update
sudo apt-get install nginx php7.0-fpm php7.0-cli php7.0-curl php7.0-gd php7.0-mcrypt php7.0-cgi
sudo service nginx start
sudo service php7.0-fpm restart
sudo nano /etc/nginx/sites-available/default
將檔案內的以下內容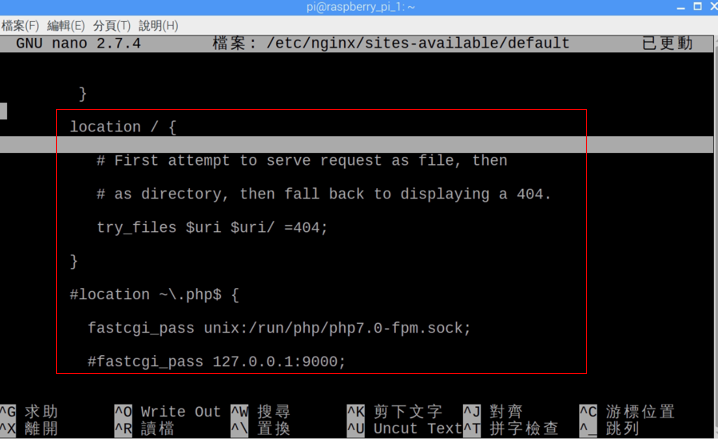
修改成
location / {
index index.html index.htm index.php default.html default.htm default.php;
}
location ~.php$ {
fastcgi_pass unix:/run/php/php7.0-fpm.sock;
#fastcgi_pass 127.0.0.1:9000;
fastcgi_param SCRIPT_FILENAME $document_root$fastcgi_script_name;
include fastcgi_params;
}
(須將#location ~.php$前方的#去掉)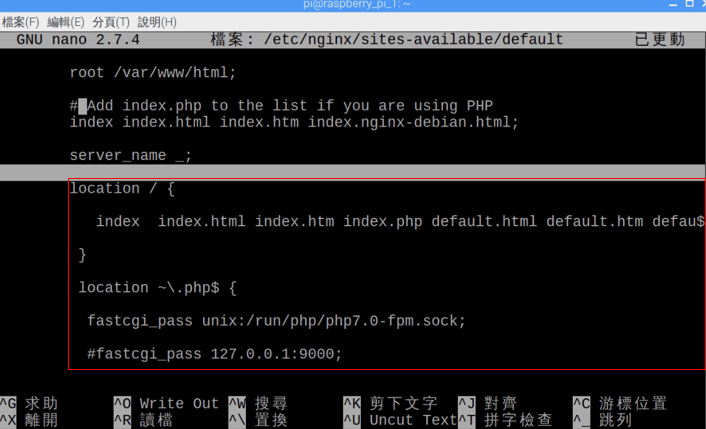
存檔並且重新啟動 nginx 服務
sudo service nginx restart
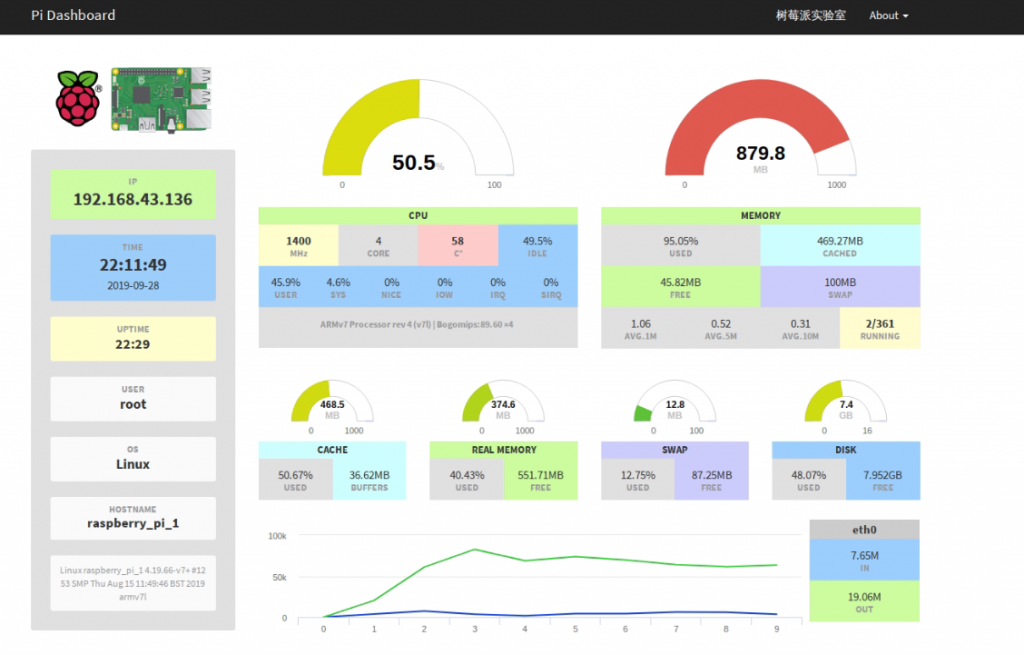
下載安裝 Pi Dashboard主程式
cd /var/www/html
sudo git clone https://github.com/spoonysonny/pi-dashboard.git
打開瀏覽器輸入http://you_raspberry_ip/pi-dashboard/
(以我的樹莓派為例: http://192.168.43.136/pi-dashboard/)