iT邦幫忙

第 11 屆 iThome 鐵人賽

DAY 13
0
Blockchain

Go to Blockchain: 從區塊鏈基礎到用 Go 實作區塊鏈系列 第 13

Go to Blockchain: Day13 開始自幹區塊鏈-工作量證明(2)

  • 分享至 

  • xImage
  •  

開始證明

  • 接續我們前一天,資料都準備好了,那我們就開始證明吧
  • 我們就將 data 經過 Hash 然後再跟難度比較:
    • 如果結果為大於, nonce + 1,繼續重複
    • 如果結果為小於,此為答案
  • 如此我們就有可行的 Hash 啦~
const targetBits = 12

func (pow *ProofOfWork) Proof() (int, []byte) {
	var hashInt big.Int
	var hash [32]byte
	n := 0

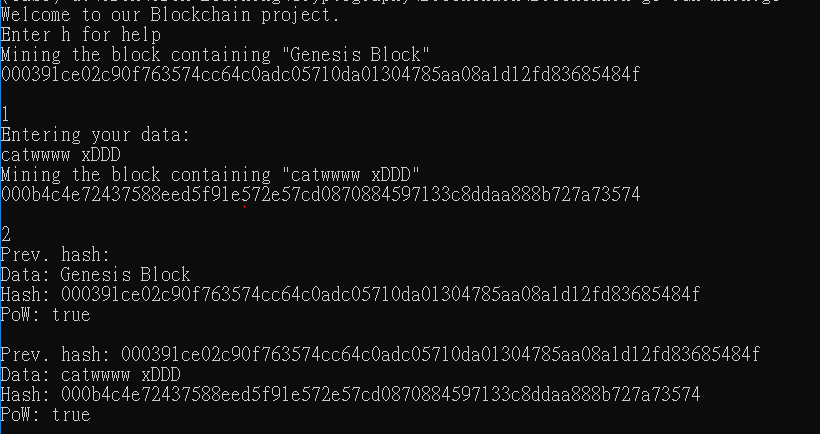
	fmt.Printf("Mining : \"%s\"\n", pow.block.Data)

	for n < maxNonce {
		data := pow.prepareData(n)

		hash = sha256.Sum256(data)
		fmt.Printf("\r%x", hash)
		hashInt.SetBytes(hash[:])

		if hashInt.Cmp(pow.target) == -1 {
			break
		} else {
			n++
		}
	}

	fmt.Printf("\n\n")


	return n, hash[:]
}
  • 因為有了 POW ,因此我們會需要在創建區塊的時候執行 POW
  • 簡單來說,就是在創建 Block 後,跟著創建一個 POW ,接著證明它,就這樣xD
func CreateBlock(Data []byte, prevBlockHash []byte) *Block {
    block := &Block{
    	time.Now().Unix(),
    	[]byte(Data),
    	prevBlockHash,
    	[]byte{},
    	0,
    }
    pow := NewProofOfWork(block)
    nonce, hash := pow.Proof()

    block.Hash = hash[:]
    block.Nonce = nonce

    return block
}

驗證 POW

  • 有了 POW ,我們必須加入驗證 POW 的機制
  • 簡單來說就是把 Block 的資料抓出來和難度比較,只要過了,這個 Block 就確定成功了。
func (pow *ProofOfWork) Validate() bool {
	var hashInt big.Int

	data := pow.prepareData(pow.block.Nonce)
	hash := sha256.Sum256(data)
	hashInt.SetBytes(hash[:])

	isValid := hashInt.Cmp(pow.target) == -1

	return isValid
}

附上執行結果

https://ithelp.ithome.com.tw/upload/images/20190929/20120131fN8IJmN4zo.png


上一篇
Go to Blockchain: Day 12 開始自幹區塊鏈-工作量證明(1)
下一篇
Go to Blockchain: Day14 自幹區塊鏈 (ver. python3)
系列文
Go to Blockchain: 從區塊鏈基礎到用 Go 實作區塊鏈30
圖片
  直播研討會
圖片
{{ item.channelVendor }} {{ item.webinarstarted }} |
{{ formatDate(item.duration) }}
直播中

尚未有邦友留言

立即登入留言